

If you’re facing issues with water escaping from your cleaning device’s handle, the immediate step is to check the seals and O-rings. These components are crucial in maintaining a tight connection, and wear or damage can lead to leaks. It’s advisable to replace any worn seals promptly to ensure optimal performance.
Next, inspect the connections between the trigger assembly and the hose. Loose fittings can create gaps, allowing fluid to escape under pressure. A simple tightening of these connections often resolves the problem, ensuring a secure and effective operation.
Examine the condition of your hose as well. Aged or damaged hoses may develop cracks or holes, contributing to water loss. If you notice any such issues, replacing the hose is recommended to maintain a consistent flow and pressure.
Lastly, consider the operating pressure of your device. Exceeding the manufacturer’s specifications can place undue stress on connections and seals, resulting in leaks. Always operate within the recommended pressure range to extend the life of your cleaning equipment.
Identifying Common Leak Sources in Pressure Washer Guns
First, examine the O-rings as they are frequent culprits behind unwanted escapes. If these rubber rings appear cracked, worn, or dislodged, replacing them is a straightforward solution that can significantly reduce leaks.
Connector Inspection
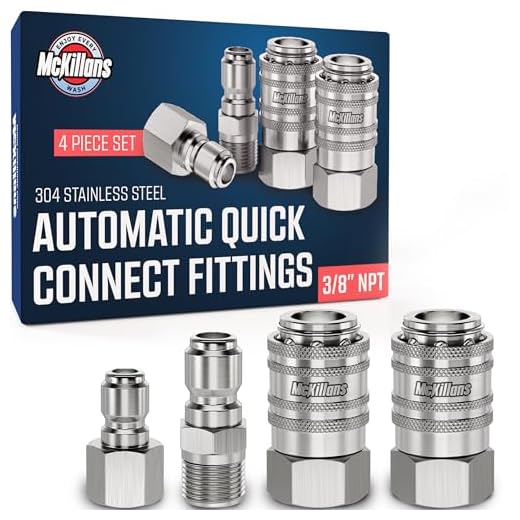
Next, inspect the connectors at both ends of the hose and the nozzle. Loose or damaged fittings can allow water to seep through. Tightening connections with appropriate tools can often resolve the issue, but if the threads are stripped or the fittings are damaged, replacements may be necessary.
Trigger Mechanism Assessment
Also, assess the trigger mechanism. A faulty or improperly seated trigger can cause drips. Ensure the mechanism moves freely, and check for any debris or damage that may prevent a proper seal. Cleaning the area and lubricating the moving parts can help restore functionality.
Finally, observe for leaks when the unit is under pressure. This allows you to pinpoint the exact source more easily. Make sure to check all visible joints and seals. Regular maintenance and checks of these components can prolong the equipment’s life and enhance its performance.
Examining O-Rings and Seals for Wear and Damage
Inspect O-rings and seals regularly for signs of wear, such as cracks, nicks, or flat spots. Even minor damage can lead to a significant loss of pressure. Replace any that seem compromised, as new components restore optimal functioning. Always ensure the correct size when sourcing replacements; incorrect sizing can exacerbate leakage issues.
Replacement Process
To replace O-rings or seals, follow these steps: first, detach the component carefully, avoiding damage to the surrounding parts. Once removed, clean the area thoroughly to remove debris and residue. Install the new O-ring or seal evenly, ensuring it sits flush in the groove. Reattach the component and test for leaks before returning to regular use.
Material Considerations
Choose high-quality materials for O-rings and seals; rubber and silicone options are typically best for durability against pressure and temperature variations. Some materials may degrade faster, particularly in extreme conditions, so consider your cleaning tasks carefully when selecting components.
How to Properly Tighten and Secure Connections
To prevent any fluid escape, ensure that connections are firmly secured. Use an appropriate wrench to tighten fittings according to manufacturer specifications. Avoid over-tightening, which can cause damage to threads or joints.
Step-by-Step Tightening Procedure
.jpg)
1. Clean the Threads: Before tightening, inspect and clean the threads of the components to remove debris or corrosion.
2. Align Components: Ensure that all parts are correctly aligned. Misalignment can lead to stress on the connections.
3. Use Teflon Tape: For threaded connections, wrap Teflon tape around the male threads. This helps create a tighter seal and prevents leakage.
4. Tighten Gradually: Start to tighten the connection by hand, then use a wrench for the final turn. A quarter turn past hand-tight is often sufficient.
Regular Maintenance Checks
Inspect connections periodically for signs of wear or loosening. Vibration during use can gradually loosen fittings, so it’s vital to check them before and after operation. Regular maintenance of seals and rings limits the risk of failures.
Invest time in properly securing all hardware. This simple practice enhances performance and extends the lifespan of the equipment.
Checking for Blockages in the Nozzle and Hose
Inspect the nozzle and hose for any blockages that could interfere with the water flow. Start by removing the nozzle and visually examining it for debris or buildup. A clogged nozzle can restrict water pressure and lead to unintended escapes.
Inspecting the Nozzle
To effectively check the nozzle:
- Run water through it without attaching the hose. This will help dislodge any minor blockages.
- If the spout is obstructed, use a fine wire or a nozzle cleaning tool to clear any stubborn particles.
- For particularly stubborn blockages, soak the nozzle in a vinegar solution for thirty minutes before rinsing.
Examining the Hose

Don’t overlook the hose itself; it’s common for debris to become trapped within it, impairing water flow. Follow these steps:
- Check for visible kinks or bends that might restrict flow.
- Examine the interior by running a flexible cleaning brush or a long, flexible object through the length of the hose.
- If you suspect a blockage deep within, disconnect the hose and flush it with water to clear any obstruction.
| Component | Common Blockages | Cleaning Method |
|---|---|---|
| Nozzle | Debris, mineral buildup | Wire cleaning tool, vinegar soak |
| Hose | Kinks, inner debris | Flexible brush, water flush |
Regular checks on these components will help maintain optimal performance and prevent unexpected water escapes. Staying proactive can save you time and frustration in the long run.
Understanding the Role of Pressure Relief Valves
Regular maintenance of pressure relief valves is key to preventing unwanted leaks from your cleaning equipment. These components ensure that excess pressure is safely released, protecting other parts of the machine from damage. Over time, wear and tear can cause malfunctions, resulting in water escaping from improper areas.
Inspect the relief valves regularly for any signs of rust, corrosion, or cracks. A compromised valve not only leads to leaks but can also affect the overall performance of the machine. If you notice any irregularities, replacement should be considered immediately.
It’s important to ensure that these valves are correctly set to the manufacturer’s specified pressure limits. An incorrect setting can lead to either insufficient pressure release or excessive leaking. Consult your manual for specifications and adjust if necessary.
Lubrication of the valve seals aids in maintaining their function, preventing stiffness that can lead to operational issues. Use a silicone-based lubricant to avoid degradation of the rubber components.
Finally, always test the equipment after any maintenance work on relief valves. Running the machine with water briefly allows you to check for leaks and confirms that the valves are functioning correctly. Addressing any issues promptly will extend the lifespan of your equipment and ensure optimal cleaning performance.
When to Replace Your Pressure Cleaning Wand
For optimal results, replace your cleaning tool when the following conditions arise:
Signs of Wear and Tear
- Persistent leaks, even after attempted repairs.
- Cracks or visible damage on the wand’s exterior.
- Loss of pressure during operation, indicating internal degradation.
Aging Components
Components like seals and connectors naturally degrade over time. If you notice parts of your unit are made of brittle materials or have lost their elasticity, it’s time to consider a replacement. Regular inspections can help identify these issues before they escalate.
Performance Issues
- If the device struggles to reach expected cleaning performance.
- Unusual noises during operation that weren’t present before.
Replacing your cleaning wand proactively can prevent larger issues down the line, saving time and maintenance costs. Always choose a compatible model to ensure seamless integration with your equipment.
Steps for Regular Maintenance to Prevent Leaks
Regular upkeep of your cleaning equipment not only extends its lifespan but also mitigates the risk of water escaping during use. Begin by cleaning all external surfaces to remove grime and debris that could impede components.
Monthly Inspections

Schedule a monthly inspection. Check all fittings and connections for wear or damage. Tighten any loose components, paying particular attention to areas connecting hoses and attachments. This proactive measure often prevents leaks before they develop.
Lubrication and Storage
Use lubricant on O-rings and seals to keep them flexible and effective. Before storing the equipment for an extended period, drain any remaining water and store it in a cool, shaded area. Extreme temperatures can degrade materials, leading to potential issues upon next use.
Adherence to these practices significantly reduces the chance of leaks, leading to a more pleasant and efficient cleaning experience.
FAQ:
What are the common reasons for my pressure washer gun to leak?
There are several reasons why your pressure washer gun might be leaking. One common cause is a damaged or worn-out O-ring or seal. Over time, these components can degrade due to exposure to water and pressure, leading to leaks. Another potential reason is a loose connection between the gun and the hose or the nozzle; this can cause water to escape. Additionally, if there are blockages in the nozzle or if the spray tip is cracked, this could also result in leaking. Lastly, keep an eye on the trigger mechanism itself, as wear and tear can also result in leaks.
How can I fix the leak in my pressure washer gun?
To fix a leaking pressure washer gun, start by identifying the source of the leak. If it’s coming from an O-ring or a seal, you may need to replace it. Consult the user manual for the specific part number to ensure you purchase the right replacement. For loose connections, simply tighten the fittings to ensure a snug fit. If the nozzle is clogged, clean it thoroughly. If it’s cracked or damaged, you will need to replace the entire spray tip. If the problem persists after trying these fixes, consider taking the gun to a professional for a more thorough inspection.


