

The first thing to check when encountering interruptions is the fuel quality. Always use fresh fuel, as old or contaminated gasoline can lead to engine problems. If your device uses petrol, consider replacing it if it has been sitting for more than 30 days. Ensure the fuel filter is clean and replace it if it’s clogged.
Another point of concern is the air filter. A dirty or blocked air filter restricts airflow to the engine, causing it to stall. Inspect it and clean or replace it as necessary. Regular maintenance of this component can significantly impact overall performance.
Inspecting the water supply is also crucial. Ensure the garden hose is free from kinks and the water source is turned on fully. Inadequate water flow can strain the system, leading to unintended errors. Lastly, check for any leaks in the hose or fittings, as they can disrupt pressure and lead to stalling.
Understanding these key factors can transform your approach to regular maintenance and troubleshooting. Efficient cleaning doesn’t have to be a hassle; proper care will keep your appliance running smoothly for years.
Reasons for Intermittent Operation of Your Cleaning Equipment
If your cleaning device stops unexpectedly during use, start by inspecting the water supply. Ensure that the hose is free from kinks and that the water source is turned on fully. A restricted water flow can cause the unit to halt.
Fuel Issues
Check the fuel level if using a model with an internal combustion engine. Low fuel can cause interruptions. Additionally, examine the fuel quality; stale or contaminated fuel may impact performance. Replace it with fresh fuel as needed.
Filters and Nozzles
Clean or replace filters that might be clogged with debris. The nozzle can also become blocked over time, leading to erratic functioning. Periodically check and clear any build-up.
- Inspect the intake filter regularly.
- Use a fine wire or needle to clear nozzle blockages.
- Test with different nozzles to see if performance improves.
Issues with over-pressurisation can occur as well; ensure the pressure relief valve is working correctly. A stuck valve could lead to malfunctioning.
Electrical Components

For electric models, examine the power supply and connections. A loose electrical connection might disrupt power flow, leading to stalling. Inspect the extension cord when applicable, as damage can impede performance.
- Check for frayed wires.
- Ensure plugs are secure.
If these steps do not remedy the situation, consider consulting the manufacturer’s troubleshooting guide or a professional technician for further assistance. Identifying the root cause is essential for a reliable operation.
Identifying Fuel-Related Issues in Your Pressure Washer
The first step is to inspect the fuel tank for any stale petrol. If the fuel has been sitting in the tank for over a month, replace it with fresh fuel to ensure optimal performance.
Check the fuel lines for cracks or blockages. A damaged line can restrict the flow, causing operational interruptions. If you notice any issues, replace the fuel line immediately.
Examining the fuel filter is crucial. A clogged filter can prevent fuel from reaching the engine. If you find it dirty or blocked, replace it to restore flow.
The condition of the carburettor affects how fuel mixes with air. If the carburettor is clogged, clean it thoroughly using a suitable cleaner and compressed air to remove any build-up.
Monitor the fuel valve; if it’s not fully open, this can hinder performance. Ensure it is in the proper position to facilitate maximum fuel flow.
Lastly, consider the octane rating of the fuel used. A lower grade than recommended can result in inadequate combustion. Consult the manufacturer’s specifications and use the appropriate rating for your device.
Checking the Oil Level and Quality
Regularly inspect the oil level in your machine to ensure optimal performance. Start by locating the oil dipstick, typically found near the engine. Remove the dipstick and wipe it clean before reinserting it to check the level. The oil should be within the designated range indicated on the dipstick.
Beyond just checking the level, it’s crucial to assess the oil’s quality. Fresh oil is usually a golden or amber colour. If you notice that the oil appears dark, gritty, or milky, it may need replacing. Contaminated oil can lead to insufficient lubrication, causing the engine to struggle during operation.
Recommended Oil Types
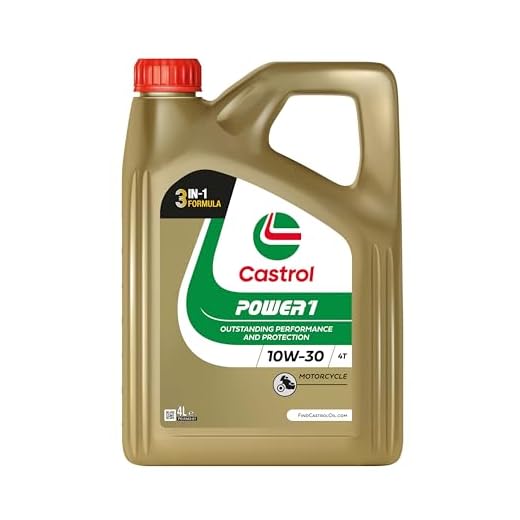
Always refer to the manufacturer’s guidelines for the correct type of oil. Most machines require SAE 30 or a specific synthetic oil designed for small engines. Make sure to use high-quality products to ensure longevity and efficient operation.
Maintenance Tips
Change the oil at least once a season or after approximately 50 hours of use. Using an oil filter can also improve engine performance. Remember to dispose of used oil responsibly by taking it to a designated recycling centre.
Incorporating these practices will help maintain engine health and improve overall functioning, allowing for a smoother and more reliable operation during your clean-up tasks.
Inspecting the Spark Plug for Damage
First, check the spark plug for any signs of wear or damage. Remove the spark plug using a socket wrench, inspecting the ceramic insulator and metal electrode. Look for cracks, carbon build-up, or corrosion, which can hinder performance.
Signs of Damage

| Condition | Description |
|---|---|
| Cracked Insulator | Can result in misfiring and poor ignition. |
| Carbon Build-Up | Indicates a rich fuel mixture or incomplete combustion. |
| Corroded Electrodes | Will create inconsistencies in spark generation. |
If damage is detected, replace the spark plug with a compatible model. Ensure correct gap settings to allow for optimal spark generation. Regular inspection every few months is recommended to prevent operational issues.
Assessing the Water Supply and Connections
Verify your water source and connections before troubleshooting further issues. A consistent supply with adequate pressure is crucial for optimal functioning. Start by ensuring that the water supply valve is open fully. If partially closed, it will restrict flow, causing disruptions.
Inspecting Hoses and Attachments
Check hoses for kinks, leaks, or clogs. Even minor blockages can hinder performance. Inspect all fittings and connections for wear and ensure they are tightened securely to avoid any leaks.
- Examine the inlet hose for signs of damage or worn areas.
- Ensure quick-connect fittings are properly sealed and not introducing air into the system.
- Inspect any additional accessories used, such as foam cannons or nozzles, for obstructions.
Water Quality Considerations
Assess the quality of water being supplied. Sediments or debris can accumulate and cause blockages, so a filter on the water supply line may be beneficial. If the water is very dirty, consider using a pre-filter or switching sources temporarily.
- Replace or clean filters regularly to maintain flow.
- Flush the system after extended periods of inactivity to remove any stagnant contaminants.
Regularly checking these elements can help maintain the equipment’s reliability and ensure it operates smoothly during use.
Examining the Pump for Blockages or Damage

Inspect the pump for any signs of obstruction or wear. Start by disconnecting the water supply and release any built-up pressure before handling the unit. Look for debris, such as dirt or leaves, that might be lodged within the inlet screen or filters. Clearing these blockages can help restore proper flow and pressure.
Checking for Internal Damage
After addressing potential blockages, assess the condition of the pump housing and components. Cracks or corrosion can disrupt operation and lead to leaks. Ensure the seals and O-rings are intact; worn parts may require replacement to maintain optimal functionality. Listen for unusual noises during operation, which could indicate internal damage.
Testing the Pump’s Performance
Once blockages are cleared and any damaged parts are replaced, reconnect the water supply and run the machine. Observe the pressure and flow. If issues persist, consider consulting the manufacturer’s manual for specific troubleshooting steps related to your model. Regular maintenance checks can help prevent these problems from occurring in the future.
Testing the Nozzle and Hose for Clogs
For optimal performance, checking the nozzle and hose for blockages is crucial. A clogged nozzle can restrict water flow, causing the machine to struggle while operating. First, detach the nozzle from the wand and inspect it closely. Look for mineral deposits, dirt, or debris that could impede the spray pattern. Cleaning the nozzle with a small needle or a soft brush can often resolve this issue.
Hose Examination
Next, turn your attention to the hose. Inspect it for leaks, kinks, or damage that may restrict water flow. Straighten any bends and ensure all connections are secure. Disconnect the hose from the water source and run water through it to confirm there are no internal blockages. If water flows freely, the hose is likely clear; if not, consider replacing it.
Lastly, reattach everything and conduct a test run. A cleaned nozzle and inspected hose will enhance the water output, contributing to smoother operation. Regular maintenance of these components ensures longevity and performance in your cleaning tasks.
Understanding the Role of the Valve System
Check the valve assembly for proper operation. The valve system manages water flow and pressure, playing a key role in overall functionality. If the valves are clogged or malfunctioning, they can cause the unit to lose pressure or operate intermittently.
Begin by inspecting the inlet and outlet valves. Ensure they open and close smoothly, without sticking or leaks. Replace any damaged or worn components to restore optimal performance.
Next, assess the unloader valve, which regulates pressure levels. If it’s out of adjustment or damaged, it can lead to excessive pressure drops or surges, resulting in inconsistent water flow. I recommend following the manufacturer’s specifications for adjustment procedures to avoid complications.
Flush the valve system periodically to remove debris that may build up over time. This preventive measure can significantly reduce the risk of future blockages and ensure uninterrupted operation.
Finally, keep the system lubricated as necessary, as this can help maintain smooth movements and prevent premature wear on the components.


