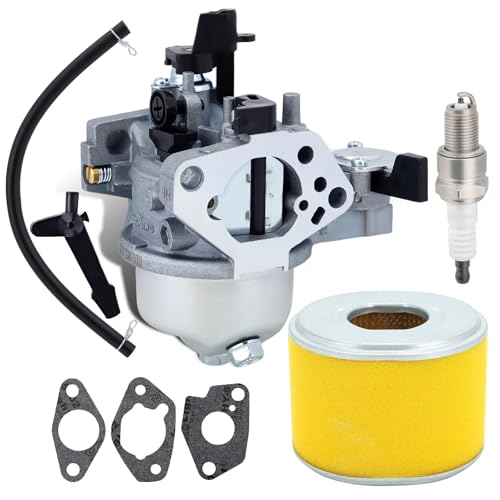

If your cleaning equipment is cutting off unexpectedly, start by checking the fuel supply. Ensure that the tank is filled adequately. In many cases, an empty or low fuel level can cause sudden shutdowns, leaving owners perplexed. Inspect the fuel lines for blockages or leaks, as these can significantly impact performance.
Next, examine the air filter. A clogged filter can restrict air flow, leading to engine stalls. Regular cleaning or replacement of the filter, depending on usage, can help maintain optimal operation. Pay attention to the spark plug as well. A fouled or damaged spark plug could prevent ignition and result in your washer refusing to function.
Another critical area to inspect is the water supply. Insufficient water pressure may cause the unit to shut down automatically to protect the motor. Ensure the water source is properly connected and check for any kinks or blockages in the hose. It’s vital to maintain steady water flow for uninterrupted operation.
Lastly, review the safety features. Many units come equipped with shut-off mechanisms to prevent overheating. If the motor gets too hot due to prolonged use or inadequate ventilation, it may stop to cool down. Allow the unit to rest and consider extending the intervals of intense use.
Tricks for Keeping Your Cleaner Operational
Inspect the fuel level; a low tank often leads to inconsistent operation. If the tank is adequate, ensure you’re using the correct type of fuel, as incorrect fuel can cause stalling. Check the fuel filter for clogging, which restricts the flow necessary for continuous operation.
Monitor the air filter; a dirty filter impedes airflow, affecting performance. Clean or replace it if it’s dirty. Also, confirm that the spark plug is in good condition. A worn or fouled spark plug can result in starting issues or abrupt shutdowns. It’s a simple fix that can restore functionality.
Evaluate the Pump and Hose
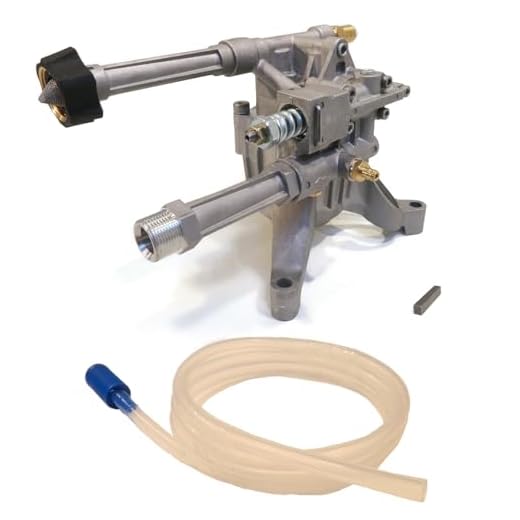
Examine the pump for leaks or damage. Any visible issues could mean reduced pressure and frequent stalling. Inspect the hoses for blockages or kinks, which can hinder water flow and lead to interruptions during use. Replace any damaged components to ensure seamless operation.
Check for Electrical Issues
If the machine has an electric motor, look for loose or frayed connections. A faulty switch or damaged cord can interrupt power supply, causing the engine to stop unexpectedly. Make sure all connections are secure, and consider testing the outlet or circuit used for power.
Check Fuel Levels and Quality

Ensure the fuel tank is at least half full. Insufficient fuel can cause engine stalling and erratic operation. Always use fresh petrol, as stale fuel can lead to issues such as starting problems or failure during operation.
Inspect the fuel quality. Contaminated or old fuel can create performance issues. If the fuel has a darker colour or a strange smell, replace it with fresh petrol. Consider adding a fuel stabiliser if you store fuel for longer periods.
Examine the fuel filter for clogs. A dirty filter restricts fuel flow, affecting engine performance. Clean or replace it regularly as part of maintenance.
Verify the type of fuel recommended by the manufacturer. Using incorrect fuel types can cause significant damage and lead to operational failures.
Regularly check for leaks around the fuel lines and tank. Any visible leaks can affect performance and pose safety risks. Fix leaks promptly to maintain optimal function.
Inspect the Air Filter for Clogs

Begin by removing the air filter cover. Check the filter for dirt, dust, or debris that may obstruct airflow. A clogged filter can cause inadequate air supply to the engine, leading to stalling issues. If the filter appears dirty, clean it with compressed air or a mild soap solution and allow it to dry thoroughly before reinstalling.
If the air filter is damaged or heavily soiled beyond cleaning, replace it with a compatible, high-quality part. Regular inspection and replacement of the air filter can extend the lifespan of the equipment and enhance performance.
Preventive Maintenance Tips
Maintain the air filter by checking it every few uses, especially in dusty environments. Consider using a pre-filter cover to reduce particle accumulation, ensuring optimal airflow and improved engine efficiency.
Choosing a premium air filter can also enhance filtration and prolong the time between cleanings, saving future hassle.
Examine the Spark Plug Condition

Inspecting the spark plug is a vital step in troubleshooting engine issues. A faulty spark plug can cause misfires or prevent ignition altogether. Follow these steps to assess its condition:
- Turn off and unplug the unit for safety.
- Locate the spark plug, which is usually found near the engine block.
- Remove the spark plug using a spark plug socket or wrench.
Once you have it out, check for the following:
- Electrode Wear: Inspect the centre and ground electrodes for signs of wear or erosion. If they appear rounded or excessively worn down, replace the plug.
- Carbon Build-Up: Look for black, sooty deposits. This indicates an overly rich fuel mixture; clean it gently with a wire brush or replace the plug.
- Fouling: A wet spark plug may suggest that fuel is flooding the engine. Dry it off, but if it remains wet, a replacement is necessary.
- Cracks or Damage: Examine the ceramic insulator for cracks or chips. Any damage here can lead to short circuits, requiring a new plug.
After inspection and potential replacement, ensure the spark plug gap is set correctly according to the manufacturer’s specifications. Reinstall the spark plug securely, taking care not to overtighten. A well-maintained spark plug enhances ignition reliability, enhancing performance and usability.
Evaluate the Water Supply Pressure

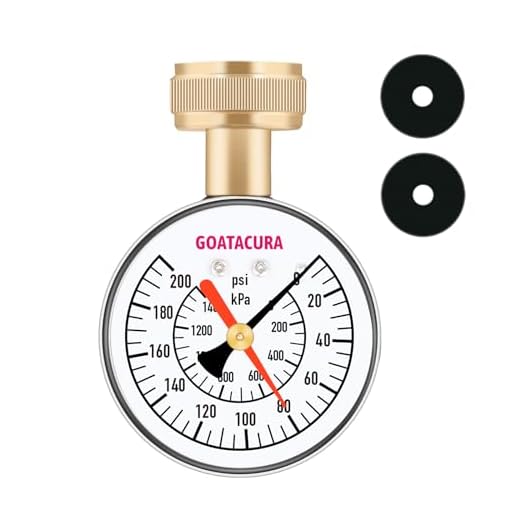
Check if the water supply is providing adequate pressure. Insufficient pressure can lead to operational issues. Use a pressure gauge to measure the supply level, aiming for a minimum of 20 PSI. If the reading is below this, find solutions to increase the supply pressure.
Inspect hoses and connections for kinks or blockages that may restrict water flow. Ensure all fittings are tight and leak-free. A proper water inlet is crucial for optimal performance. If necessary, consider running the unit with a shorter hose or different water source to test the impact on functionality.
Monitor water temperature as well. Excessively hot or cold water can influence equipment operation. Generally, domestic supply should remain within 50°F to 90°F for safe and effective use. Confirm that filters or screens are clean, as dirt can impede water flow, causing equipment to malfunction.
If the supply pressure is deemed acceptable but issues persist, it may be worthwhile to contact a plumbing expert to assess the entire water system. Regular maintenance of the supply can prevent many issues and contribute to longevity and reliability.
Review Hose Connections for Leaks
Examine all hose connections for signs of leaks. A small amount of water escaping can disrupt operation significantly. Gasket integrity is essential for maintaining proper pressure.
Steps to Identify Leaks
- Inspect each connection visually for water marks or dampness.
- Feel around the joints while the machine is in operation; any moisture indicates a potential leak.
- Ensure that all connections are tightly secured and correctly aligned.
Resolution Techniques
- Replace worn gaskets immediately to enhance the seal.
- Tighten screws and fittings that may have loosened over time. Use appropriate tools to avoid damage.
- If hoses are cracked or deteriorating, consider replacing them entirely for optimal performance.
Regular maintenance of hose connections will prevent operational issues and prolong the lifespan of your equipment. Always keep a close eye on these areas to ensure consistent functionality.
Assess the Unloader Valve Functionality
Check the unloader valve for proper operation. This component regulates the water flow, and if it is malfunctioning, the machine can lose pressure, causing it to stop. Begin by inspecting the unloader for any visible damage or corrosion.
To test the unloader valve, start the machine and allow it to reach its operational pressure. Then, pull the trigger on the gun. The unloader should redirect water flow back to the inlet. If water flows uncontrollably or if the motor continues to cycle without stopping, the unloader is likely stuck or faulty.
Disassemble the valve to clean out any debris that might be causing obstruction. Ensure all internal components are free from blockages, and check the seals for wear. If any parts are damaged, consider replacing them to restore proper function.
| Symptoms | Possible Causes | Solutions |
|---|---|---|
| Water flows continuously | Stuck unloader valve | Clean or replace unloader valve |
| Motor cycles rapidly | Malfunctioning pressure control | Check for pressure build-up and replace components if necessary |
| Noise during operation | Internal damage | Inspect and replace damaged parts |
After addressing any issues, reassemble the unloader valve, ensuring all parts fit snugly. Re-test the unit, monitoring for consistent pressure and cycle behaviour. Regular maintenance of this component can prevent similar issues in the future.
Identify Potential Electrical Issues
Begin by checking the power supply. Ensure that the outlet provides adequate voltage and that any extension cords are rated for the current required. A drop in voltage can cause the motor to stall intermittently.
Inspect the power cord for cuts or fraying. Damage here can lead to inconsistent power delivery. If the cord shows signs of wear, replace it immediately to avoid further complications.
Test the on/off switch for functionality. Use a multimeter to ensure electrical continuity. A faulty switch can disrupt operation. If you discover issues, consider replacing the switch to restore reliable functionality.
Examine the circuit breaker or fuse linked to your equipment. A tripped breaker or blown fuse can interrupt power. Reset the breaker or replace the fuse as necessary, ensuring it matches the equipment’s requirements.
Check for loose wiring connections within the unit. Vibration during operation can loosen connections over time, resulting in intermittent power. Secure any loose wires or connectors to prevent power loss.
Finally, assess the motor itself for signs of wear. If the motor struggles to maintain consistent operation, it may require servicing or replacement. An experienced technician can evaluate and address any internal issues that may affect performance.

