

First, confirm that the water supply is turned on fully. Insufficient flow can stem from either a partially closed tap or a blockage in the hose. Ensure the inlet hose is correctly connected and free from kinks or damage. If the hose is compromised, replace it for optimal performance.
Next, inspect the filter located at the water inlet. A clogged or dirty filter can severely limit water intake. Clean or replace this component as necessary to restore proper function. Additionally, check for potential obstructions in the nozzle or lance. A build-up of debris can impede flow, so remove any blockages to ensure a steady output.
It’s crucial to verify that all connections are tight. Loose fittings can introduce air into the system, causing operational issues. Examine the seals and ensure they are intact, as damaged gaskets may lead to leaks. Lastly, if your unit includes an anti-drain valve, ensure it is functioning correctly, as one that is stuck closed could prevent fluid from entering the pump.
Checking the Water Supply Connection
First, ensure the hose connection is securely attached to both the unit and the water source. Any loose fittings can restrict flow significantly.
Inspect the entire length of the hose for kinks, twists, or blockages. A damaged or pinched hose may impede the flow. Run your hands along the hose to feel for any irregularities.
Assessing the Water Source

Examine the faucet or spigot for any issues. Turn it on fully to confirm that it’s providing adequate flow. If necessary, disconnect the hose and check for a steady stream without any attachments.
Check the screen filter in the inlet of the machine. Debris accumulation can obstruct the entry point. Clean the filter carefully with water and a small brush.
| Issue | Solution |
|---|---|
| Loose Connections | Tighten fittings |
| Damaged Hose | Replace or repair hose |
| Faucet Issue | Ensure valve is open |
| Clogged Filter | Clean or replace filter |
After checking all connections and components, reassemble everything and restore the water supply. Test the cleaner to see if it operates correctly.
Inspecting the Inlet Filter for Clogs

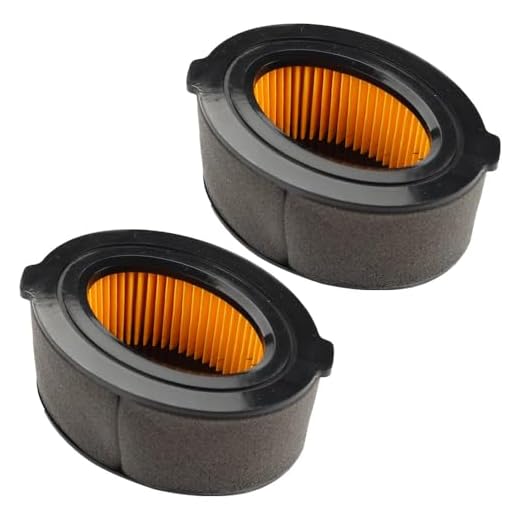
Check the inlet filter immediately. This component can easily become blocked by debris, restricting fluid flow. Remove the filter from its housing and examine it for dirt or obstructions.
Cleaning is straightforward. Rinse the filter under clean running water to remove any trapped particles. If the blockage is severe, consider soaking it in a mild detergent solution and then rinsing again.
Once cleaned, inspect for damage such as cracks or warping. A compromised filter needs replacement to ensure optimal performance. Make sure the filter is securely reattached to prevent any leaks or inefficiencies.
Regular maintenance of the inlet filter will prolong the lifespan of the equipment and improve its performance. It’s wise to inspect this part frequently, especially after each use or during seasonal maintenance checks.
Analysing the pump for damage or wear
Examine the pump for visible signs of cracks or deformation. Check for any leaks around the body, which could indicate internal wear. Ensure all connections are snug, as loose fittings may lead to performance issues.
Inspect the pump’s shaft for any scoring or pitting that can occur due to abrasion over time. This can affect the seal’s integrity, leading to water loss or reduced performance.
Remove the housing if necessary to get a clearer view. Look for any debris or buildup within the pump chamber that might hinder its operation. A clean internal mechanism is vital for optimal functionality.
Listen for unusual sounds when the machine operates. A grinding noise may suggest component failure, while regular chattering could indicate air pockets or blockages within the pump system.
Check the pump’s pressure rating to ensure it matches the specifications of your cleaning unit. An incorrect rating can lead to inefficiency or possible damage.
If you notice any significant wear, consider replacing the affected components or the entire unit, depending on the severity. Regular maintenance and timely replacements can extend the lifespan of the equipment, ensuring it operates efficiently when needed.
Examining the Nozzle for Blockages
Check the nozzle for any obstructions that might restrict flow. Start by detaching it from the lance. Inspect for accumulated debris or mineral deposits.
- Use a fine wire or pin to carefully clear out any clogs, ensuring not to damage the nozzle’s interior.
- Soak the nozzle in a vinegar solution if mineral buildup is present, then rinse thoroughly.
- Test different spray patterns by switching between nozzles (if available) to determine if the issue is specific to one nozzle.
Always keep a standard nozzle cleaning kit on hand for maintenance. Regular cleaning helps maintain optimal performance and prevents interruptions during use.
Verifying the Hose for Leaks or Kinks
Examine the hose thoroughly for any signs of damage. Look for cracks, holes, or frayed areas that could hinder fluid flow. Even tiny leaks can significantly impact performance.
Next, inspect for kinks or twists along the length of the hose. These can restrict the passage of liquid, leading to insufficient output. Run your fingers along the hose to feel for any obstructions.
Testing for Leaks
To confirm the integrity of the hose, conduct a simple test. With the connection secured, turn on the water supply and observe for any drips or spraying. Mark any areas that appear compromised.
Unkinking the Hose
If you identify any kinks, gently straighten them to restore proper flow. Always ensure the hose is fully extended when in use, as this prevents future kinks from forming. Keep the hose coiled properly when not in use to maintain its longevity.
Regular maintenance of the hose will enhance performance and prolong the lifespan of your equipment. Check it frequently to avoid unexpected issues.
Assessing the pressure washer settings
Check the pressure setting dial; it should align with the type of task at hand. Many units have adjustable pressure levels that can be altered to suit different cleaning needs. Ensure it’s not set to the minimum pressure, as this can prevent adequate flow. Adjust to a higher setting if necessary.
Review the spray pattern adjustment. Some models feature interchangeable nozzles or adjustable spray wands that modify the spray angle. An incorrect setting might restrict water output. Switch the nozzle to one that provides a wider spray and see if that helps.
Examine the detergent settings if applicable. If your device has a soap application feature, ensure that it isn’t unintentionally activated, as this function can disrupt normal water flow. Turn off the detergent setting to return to standard cleaning mode.
Consider the thermal relief valve. If your machine has overheated, this valve may activate to protect the pump, leading to a temporary halt in flow. Allow the unit to cool down before attempting to use it again.
Lastly, consult the user manual. Referencing the specifics for your model can clarify any unique settings or procedures that may affect operation. Often, manuals provide troubleshooting tips that are tailored to your equipment.
Understanding the Role of Water Temperature
Utilising hot or cold liquid significantly impacts cleaning performance and equipment efficiency. For maximum effectiveness, I recommend the use of heated fluid. When temperatures reach around 60°C (140°F), the cleaning power enhances considerably, allowing for easier removal of stubborn grime and grease.
Advantages of Hot Fluid
- Accelerates the breakdown of tough stains, making the process quicker.
- Improves the effectiveness of cleaning detergents and solutions.
- Reduces the need for harsh chemicals, promoting a safer cleaning environment.
Considerations for Cold Fluid

- Colder conditions may lead to inefficient cleaning, particularly for oil-based substances.
- When using unheated liquid, I suggest longer cleaning times or additional scrubbing.
- Ensure the equipment is rated for cold liquid use if hot options are unavailable.
Regular checks of the heating element, if applicable, are important. Any blockages or failures here can lead to decreased performance. Consistently monitor the temperature settings; maintaining a range of 50°C to 60°C is typically ideal for most cleaning tasks.
FAQ:
What could cause my pressure washer to stop water from coming out?
There are several reasons why water might not be coming out of your pressure washer. One common issue is a blockage in the hose or nozzle. Debris or kinks in the hose can restrict water flow. Another possibility is that the pump is not functioning correctly, which could be due to low water levels or a malfunctioning component. Additionally, ensure that the pressure washer is connected to a proper water supply and that the water inlet filter isn’t clogged. If checked and cleared, these issues often resolve the problem.
How can I troubleshoot my pressure washer if no water is coming out?
Troubleshooting a pressure washer involves several steps. First, check the water supply; ensure that the tap is open and the hose is not kinked or blocked. Next, inspect the filter screen to see if it’s clogged. If the water supply is fine, examine the pressure washer itself. Look for leaks, damaged seals, or any irregular sounds coming from the pump. If the pump seems alright but still isn’t working, it may need a repair or replacement. Testing to see if the problem persists with different nozzles can also help identify the issue.
Is there a way to prevent my pressure washer from experiencing water flow issues?
To prevent issues with water flow in your pressure washer, regular maintenance is key. Always flush the system after use to clear out any debris. Store your pressure washer in a dry, protected place to avoid damage from weather. Regularly check hoses and connections for wear and tear, and replace any damaged components promptly. Additionally, ensure that you are using clean water and that the inlet filter is routinely checked and cleaned. Following these practices can significantly reduce the likelihood of water flow problems.


