


First, ensure the machine is on a flat surface and all necessary safety measures are in place. Turn off the engine and allow it to cool completely. It’s imperative to work in a well-ventilated area and keep away from open flames or sparks.
Next, locate the fuel tank. Using a siphon pump is the most effective method for removing the contents. Insert the siphon tube into the tank carefully. Ensure that it reaches the bottom to maximise extraction.
Begin the siphoning process by creating a vacuum or manually pumping the device. Monitor the procedure closely to prevent spillage. Once the fuel is extracted, securely seal the container for proper disposal, following local regulations for hazardous waste.

After draining, inspect the fuel lines and filters for any residues or blockages. Cleaning these components will ensure optimal performance during future operations.
Finally, it’s advisable to run the engine without fuel temporarily to clear any remnants from the system. This will help maintain the integrity of the unit and prolong its longevity. Always refer to your owner’s manual for specific instructions tailored to your model.
Removing Fuel from the Engine
First, locate the fuel shut-off valve and turn it to the off position. This simple step prevents any accidental leakage while working. Position a suitable container underneath the carburettor to collect the leftover liquid.
Using a wrench, cautiously loosen the carburettor drain screw. The fuel should flow out into your designated container. Make sure to tighten the screw after the operation is complete to prevent any leaks.
Emptying the Fuel Tank

Next, move to the fuel tank. This part is usually done through a siphoning method. A manual siphon pump is ideal for this task. Insert the siphon hose into the tank and squeeze the pump to initiate the flow.
Ensure proper ventilation when handling the liquid to avoid harmful vapours. Once the tank is empty, replace the cap securely. Dispose of the waste in accordance with local regulations.
Final Checks

After emptying, inspect the fuel system for any signs of residue. Flush with fresh fuel if necessary to avoid issues in the future. This not only keeps the engine in good condition but also ensures a reliable start when you are ready to use the equipment again.
| Step | Action |
|---|---|
| 1 | Turn off the fuel shut-off valve. |
| 2 | Place a container under the carburettor. |
| 3 | Loosen the drain screw to release fuel. |
| 4 | Use a siphon pump to empty the fuel tank. |
| 5 | Inspect and flush the system if necessary. |
Gather Necessary Tools for Fuel Removal
Before beginning the process, ensure you have the right equipment ready to facilitate the extraction of fuel efficiently and safely.
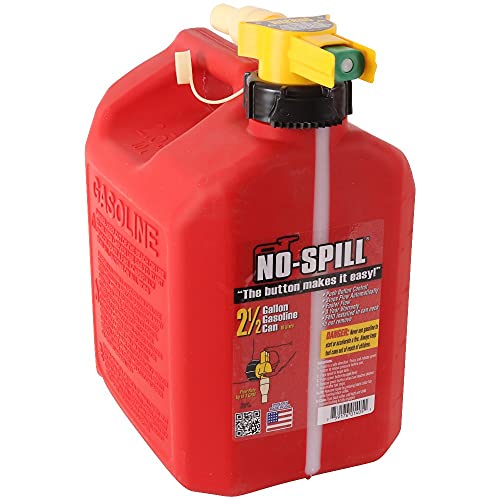
- Siphon Pump: A manual or electric siphon pump simplifies the transfer of liquid. Select one designed for petrol to prevent material degradation.
- Fuel Container: Use a suitable storage canister, compliant with local regulations, to collect the removed liquid securely.
- Funnel: A funnel aids in pouring without spills. Choose one with a wide mouth to accommodate easy pouring from the pump.
- Pliers: A pair of pliers may be required to clamp hoses or remove fittings, ensuring that no excess fluid escapes during the process.
- Rags: Keep absorbent rags handy to wipe any spills instantly and maintain a clean working area.
- Safety Gear: Ensure you have gloves and goggles to protect yourself against unexpected splashes or contact with the liquid.
Double-check that all tools are in good condition before proceeding. Having these items ready will streamline the procedure and minimise the risks involved.
Ensure Safety Before Proceeding

Remove any potential hazards in the area prior to beginning the process.
- Always operate in a well-ventilated space.
- Verify that the machine is completely shut off and cooled down.
- Disconnect the spark plug wire to prevent accidental starts.
- Wear protective gloves and goggles to safeguard against splashes or spills.
Maintain a safe distance from open flames or sources of ignition. Keep a fire extinguisher nearby just in case.
Utilise a suitable container to collect the liquid, ensuring it is designed for flammable materials. Always label the container properly and store it away from heat sources.
Afterwards, you should clean any spills immediately to prevent slips and hazards associated with flammable substances.
Locate the Fuel Tank and Drain Plug

Begin by identifying the fuel tank, typically found at the rear section or top of the unit. It’s usually a translucent or opaque plastic container, easily distinguishable. Ensure that the tank is not pressurised or hot before proceeding.
Next, find the drain plug, which is often located at the bottom of the tank or near its base. This may require removing protective covers or checking the user manual for specific locations. Keep a container ready to catch the liquid as it flows out.
Remember to place the pressure machine on a level surface to prevent spills. Once you spot both components, you can execute the extraction task efficiently.
Prepare for Fuel Collection and Disposal
Utilising proper methods for collecting and disposing of leftover liquid is paramount. Begin by gathering a suitable container that is compatible with the substance. Ensure it is clean and made from materials resistant to the chemical properties of fuel.
Consider the following steps:
- Choose a robust, spill-proof container with a secure lid. A designated fuel container is advisable.
- Utilise absorbent materials, such as rags, to address potential spills. Keep these close at hand.
- Familiarise yourself with local regulations regarding disposal. Some areas offer special collection events for hazardous waste.
- Evaluate the option of recycling. Some facilities accept old liquids for repurposing.
Lastly, maintain a well-ventilated area while performing the procedure to ensure safety and reduce inhalation risks. The effective management of residual liquid not only promotes safety but also adherence to environmental standards.
Open the Drain Plug and Drain the Fuel
Place a suitable container underneath the drain plug to catch the fuel. Ensure the container is made of material resistant to solvents. Using a wrench, carefully loosen the drain plug. Once it’s free, allow the substance to flow into the container completely. Keep an eye on the flow rate to prevent overflow.
After the tank is empty, clean any spilled fuel with a cloth to maintain a tidy workspace. Retighten the drain plug securely to avoid leaks in the future. Dispose of the collected liquid in accordance with local regulations to ensure environmental safety.
Remove any Remaining Fuel from the Carburettor
To eliminate the leftover liquid in the carburettor, first ensure that the engine is completely cool. Locate the carburettor, typically situated near the engine. A small bowl or container should be ready to catch the fuel. Use a wrench to loosen the bolt securing the carburettor bowl, allowing the residual liquid to pour out into the container.
Steps to Follow
1. Disconnect the spark plug wire to prevent accidental ignition.
2. Position your collection container under the carburettor.
3. Carefully unscrew the carburettor bowl bolt slowly to control the flow of remaining liquid.
4. Once the liquid is fully removed, securely reattach the bowl and tighten the bolt.
Safety Tips
Always wear gloves and goggles to protect yourself from spills. Ensure the area is well-ventilated during this process.
| Tool | Purpose |
|---|---|
| Wrench | To loosen the carburettor bowl bolt |
| Container | For collecting leftover liquid |
| Gloves | To protect hands from fuel |
| Goggles | To safeguard eyes from splashes |
Clean Up Spills and Dispose of Fuel Properly
Immediately address any spills with absorbent materials, such as rags or kitty litter, to minimise environmental impact. Avoid using water, as it may spread contamination. Once the area is blotted, carefully gather the soaked materials and place them in a sealable container.
For disposal, consult local regulations regarding hazardous waste. Many municipalities have specific centres for disposing of petroleum products. Do not simply throw absorbents and fuel-soaked items in regular trash; this can lead to fines and environmental harm.
In case of larger spills, ensure proper ventilation and consider contacting a professional cleanup service. A fast response reduces the risk of fire hazards and environmental contamination.
Store leftover fuel in a proper, labelled container. Use only approved fuel containers to prevent leaks and ensure safe storage. Keep these securely shut and away from heat sources. Regularly check for leaks or damage to prevent future issues.
Always follow safety protocols when handling any type of fuel. Employ protective gear, such as gloves and goggles, during collection and disposal to safeguard against harmful substances.
Store the Equipment After Emptying
Ensure proper placement in a dry, sheltered environment to prevent rust and environmental damage. A garage or shed works well, keeping the device away from direct sunlight and moisture can prolong its longevity.
Follow Basic Maintenance Guidelines

Periodically check and clean air filters and the nozzle to maintain optimal performance when next in use. A simple wipe-down of the exterior will also help in preventing grime buildup.
Secure the Fuel Tank and Engine
If applicable, close any access points to the fuel compartment to avoid dust and debris infiltration. Ensure all caps are tightly sealed and functional seals are intact.
Store any accessories like hoses and nozzles in an organised manner to prevent tangling and damage. Keeping everything in one place makes retrieval easier for future tasks.
Review your storage practices yearly, ensuring that components are in excellent condition and ready for action whenever needed. A well-maintained unit simplifies your next clean-up task.
FAQ:
What are the steps to drain gas from a Honda pressure washer?
To drain the gas from a Honda pressure washer, follow these steps: First, ensure the pressure washer is turned off and parked on a flat surface. Next, locate the fuel shut-off valve, typically found near the fuel tank. Turn the valve to the off position. After that, remove the fuel cap for ventilation. Then, using a siphon pump or suitable container, carefully siphon the fuel out of the tank. If your pressure washer has a carburettor drain screw, you can also open that to allow any remaining fuel to drain out. Finally, replace the fuel cap securely and store the pressure washer in a clean, dry place.
Why is it important to drain gas from a Honda pressure washer?
Draining gas from a Honda pressure washer is important for several reasons. Firstly, leaving fuel in the tank for extended periods can lead to fuel degradation, which can clog the fuel system and carburettor. This can create starting issues or even damage the engine. Secondly, if the pressure washer is not going to be used for a long time, draining the gas prevents the risk of leaks or spills. Finally, removing old fuel makes it easier to refill the tank with fresh fuel when the pressure washer is needed again, ensuring optimal performance.
Can I use a siphon pump to drain fuel from my Honda pressure washer?
Yes, a siphon pump is an effective method for draining fuel from your Honda pressure washer. Make sure the siphon pump is suitable for fuel and follow the manufacturer’s instructions. To use it, simply insert one end of the siphon into the fuel tank and place the other end into a container. Start the siphon action, and the fuel will begin to transfer into your container. Always take precautions to prevent spills and ensure proper ventilation when handling fuel.
What should I do if I can’t find the fuel shut-off valve on my Honda pressure washer?
If you cannot locate the fuel shut-off valve on your Honda pressure washer, first refer to the user manual for specific information regarding your model. If the manual does not help, you can still drain the fuel by carefully siphoning it out as described earlier. Additionally, you can check for a carburettor drain screw to let any remaining fuel out. If unsure, consult a professional for assistance to avoid damaging the pressure washer.
Is it possible to leave a small amount of gas in my Honda pressure washer, or should I drain it completely?
While it is technically possible to leave a small amount of gas in your Honda pressure washer, it is generally recommended to drain it completely, especially if the washer will be unused for an extended period. A small amount of gas can still degrade and lead to issues down the line. Draining the tank helps maintain the integrity of the fuel system and avoids potential complications when you are ready to use the pressure washer again.


