

Why a Manual Pressure Washer Still Wins
I choose a manual pressure washer because it’s precise, economical and surprisingly eco-friendly; one handheld blast often uses far less water than a running hose. This five-step guide helps me pick, prepare, operate and maintain a unit safely and efficiently.
What I Need Before I Start
Choose the Right Manual Pressure Washer
Not all washers are equal — which features actually matter?Match the machine to the job: I look at pressure (PSI) and flow rate (L/min) first — higher PSI suits stubborn grime on concrete, while lower PSI and higher flow are kinder to timber and vehicles. I favour metal pumps and brass fittings for longevity, but I accept lighter polymer bodies when frequent mobility matters.
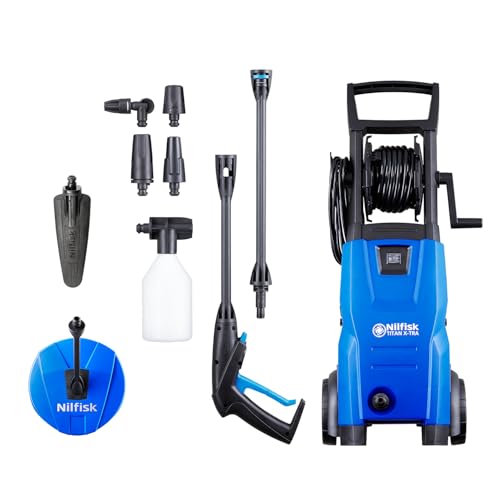
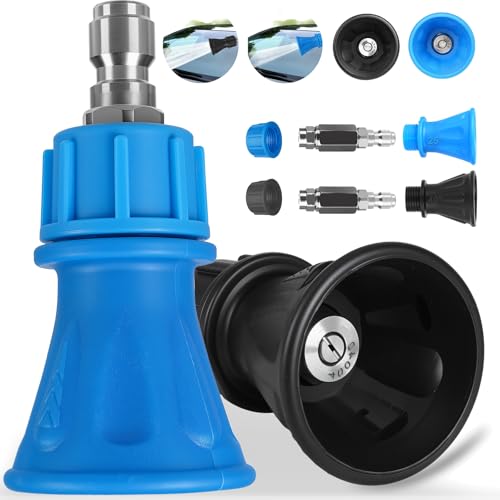
Prioritise build and nozzle variety: I check that the unit offers a range of nozzles from 0° (pinpoint) to 40° (wide spray) so I can adapt to tasks; adjustable lances give me extra versatility and reduce the need to swap attachments mid-job.
Choose portability by task: I pick a trolley-mounted unit for large garden paths and driveways because it’s steadier; I take a compact handheld for patio furniture or garden ornaments to avoid overkill and fatigue.
Check power source trade-offs: I select petrol for mobility and sustained power on big areas, knowing it’s heavier and noisier. I pick electric for quieter, cleaner domestic work where mains power is available.
Consider aftercare and support: I read reviews to verify build quality, warranty and spare-part availability so I’m not stranded if a seal or hose fails.
Choosing correctly reduces the risk of surface damage and saves time during the job.
Prepare Safely and Smartly
I never start without these checks — could safety save your paint?Safety and preparation are non‑negotiable. Follow these clear actions before I start spraying.
Proper preparation minimises accidental damage, reduces clean-up time and keeps me safe throughout the task.
Assemble and Test the Unit
A quick checklist prevents wasted time — assembly in minutes.Attach the lance: I attach the lance and select the correct nozzle for the job, checking the coupling seals and hose clamps. For example, I choose a 25° nozzle for general patio cleaning and a 0° or rotary nozzle only for very stubborn deposits, used briefly.
Connect the water supply: I prime the pump by running water through the system before starting to avoid dry‑run damage. Priming prevents seal failure and premature wear.
Check the powertrain:
Secure fittings: I tighten all quick‑connects and hose clamps, then slowly pressurise the system while watching every joint for leaks. I tighten or replace any fitting that drips.
Test spray: I test spray on a low‑pressure setting onto a scrap or inconspicuous area, adjusting nozzle angle and pressure gradually. I increase pressure only as required to avoid surface damage.
Prepare chemicals: I keep a household bucket nearby to test detergents and flush the washer’s chemical injector if fitted, checking dosing behaviour on a small patch.
Stop immediately, depressurise and remedy the issue if I hear abnormal noises or detect leaks.
Technique: Pressure Washing Like a Pro
Small adjustments make a massive difference — here’s my technique.Hold the lance with two hands and adopt a stable stance. Keep a steady, controlled sweep and move deliberately — jerky motions cause uneven cleaning and surface damage.
Start at a safe distance and work in. For fragile surfaces I begin 30–60 cm away; for hard paving I inch closer until the dirt releases without etching. Test on an inconspicuous patch and adjust.
Maintain overlapping passes and keep the nozzle angle roughly 45° for general cleaning to lift dirt effectively. Work methodically in rows so each pass overlaps the last by about 30%.
Begin vertical work at the bottom and wash upwards to avoid streaking; then rinse top‑to‑bottom to flush residue away. Use the widest fan for delicate finishes and narrow it only for very stubborn deposits.
Apply detergent at low pressure if your unit has a feed or use a low‑pressure setting. Allow the recommended dwell time (check the label), then rinse thoroughly.
Use the widest nozzle and constant motion on painted or timber surfaces to avoid stripping. Adapt pressure and nozzle to the material:
Adapt continuously: stop, reduce pressure or step back if I see surface damage, and repeat with care.
Maintain and Troubleshoot for Longevity
Keep it running for years — avoid costly mistakes I’ve seen before.Flush the system with clean water after every use; I run water through the detergent feed until the outflow is clear to avoid chemical damage.
Relieve pressure and disconnect hoses before storage; I always trigger the gun to vent remaining pressure and stow hoses loosely to prevent kinks.
Inspect seals, nozzles and hoses regularly; I check for cracks, hardened O‑rings or deformed nozzle tips and replace worn parts proactively to avoid sudden failures.
Clean or replace filters and check pump oil where applicable; I follow the service intervals in the manual and top up or change oil when the level or colour is off. For example, a milky oil indicated water ingress and prompted an immediate seal change.
Drain water for winter storage and add recommended antifreeze where appropriate; I empty the pump and hoses and, in freezing weather, run a small quantity of non‑toxic antifreeze through the system.
Troubleshoot methodically when pressure falls:
Keep a compact spares kit on site with:
Maintain consistently to preserve efficiency, reduce repair costs and ensure the washer is ready whenever I need it.
Ready to Clean with Confidence
I now have a concise five-step plan—choose wisely, prepare safely, assemble correctly, apply the right technique and maintain the machine; I will follow these steps to achieve efficient, damage-free cleaning, so I’ll give it a try and share my results.


For those in cold climates: any extra guidance on winterizing? The guide touched on maintenance but didn’t go into antifreeze or storage specifics. Want to avoid cracked pumps when temps drop.
Winterizing is important. Basic steps: flush and run clean water through to remove detergent, drain all lines and pump, store indoors if possible. For long storage, use a pump saver (a glycerin-based antifreeze for pumps) to coat internal seals — don’t use automotive antifreeze unless the manufacturer recommends it.
I wrap mine in a breathable cover and keep it in a shed at ~40°F. No issues for 3 years so far.
Thanks, Ivy. We’ll add a winterizing checklist with product suggestions in the article update.
Great write-up — I just want to confirm: when you say ‘manual’ in the title, is that strictly hand-pumped units, or does it include battery-assisted portable washers? I’m considering a cordless model but like the step-by-step approach here.
Good question, Priya. In this guide ‘manual’ primarily refers to hand-pumped, non-motorized units, but many of the safety, assembly, and technique tips apply to battery-assisted/cordless portable washers too. If you’re choosing between them: cordless gives more power and less arm fatigue but at the cost of weight and maintenance (battery).
Helpful overall but I felt the article skimmed over comparisons between models. ‘Choose the Right Manual Pressure Washer’ is great as a header, but I wanted a short table or bullets on flow rates, typical PSI ranges, and which models fit which tasks. Constructive request: add more spec-based guidance.
Fair point, Sam. We tried to keep it high-level for beginners, but you’re right — a spec comparison would help intermediate users choose. We’ll work on adding a quick specs section with common PSI/flow ranges and what they handle best.
Short tip: when cleaning siding, keep the nozzle at a slight downward angle and don’t blast upward — avoids forcing water under the siding. Also, move at a steady pace to prevent streaks.
Yep — learned this after a small leak problem. Angle matters more than I thought.
Excellent technique tip, Emily — downward angle prevents water intrusion behind materials. We’ll emphasize that in the technique section.
I tried a manual pressure washer last weekend and my arms are still mad at me. Is there any technique to reduce fatigue? The guide’s technique section was helpful but felt a little light on ergonomics.
Totally understandable — manual units can be tiring. Tip: use your body weight and core, not just arms; take shorter sessions (10–15 min) with breaks; adjust handle height if possible; and some pumps have lighter compression cycles. Using two hands and alternating grips helps too.
Also try a longer wand if your unit supports it. Keeps you upright and reduces arm strain. Stretch before/after and you’re golden.
Great article! I’m looking to buy my first manual pressure washer. Can someone clarify if the petrol ones are really that much more powerful than electric? I’ve heard mixed opinions on both.
In my experience, petrol washers do pack more power, especially for larger areas or tougher jobs. But they can be a bit noisy and harder to maintain. I’ve gone with an electric one for home use, and it’s worked fine for me.
Manual pressure washer? What is this, medieval fitness training disguised as cleaning?
Kidding aside, the nostalgia is fun. The maintenance tips were solid but I still miss the instant gratification of a gas unit. Manual = arm day every day. ????
Couple of real questions:
1) Can I use softened water in these pumps? My house has a water softener and I worry about soap residue.
2) For maintenance, any specific pump oil or brand you recommend? I want this thing to last a few years.
3) Troubleshooting: if pressure drops over time, is it usually seals or the nozzle?
Thanks all — helpful. I’ll add a little maintenance kit to my cart.
Good questions, Carlos.
1) Softened water is usually fine for cleaning; the only caveat is detergents may lather differently, but no harm to the pump. Hard minerals are more of a concern.
2) For pumps that require oil, use the manufacturer’s recommended oil (usually listed in the manual). If unspecified, a high-quality SAE 30 or pump-specific oil is common — check the pump type.
3) Pressure drop is often due to worn seals/valves or a clogged nozzle. Check the nozzle first (easy), then inspect seals and replace if brittle.
Good point, Marco — always bleed air after assembly or storage. Carlos, flush with clean water and cycle the pump; if pressure returns, it was likely air/clog.
I keep a small seal kit and spare nozzle in the garage — saved me twice. Also store dry and out of sun to avoid quick seal degradation.
I had pressure drop due to air in the line after winter storage. Bleed the system first before swapping parts.
Great guide — super clear steps. Quick question: when you say ‘choose the right nozzle’ in step 1, do you mean the spray angle (like 15 vs 40) or the material (brass vs plastic)? Which matters more for stubborn grime vs gentle surfaces?
Also watch the PSI rating of the washer with the nozzle — a 15° on a low-PSI manual unit might not be that intense. I learned that the hard way ????
Good catch, Maya — I meant both. Spray angle determines intensity (15° is concentrated and powerful; 40° is wider and gentler). Material matters for durability — brass nozzles last longer and resist wear, plastic can be fine for light use. For stubborn grime start with a wider angle to remove loose debris then switch to a narrower one if needed.
If you’re unsure, get a nozzle kit. Saved me multiple times when I was switching between siding and concrete.
Okay long post coming lol — I used this guide to clean my patio yesterday and it actually worked way better than I expected.
Step 2 (safety) saved me: I covered the plants and wore goggles like the article said. No eye accidents = success.
Step 3 assembly was straightforward but I did forget a seal washer and had to run to the hardware store (pro tip: check all seals before you start).
Technique: short bursts + overlap cleaned the worst stains without blasting my deck.
10/10 would recommend, and my neighbors are now suspiciously clean. ????
Ha, neighbors will complain about their own dirty stuff now ????. Nice tip about short bursts — saved me time.
One more note: if you used detergent, make sure to rinse thoroughly and let the surface dry before applying any sealants. Thanks for the write-up!
Love the neighborhood-cleanliness side effect! Thanks for the detailed run-through, Olivia — seals are easy to overlook. We’ll add a checklist for pre-start items in the next update.
Same here — forgot the small o-ring too. Also, if you’re doing wood, keep the wand moving to avoid gouging the grain.