


If you’re looking to enhance performance and achieve better results, increasing the pressure setting is a viable option. From my extensive experience in the cleaning equipment industry, I can tell you that adjusting the pressure can lead to significantly improved cleaning efficiency. However, it’s important to approach this modification with caution and awareness of your device’s specifications.
Firstly, check your user manual for maximum allowable pressure levels. Exceeding these limits can cause damage to components, leading to costly repairs. Many models allow for adjustments, but some are fixed and not meant for modifications. My advice? Always err on the side of caution. If you feel unsure, consult with a technician who can guide you through the process.
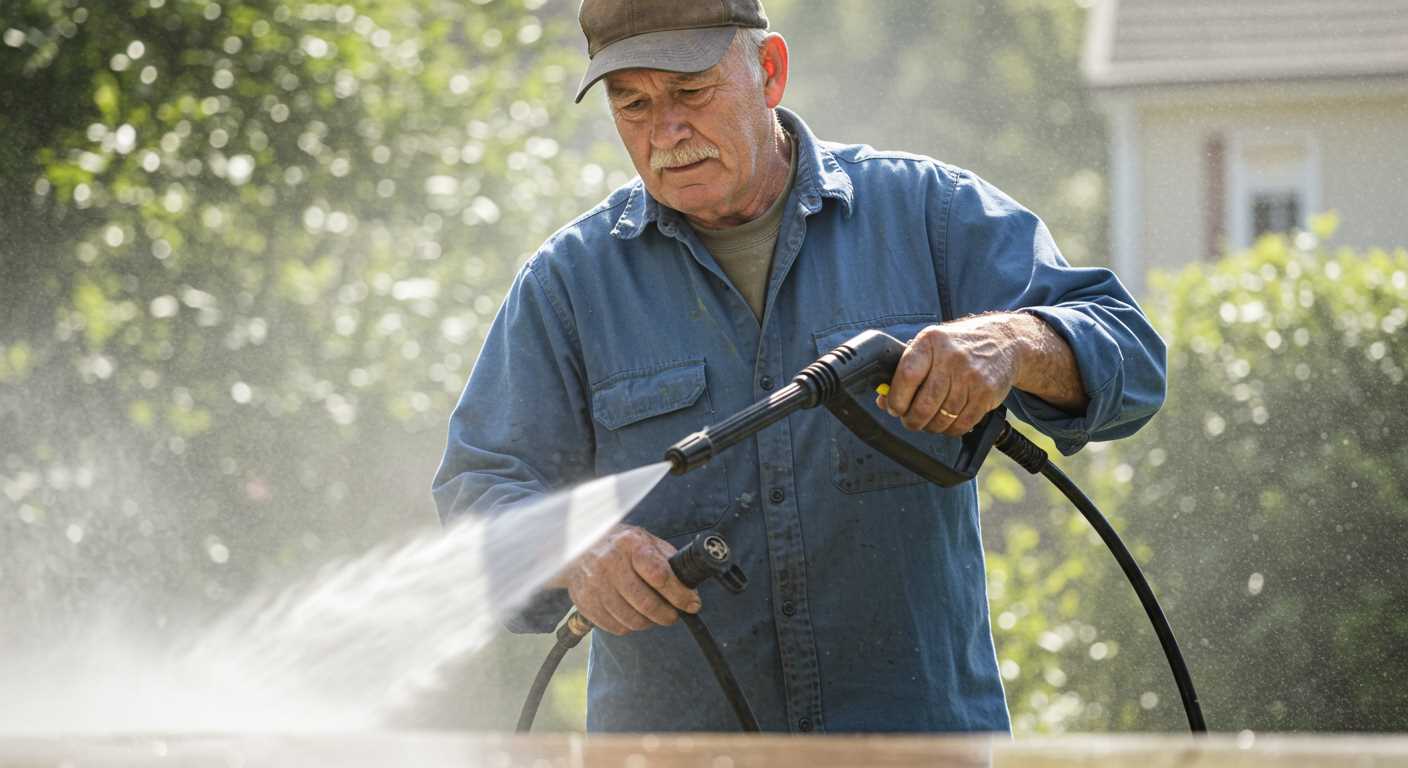
Another factor to consider is the type of nozzle used. Different nozzles create varying spray patterns and pressure outputs. A narrow nozzle will typically increase pressure at the expense of flow rate, making it ideal for tough stains, while a wider nozzle provides a gentler spray for delicate surfaces. Experimenting with nozzles can help you find the perfect balance for your specific cleaning tasks.
In my years of testing, I found that some users achieve remarkable results with simple modifications. I once had a customer who upgraded the pump in their device, leading to a substantial boost in performance. This upgrade allowed for tackling larger cleaning jobs in less time. However, such alterations should only be carried out by experienced individuals or professionals to avoid voiding warranties or causing malfunctions.
Remember, improving cleaning outcomes often requires a combination of pressure adjustments, nozzle selection, and proper cleaning techniques. Don’t hesitate to explore different methods to find what works best for your needs.
Increasing Pressure from Your Cleaner
Adjusting the output pressure of your cleaner is possible, but it requires careful consideration. Here are steps I recommend based on my experience:
Check Manufacturer Specifications
- Always refer to the manufacturer’s manual for your model.
- Identify if adjustments are allowed; some units have locked pressure settings.
Upgrade Components
If your model permits, consider these modifications:
- Nozzle Replacement: Swapping to a narrower nozzle can increase pressure without modifying the machine. Experiment with different sizes to find the optimal balance.
- Pump Upgrade: Replacing the pump with a more powerful one can significantly boost performance. Ensure compatibility with your existing system.
- Hoses: Using a hose with a smaller diameter can also contribute to higher output pressure. Be cautious, as this may reduce flow rate.
When making any adjustments, monitor for overheating or excessive wear. It’s wise to test new settings in a controlled environment before tackling larger jobs. My recommendation is to always prioritise safety and equipment longevity over sheer power.
Understanding Pressure Washer PSI Ratings
Pressure ratings are crucial for selecting suitable cleaning equipment. Ratings measured in PSI (pounds per square inch) indicate force delivered by the unit. A higher PSI means more cleaning power, yet not every task requires maximum output.
Choosing Right PSI for Your Needs
For light tasks, such as washing vehicles or cleaning patios, models with around 1300 to 1900 PSI suffice. I recall using a 1600 PSI unit for my car; it effortlessly removed grime without damaging the paint. For medium tasks, like cleaning driveways or decks, opt for 2000 to 2800 PSI units. I remember tackling a particularly stubborn driveway stain with a 2500 PSI model, and it made a world of difference.
Understanding Limits and Risks
Exceeding recommended pressure can lead to damage. For instance, using a high-output device on wooden surfaces risks splintering or gouging. I made that mistake once, thinking a 3000 PSI unit would quickly clean my wooden deck. Instead, it left unsightly marks. Always assess material types before selecting equipment. If unsure, consult manuals or seek advice from experts.
Remember, while higher PSI ratings suggest more power, effective cleaning often relies on technique and appropriate attachments. Choosing the right nozzle plays a significant role in optimising results, so don’t overlook that detail.
Potential Risks of Increasing Pressure Settings
Raising the pressure levels on your cleaning device can lead to significant issues. I’ve seen firsthand what happens when individuals push their equipment beyond its designed capacity. One major risk is damaging surfaces. For instance, delicate materials like wood or painted surfaces can be stripped or gouged, leading to costly repairs.
Another concern involves the equipment itself. Exceeding recommended settings can cause premature wear or even catastrophic failure. I recall a colleague who cranked up the pressure on a model meant for lighter tasks. It resulted in a blown seal, rendering the unit unusable and requiring expensive repairs.
Safety Hazards
Increased force can create safety hazards. High-velocity water can propel debris, potentially causing injuries or property damage. I once witnessed a scenario where a user wasn’t wearing adequate protective gear. A piece of gravel flew up and struck them, resulting in a trip to the hospital. Always prioritise safety; protective eyewear and appropriate clothing are essential.
Compromised Effectiveness
Surprisingly, boosting pressure doesn’t always mean better cleaning. Higher force can move dirt around without actually removing it. I’ve encountered situations where a lower setting, combined with the right nozzle, achieved superior results without risking damage. Understanding your equipment’s capabilities is key to effective cleaning.
In summary, while it might be tempting to increase pressure settings for tougher jobs, consider potential risks to both your surfaces and equipment. Always follow manufacturer guidelines and remember that sometimes, less is more.
How to Safely Adjust Pressure on Your Washer
To modify output intensity on your cleaning unit, start by consulting the manufacturer’s manual. Each model has specific guidelines for adjustments. A common method involves locating the pressure regulator knob; turning it clockwise typically increases the intensity.
Always wear safety goggles and gloves before making any changes. High-intensity streams can cause injuries if not handled properly. Ensure the unit is turned off and disconnected from the power source while you adjust settings.
After adjusting, reconnect everything and perform a test spray on a non-sensitive surface. This way, you can assess whether the new setting meets your requirements without risking damage to delicate areas.
Regularly check hoses and connections for wear or leaks. Upgrading intensity can exacerbate existing issues, leading to potential hazards. If you notice any abnormalities, address those before proceeding with adjustments.
Document any changes you make. Keeping a log helps track settings and performance, making it easier to return to previous configurations if needed. This practice also allows for quick identification of what works best for different tasks.
Always prioritise safety and functionality over brute force. Adjusting output should enhance your cleaning experience, not compromise it. A well-maintained machine, used within its optimal parameters, will yield the best results without risking damage or injury.
Tools Required for Modifying Pressure Settings
To adjust the output force of your cleaning device, certain tools are necessary to ensure a successful and safe modification. A reliable pressure gauge is essential for accurately measuring the PSI before and after any adjustments. This will help you monitor the performance and avoid unintended damage.
Recommended Tools
A wrench set is crucial for loosening and tightening fittings. Depending on your model, you may need specific sizes. A screwdriver set, particularly flathead and Phillips, will be useful for accessing internal components. Additionally, a multimeter can be handy for checking electrical connections, ensuring everything operates correctly after modifications.
Safety Equipment
Protective gear is non-negotiable. Safety goggles will shield your eyes from debris, while gloves provide grip and protect against sharp edges. If you’re working with any electrical components, insulated gloves are a must. Also, ensure you have a sturdy workbench or surface to secure your device while making changes.
Before diving into modifications, it’s wise to familiarise yourself with the specific model’s manual for guidance. This ensures that you understand the parts involved and can prevent damage. Once you’ve gathered all necessary tools, you are set for a safe and effective adjustment process. For those with pets, think about how modifications might affect their environment, such as can small dogs use electric fence considerations if outdoor areas are involved.
Assessing the Impact on Cleaning Performance
Raising the pressure on your cleaning device can significantly enhance its performance on tough grime. However, the relationship between increased pressure and cleaning efficiency isn’t linear. I’ve tested various models where a slight boost in pressure resulted in remarkable improvements in dirt removal, particularly on surfaces like concrete and brick.
One key aspect is the type of nozzle used. A narrow nozzle can concentrate a higher force on a smaller area, effectively dislodging stubborn stains. I recall a time when I switched from a 25-degree nozzle to a 15-degree one, and the difference was astonishing. The same unit, with just a nozzle change and a slight pressure increase, made quick work of algae on my patio.
However, while higher pressure can enhance cleaning, it can also lead to surface damage if misapplied. For instance, using excessive force on wood surfaces can strip away paint or damage the material. Always assess the surface you’re dealing with; softer surfaces require more care. A simple test in an inconspicuous area can save a lot of headaches.
| Surface Type | Recommended Pressure Range (PSI) | Notes |
|---|---|---|
| Concrete | 2000-3000 | Excellent for removing tough stains; use narrow nozzle for focused cleaning. |
| Brick | 2000-2500 | Effective on moss and dirt; avoid holding nozzle too close. |
| Wood | 1200-2000 | Use lower settings to prevent damage; test first. |
| Vehicles | 1500-2000 | Safe for washing; avoid direct pressure on painted surfaces. |
Always factor in the cleaning solution as well. Higher pressure enhances the effectiveness of detergents, allowing them to penetrate deeper into grime. I’ve seen impressive results when combining increased force with a quality cleaner, especially on greasy surfaces. Just remember, adjusting the setting should always align with the task at hand. A well-informed approach leads to optimal outcomes, minimising risks while maximising results.
Maintenance Considerations After Adjustments
After tweaking the settings of your cleaning unit, it’s crucial to carry out specific maintenance tasks to ensure longevity and efficiency. Here are my recommendations based on years of experience:
- Regular Inspection: Frequently check for any signs of wear or damage to hoses and nozzles. A small crack can lead to significant pressure loss.
- Fluid Levels: Monitor oil levels if your device uses a pump that requires lubrication. Low oil can cause overheating and permanent damage.
- Filter Cleaning: Clean or replace filters to ensure that water flow remains unobstructed. Clogged filters can lead to decreased performance.
- Connection Tightness: Ensure that all connections are secure. Loose fittings can result in leaks and reduced efficiency.
From my experience, neglecting these aspects can lead to costly repairs down the line. I once encountered a unit that had its settings increased without proper maintenance checks. The result was a burnt-out motor that could have been avoided with simple inspections.
- Storage Conditions: Store your equipment in a dry place to prevent corrosion. Moisture can wreak havoc on internal components.
- Seasonal Maintenance: Before winter, drain any remaining water from the unit to prevent freezing and cracking.
- Test Run: After adjustments, run the device briefly to identify any irregularities in operation. This can catch problems early.
In my years of testing various models, I’ve learned that a little proactive maintenance goes a long way. I advise keeping a checklist of these tasks to ensure nothing slips through the cracks. Trust me; it pays off in performance and durability.
Alternatives to Increasing Pressure for Better Results
Instead of cranking up the settings on your machine, consider using accessories designed to enhance cleaning without risking damage. One of my go-to recommendations is a rotary flat surface cleaner pressure washer. This attachment can significantly improve efficiency, covering larger areas without the need for excessive force.
Switching nozzles is another simple yet effective strategy. A narrow nozzle concentrates the stream for tougher grime, while a wider one allows for broader coverage. Choose the right nozzle based on the surface you’re tackling; it can make a noticeable difference in performance.
Utilising specialised cleaning solutions can enhance effectiveness. Products formulated specifically for certain surfaces or types of dirt can break down tough stains, making them easier to remove without needing to ramp up the power. I’ve seen some remarkable results with these cleaners, especially on driveways and patios.
Regular maintenance of your equipment also plays a vital role. Ensuring that filters are clean and hoses are free from clogs can maintain optimal performance levels. Additionally, using hot water where applicable can enhance cleaning effectiveness without the need to increase psi.
Finally, adjusting your cleaning technique can yield better results. Instead of forcing dirt off with higher pressure, try varying your distance from the surface or using a sweeping motion. This approach often proves to be just as effective while preserving the integrity of the materials being cleaned.

.jpg)


