


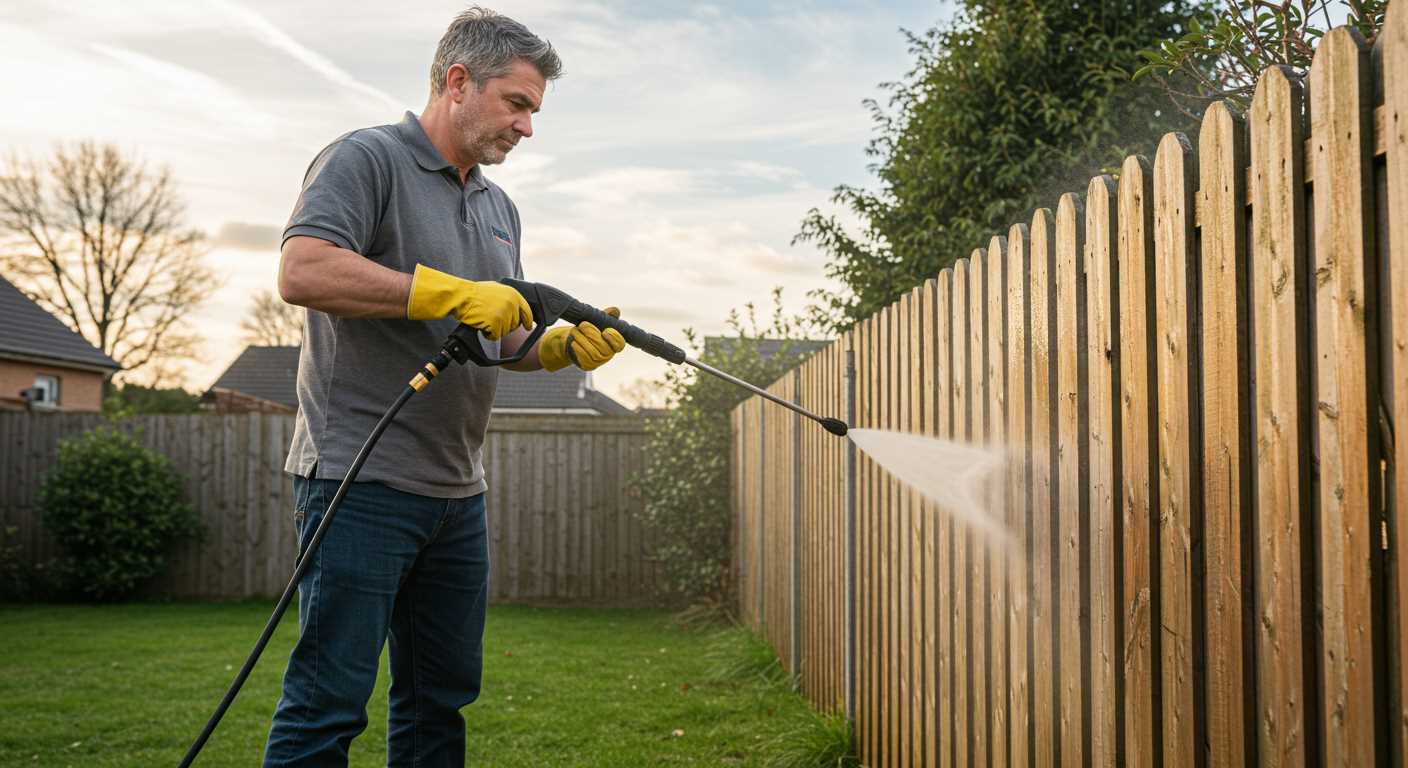
Using a high-pressure cleaner isn’t just possible; it’s a fantastic way to maintain your two-wheeled companion. In my decade-long experience as a consultant for cleaning equipment, I’ve discovered the right methods that ensure a thorough wash without causing damage. The key lies in technique and understanding the machine’s capabilities.
First, always opt for a wider spray nozzle. A 25-degree nozzle works wonders for removing grime without risking delicate components. I recall a time when I used a narrower nozzle, and the intense force dislodged a few parts from my bike. Lesson learned! Position the nozzle at least two feet away from the frame to control the pressure effectively.

Pay attention to the areas that accumulate dirt the most, such as the chain, gears, and brake calipers. A gentle approach around sensitive components like bearings and electronic systems is crucial. During one of my cleaning sessions, I focused too heavily on the drivetrain, inadvertently forcing water into the bottom bracket. A simple oversight can lead to costly repairs.
Lastly, always follow up with a thorough inspection. After washing, take a few moments to check for any loose screws or components that might have become dislodged during the process. It’s a small step that can save significant headaches later. Trust me, a well-maintained bike not only rides better but also lasts longer.
Using a High-Pressure System for Two-Wheelers
Directing a high-pressure jet at a two-wheeled vehicle can lead to effective results, but caution is key. Focus on keeping a safe distance, ideally around 30 centimetres, to avoid damaging delicate components. Avoid direct contact with bearings, seals, and electronic parts. It’s wise to cover sensitive areas to prevent water ingress.
Preparation Steps
Before starting, ensure the vehicle is cool and dry. Remove any accessories or bags that might obstruct the cleaning process. A quick inspection for loose components or dirt build-up can save time and prevent damage. If mud is caked on, a pre-soak with water from a bucket can help loosen it up.
Technique and Post-Cleaning Care
Use a wide spray nozzle to disperse the force of the water evenly. Start from the top and work down, which helps to avoid pushing dirt into crevices. After rinsing, apply a suitable lubricant to moving parts once everything has dried. This step helps maintain performance and longevity.
Finally, always refer to the manufacturer’s guidelines regarding washing methods. Some brands may advise against such practices. If in doubt, opt for traditional cleaning methods or consult a professional.
Understanding the Risks of Using a Pressure Washer on a Bike
.jpg "Can you clean a bike with a pressure washer")
Utilising a high-pressure device on a two-wheeled vehicle can lead to significant risks. I’ve seen firsthand the potential damage that can occur. It’s crucial to be aware of these hazards before considering such an approach.
Potential Damage to Components
- Seals and Bearings: High-pressure streams can force water into areas where it shouldn’t be, like bearings and seals, causing premature wear or even failure.
- Electronics: Many modern models include electronic components. Direct exposure to a strong jet can lead to malfunctions or short circuits.
- Paint and Finish: The force can strip away paint or damage decals, leading to unsightly wear and tear.
Safety Concerns
- Slips and Falls: Water sprayed onto the ground can create slippery conditions, increasing the risk of accidents.
- Injury Risks: High-pressure jets can cause injuries if they make contact with skin. The force can penetrate deeply, leading to serious harm.
- Environmental Impact: Using excessive amounts of water can contribute to wastage, especially in areas experiencing drought.
In my experience, a gentle touch combined with the right tools tends to yield the best results. Opt for soft brushes and gentle cleaning solutions instead. Protecting your vehicle and ensuring a safe cleaning process is always the priority.
Choosing the Right Pressure Washer Settings for Bike Cleaning
For optimal results, set the psi (pounds per square inch) between 1200 and 1900. This range provides enough force to remove dirt without damaging sensitive components.
Adjust the nozzle accordingly. A wide-angle spray, such as a 25 or 40-degree nozzle, disperses water more gently, suitable for delicate parts. Narrow nozzles can be too aggressive, risking harm to the frame and components.
Temperature plays a role, too. Using warm water can enhance cleaning efficiency, especially for greasy areas. Make sure the water temperature does not exceed 50°C to avoid damaging seals or paint.
Consider the cleaning solution. Some models offer detergent injection; use a bike-specific cleaner to avoid corrosion. Always follow the manufacturer’s guidelines for dilution ratios.
| Setting | Recommendation |
|---|---|
| Pressure (psi) | 1200 – 1900 |
| Nozzle Type | 25 or 40-degree for safer cleaning |
| Water Temperature | Max 50°C |
| Cleaning Solution | Bike-specific detergent |
Before starting, conduct a test on a small, inconspicuous area to ensure the settings do not cause any damage. This simple step can save from costly repairs down the line. Always maintain a distance of at least 12 inches from the surface while spraying, adjusting as necessary for different areas.
Post-cleaning, rinse thoroughly to remove any residue from detergent or debris. Taking these precautions ensures a thorough and safe cleaning experience, prolonging the lifespan of your gear.
Identifying Parts of the Bike Safe for Pressure Washing
Focus on components such as the frame, wheels, and handlebars. These sections are typically robust and can withstand higher water pressures. Use a moderate setting to avoid any damage.
Frames: Most frames are made of aluminium or steel, which resist water pressure. Ensure that you angle the nozzle away from sensitive areas like bearings and seals. A gentle spray will prevent water from infiltrating these critical points.
Wheels: Rims and tyres are designed for rugged use. Directing water at a slight angle helps remove dirt without risking punctures or damage to the tyre walls. Pay attention to the spokes; a softer approach will prevent bending.
Handlebars: Clean the grips and controls carefully. Avoid blasting water directly at the brake levers and shifters. Instead, a light misting can help remove grime without risking internal damage.
Suspension components: Be cautious here. While the outer surfaces can handle some water, avoid direct exposure to seals and joints. A soft cloth or sponge is often more effective for these areas.
Chain and drivetrain: Pressure washing isn’t advisable for these components. Instead, use a dedicated degreaser and a brush. This approach prevents water from washing away essential lubrication.
After washing, inspect each part for any signs of water ingress, especially in sensitive areas. A quick wipe with a dry cloth can help remove any residual moisture. This practice ensures longevity and optimal performance of your equipment.
Preparing Your Bike for Pressure Washing
Before you start the washing process, ensure that all delicate components are protected. Remove any accessories such as lights, bags, and computers. These can easily be damaged by high water pressure. For the chain and derailleur, apply a light coat of oil beforehand to prevent water from penetrating these areas too deeply.
Next, inspect the frame and components for any loose parts. Tighten bolts and screws to avoid any dislodging during the wash. Pay special attention to the headset, bottom bracket, and wheel axles. If any parts feel loose or worn, consider servicing them before the cleaning session.

Cover areas such as the bottom bracket and headset with plastic bags or tape. This prevents water from entering the bearings, which can lead to rust and other issues. Additionally, remove the wheels if possible, as this allows for a more thorough clean and reduces the risk of water getting trapped in hard-to-reach areas.
Gather your cleaning supplies, making sure to have a soft brush and some biodegradable soap on hand. After the high-pressure treatment, a gentle hand wash will help remove any remaining grime without risking damage to sensitive components.
Lastly, ensure your workspace is set up properly. Position your equipment where you have ample room to move around the bike. This makes the entire process smoother and allows for better control over the wash. Having a clear area also prevents any accidental damage to the surroundings or yourself.
Steps to Properly Clean Your Bike with a Pressure Washer
Begin by gathering all necessary tools and materials: a suitable high-pressure cleaner, a gentle detergent, a soft cloth, a chain lubricant, and a bucket. This preparation ensures a smooth cleaning process.
- Choose the Right Location: Select an outdoor area where water runoff won’t cause issues. Avoid using it indoors or near sensitive electronic devices.
- Inspect Components: Before starting, examine various parts for any loose items or potential damage. Pay attention to the wheels, handlebars, and components like derailleurs.
- Apply Detergent: Dilute a mild detergent in a bucket. Using a cloth, apply it to the frame, wheels, and drivetrain. Allow it to sit for a few minutes to break down dirt.
- Set Pressure Level: Adjust the machine to a low-pressure setting. Higher pressure can force water into bearings or damage paintwork. Generally, a setting around 1000 to 1200 PSI works well.
- Use a Wide Spray Nozzle: Opt for a wider spray pattern to avoid concentrated blasts that might harm delicate parts. A 25-degree nozzle is usually a safe choice.
- Maintain Distance: Keep the nozzle at least 12 inches away from the surface. This distance reduces the risk of damage while still effectively removing grime.
- Rinse Thoroughly: Start rinsing from the top down, allowing dirt and detergent to flow off. Pay special attention to crevices and components where grime tends to accumulate.
- Dry Components: After rinsing, use a soft cloth to wipe down the frame and components. This step prevents water spots and rust. Ensure that hard-to-reach areas are also dried.
- Lubricate Moving Parts: Once everything is dry, apply lubricant to the chain and any other moving parts to ensure smooth operation.
- Final Inspection: After everything is complete, do a final check to ensure no components were inadvertently damaged or left unlubricated.
Following these steps will help maintain the condition of your two-wheeled companion while ensuring a thorough clean. Personal experience shows that a careful approach leads to satisfying results without compromising integrity.

Post-Cleaning Maintenance After Pressure Washing
After using a high-powered device to rinse off dirt and grime, immediate attention to maintenance is vital. First, ensure that all components are dried thoroughly. Moisture left on sensitive parts like bearings and cables can lead to rust and deterioration over time.
Next, lubricate the chain and any moving parts with appropriate bike lubricant. This step is crucial as the forceful stream may wash away existing lubrication, leaving the components vulnerable to wear. A well-lubricated chain ensures smooth operation and prolongs the lifespan of the drivetrain.
Checking and Reapplying Protective Coatings
Inspect the frame and other surfaces for any signs of damage or wear. If the protective coatings have been compromised, consider applying a layer of wax or sealant. This not only enhances the appearance but also provides an extra barrier against the elements.
Final Touches and Storage
Finally, wipe down any remaining moisture with a clean, dry cloth. It’s also a good idea to check tire pressure and ensure that the brakes are functioning correctly after the wash. Store the equipment in a dry place, and if you need tips on other cleaning tasks, check out cleaning the dustbin properly how to do it. Taking these simple steps can greatly enhance the longevity of your equipment and ensure optimal performance for your next ride.
Alternative Cleaning Methods for Sensitive Bike Components
For delicate parts such as bearings, cables, and electrical components, gentle cleaning methods are advisable. Instead of high-pressure techniques, a soft cloth or sponge with warm, soapy water works wonders. Use a mild detergent to avoid damaging sensitive finishes.
For drivetrain components like the chain and derailleur, a dedicated degreaser applied with a brush can effectively remove grime without risking damage. After applying the degreaser, rinse it off gently with water from a hose or a bucket, avoiding any harsh sprays.
Consider using a handheld steam cleaner for areas that require extra attention. Steam penetrates dirt and grease without the risk of water pressure damaging seals or bearings. Always follow the manufacturer’s guidelines for steam cleaning to ensure safety and efficiency.
After cleaning, ensure all components are dried thoroughly to prevent rust. Lubricate the chain and other moving parts to maintain performance. For the best results, pairing these techniques with best pressure washer soap and detergent can enhance the cleaning process while protecting sensitive areas.
Common Mistakes to Avoid When Using a Pressure Washer on a Bike
One major error is directing the nozzle too close to sensitive components. I recall a case where a friend damaged his gear shifting mechanism because he held the nozzle just a few inches away. Always maintain a safe distance, typically around 12 to 18 inches, to prevent any unintended consequences.
Another frequent misstep involves using excessive pressure settings. While it may be tempting to crank up the power for a thorough wash, high pressure can strip paint and damage decals. I learned this the hard way during a demonstration, where a low-pressure setting proved more effective for removing grime without causing harm.
Ignoring Electrical Components
Many overlook the presence of electrical elements on their machines. Water ingress can lead to serious issues. I often remind myself and others to cover or avoid spraying areas like the battery or control panel. A simple plastic bag can be a lifesaver in these situations.
Neglecting Post-Cleaning Checks
Failing to inspect the bike after washing is another common oversight. After one wash, I found that a small piece of debris had lodged in the brake caliper, affecting performance. Take a moment after the job is done to ensure everything is in place and functioning correctly. A thorough check can save you from potential hazards on the road.
.jpg)


