


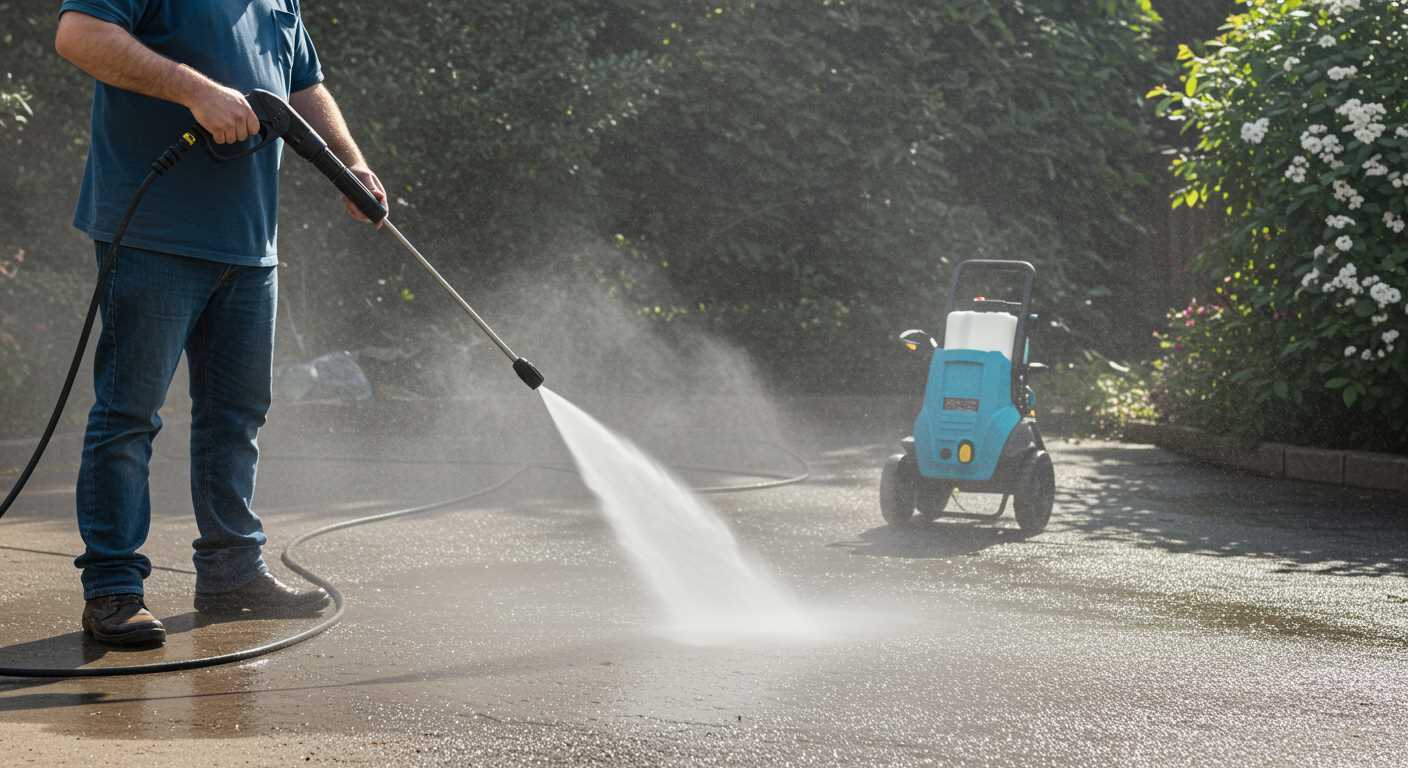
Absolutely, using a high-pressure cleaning device is an effective method for maintaining the exterior of a dwelling. During my decade in the cleaning equipment industry, I’ve witnessed countless homeowners transform their properties through this technique. However, caution is paramount; the process requires knowledge and finesse to avoid damage.
Firstly, selecting the right nozzle is crucial. A wide-angle spray tip, typically 25 or 40 degrees, diffuses the water effectively, preventing potential harm to shingles or tiles. I often recommend testing the device on a small, inconspicuous area to gauge the impact of the water pressure. During my early days, I learned this the hard way when I inadvertently dislodged some shingles on my own home while experimenting.

Timing is also a key factor. It’s best to perform this task on a cool, dry day. This not only aids in achieving optimal results but also prevents the cleaning solution from drying too quickly, which can leave streaks behind. I remember one particularly sunny day when I rushed through the process, only to find unsightly markings that took additional effort to rectify.
Lastly, always use appropriate cleaning solutions. A mixture specifically designed for exterior surfaces can enhance results significantly. I recall a project where I used a mild bleach solution, which not only removed stubborn moss but also left the structure looking rejuvenated. Following these guidelines ensures a safe and successful cleaning experience, allowing for a refreshed appearance without compromising the integrity of the structure.
Cleaning Techniques for Roof Surfaces
Utilising a high-powered cleaning system can be efficient for maintaining the exterior of various structures, including sloped surfaces. However, caution is paramount. I recall a time when I assisted a friend with their home maintenance; the results were impressive yet slightly overwhelming. The high velocity can dislodge shingles and cause leaks if not handled correctly.
When opting for this method, select a model that allows for adjustable pressure settings. A belt drive pressure washer often provides the necessary balance of power and control. This type can help avoid damage while ensuring thorough removal of dirt and debris.
It’s also wise to keep the nozzle at a safe distance from the surface. I’ve seen roofs damaged when individuals got too close, forcing water under shingles. A wider spray pattern can mitigate this risk while still achieving satisfactory results.
Always start at the top and work downwards. This approach prevents dirty water from running over areas already cleaned, saving time and effort. And don’t forget to check the weather forecast; working on a dry day ensures that cleaning products, if used, will adhere properly.
Lastly, consider incorporating a biodegradable cleaner for tougher stains. This combination of techniques will yield a cleaner finish without compromising the integrity of the materials involved. Happy cleaning!
Understanding the Risks of Roof Cleaning with a Pressure Washer
Operating a high-powered cleaning device on a sloped surface poses significant dangers that must not be overlooked. The force of water can inadvertently dislodge shingles or tiles, leading to costly repairs. During my years in the industry, I’ve encountered numerous situations where a seemingly harmless task turned into a homeowner’s nightmare.
One particular incident stands out. A client decided to tackle the algae growth on their shingles using a high-pressure system. The result was catastrophic; the high velocity of the water stripped away protective granules, leaving the roof vulnerable to further damage and leaks. It’s crucial to understand that not all roofing materials can withstand intense water pressure.
Additionally, slipping hazards should not be underestimated. Wet surfaces, particularly on roofs, can lead to falls, resulting in serious injuries. I’ve seen seasoned professionals, confident in their skills, lose their footing due to unexpected water pooling. Proper safety measures, including harnesses and non-slip footwear, are non-negotiable when attempting such tasks.
| Risk Factor | Description | Recommendation |
|---|---|---|
| Material Damage | High pressure can damage shingles or tiles. | Use a low-pressure cleaning method. |
| Injury | Slippery surfaces can lead to falls. | Wear appropriate safety gear. |
| Water Intrusion | Improper cleaning can force water under shingles. | Ensure proper sealing and drainage. |
| Environmental Impact | Chemicals can wash away into local waterways. | Choose eco-friendly cleaning solutions. |
In my experience, opting for gentler cleaning methods, such as soft washing, can effectively remove dirt and algae without incurring these risks. This approach utilises a mix of water and cleaning agents at lower pressures, ensuring the integrity of the roofing material remains intact while still achieving a clean surface.
Consider consulting professionals who specialise in roof maintenance. Their expertise can save both time and money in the long run, preventing potential mishaps that a DIY approach might invite. Always prioritise safety and material preservation over temporary cosmetic improvements.
Choosing the Right Pressure Washer for Roof Cleaning
To ensure optimal results while tackling the task of roof maintenance, selecting the appropriate equipment is paramount. Based on my extensive experience in the cleaning equipment industry, here are key factors to consider.
- Pressure Rating: A model with a pressure range of 1200 to 2300 PSI is generally suitable for most roofing materials. Higher pressure can risk damage, especially on shingles or tiles.
- Flow Rate: Look for a unit with a flow rate of at least 1.5 to 2.5 GPM. This will aid in rinsing away dirt and debris effectively without excessive pressure.
- Weight and Portability: The weight of the unit affects manoeuvrability. Choose a lighter model if you plan on moving it frequently. Features like wheels and handles enhance convenience.
- Nozzle Variety: A range of interchangeable nozzles allows for versatility. Use a wider spray pattern for gentle cleaning and a narrower one for tougher spots.
- Electric vs. Gas Models: Electric units are quieter and easier to maintain, while gas models generally offer more power. Your choice should depend on the scale of the task.
- Safety Features: Ensure the machine has a safety lock and thermal relief valves. These features prevent accidents and equipment damage.
- Accessories: Consider additional attachments like surface cleaners or extension wands to enhance reach and efficiency.
During my time in the field, I encountered various brands and models. One standout was the Karcher K5, which balanced power and usability superbly. It tackled stubborn stains effectively while remaining gentle enough for delicate surfaces. Conversely, I found that some high-end gas models, while impressive, could be overkill for standard maintenance tasks.
Ultimately, investing in the right equipment saves time and reduces the risk of costly damage. Take the time to evaluate your specific needs and choose wisely. Happy cleaning!
Optimal Pressure Settings for Different Roof Materials
For asphalt shingles, set the equipment to around 1,200 to 1,500 PSI. This range effectively removes dirt and moss without causing damage. When I first tackled an asphalt roof, I started off too high, and the shingles began to lift. A lower setting saved that project.
Tile and Slate Roofs

For tile or slate, 1,500 to 2,000 PSI is ideal. Be cautious, as these materials can crack if over-pressured. I recall a job where a client insisted on a higher setting; the result was a costly repair for a cracked tile that could have been avoided.
Wood Shakes
Wood shakes require a gentle touch, typically around 800 to 1,200 PSI. Higher pressure can strip away the protective oils, leading to faster deterioration. I’ve learned through experience that a soft wash solution paired with low pressure yields the best results for wood surfaces.
Always begin with the lowest setting and gradually increase as needed. Test a small area first; this simple step can prevent costly mistakes. Knowing the right pressure settings tailored to your specific material can make all the difference in achieving a thorough and safe clean.
Essential Safety Gear for Roof Cleaning Operations
Prioritising safety is paramount during any cleaning task involving high-powered equipment. Equip yourself with the right gear to minimise risks while working at heights.
- Hard Hat: Protect your head from falling debris. A hard hat is a must, especially when working near overhanging branches or loose shingles.
- Safety Glasses: Shield your eyes from flying particles and chemical sprays. Opt for impact-resistant lenses for maximum protection.
- Non-Slip Footwear: Select shoes with excellent grip to prevent slips on wet surfaces. Rubber-soled boots are ideal for maintaining stability.
- Gloves: Wear sturdy gloves to protect your hands from harsh chemicals and sharp edges. Look for waterproof options that allow for dexterity.
- Harness and Lanyard: If working on a steep slope, a safety harness connected to a secure anchor point is crucial. This gear can prevent falls from heights.
- Respirator: Use a respirator if dealing with mould or cleaning agents that emit harmful vapours. Ensure it fits properly for effective filtration.
Always inspect your equipment before use. For instance, I remember a time when a frayed harness almost caused an accident. Thankfully, I noticed it beforehand. Regular maintenance of safety gear is just as important as the job itself.

Additionally, ensure that anyone assisting you is equipped with similar protective gear. Having a safety buddy system can enhance overall vigilance. When working on a project, I often remind my team to stay aware of their surroundings. It’s easy to get caught up in the work and forget the potential dangers.
Once you’ve equipped yourself for safety, consider reviewing best practices for cleaning various surfaces. For more insights on maintenance, check out how to clean stainless steel the ultimate guide.
Step-by-Step Guide to Pressure Washing Your Roof
Begin by clearing the area around the structure. Remove any debris, leaves, or branches that could obstruct your path or become projectiles during the cleaning process. This not only ensures safety but also allows for effective operation.

Next, position a sturdy ladder securely against the side. Ensure that it is stable and that you have someone to assist you if necessary. Safety is paramount here; never compromise on this aspect.
Once you have access, inspect the surface for loose shingles or tiles. Any damaged areas should be addressed prior to the washing procedure to prevent further issues.
Select a detergent suitable for the specific material. Using the wrong type can lead to damage or ineffective results. Mix the cleaning solution according to the manufacturer’s instructions and apply it using a low-pressure nozzle.
Allow the solution to sit for approximately 15-20 minutes. This dwell time is crucial as it helps break down grime and moss. Avoid letting it dry completely, as this can negate the benefits of the detergent.
After the dwell time, switch to a high-pressure nozzle. Maintain a distance of at least 2-3 feet from the surface to avoid causing damage. Start at the highest point and work your way down, moving in a sweeping motion. This method ensures that the debris flows downward and does not settle on already cleaned areas.
For stubborn stains or patches of moss, a second application of detergent may be necessary. Reapply the cleaning solution, let it sit, and then rinse thoroughly.
Once you’ve completed the washing, inspect the area for any missed spots. A thorough check ensures a comprehensive clean. Rinse any remaining debris from the gutters and downspouts to prevent clogs.
Finally, allow the surface to dry naturally. Avoid walking on it until it is completely dry to prevent slips or further damage. Dispose of any leftover cleaning solution and debris responsibly.
| Step | Action |
|---|---|
| 1 | Clear debris from the area |
| 2 | Set up a stable ladder |
| 3 | Inspect for damage |
| 4 | Choose and mix suitable detergent |
| 5 | Apply detergent and allow to dwell |
| 6 | Switch to high-pressure nozzle and rinse |
| 7 | Inspect for missed spots |
| 8 | Allow to dry |
Following these steps will lead to a successful cleaning operation, ensuring a well-maintained exterior that enhances the overall appearance of the property.
Common Mistakes to Avoid While Pressure Washing a Roof
Using high-pressure equipment on a sloped surface often leads to errors that can damage both the structure and the person operating it. One significant blunder is selecting an unsuitable nozzle. A narrow stream can strip away protective granules from shingles, while too wide a spray may not remove stubborn grime effectively. Opt for a nozzle that delivers an even spray to balance cleaning power and safety.
Ignoring the Weather Conditions
Conducting operations during windy or rainy weather is another pitfall. Rain can dilute cleaning agents, reducing their effectiveness, while wind can propel debris and water in unexpected directions. Always check the forecast and choose a calm, dry day for this task.
Neglecting Surface Assessment
Failing to inspect the surface beforehand can lead to severe repercussions. Look for loose shingles or cracks. Pressure exerted on damaged areas may worsen existing issues, resulting in costly repairs. Conduct a thorough examination before starting and address any repairs needed.
Wearing inadequate safety gear can also be detrimental. Ensure a sturdy harness and non-slip footwear are part of your kit. The risk of slipping is elevated when working on an incline, and proper equipment can prevent accidents.
Lastly, rushing the process is a surefire way to overlook critical details. Taking your time allows for a thorough clean and helps avoid repetitive trips up and down ladders. A methodical approach ensures no area is neglected, and the job is completed safely and effectively.
Post-Cleaning Care for Your Roof After Pressure Washing
After finishing the task of scrubbing your rooftop, a few crucial steps will significantly enhance the longevity and appearance of your surfaces. First, inspect the area closely for any remaining debris or water pooling. Ensuring proper drainage is vital to prevent future issues, such as mould growth or water damage.
Applying Protective Coatings
Consider applying a protective coating or sealant tailored for your roofing material. This can help repel dirt, moisture, and UV rays, extending the life of the surface. Products specifically designed for shingles or tile roofs will provide the best results. Follow the manufacturer’s guidelines for application, and pay attention to drying times to ensure effectiveness.
Regular Maintenance Schedule
Establish a routine maintenance schedule. Regular inspections can catch issues early, and periodic washes can keep your surfaces looking pristine. I recommend checking your rooftop at least twice a year, particularly after heavy storms. Keeping an eye out for loose shingles, debris accumulation, or any signs of wear will help you address problems before they escalate.
.jpg)


