
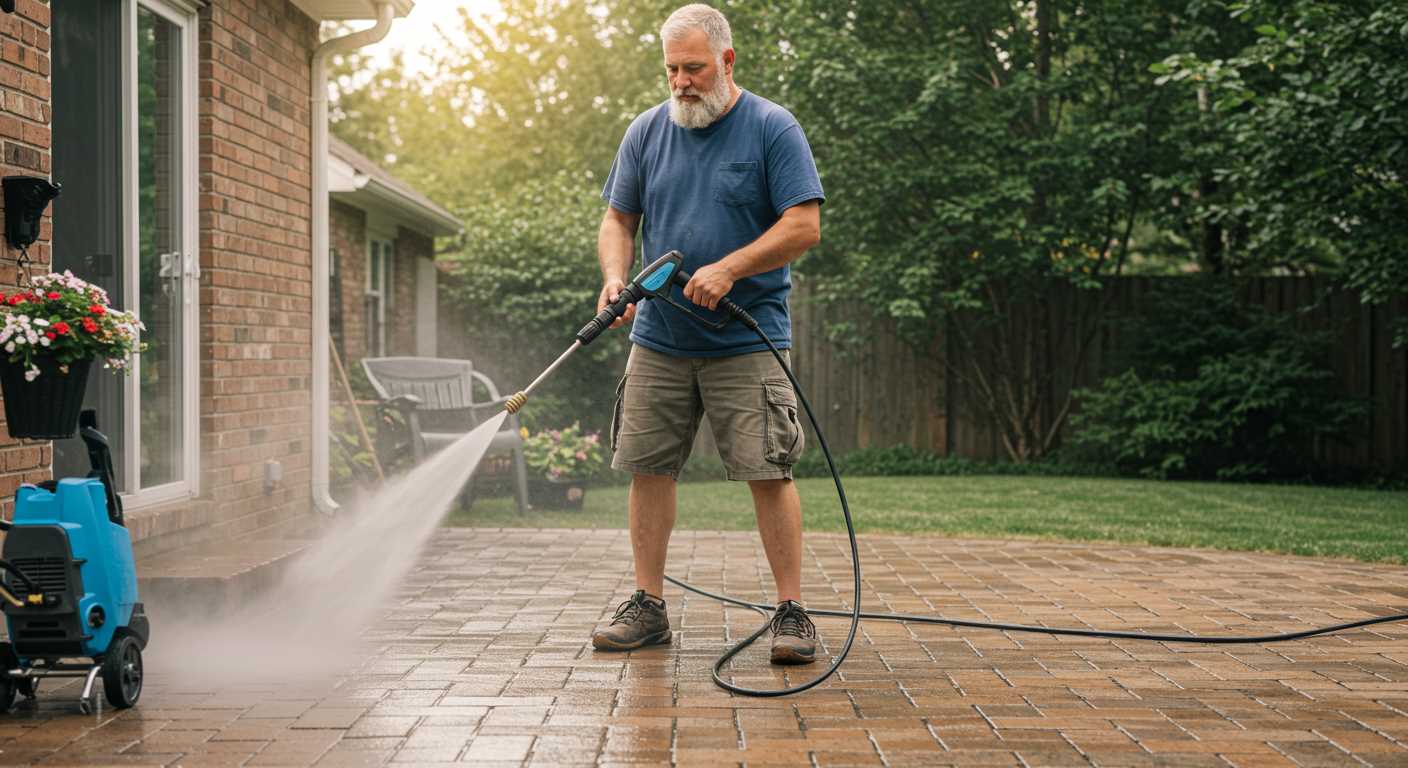


Using a high-powered cleaning device can yield impressive results for those looking to refresh the appearance of exterior surfaces. My experience in the cleaning equipment industry has shown me that the right approach can make a significant difference. It’s all about the technique and the settings you choose. Start with the right nozzle; a wider spray pattern reduces the risk of damage while still providing enough force to lift grime and mildew.
Before getting started, preparation is key. Ensure the area is free from obstacles, and consider protecting nearby plants and surfaces. During my years consulting, I often observed how neglecting this step could lead to unwanted surprises, such as damaged flowers or splattered paint. Using a gentle detergent can enhance the cleaning process, especially for stubborn marks. Simply mix it with water in the designated reservoir, and let the machine do its magic.

Watch the angle of the spray as well. Aiming too closely can cause harm to the material, while a slightly angled approach allows for better cleaning without risking damage. I recall a client who had significantly stained boards; with the right angle and technique, we restored them to their former glory without any adverse effects. Always remember to work from the top down to ensure that dirt flows away from already cleaned areas, making the task more efficient.
Can You Clean Fascias and Soffits Yourself Using a Pressure Washer?
Taking on the task of tidying up those overhead structures with a high-powered cleaner can be satisfying and yield impressive results. From my years in the industry, I’ve seen how a bit of effort can restore the original brightness of these surfaces. However, it’s crucial to be mindful of a few factors before diving in.
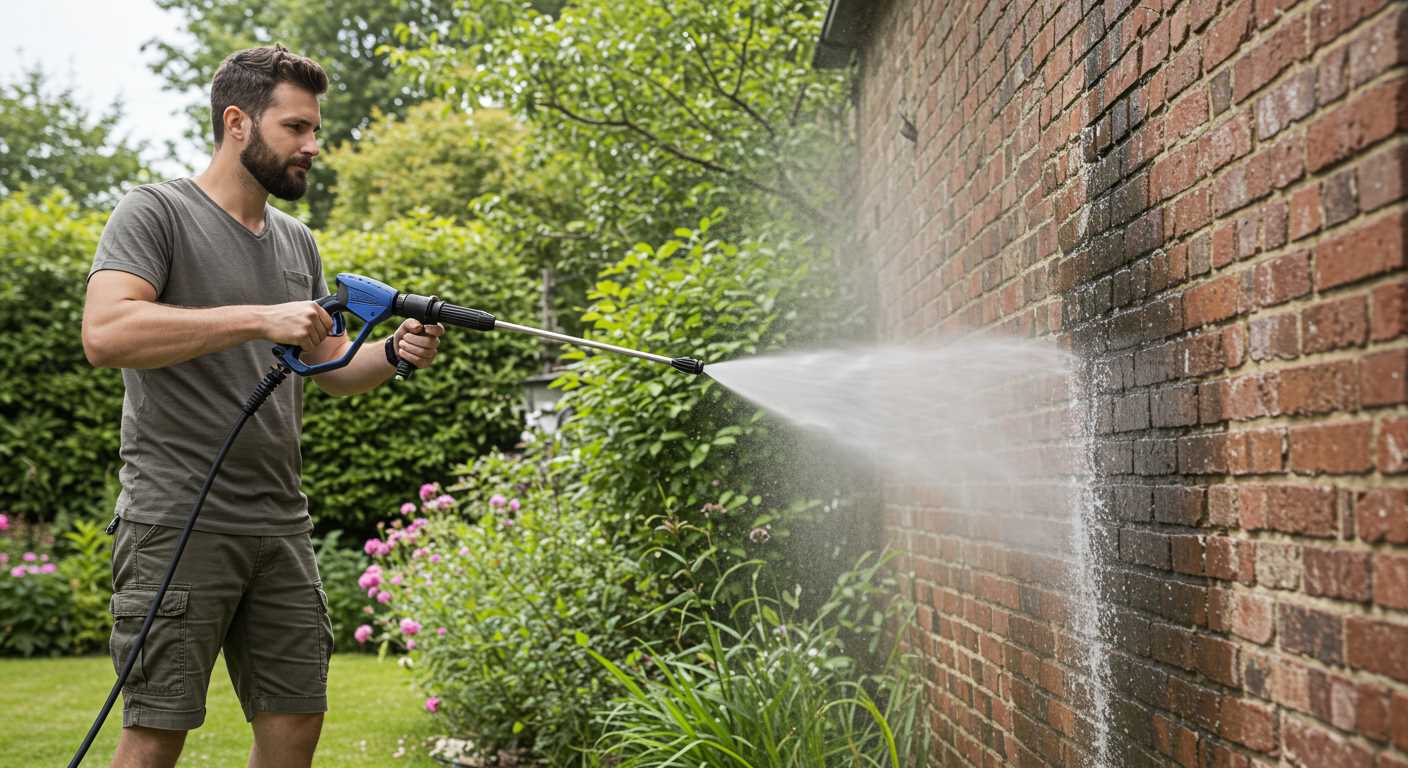
First, select the right nozzle. A narrow spray can be tempting for stubborn grime, but this can easily lead to damage. I recall a time when I opted for a concentrated jet, thinking it would do the trick faster. Instead, I ended up with paint damage and had to repaint the area. Opt for a wider angle to disperse the force and avoid mishaps.
Next, adjust the pressure settings. Many models allow for variations in pressure, and starting low is wise. Gradually increase the power if needed. I’ve learned the hard way that what seems like a tough stain can often be handled with lower settings, preserving the surface integrity.
Preparation is key. Before starting, I always ensure that the area is free from loose debris and that windows are tightly shut to prevent water intrusion. In one instance, I neglected to secure a window, leading to a minor flood inside. A few minutes spent on prep saves a lot of hassle later.
Consider the environment. Wind can blow water or detergent back onto you, or worse, into areas you didn’t intend to reach. I once got caught off guard by a gust that sent a spray right back at me, and it wasn’t pleasant. If conditions aren’t ideal, it might be best to postpone.
Lastly, take safety seriously. Using a ladder can be risky, especially on uneven ground. I’ve had my share of close calls. If the height is significant, it may be wiser to use a longer extension or even hire professionals. Safety should always come first.
In conclusion, with the right equipment, technique, and precautions, achieving a sparkling finish on these structures is very much within reach for the hands-on homeowner. Just be cautious, and you’ll likely find the experience rewarding.
Understanding Fascias and Soffits: What Are They?
Fascias serve as the horizontal boards that run along the edge of the roofline, providing a finished look while supporting the lower edge of the roof tiles or shingles. They are typically constructed from materials like wood, PVC, or composite materials, which can withstand weather elements. The colour and style of fascias can significantly influence the overall aesthetic of a property, so selecting the right type is crucial for enhancing curb appeal.
Soffits, on the other hand, are found beneath the overhanging sections of the roof, connecting the edges of the roof to the exterior walls. Their purpose extends beyond aesthetics; they also allow for ventilation in the roof space, preventing moisture buildup and reducing the risk of mould and rot. Soffits can be made from similar materials as fascias, with options for ventilation holes or solid panels, depending on the desired airflow and look.
Importance of Maintenance
Regular upkeep of these components is key to preserving their function and appearance. Neglect can lead to issues such as water damage, pest infestations, and unsightly stains. Understanding the materials used in constructing fascias and soffits will aid in determining the best cleaning methods and frequency required to keep them in top condition.
Common Issues and Solutions
Many homeowners encounter problems like peeling paint, grime accumulation, and organic growth on these surfaces. Addressing these issues promptly not only keeps the property looking well-maintained but also extends the lifespan of the materials. A simple inspection can reveal whether a thorough wash or minor repairs are needed, ensuring that both fascias and soffits remain functional and visually appealing.
Benefits of Cleaning Fascias and Soffits with a Pressure Washer
Achieving pristine results with high-pressure equipment on exterior surfaces is a game-changer. From my experience, there are several advantages to this approach that stand out.
Time Efficiency

Utilising this method significantly cuts down on the time spent on maintenance tasks. In my early days as a consultant, I remember tackling a particularly grime-laden property. What took hours with a brush and chemicals was reduced to mere minutes with my trusty device. The powerful stream eliminates dirt and algae swiftly, making it an ideal choice for those with a busy lifestyle.
Enhanced Aesthetic Appeal
After a thorough rinse, the transformation is remarkable. I’ve witnessed countless properties regain their charm after just one session. The build-up of pollutants can dull the appearance of your home, but a robust clean restores its original vibrancy. It’s satisfying to see the immediate effects; the difference can often feel like a complete makeover.
Additionally, maintaining these structures helps prolong their lifespan. I’ve seen homes with neglected surfaces deteriorate quicker due to mould and grime accumulation. Regular upkeep not only preserves aesthetics but also protects the integrity of the building materials.
For anyone considering this method, ensure to follow safety precautions. It’s crucial to use the right settings to avoid damage. With the proper technique, the benefits are undeniable, leading to a cleaner, more appealing residence in no time.
Choosing the Right Pressure Washer for the Job
For effective cleaning, select a model with at least 2000 PSI. I remember testing a range of units, and those with lower pressure simply didn’t cut through grime effectively. A higher PSI means more power, which translates to better results on stubborn dirt.
Flow rate is equally important; aim for at least 1.8 GPM. This ensures adequate water delivery to wash away debris. I’ve encountered models that, despite high PSI, fell short due to insufficient flow rate. It’s all about balance.
Electric washers are quieter and suitable for light tasks, while gas-powered models provide more power for larger jobs. I’ve used both and found gas units particularly effective for heavy-duty cleaning, though they require more maintenance.
Consider the nozzle options that come with the unit. A rotating nozzle can be a game-changer for tough spots. I’ve had instances where switching nozzles made all the difference in cleaning efficiency. A wide spray pattern can cover large areas quickly, while a narrow jet is ideal for precision work.
Don’t overlook portability. If you’re working at height or moving around, a lightweight model with sturdy wheels can save you time and effort. I’ve struggled with cumbersome equipment before; a well-designed frame makes a world of difference.
Lastly, check for compatibility with detergents. Some jobs require soap to tackle grease and grime effectively. I’ve found that units designed for detergent use often come with specific settings that optimise the cleaning process.
Preparing Your Work Area and Safety Precautions
Before starting the task, ensure the area is free from obstacles. Remove any furniture, potted plants, and decorations that might get in the way or be damaged by the spray. It’s also wise to cover nearby electrical outlets and fixtures with plastic to prevent water infiltration.
Wear appropriate protective gear. Safety goggles shield your eyes from debris, while gloves protect your hands from chemicals and sharp edges. A dust mask can prevent inhalation of any mould or allergens stirred up during the process.

Check the weather forecast. Avoid attempting this on windy or rainy days, as moisture can affect visibility and lead to hazardous conditions. Ideally, choose a sunny day; it helps surfaces dry quickly, reducing the chances of streaks.
Ensure the pressure cleaning equipment is in good working order. Check hoses for leaks, and confirm the nozzle is appropriate for the materials you’re working on. A narrow nozzle can create too much force, potentially causing damage.
Have a safe ladder or scaffolding ready. Ensure it’s stable and positioned on even ground. If ascending to heights, consider having someone assist you on the ground. This added layer of safety ensures you can focus on the task without worrying about potential falls.
Before applying any cleaning solution, test it on a small, inconspicuous area to gauge its effect. It’s important to avoid any adverse reactions that may damage surfaces. Remember, prevention is better than cure.
Hydration is key during this task. Keep water nearby to stay refreshed and alert throughout the cleaning process. Taking breaks to hydrate can prevent fatigue and help maintain focus.
Finally, should you be interested in other DIY projects, check out this guide on how to can fresh green beans without a pressure cooker. It’s always rewarding to take on new challenges!
Step-by-Step Guide to Cleaning Fascias and Soffits
Begin with a thorough inspection. Look for any signs of damage or loose fittings. If you see any issues, address them before proceeding.

Gather your materials. You’ll need a ladder, suitable cleaning solution, a soft-bristle brush, and a sprayer. Ensure your high-pressure unit is equipped with the right nozzle–typically, a wide-angle nozzle works best for this task.
Set up the ladder securely. It’s crucial to position it on stable ground, with someone to assist if needed. Safety is paramount, so wear gloves and goggles to protect yourself from debris and cleaning agents.
Prepare the cleaning solution according to the manufacturer’s instructions. A mix of water and a mild detergent often suffices to tackle grime without causing damage.
Start at one end of the structure and work your way along. Spray the cleaning solution from the bottom up to avoid streaks. Allow it to sit for a few minutes; this helps break down stubborn dirt.
Use the soft-bristle brush to scrub any areas with significant build-up. Pay attention to corners and joints, where dirt tends to accumulate. Rinse the brush frequently to avoid redistributing grime.
After scrubbing, switch to the pressure device. Start rinsing from the top down, maintaining a safe distance to prevent damage. Adjust the nozzle as needed for a wider spray to cover more area efficiently.
Inspect your work as you go. If any areas require further attention, repeat the cleaning process on those sections.
Finally, allow everything to dry thoroughly. Check for any missed spots, and touch up as necessary. Once satisfied, clean up your work area, ensuring all equipment and materials are stored properly.
| Step | Action |
|---|---|
| 1 | Inspect for damage |
| 2 | Gather materials |
| 3 | Set up ladder safely |
| 4 | Prepare cleaning solution |
| 5 | Apply cleaning solution |
| 6 | Scrub with a brush |
| 7 | Rinse with pressure unit |
| 8 | Inspect and touch up |
| 9 | Clean up work area |
Common Mistakes to Avoid When Operating a High-Pressure Cleaner
One of the most frequent errors is selecting an inappropriate nozzle. Using a narrow-angle spray on delicate surfaces can cause damage, while a wide-angle spray may not provide the necessary force to remove stubborn grime. Always match the nozzle to the surface type.
Neglecting Safety Gear
Protective equipment is non-negotiable. Skipping safety goggles or gloves can lead to injuries from flying debris or high-pressure water. Always wear appropriate attire to avoid accidents.
Poor Technique
- Aiming the nozzle too close can result in surface damage. Maintain a safe distance to prevent etching.
- Working from the top down is crucial. If done in reverse, dirt will run onto already cleaned areas, increasing effort.
- Using too much pressure can strip paint or damage wood. Start at a lower setting and adjust as needed.
Another common pitfall is neglecting to test on a small, inconspicuous area first. This allows for assessing the pressure’s impact before committing to the entire surface.
Ignoring Manufacturer Guidelines
Every model comes with specific instructions. Disregarding these can lead to equipment malfunction or subpar results. Familiarise yourself with the manual to avoid potential issues.
- Always check the recommended cleaning agents. Some chemicals can damage the machine.
- Be mindful of the water supply. Low flow can strain the equipment and affect performance.
Finally, don’t rush the process. Allowing the cleaner sufficient time to work can make a significant difference in the outcome. Patience often yields the best results.
Post-Cleaning Care: Maintaining your Fascias and Soffits
After a thorough wash, it’s crucial to focus on the upkeep of your exterior elements to prolong their lifespan and maintain their appearance. Here are some tips based on my years of experience in the field:
- Regular Inspections: Conduct visual checks every few months for signs of deterioration or damage. Look for peeling paint, cracks, or any signs of mildew.
- Routine Cleaning: Establish a schedule for light cleaning every six months. A simple wipe down with soapy water can help prevent the build-up of dirt and grime.
- Protective Coatings: Consider applying a protective sealant or paint designed for outdoor use. This can shield surfaces from moisture and UV damage, keeping them looking fresh longer.
- Gutter Maintenance: Ensure that gutters are clear of debris. Clogged gutters can lead to water overflow, which may damage surrounding areas and promote mould growth.
During my time in this field, I encountered many homeowners who overlooked the importance of maintenance after a deep clean. One particular case involved a client who neglected their exterior for years. After a thorough wash, they were thrilled with the results, but without ongoing care, they soon faced expensive repairs due to water damage.
Keep in mind that maintaining these elements is an ongoing process. Investing a little time and effort regularly can save significant costs down the line.
- Use Gentle Products: When choosing cleaning agents, opt for mild soap solutions to avoid harsh chemicals that could damage surfaces.
- Stay Aware of Weather: Monitor the local weather conditions. High humidity or rain can affect the longevity of any protective treatments applied.
By integrating these practices into your routine, the aesthetic appeal and integrity of your home’s exterior can be preserved, ensuring it remains a source of pride for years to come.
When to Consider Professional Cleaning Services
Hiring a specialist becomes necessary when facing stubborn grime, mould, or hard-to-reach areas. In my experience, if the grime has built up over time, a DIY approach may not yield satisfactory results. Professionals possess advanced tools and techniques that can effectively tackle even the most challenging residues.
Signs That Indicate the Need for Expert Help
If you’re uncomfortable with heights or lack experience working on ladders, enlisting a service can provide peace of mind. A professional team not only ensures safety but also guarantees a thorough job. Moreover, if the surfaces have not been maintained for years, the dirt can penetrate deeper, requiring specialised cleaning agents that are often not available to the general public.
Cost vs. Benefit Analysis
While DIY cleaning might seem budget-friendly, consider the long-term outcome. Investing in professional services can save time and avoid potential damage caused by improper techniques. A small upfront cost can prevent larger expenses down the line, especially if damage occurs during an attempt to do it yourself. If you require assistance with cleaning chemicals, I suggest looking into options like a car wash foam cannon for pressure washer, which can enhance the effectiveness of your cleaning efforts, but remember that sometimes a professional touch is the best route for long-lasting results.
.jpg)


