
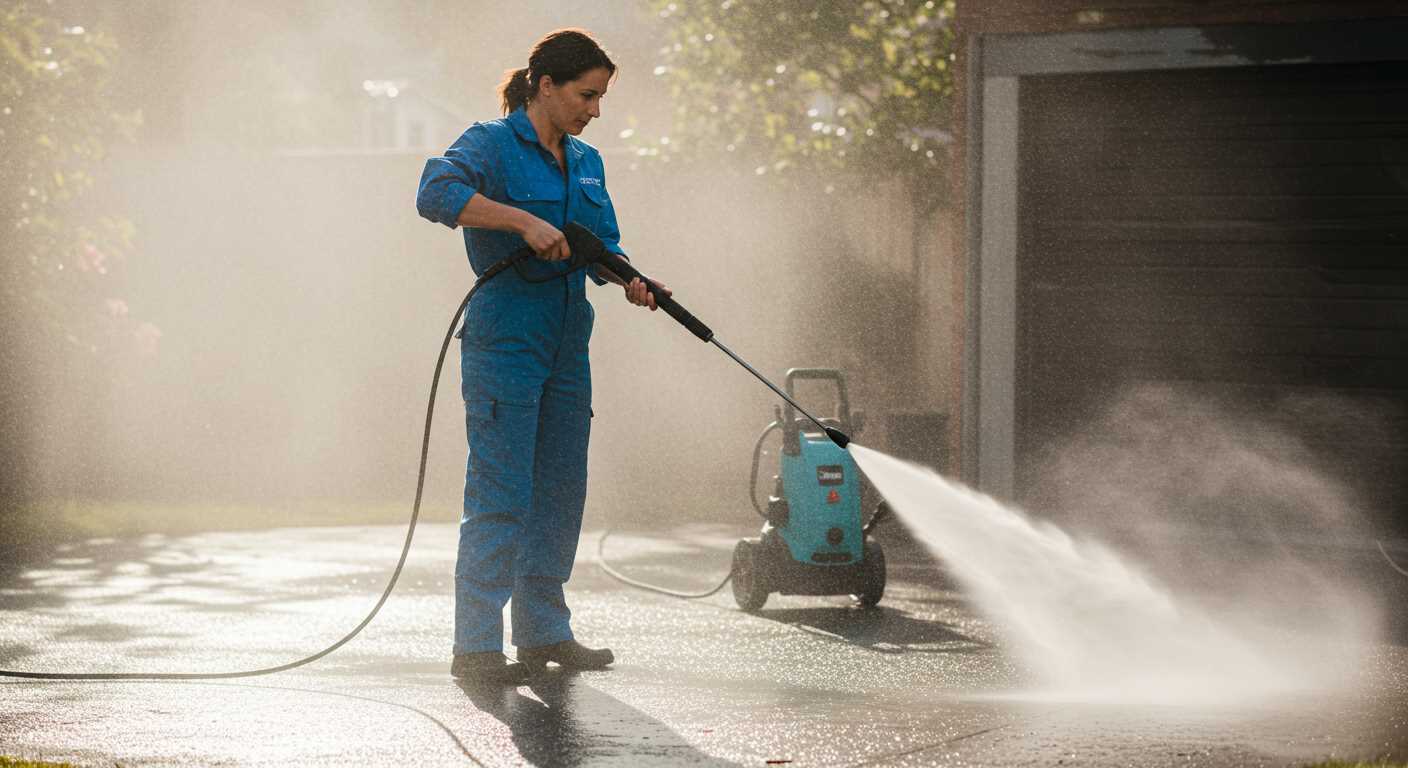


Using a high-pressure cleaning device can significantly diminish unwanted marks on various surfaces. From my years of experience in the cleaning equipment industry, I’ve witnessed firsthand how powerful these machines are in tackling stubborn stains, including those pesky outdoor artworks.
For optimal results, select a model that offers adjustable pressure settings. This feature is crucial as it allows for precise control, ensuring the surface underneath remains intact while effectively tackling the unwanted pigments. Starting with a lower pressure and gradually increasing it is a strategy I recommend based on numerous successful clean-up projects.

Before beginning, always test a small, inconspicuous area. This step is vital to assess the reaction of the surface to the high-pressure stream. On brick or concrete surfaces, the results can be remarkable, yet softer materials may require additional caution to avoid damage.
Additionally, incorporating a suitable cleaning solution can enhance the process. Some formulations are designed specifically for breaking down tough stains and can be applied before or during the cleaning process. In my experience, this combination can lead to outstanding outcomes, often leaving surfaces looking as good as new.
Understanding the basics of pressure washing for graffiti removal
For effective elimination of unwanted markings, selecting the right equipment is vital. A pressure cleaning unit should be powerful enough to tackle various surfaces without causing damage. Typically, a model with a minimum of 3000 PSI is ideal for most surfaces, but softer materials may require lower pressure settings. Always begin with a test on a small, inconspicuous area to gauge how the surface reacts before proceeding.
Water Temperature and Nozzle Selection
The temperature of the water plays a significant role in the process. Hot water can break down adhesives and paint more efficiently than cold. If your equipment allows, opt for heated water to enhance cleaning effectiveness. Additionally, nozzle selection is crucial; a 15-degree or 25-degree nozzle works well for tougher stains, while a wider spray may be suitable for delicate surfaces.
Pre-Treatment and Safety Measures
Before applying high-pressure techniques, consider pre-treating the area with a suitable cleaning solution. This can assist in loosening the paint. Always wear protective gear, including goggles and gloves, to safeguard against debris and chemical splashes. If you find your device struggles to maintain pressure, refer to this guide on pressure washer does not build up pressure for troubleshooting tips.
Finally, patience is key. Sometimes multiple passes are necessary to achieve the desired result. Take your time, and ensure thorough rinsing to avoid residue that can lead to further staining.
Choosing the Right Pressure Washer for Graffiti Removal
Selecting an appropriate high-pressure cleaning device is critical for tackling unwanted markings effectively. Here are key factors to consider:
- Pressure Rating: Look for a model with a minimum pressure of 2500 PSI. Higher pressure often leads to better results, especially on porous surfaces.
- Flow Rate: A higher flow rate, measured in gallons per minute (GPM), will enhance the cleaning process. Aim for at least 2.5 GPM for optimal performance.
- Nozzle Types: Different nozzles serve various purposes. A 15-degree nozzle is typically ideal for tough stains, while a 25-degree one might suffice for lighter marks. Always have a range on hand.
- Heat Source: Hot water machines can significantly improve cleaning efficiency, particularly for oil-based or stubborn residues. Investing in a hot water unit may be worthwhile.
- Portability: Ensure the unit is easy to manoeuvre, especially if working on larger surfaces. Consider wheels and weight for transport.
- Attachments and Accessories: Look for models that offer brushes or surface cleaners. These can aid in achieving better results and reduce cleaning time.
In my experience, I’ve found that investing in a reliable brand often pays off in the long run. I once used a lesser-known model, and the results were disappointing due to inconsistent pressure and poor build quality. On the other hand, a trusted brand delivered excellent results quickly and efficiently.
Lastly, always consider safety features. Ensure the device has a safety lock on the trigger and a sturdy design to prevent accidents. Using a high-pressure cleaning tool can be hazardous, so wearing protective gear is non-negotiable.
For further cleaning insights, you might find this guide on how to clean algae from fish tank glass useful, as it highlights techniques applicable across various cleaning scenarios.
Selecting Appropriate Cleaning Solutions for Effective Results
For optimal outcomes in erasing unwanted markings, using suitable cleaning agents is fundamental. Based on my extensive experience in the field, I’ve found that selecting the right product can significantly enhance the results.
Types of Cleaning Solutions

Different surfaces require specific formulations. For porous materials like brick or concrete, a biodegradable solution that penetrates deeply works wonders. On smoother surfaces like metal or glass, a less aggressive cleaner can suffice. Always read the product label for compatibility with the surface to avoid damage.
Application Techniques
Applying the cleaning solution effectively is just as important as choosing the right one. Use a spray bottle for even distribution, allowing the solution to dwell for several minutes before rinsing. This dwell time is crucial; it allows the cleaner to break down the unwanted material, making subsequent rinsing more effective.
| Surface Type | Recommended Cleaning Solution | Application Method |
|---|---|---|
| Brick | Biodegradable cleaner | Spray, dwell for 10 minutes, rinse |
| Concrete | Degreaser | Apply with a brush, rinse |
| Metal | Non-acidic cleaner | Spray, rinse immediately |
| Glass | Glass cleaner | Spray, wipe with a cloth |
In my experience, testing a small area first helps gauge the effectiveness of the solution and ensures no adverse reactions occur. What works for one surface may not work for another, so adjustments are often necessary. Always prioritise safety and environmental considerations when selecting any cleaning agent.
Step-by-step guide to using a pressure washer on graffiti
Begin by assessing the surface. Ensure it’s safe for high-pressure cleaning. Some materials, like soft wood, may get damaged. If you’re unsure, test a small, inconspicuous area first.
Preparation
Gather your equipment: a suitable high-pressure machine, nozzle attachments, and protective gear. Wear goggles and gloves to protect against debris and cleaning solutions. If the area is large, consider marking off sections to maintain focus.
Cleaning Process
Set the machine to a low pressure initially. Start from a distance of about two feet from the surface. Gradually move closer as needed. Keep the nozzle constantly in motion to prevent any surface damage.
Apply the chosen cleaning solution. Allow it to dwell for a few minutes before rinsing. This step enhances the chances of breaking down the unwanted paint. After dwelling, switch to a higher pressure and rinse thoroughly, ensuring all residues are washed away.
Inspect the area post-cleaning. If remnants persist, repeat the application and rinsing process as necessary. Adjust the angle of the nozzle to target stubborn spots effectively.
Always follow up with a thorough rinse to ensure no cleaning agents remain, as they can affect the surface over time. Finally, clean your equipment promptly to prolong its lifespan.
Safety Precautions When Using a Pressure Washer
Always wear protective eyewear. High-pressure streams can send debris flying, and a sudden splash can cause serious eye injuries. I learned this the hard way during my first week on the job. A small stone hit my safety goggles, reminding me that prevention is better than cure.
Dress appropriately. Sturdy footwear and long trousers are a must. I once made the mistake of wearing sandals on a hot day. A slip and a blast of water sent me tumbling, and I ended up with bruises that lasted for weeks. Safety shoes with good grip can prevent slips, especially on wet surfaces.
Handling Chemicals
Be cautious with cleaning solutions. Always read labels and follow instructions meticulously. I recall a day when I mixed two different products without checking compatibility. The result was a toxic fume that sent me running for fresh air. Use gloves and a mask to shield your skin and lungs. Mixing chemicals can be dangerous; never take shortcuts.
Equipment Safety Checks
Inspect the equipment before use. Check hoses for cracks and leaks. I once had a hose burst mid-job, spraying water everywhere and causing a minor flood. Regular maintenance can prevent accidents. Ensure all connections are secure, and don’t forget to keep the area clear of obstacles to avoid tripping hazards.
Common mistakes to avoid during graffiti removal
One major pitfall is using excessive pressure. I recall a job where I blasted away at a wall, confident that high settings would yield quick results. Instead, I ended up damaging the surface, creating a bigger problem than the original issue. Always start at the lowest pressure and gradually increase it, gauging the effect on the surface.
Another frequent error is neglecting surface testing. Before tackling a large area, test a small, inconspicuous section. This simple step can save you from unsightly patches or uneven surfaces later on. I learned this the hard way after rushing into a project only to find that the paint underneath was coming off as well.
Ignoring the right cleaning agents
The choice of cleaning solutions can significantly impact results. I once underestimated the power of a good chemical agent. Using plain water might seem convenient, but it often leads to unsatisfactory outcomes. Always select a cleaner formulated for the specific type of surface you’re treating. Pairing it correctly with your washing equipment can make a world of difference.
Not wearing proper protection
Safety gear is non-negotiable. I remember a day when I got a chemical splatter in my eyes because I skipped goggles, thinking I was being cautious enough. Trust me, the discomfort was not worth the risk. Always wear safety goggles, gloves, and protective clothing to shield yourself from harmful substances and debris.

Evaluating surface compatibility for pressure washing
Always assess the material before starting any cleaning task. For porous surfaces like brick or concrete, the high force can embed chemicals deep into the substrate, causing lasting damage. I once encountered a job where an old brick wall was treated with excessive pressure, resulting in chipped edges and a rough texture that was hard to rectify.
Non-porous surfaces such as glass or metal typically handle the force better. However, even these materials can suffer from improper technique. A friend of mine once used a jet setting on a glass window, leading to cracks due to rapid temperature changes. It’s crucial to adjust the nozzle and pressure according to the surface type.
For painted surfaces, caution is paramount. Many paints, especially older ones, can peel or fade under high pressure. During a restoration project on an old wooden deck, I learned that using a lower pressure setting with a wider nozzle saved the finish while still effectively cleaning the surface. Always test a small, inconspicuous area first to gauge the reaction.
Another aspect to consider is the age and condition of the surface. Weathered surfaces, while often more resilient, can also be more vulnerable to damage. During a job on a weathered fence, I had to adjust my approach significantly compared to newer wood, ensuring I didn’t strip away too much material.
For stone surfaces, especially softer varieties like sandstone, a gentle touch is necessary. An experience I had involved a beautiful sandstone pathway that I nearly ruined due to using too much pressure. After that, I always opted for a fan spray setting to maintain integrity.
Lastly, always consult the manufacturer’s guidelines for the surface in question. They often provide invaluable insights on what to use and what to avoid. It’s a small step that can save a lot of hassle down the line. Each surface tells its own story, and understanding these nuances can make all the difference in achieving satisfactory results without unintended consequences.
Post-cleaning care to maintain surfaces after graffiti removal
After tackling those unsightly marks, proper maintenance is key to preserving the integrity of the surface. My experience has shown that applying a sealant can significantly enhance durability. A high-quality sealant acts as a protective barrier, preventing future stains from adhering and making subsequent clean-ups easier.
Regular inspections and cleaning
It’s wise to schedule regular inspections of the cleaned areas. A simple wash with mild soap and water can help keep the surface looking fresh. In my years of working with various surfaces, I found that even a light rinse can remove dirt that accumulates over time, preventing it from becoming more challenging to clean later.

Prompt action on new marks
Should any new marks appear, addressing them immediately is crucial. I recall a time when a client hesitated to act, thinking a small tag would fade away. Unfortunately, it only grew more stubborn over time. Quick action not only saves time but also reduces the likelihood of needing more aggressive cleaning methods later on.
Finally, sharing information with property owners about the best practices for maintaining their surfaces can foster a sense of care and responsibility. Knowledge is power, and ensuring that everyone is aware of how to keep their environments pristine can make all the difference.
Alternative methods for graffiti removal when pressure washing isn’t suitable
For situations where high-pressure cleaning isn’t an option, several other techniques can effectively eliminate unwanted markings. In my years of experience, I’ve seen both success and failure with various methods. Here’s a rundown of what has worked best.
1. Chemical Removers
- Choose a remover specifically designed for the surface type. For instance, concrete cleaners differ from those suitable for wooden surfaces.
- Follow the manufacturer’s directions carefully. Apply the solution generously, allowing it to dwell for the recommended time to break down the paint.
- Scrubbing may be necessary after application. Use a stiff-bristle brush to help lift the residue.
2. Heat Application
- Using a heat gun can soften the paint, making it easier to scrape away. Maintain a safe distance to avoid damage to the underlying material.
- Always wear heat-resistant gloves and goggles for protection during this process.
3. Sandblasting
- This method is effective on tougher surfaces like brick or stone. It involves blasting abrasive material at high speed to remove paint.
- Ensure proper ventilation and wear protective gear, as this technique creates a significant amount of dust and debris.
4. Biodegradable Solutions
- For environmentally conscious options, look for eco-friendly removers. These are less harsh and can be just as effective.
- Apply as per the instructions, allowing the solution time to penetrate before scrubbing and rinsing.
5. Commercial Services
- Consider hiring professionals if the task seems daunting or if the surface is delicate. They have the expertise and equipment to tackle challenging situations.
- Research local companies and read reviews to ensure quality service.
Each of these methods has its place depending on the surface and the severity of the markings. Always test on a small, inconspicuous area before proceeding with larger sections to avoid damage.


.jpg)


