


Yes, modifying a compressed air device for cleaning purposes is feasible, provided the right adjustments are made. In my extensive experience with various cleaning tools, I’ve discovered innovative ways to repurpose equipment, and this method stands out for its practicality and effectiveness.
First, ensure that the air source can generate sufficient pressure, ideally around 100 PSI. While this may not match the output of a conventional cleaning unit, it can still perform adequately for lighter tasks. Pairing it with a suitable nozzle can enhance the efficacy of the stream, allowing you to tackle dirt and grime effectively.

In my trials, I found that adding a water attachment directly to the air outlet significantly improves the cleaning process. This setup allows for a mix of air and water, creating a more powerful jet that can dislodge stubborn debris from surfaces. Just be cautious with the water flow rate; too much can lead to inefficiencies and possible damage to the equipment.
Maintaining the right balance of pressure and flow is crucial. I recommend starting with lower settings and gradually adjusting to find the optimal combination for your specific cleaning tasks. This experimentation can lead to surprising results, turning an ordinary air device into a versatile cleaning companion.
Understanding the Basics of Compressors and Washing Machines
Familiarity with the mechanics of these devices is crucial for anyone considering modifications. Compressors function by drawing in air and increasing its pressure, which is then stored in a tank. This pressurised air can be used for various applications, including cleaning tasks, but not all models are suitable for high-pressure cleaning.
Washing machines, on the other hand, use a combination of high-pressure water and a specific nozzle design to effectively remove dirt and grime from surfaces. The pressure generated is significantly higher than what most standard compressors can achieve, typically ranging from 1000 to over 4000 PSI, depending on the model.
In my experience as a consultant, I found that many people underestimate the importance of water flow rate, measured in litres per minute (LPM). A washing machine typically requires a minimum flow rate to maintain effective cleaning. If a compressor lacks the necessary output, it may not achieve the desired results, leading to frustration and wasted effort.
Compatibility of accessories is another aspect to consider. Nozzles and hoses designed for high-pressure systems differ significantly from those used with compressors. The fittings must align correctly to avoid leaks and ensure optimal performance. I’ve encountered numerous projects where mismatched components led to inefficiencies and potential damage to equipment.
Consistency in pressure is also vital. Many compressors experience fluctuations in pressure, which can hinder cleaning effectiveness. A stable output is necessary for thorough cleaning, particularly on tough stains or debris. During my tenure, I often emphasised the importance of selecting equipment that maintains a steady flow and pressure for the best results.
In summary, while it might be tempting to repurpose a compressor for cleaning, understanding the fundamental differences between these devices is key. The right tools and knowledge are essential for achieving satisfactory outcomes in any cleaning venture.
Necessary Tools and Equipment for Conversion
For this transformation, gather a few specific tools and components to ensure everything fits together seamlessly. First, invest in a high-quality nozzle that can handle increased water flow and pressure. Look for adjustable nozzles to control the spray pattern effectively.
A durable hose is critical. Choose one that can withstand the pressure levels you’ll be working with, ideally around 25 feet long. This length provides flexibility while ensuring you can reach various areas without hassle.
Next, a reliable pressure regulator is necessary to maintain consistent pressure and prevent damage to the components. Using a regulator designed for water systems will ensure compatibility and safety during operation.
Don’t forget about adapters and fittings. Depending on your existing equipment, you may need various connectors to join the hose and nozzle to your compressor. Investing in high-quality fittings will help prevent leaks and ensure longevity.
To enhance cleaning capabilities, consider a best chemical injector for pressure washer. This tool allows you to mix cleaning solutions with water effectively, tackling tough stains and grime with ease.
Lastly, a sturdy mounting system will help secure your setup, ensuring stability while you work. A well-organised workspace makes for easier handling and reduces the risk of accidents.
Step-by-Step Guide to Modifying an Air Compressor
Gather all necessary components before beginning. Key items include a high-pressure nozzle, a suitable hose rated for high pressure, and an adapter for connecting the nozzle to the unit’s output. Ensure that all parts fit securely to avoid leaks and pressure loss.
Begin by disconnecting the power source. Safety is paramount; ensure that the device is completely powered down and unplugged. This reduces the risk of accidental activation during your modifications.
Next, remove the existing fittings from the output port. Use appropriate tools to detach these components carefully. It’s crucial to avoid damaging the threading on the output port, as this will affect the integrity of the new connections.
Attach the high-pressure nozzle to the output port with the adapter. Ensure a tight fit to prevent leaks. It might require some adjustments to align the threads properly, so take your time here. A leak can cause significant loss of performance.
Now, connect the high-pressure hose to the nozzle. Check the hose specifications; it should withstand high pressure without kinks or bulges. Secure both ends tightly, as any loose connection will compromise performance.
Before testing, fill a container with water and connect the hose’s other end to the water source. Ensure that the inlet is submerged to prevent air from entering the system. Air in the lines can lead to poor performance and potential damage.
Once everything is connected, plug in the unit and power it on. Start at a low pressure to test the connections. Gradually increase the pressure while monitoring for any leaks or unusual sounds. Adjustments may be necessary if any issues arise.
Finally, perform a thorough test on a small section of the surface you intend to clean. This allows you to assess the effectiveness of the setup while ensuring everything operates as expected. Fine-tune the pressure and distance from the surface for optimal results.
Choosing the Right Nozzle for Pressure Washing
Opt for a nozzle that fits your specific cleaning task. Each nozzle type delivers a different spray pattern and pressure, making it crucial to select the right one for effective results. In my experience, the most common options include 0°, 15°, 25°, and 40° nozzles, plus a soap nozzle for detergent application.
Understanding Spray Patterns
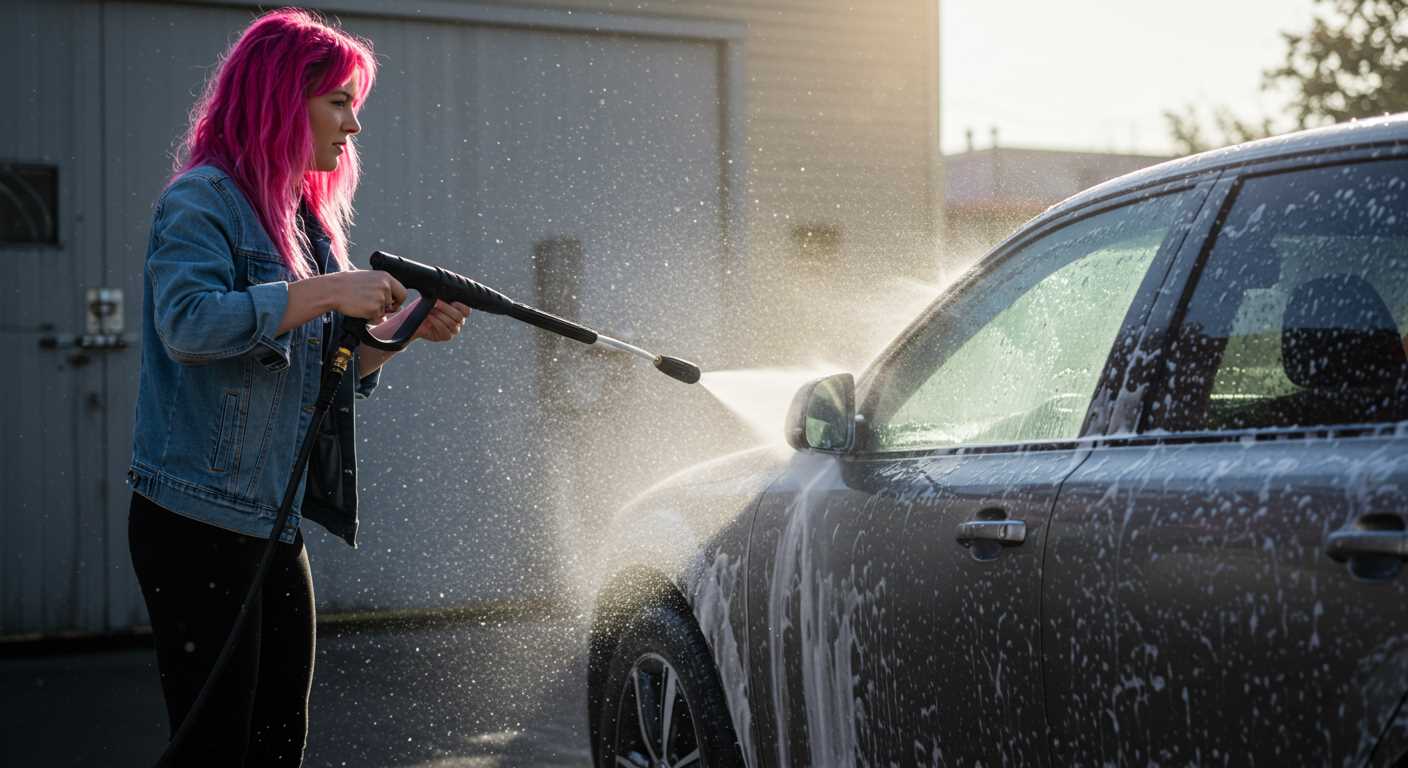
The 0° nozzle produces a concentrated, powerful stream ideal for tough stains on hard surfaces. However, use it cautiously, as it can damage delicate materials. The 15° option delivers a wider spray for heavy-duty jobs like removing paint or grime from concrete. For general cleaning of driveways or decks, the 25° nozzle is versatile, providing a balance between pressure and coverage. The 40° nozzle offers the gentlest spray, perfect for washing cars or delicate surfaces.
Material Considerations
Pay attention to the material of your chosen nozzle. Brass nozzles are durable and resist corrosion, while plastic options are lighter but may not withstand high pressures as well. I’ve found that investing in a quality brass nozzle pays off in the long run, as it lasts significantly longer under heavy use.
Lastly, remember to check the compatibility of the nozzle with your system. Mismatched fittings can lead to leaks or reduced pressure. When in doubt, consult the manufacturer’s specifications or a knowledgeable retailer for guidance. The right nozzle not only enhances performance but also saves time and effort in your cleaning tasks.
Safety Precautions When Using Modified Equipment
Before using any modified apparatus, always prioritise safety. Here are specific precautions to follow:
- Protective Gear: Wear goggles, gloves, and sturdy footwear. High-pressure streams can cause serious injuries.
- Check for Leaks: Inspect all connections for air and water leaks. Use soapy water to identify any escaping fluid.
- Pressure Rating: Ensure the modified unit’s pressure settings are appropriate for the intended applications. Overshooting can lead to equipment failure or injury.
- Sturdy Surface: Operate on stable ground. An uneven surface can lead to tipping or accidents.
- Proper Hose Management: Avoid kinks and tangles. A twisted hose may burst under pressure, creating a hazard.
- Electrical Safety: If the modification involves electrical components, ensure all connections are secure and insulated. Keep electronics away from water sources.
- Maintain Distance: Maintain a safe distance from the nozzle while in operation. High-pressure jets can project debris and cause injury.
- Supervise Operation: If others are nearby, ensure they are aware of the potential risks and maintain a safe distance. Clear the area of bystanders.
During my years in the cleaning equipment industry, I’ve seen firsthand the consequences of neglecting safety measures. One incident involved a colleague who suffered a laceration due to an unsecured nozzle. Proper precautions could have prevented the injury.
Stay vigilant and respect the power of the equipment. It’s not just about achieving cleanliness, but also about ensuring a safe working environment.
Common Issues and Troubleshooting Tips
One of the frequent problems encountered is inadequate pressure output. If the water flow seems weak, check the hose connections for leaks or kinks. Make sure the inlet filter is clean; a clogged filter can severely limit water flow. Additionally, ensure the nozzle is appropriate for the task; an incorrect nozzle can reduce the pressure significantly.

Another common issue is overheating. If the unit runs hot, it may be due to prolonged use without breaks. Allow the system to cool down periodically. Also, monitor the duty cycle of your equipment; operating beyond its limits can lead to overheating and eventual failure.
Noise levels can also indicate a problem. Unusual sounds might suggest an issue with the motor or internal components. If you hear grinding or knocking, it’s best to turn off the unit and check for loose parts or damaged components.
To ensure smooth operation, regular maintenance is key. Clean the filters and check the oil levels if applicable. Keep the system free from debris, as accumulated dirt can obstruct the flow and affect performance.
If the setup fails to start, inspect the power supply first. Ensure that connections are secure and that the circuit isn’t overloaded. In some cases, resetting the system might solve the issue.
| Issue | Possible Cause | Solution |
|---|---|---|
| Low Pressure | Kinked hose or clogged filter | Check and clear hose; clean filter |
| Overheating | Prolonged use | Allow to cool; check duty cycle |
| Unusual Noise | Loose or damaged parts | Turn off; inspect components |
| Won’t Start | Power supply issue | Check connections; reset system |
For those curious about alternative uses of high-pressure systems, consider cleaning the carpet with a pressure washer. Just ensure you’re using the right techniques to avoid damaging your carpet.
Maintaining Your Converted Pressure Washer
Regular upkeep of your modified cleaning device ensures longevity and optimal performance. Here are specific steps to keep in mind:
- Check the Connections: Regularly inspect all hoses and fittings for leaks or wear. A small crack can lead to significant pressure loss.
- Clean the Nozzle: Clogged nozzles reduce efficiency. After each use, rinse the nozzle with clean water and use a needle to clear any debris.
- Monitor the Pressure Gauge: Ensure that the gauge provides accurate readings. If you notice fluctuations, recalibrate or replace it as necessary.
- Inspect the Motor: Keep the motor free of dust and debris. Use a soft brush or compressed air to clean the vents regularly.
- Change the Oil: If your unit has an oil reservoir, change the oil according to the manufacturer’s recommendations. Old oil can lead to overheating.
From my experience, I’ve found that paying attention to these details can prevent headaches down the line. One time, I neglected to check the hoses and ended up with a significant leak during a job. It not only delayed my work but also caused unnecessary mess.
In addition to these tasks, consider the following:
- Store Properly: After use, store the equipment in a cool, dry place. Avoid leaving it outside where it can be exposed to elements.
- Use Quality Detergents: If using soap or detergents, opt for those specifically designed for high-pressure systems. Generic soaps can cause build-up in the system.
- Test Operational Integrity: Before starting a big project, run a quick operational test to ensure everything functions smoothly.
I’ve learned through trial and error that a little maintenance goes a long way. For instance, after implementing a routine check-up every month, I noticed a significant improvement in performance and reliability. Keeping a maintenance log can also be helpful in tracking any changes or issues that arise, enabling proactive solutions.
.jpg)


