
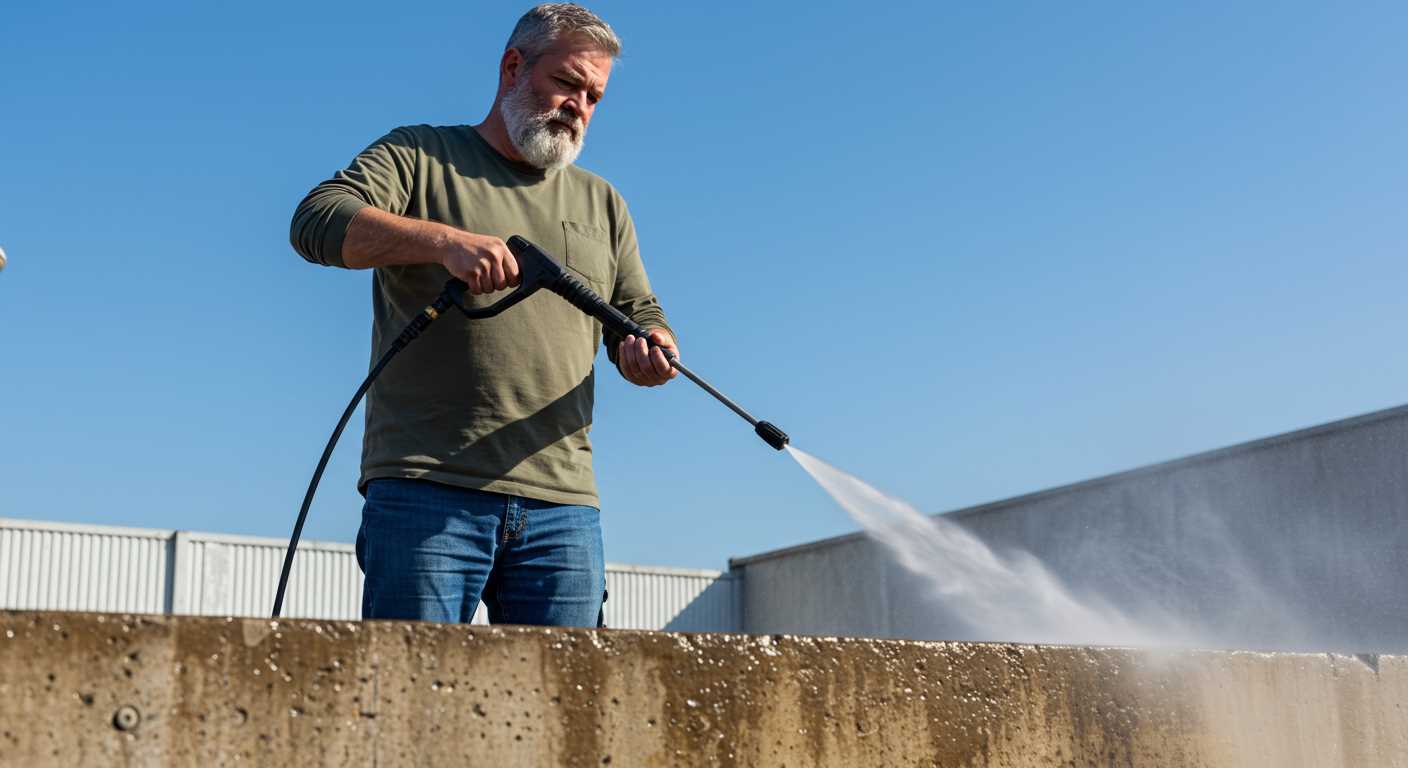


Stripping old coatings from surfaces can be a straightforward task if approached correctly. A high-pressure cleaning system can be remarkably effective for this purpose, especially on surfaces such as decking, fences, or exterior walls. The right nozzle and pressure setting are crucial; typically, a narrow nozzle with a high PSI rating will yield the best results.
In my experience, beginning with a lower pressure setting is advisable to gauge how the surface reacts. Gradually increasing the pressure allows for the safe removal of stubborn layers without damaging the underlying material. I recall a project involving an old wooden deck where starting too aggressively led to gouges in the wood, which required extensive repairs.

For those tackling this task, ensure the area is well-prepared. Clearing the surroundings of any debris, covering nearby plants, and wearing appropriate safety gear is essential. Using a cleaning solution designed to aid in the stripping process can enhance results, especially for heavily coated surfaces. A thorough rinse afterward will help remove any residual products and debris.
Lastly, patience is key. Sometimes, multiple passes are necessary to achieve a clean finish. Regularly assessing progress can help determine if adjustments in technique are needed. By following these guidelines, achieving a clean and refreshed surface is entirely feasible without resorting to harsh chemicals or excessive scrubbing.
Using a High-Pressure Cleaner for Paint Stripping

Absolutely, a high-pressure cleaner can be a handy tool for stripping layers of colour from various surfaces. Based on my years testing different models, I’ve found that units with adjustable pressure settings are particularly effective. A setting around 2500 to 3000 PSI tends to strike the right balance–strong enough to lift old finishes without damaging the underlying material.
Prior to starting, ensure the surface is suitable; wood, concrete, and metal respond well, while delicate surfaces may suffer. Consider using a fan spray nozzle, as it disperses water evenly, reducing the risk of gouging or etching. Always maintain a distance of roughly 12 to 18 inches from the surface for optimal results.
In my experience, it’s wise to pre-soak the area with a suitable chemical stripper. This step helps break down the bonds of the paint, allowing the water jet to work more effectively. After applying the chemical, let it dwell for the recommended time before tackling it with the high-pressure device.
Safety gear is non-negotiable. Goggles, gloves, and sturdy footwear protect against flying debris and high-velocity water. I have witnessed firsthand the consequences of neglecting safety measures; a paint fleck in the eye can lead to serious issues.
Lastly, be prepared for clean-up. The combination of water and paint can create a slippery mess. After the job is complete, ensure a thorough rinse of the area to prevent any residual chemicals from affecting the environment. With the right approach, a high-pressure cleaner can significantly speed up the task of stripping unwanted finishes and leave surfaces ready for a fresh coat.
Understanding the Basics of Pressure Washing
Familiarity with the machinery is key. The heart of the operation lies in the pump, which generates the force necessary for effective cleansing. A higher PSI (pounds per square inch) indicates greater force, but it’s important to match this to the task at hand to avoid damage to surfaces.
Water flow rate, measured in GPM (gallons per minute), also plays a significant role. For instance, a higher GPM enables quicker cleaning, as more water is delivered to the surface. However, combining both PSI and GPM effectively can make all the difference in achieving optimal results without risking harm.
Different nozzles alter the spray pattern and intensity. A zero-degree nozzle concentrates water into a powerful jet, suitable for stubborn grime, while a wider angle nozzle disperses water, reducing force but increasing coverage. Switching nozzles according to the surface type is crucial – softer surfaces demand less intensity.
Cleaning agents can enhance results, especially when dealing with tough stains or mildew. Always check compatibility with the equipment and surface to prevent any adverse reactions. Pre-treating areas with appropriate solutions can save time and effort during the actual washing process.
Safety should never be overlooked. Protective eyewear and appropriate footwear are a must. The force generated by the machine can cause injury if mishandled. Keeping a safe distance from electrical outlets and ensuring proper grounding can prevent accidents.
Practising on inconspicuous areas first can help gauge the right settings and techniques. This approach allows for adjustments without risking damage to visible sections. Learning the nuances of different surfaces will enhance skills and ensure satisfactory outcomes over time.
Types of Paint Suitable for Removal with a Pressure Washer
Latex and acrylic formulations are the most compatible for this method. Their water-based properties allow for easier dislodging when subjected to high-velocity water streams.
Latex Paint
Latex paint is a popular choice for exterior surfaces. It’s relatively soft and tends to lift off with minimal effort. When tackling latex applications, maintaining a distance of around 12 inches is crucial to avoid surface damage. Adjusting the nozzle to a wider spray pattern can also help disperse the force, making it more effective without risking harm.
Acrylic Paint
Acrylic formulations can be similarly effective in this context. They bond well to surfaces but are not impervious to water pressure. Similar techniques apply as with latex; however, the pressure setting might need to be slightly increased due to the stronger adhesive properties of acrylic. Always test a small area first to ensure the desired outcome without causing surface abrasion.
| Type of Paint | Pressure Setting (PSI) | Distance from Surface |
|---|---|---|
| Latex | 1500-2000 | 12-18 inches |
| Acrylic | 2000-3000 | 12-18 inches |
Oil-based paints, while more challenging, can also be addressed with this approach but require higher pressures and additional techniques like heat application to soften the bond. Regardless of the type, proper preparation and safety measures are essential for optimal results.
Choosing the Right Pressure Washer for Paint Removal
For effective stripping of layers, selecting the right equipment is paramount. A unit with adjustable pressure settings is beneficial, allowing you to tailor the force according to the surface type and paint thickness. Typically, models between 2000 to 3000 PSI are ideal for most tasks.
Key Features to Consider
- Flow Rate: Look for a high GPM (gallons per minute) rate. This feature aids in rinsing off residues more efficiently.
- Nozzle Options: A variety of nozzles allows for versatility. A 15-degree nozzle is often optimal for tough jobs, while a wider nozzle may be suitable for delicate surfaces.
- Heated Water Capability: If available, models that heat water can enhance paint softening, making the process easier.
- Portability: Consider weight and wheel design if working on larger projects or multiple sites.
Types of Machines
- Electric Units: Generally quieter and easier to handle. Suitable for smaller tasks.
- Gas-Powered Machines: More powerful, offering greater mobility and pressure. Ideal for extensive projects.
- Commercial-Grade Equipment: Designed for heavy-duty applications, these are built to withstand rigorous use.
In my experience, testing various models, I found that gas-powered machines excelled in removing stubborn coatings, while electric ones performed admirably on lighter jobs. Always assess the project scope to avoid under- or over-investing in equipment.
Preparing Surfaces Before Using a Pressure Washer
Thorough preparation of the area is key to achieving optimal results. Begin by clearing the space of any furniture, plants, or items that may be damaged by water or debris. This step not only protects your belongings but also allows for better access to the surfaces needing attention.
Next, inspect the surface closely. Look for loose or flaking layers that may not respond well to the high-velocity stream. If the substrate is compromised, consider scraping or sanding before proceeding. This ensures the application of force is focused on the stubborn sections rather than causing further damage.
Cleaning Debris and Contaminants
Before any high-pressure cleaning, it’s advisable to sweep away dirt, dust, and loose materials. For surfaces like decks or patios, a thorough sweep prevents clogging the nozzle with small particles. If mould or mildew is present, treat it with an appropriate cleaner. This not only enhances the effectiveness of the subsequent cleaning but also promotes healthier conditions.
Water and Electrical Safety
Ensure that any electrical outlets or connections near the work area are protected from water exposure. Using a ground fault circuit interrupter (GFCI) can safeguard against electrical hazards. Check hoses and connections for any leaks or damages to prevent unexpected interruptions during the task.
Lastly, wear appropriate personal protective equipment. Safety goggles and gloves can prevent injury from flying debris or chemical splashes. By taking these preliminary steps, the process becomes smoother, safer, and more productive, leading to better outcomes in your cleaning project.
Safety Precautions When Removing Paint with a Pressure Washer
Always wear appropriate protective gear, including safety goggles, gloves, and a mask. The force generated by high-pressure jets can dislodge not only the old coating but also debris and contaminants, which may cause injuries. Ensure to keep a safe distance from the surface being treated, typically around 12 to 18 inches, to avoid damage to the substrate.
Work Environment
Set up your workspace carefully. Make certain that the area is free from any obstacles, and ensure proper drainage to avoid slippery conditions. It’s wise to cover any nearby plants or objects that could be harmed by the force or paint particles. If working indoors, guarantee that the area is well-ventilated to prevent inhalation of any fumes from the paint or cleaning agents.
Equipment Check
Inspect the equipment before starting. Ensure all connections are secure and hoses are free from leaks. A faulty machine can lead to accidents or ineffective results. For optimal results, consider utilising a domestic electric pressure washer that fits your needs. Familiarise yourself with the operation manual to avoid mishaps. Additionally, having a reliable best air compressor for car tools nearby can be handy for cleaning small parts or tools after the job.
Always have a first aid kit on hand and know the location of emergency services in case of an accident. Being prepared goes a long way in ensuring a smooth and safe experience when tackling paint removal tasks.
Step-by-Step Guide to Using a Pressure Washer for Paint Removal
Begin with selecting the right nozzle. A 15-degree nozzle is ideal for stripping, while a wider angle may not be effective. Attach the nozzle securely before turning on the device.
Next, ensure your equipment is filled with water and connected to a power source. Check for any leaks in hoses or connections. Once everything is ready, power on the machine and allow it to reach its operating pressure.
Hold the wand approximately 12 inches from the surface. Begin spraying in a steady, sweeping motion. Start from the top and work your way down to prevent streaking. Maintain a consistent distance to avoid damaging the underlying material.
Technique Tips
For stubborn layers, you might need to go over the area multiple times. Allow the water to penetrate the coating for a few seconds before moving on. Be patient; rushing can lead to uneven results.
Post-Cleaning Steps
After completing the task, rinse the surface thoroughly to remove any loose debris or residue. It’s wise to check for areas that may require additional attention. Allow the surface to dry completely before applying a new finish.
| Step | Action |
|---|---|
| 1 | Select appropriate nozzle |
| 2 | Check equipment for leaks |
| 3 | Power on and adjust pressure |
| 4 | Begin spraying from top to bottom |
| 5 | Rinse thoroughly after stripping |
Experience has taught me that patience and technique are key. Achieving a clean surface often requires a bit of finesse and a willingness to adjust your approach as you go. Happy cleaning!
Common Mistakes to Avoid During the Process
One of the biggest blunders is selecting the wrong nozzle. A narrow nozzle concentrates the stream too much and can damage the substrate underneath. I once witnessed a homeowner ruin a wooden deck because they chose a zero-degree nozzle without realising its potential for harm. Always opt for a wider spray pattern, especially on softer materials.
Neglecting Surface Preparation
Skipping the cleaning of the surface before starting is another frequent error. I remember a project where a client wanted to strip paint from a fence without clearing debris first. The result? Ineffective removal and a lot of frustration. A clean surface allows for better results and prevents damage to the underlying material.
Ignoring Safety Gear
Many underestimate the importance of safety equipment. I’ve seen too many people disregard goggles and gloves, thinking they’ll be fine. A few years back, a friend of mine ended up with a painful injury because they were too casual about safety. Always prioritise protection; it’s not worth the risk.
Post-Removal Care and Maintenance of the Surface
After stripping the old coating, it’s crucial to take steps for the upkeep of the newly exposed surface. Neglecting this can lead to premature deterioration.
- Thorough Cleaning: Wash the surface with clean water to eliminate any residue from the removal process. This helps in avoiding any interference with subsequent treatments.
- Drying: Allow the area to dry completely. Moisture can hinder adhesion, so ensure adequate ventilation and time for drying.
In my experience, waiting for at least 24 hours is often necessary, especially in humid conditions.
- Inspection: Examine the surface for any imperfections or remaining flakes. Address these areas before applying any new finish.
- Repairs: Fill in any cracks or holes with appropriate fillers. I’ve found that a high-quality exterior filler works wonders for longevity.
Always sand the repaired areas smooth to ensure a uniform surface, which I learned from countless projects over the years.
- Sealing: Consider applying a primer suitable for the surface type. This not only enhances adhesion but also provides an additional layer of protection against moisture and elements.
- Finishing: Once primed, select a high-quality topcoat. For exteriors, I recommend products specifically designed for outdoor use, as they withstand weather better.
Regular maintenance is key. I suggest checking the surface annually for signs of wear, and reapplying the finish as necessary.
- Cleaning Schedule: Establish a routine for cleaning the surface to remove dirt and grime, preventing buildup that can damage the finish.
- Touch-ups: Keep some leftover paint for minor touch-ups. It’s easier to maintain a consistent look that way.
With careful attention post-removal, the surface can stay looking fresh and well-maintained for years to come. Investing time in this stage pays off significantly, avoiding future headaches and costly repairs.
.jpg)


