


High-pressure cleaning is a powerful tool, but using it on certain surfaces can lead to unintended consequences. Based on my extensive experience in the cleaning equipment industry, I can confidently state that using a high-pressure cleaner on a textured exterior finish can risk damage or removal of the coating, especially if it was not applied correctly or has degraded over time.
When cleaning, it’s essential to consider the condition of the surface. If the coating is old or poorly adhered, the aggressive force of the water can dislodge it. I’ve witnessed this firsthand on numerous occasions where clients believed their surfaces were securely coated, only to find inconsistencies once the pressure was applied. This is often exacerbated by the distance of the nozzle from the surface and the pressure setting used.
To mitigate the risk of stripping the finish, I recommend testing a small, inconspicuous area before proceeding with full cleaning. Use a lower pressure setting and maintain a reasonable distance from the surface. This approach allows you to gauge how well the finish holds up while minimising potential damage. Always keep in mind that the longevity of your exterior coating depends significantly on its application quality and maintenance over time.
Impact of High-Pressure Cleaning on Exterior Coatings
Using high-pressure equipment can indeed affect the longevity of exterior coatings on masonry surfaces. My experience shows that if the coating is old or poorly applied, the intense force of the water can loosen it. I recall a project where we encountered a wall with multiple layers of old coatings. Applying high pressure resulted in sections peeling away, revealing the raw surface beneath. It’s crucial to assess the condition of the coating before commencing any cleaning task.
Assessment Prior to Cleaning
Always inspect the surface first. If you notice cracks, flaking, or bubbling, it’s a sign that the coating isn’t adhering well. In such cases, using high-pressure methods can exacerbate the problem. I often recommend performing a small test in an inconspicuous area to gauge how the surface reacts. This can save you from unexpected results on larger sections.
Recommended Techniques for Best Results
When cleaning, use a fan spray nozzle rather than a direct jet. This distributes the pressure more evenly and reduces the risk of damage. Keeping a distance of around 12 to 18 inches from the surface helps maintain effectiveness while minimising the chance of dislodging the coating. If you encounter stubborn stains, consider pre-treating them with a suitable cleaner. This way, you can achieve a clean surface without aggressive pressure that could affect the integrity of the coating.
Understanding Composition of Exterior Coatings
When assessing the resilience of exterior coatings, it’s crucial to examine their formulation. Many of these substances incorporate a blend of polymers, pigments, and additives, which collectively determine their durability and adherence to surfaces.

Common Components
- Binders: These are the glue that holds everything together. Acrylics and silicones are prevalent, as they offer flexibility and resistance to cracking.
- Pigments: These provide colour and protection from UV rays. Titanium dioxide is a common choice for its opacity and longevity.
- Additives: Ingredients like fungicides and mildewcides help prevent biological growth, while surfactants can enhance spreadability during application.
Durability Factors
- Surface Preparation: A clean and dry substrate is vital for optimal adhesion.
- Environmental Conditions: Temperature and humidity during application affect curing and longevity.
- Application Method: Techniques such as brushing, rolling, or spraying influence thickness and uniformity, impacting overall performance.
Understanding these elements can significantly aid in selecting the right product for your needs. Each component plays a role in how well the coating will withstand external forces, including cleaning methods.
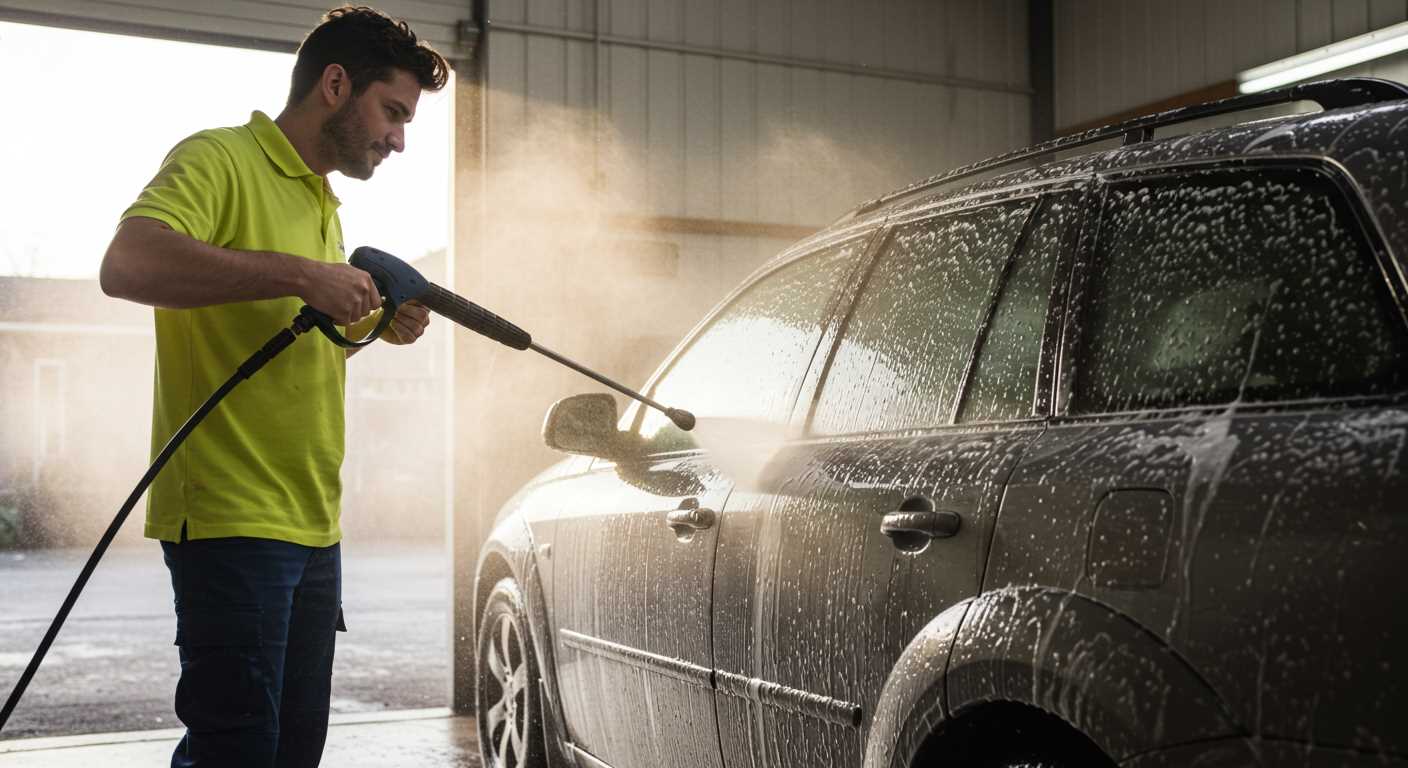
How Pressure Washing Works on Different Surfaces
When using high-pressure equipment on various surfaces, it’s crucial to adjust the settings according to the material being cleaned. For example, brick and concrete require a different approach compared to wood or vinyl. The intensity of the water jet can remove dirt and grime effectively, but using it incorrectly could damage the surface.
Concrete and Brick Surfaces
On solid surfaces like concrete, a higher pressure setting can work wonders. The jet can dislodge stubborn stains and restore the original appearance. However, one must be cautious; excessive pressure can erode the surface, leading to pitting or chipping. I once had a client who wanted to refresh their driveway. I started with a lower pressure setting to avoid damage, gradually increasing it as needed. The results were impressive, but it’s a fine line to walk.
Wood and Vinyl Surfaces
Wood requires a gentler touch. Using too high a pressure can strip away the protective layer, causing splintering. For vinyl, a moderate setting is usually adequate to eliminate dirt without compromising the integrity of the material. In my experience, I’ve seen homeowners make the mistake of using full power on wooden decks, only to regret it later. Instead, a technique I recommend is to keep the nozzle moving to distribute the pressure evenly.
Understanding how to adjust your equipment is key. For those curious about photography equipment, check out this insightful article on whether are digital cameras better than cell phones. It’s an interesting read that showcases the importance of choosing the right tools for the job, much like selecting the right pressure for cleaning surfaces.
Factors Affecting Paint Removal with Pressure Washers
Several elements influence how effectively coatings detach during high-pressure cleaning. Understanding these factors can significantly enhance the results of your cleaning efforts.
Surface Condition and Texture
The state of the surface plays a critical role. Rough or porous textures retain coatings more stubbornly compared to smooth finishes. For instance, if the substrate has cracks or pits, the coating can settle into those areas, making removal more challenging. Conversely, a well-prepared and smooth surface allows for easier dislodgment of the finish.
Water Temperature and Pressure Settings
The temperature of the water can also impact the removal process. Warm water tends to soften coatings, making them more susceptible to being blasted away. However, using an excessively high pressure can damage the underlying material, especially if it’s fragile or aged. Finding the right balance between pressure and temperature is paramount for optimal results.
Another consideration is the nozzle type. A narrow spray pattern concentrates force on a smaller area, enhancing the chances of dislodging stubborn layers. However, using the wrong nozzle can lead to unintended surface damage. Always select the appropriate nozzle for the job.
Lastly, the age and quality of the coating matter. Older, degraded finishes often have weakened adhesion and are easier to remove than fresh applications. Understanding these nuances can make a significant difference in your cleaning approach.
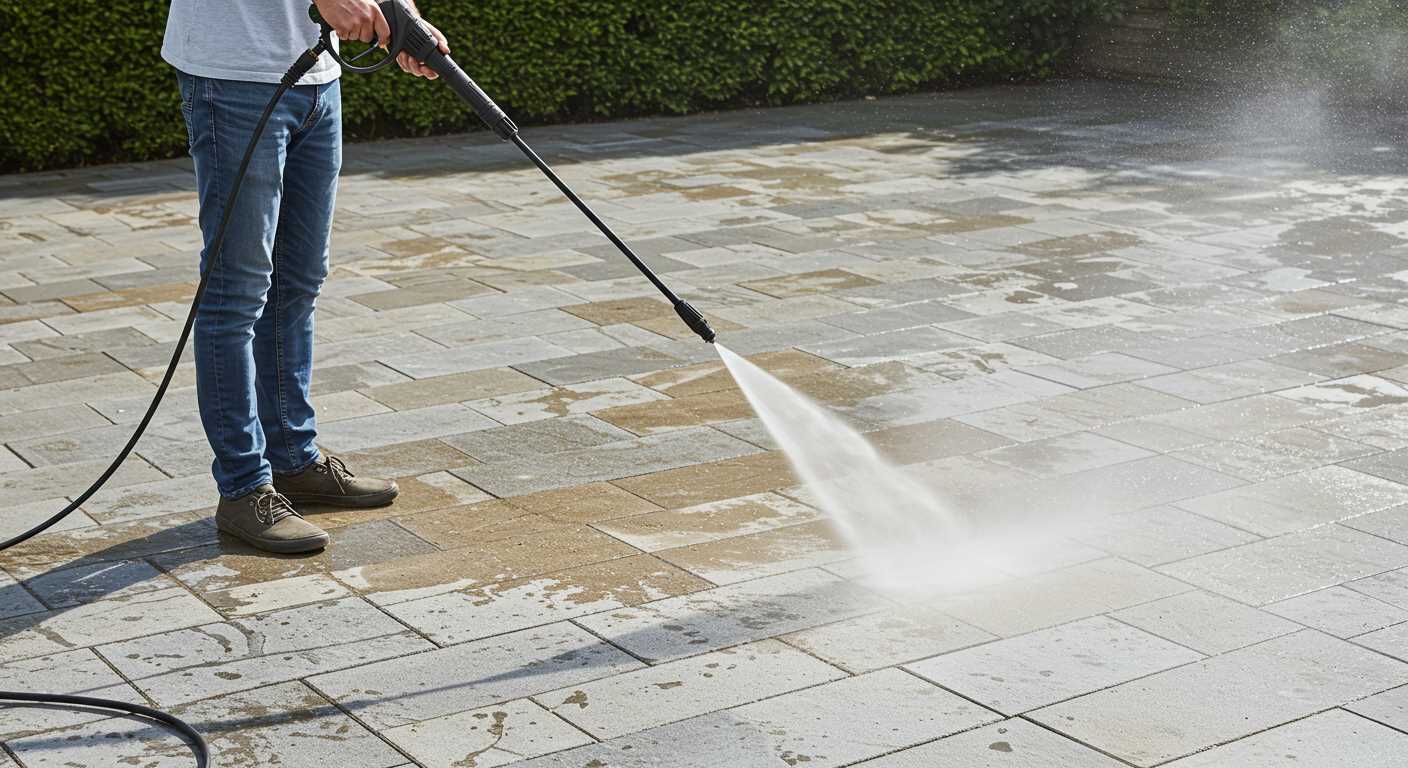
Recommended Pressure Settings for Masonry Surfaces
For optimal results, set your device between 1500 to 2500 PSI when working on rough surfaces. This range effectively removes dirt and grime without risking damage.
- Soft Textures: For softer or more delicate surfaces, maintain a lower setting around 1500 PSI. This prevents chipping or etching.
- Standard Surfaces: Use 2000 PSI for standard applications. It strikes a balance between power and safety.
- Heavily Stained Areas: If you encounter tough stains or older structures, you can go up to 2500 PSI. However, exercise caution and test a small area first.
It’s wise to keep the nozzle at least 12 inches away from the surface during the clean-up. This distance helps avoid unintentional damage while still applying enough force to remove unwanted residues.
Always remember to inspect the equipment before use. A malfunctioning unit can lead to uneven pressure, resulting in an inconsistent clean or potential damage. If you notice any unusual behaviour, such as your unit pulsating, check out this guide on why does my pressure washer keep pulsing.
Lastly, ensure you work in sections, overlapping each pass slightly for even coverage. This strategy guarantees a thorough clean without missing spots or applying excessive pressure in one area.
Best Practices for Pressure Washing Masonry Paint
Start by selecting the right nozzle. A 25-degree or 40-degree nozzle is often ideal for softer surfaces, as it spreads the water stream, reducing the risk of damage. I recall a time when I used a narrow nozzle on a textured wall, and the results were less than stellar–chips and gouges were evident. It’s crucial to maintain a distance of about 12 to 18 inches from the surface to prevent unnecessary wear.
Prior to washing, it’s wise to conduct a spot test in an inconspicuous area. This not only helps gauge the adhesion of the coating but also allows you to assess how the surface reacts to the high-pressure stream. I once overlooked this step and ended up with uneven patches on a client’s wall–an avoidable mistake!
Temperature of the water can also influence the outcome. Using warm water can enhance the cleaning efficacy, especially for stubborn stains. I often recommend a mix of warm water and appropriate cleaning solution for particularly dirty surfaces. Just ensure the solution is compatible with the surface material to avoid damage.
Timing matters too. Avoid washing during the hottest part of the day to prevent rapid drying, which can lead to streaks. Early mornings or late afternoons are preferable. I’ve found that late-day cleanings often yield the best results. The cooler temperatures allow for thorough rinsing without the water evaporating too quickly.
Be mindful of the cleaning solution. Always opt for environmentally friendly products when possible. Harsh chemicals can degrade the substrate or harm surrounding vegetation. I remember a project where a strong chemical solution caused discolouration on nearby flower beds–lesson learned!
After washing, inspect the surface for any remaining dirt or imperfections. Sometimes, a second pass is necessary. I’ve had instances where a single wash didn’t achieve the desired cleanliness, leading to a repeat effort. It’s better to take your time to ensure a thorough job.
| Best Practices | Description |
|---|---|
| Nozzle Selection | Use a 25-degree or 40-degree nozzle for a wider spray. |
| Spot Test | Conduct a test wash in an inconspicuous area. |
| Water Temperature | Warm water enhances cleaning efficiency. |
| Timing | Avoid peak sunlight hours for optimal results. |
| Cleaning Solutions | Choose eco-friendly products to prevent damage. |
| Inspection | Check for remaining dirt and consider a second wash if needed. |
Signs of Damage After Pressure Washing
After utilising a high-pressure cleaning machine, look out for specific indicators of harm that may have occurred to the surface. Cracking or flaking is a primary concern; if you notice pieces breaking away, it indicates the surface has been compromised. Check for uneven textures; a smooth finish should not feel rough or bumpy after cleaning. If discolouration is evident, such as fading or blotchy patches, this signals potential damage to the top layer.
Surface Integrity
Another sign is the presence of water ingress. If you observe moisture accumulation or dampness inside the structure, this could mean that the protective barrier has been breached. Pay attention to loose or peeling edges around corners and seams. This often suggests that the bond between the surface and its coating has weakened significantly.
Longevity and Maintenance Issues
Finally, if the surface begins to show signs of mould or mildew shortly after cleaning, it might indicate that the protective qualities have been diminished. Routine inspections will help catch these issues early, ensuring the longevity of the surface and reducing the need for costly repairs or reapplications. Keeping a close eye on these signs will aid in maintaining the integrity of your surfaces after cleaning.
Alternative Methods for Removing Masonry Paint
For those looking for solutions beyond high-pressure cleaning, several effective techniques exist. Each method varies in effectiveness and suitability depending on the surface condition and type of coating. Here are some options I recommend based on my extensive experience.
Chemical Strippers
Chemical strippers are powerful agents designed to break down coatings. Choose a product that is specifically formulated for concrete or similar surfaces. Apply the stripper generously, allow it to dwell as per the manufacturer’s instructions, and then use a scraper or stiff brush to remove the loosened coating. It’s essential to wear protective gear and ensure adequate ventilation when using these products, as they can release harmful fumes.
Heat Guns
Using a heat gun can be an effective approach for smaller areas. The heat softens the coating, making it easier to scrape off. Maintain a safe distance to avoid damaging the substrate, and work in sections. This method requires patience and precision, as overheating can lead to cracks or burns on the surface.
Another technique involves using a floor sander equipped with coarse-grit sandpaper. This method is particularly effective on larger flat surfaces. It will create a lot of dust, so wearing a mask and goggles is advisable. After sanding, finish with finer grit for a smoother surface.
Lastly, consider using a combination of methods for stubborn sections. Start with a chemical stripper, follow with heat application, and finish with sanding for a thorough removal process.
Always test any method on a small, inconspicuous area first to assess its impact on the surface. Patience and careful technique will yield the best results, ensuring the substrate remains intact while you achieve a clean finish.
.jpg)


