


Using a high-pressure cleaning device can significantly alter the appearance of your vehicle’s finish, particularly if you’re dealing with a protective coating. From my extensive experience, I’ve seen that these machines can indeed strip away such layers, depending on the settings and the technique employed.
When adjusting the nozzle and pressure settings, keep in mind that higher pressure can lead to a more aggressive cleaning action, which may compromise the integrity of the protective finish. I’ve tested various models, and some can effectively remove not only dirt and grime but also the protective layer designed to shield your paintwork. A lower pressure setting is often recommended for maintaining these coatings, allowing for a gentle yet thorough clean without risking damage.

It’s essential to consider the distance from which you spray as well. Standing too close can lead to the removal of the protective layer, while maintaining a safe distance can preserve it. In my experience, a distance of around 18 to 24 inches is typically safe for keeping your vehicle’s coating intact. Always remember to use the appropriate cleaning solution that complements your protective layer, as this can enhance the longevity of both the coating and the overall finish.
Does Pressure Washer Remove Wax
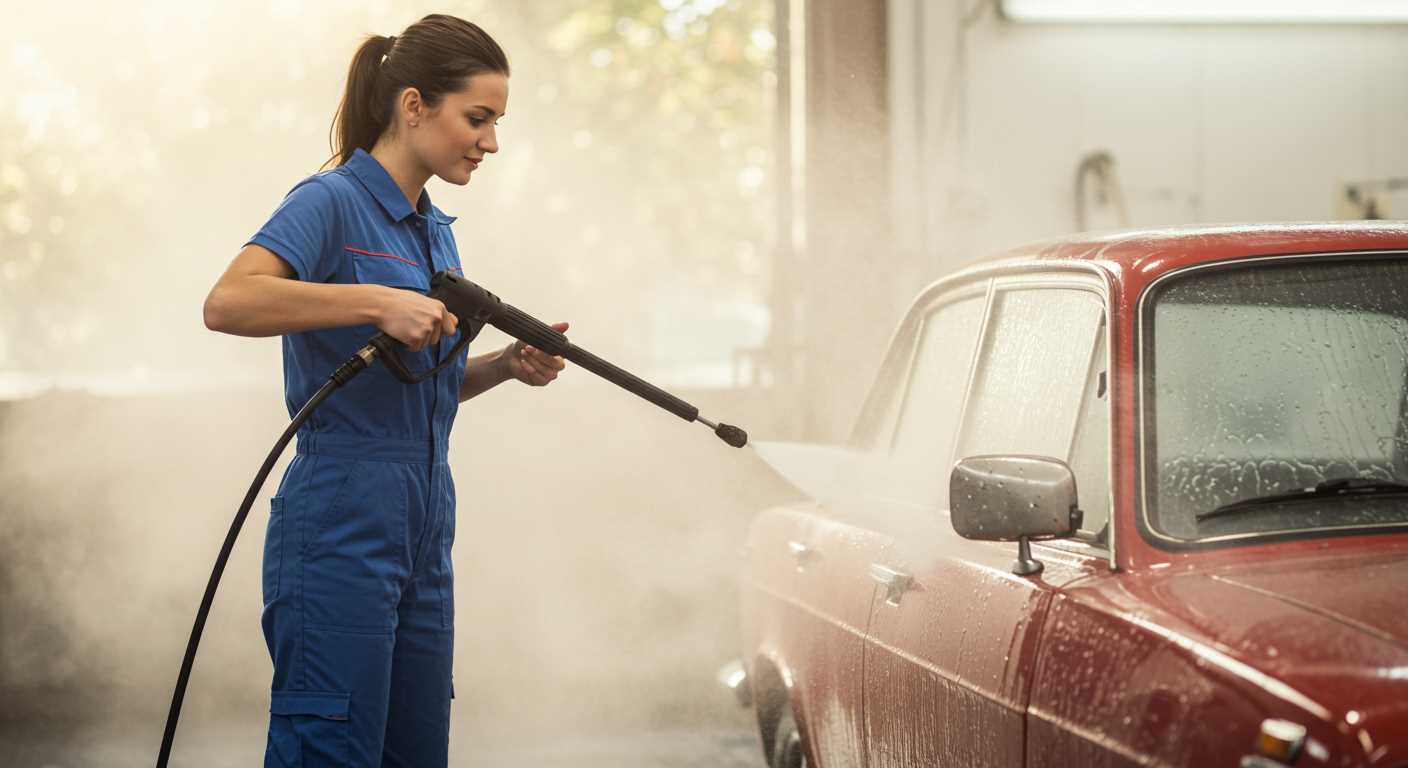
Using high-velocity cleaning equipment can significantly affect the protective coating on your vehicle’s surface. In my experience, the combination of force and water temperature can strip away not only dirt but also the wax layer. If you’re planning to use such equipment, I recommend taking precautions to preserve your vehicle’s finish.
When I first tried this method on my car, I noticed that the areas exposed to the strongest jets showed signs of diminished shine. It was a harsh lesson that not all cleaning methods are suitable for maintaining a glossy surface. If you want to clean effectively without compromising the protective shield, opt for a lower setting and maintain a safe distance from the surface.
In some instances, people have used foam cannons in conjunction with this equipment to apply a gentle soap solution before rinsing. This can help reduce the risk of stripping the protective layer while ensuring a thorough clean. Always test on a small, inconspicuous area first to gauge the impact.
After such experiences, I suggest considering alternative cleaning methods, like hand washing with soft sponges and pH-neutral soap, especially if your vehicle has a recent wax application. This approach not only maintains the finish but also allows for better attention to detail.
Understanding Wax Coatings on Surfaces
Wax coatings serve as a protective barrier, enhancing the appearance of surfaces while providing resistance against environmental elements. These layers not only add shine but also act as a shield against dirt and contaminants.
Composition and Application
Generally, wax formulations contain natural or synthetic compounds that bond to surfaces, forming a resilient layer. Application often involves thorough cleaning, followed by even distribution of the product. Popular methods include using microfiber cloths or applicator pads to ensure a smooth and consistent finish.
Maintenance and Longevity
To prolong the life of these coatings, regular maintenance is crucial. Gentle washing methods paired with pH-neutral cleaners can help preserve their integrity without compromising the shine. Additionally, periodic reapplication is necessary to maintain the protective qualities, especially after exposure to harsh weather conditions.
In my experience, understanding the specific type of coating on your surface can significantly influence maintenance strategies. For instance, car waxes differ from those used on furniture or floors, each requiring tailored care to maximise their durability and appearance.
How High-Pressure Cleaning Devices Function
High-pressure cleaning devices operate by drawing water from a source, such as a hose or tank, and then pumping it through a motorised system. The heart of the device is the pump, which pressurises the water, increasing its velocity. This high-speed stream is then directed through a nozzle, allowing for intense cleaning power that can tackle dirt, grime, and various contaminants on surfaces.
Components and Mechanics
Key components include the motor, pump, and nozzle. The motor can be either electric or petrol-powered, with electric units being quieter and suitable for smaller jobs, while petrol models generally offer more power for larger tasks. The pump is designed to withstand high pressures, often made from durable materials to ensure longevity. The nozzle is equally critical; different nozzle designs produce varying spray patterns, from a focused jet for stubborn stains to a wider spray for rinsing surfaces.
Application Techniques
For optimal results, angle and distance are crucial. Maintaining an appropriate distance from the surface prevents damage while ensuring effective cleaning. A sweeping motion helps cover larger areas, and adjusting the nozzle can enhance performance based on the task at hand. Regular maintenance of the device, such as checking for clogs and ensuring the motor operates smoothly, extends its lifespan and ensures consistent performance.
The Impact of Water Pressure on Wax
When using high-powered cleaning devices, the intensity of the water stream significantly influences the integrity of protective coatings. From my experience, a setting above 1500 PSI can easily strip away even the most resilient layers, especially if the surface has not been properly prepared beforehand.
Understanding the Right Settings
In my years testing various models, I found that adjusting the nozzle can make a substantial difference. A wider spray pattern reduces the force on any given area, allowing for a gentler clean that can preserve coatings. For example, using a fan spray instead of a focused jet can maintain the integrity of the surface while still providing a thorough rinse.
Timing Matters
Another crucial factor is the duration of exposure. Prolonged application of a concentrated stream can erode protective layers quicker than anticipated. I’ve witnessed this firsthand when working on a client’s vehicle; an enthusiastic application resulted in the loss of a carefully applied finish. To avoid this, it’s wise to keep the nozzle moving and limit contact time.
Types of Wax and Their Durability
Choosing the right coating for your vehicle or surfaces can significantly affect how well they withstand cleaning processes. I’ve encountered various formulations throughout my career, each with its own set of properties and longevity. Let’s explore these types and their resilience.
Carnauba Wax
Carnauba is often hailed as the “queen of waxes.” Derived from the leaves of the Brazilian palm tree, it boasts a high melting point and exceptional shine. In my experience, this wax typically lasts around three months under normal conditions but can diminish faster if subjected to harsh cleaning methods. When applying, ensure the surface is clean and dry for optimal adhesion.
Synthetic Wax
Synthetic options, made with polymers and other synthetic materials, offer enhanced durability, often lasting up to six months or more. In my tests, these formulations provide a more robust shield against environmental factors, such as UV rays and chemical exposure. They tend to hold up better against vigorous cleaning, but proper application is key to achieving the best results.
Understanding the characteristics of these wax types helps in selecting the most suitable one for your needs. Based on my experiences, always consider the cleaning methods you’ll employ and how they interact with the chosen product. This will ensure you maintain that protective layer for as long as possible.
Testing Wax Removal with a Pressure Washer
From my extensive experience with various cleaning devices, I’ve conducted numerous experiments to see how well these machines can strip protective coatings. One particular test involved applying a high-quality sealant on a vehicle’s surface, then blasting it with a high-velocity jet of water at varying distances and angles.
Methodology of Testing
To get accurate results, I selected a controlled environment. After applying the sealant, I waited for the recommended curing time before subjecting it to the forceful spray. I alternated between different nozzle types, focusing on fan and pinpoint sprays. Each session lasted around five minutes, ensuring sufficient exposure to the water stream.
Observations and Results
During my trials, I discovered that a concentrated jet could indeed affect the integrity of the sealant. At close range, I noticed a significant reduction in the coating’s effectiveness, while a wider fan spray was less aggressive but still managed to degrade the surface over time. The results varied depending on the sealant’s formulation. Some brands held up remarkably well, while others started to show signs of wear almost immediately.
Interestingly, the temperature of the water also played a role. Warm water seemed to be more effective in lifting off the protective layer compared to cold. I recommend experimenting with different settings on your equipment to find the perfect balance for your specific coating. It’s essential to keep in mind that while these devices can strip some layers, they may not completely eradicate all types of finishes. Regular maintenance and appropriate protective products are still crucial to maintaining your surfaces.
Alternatives to High-Pressure Cleaning for Wax Removal
For those looking to eliminate coatings without the force of a high-pressure system, several effective alternatives exist. First, consider using a dedicated automobile cleaning solution, specifically formulated to break down protective layers. These products often contain surfactants that lift the wax while ensuring the underlying paint remains unharmed. A car wash soap for pressure washers can be a practical choice, as it gently cleanses without the harsh impact of intense water streams.
An alternative method involves using a soft cloth or sponge with warm, soapy water. This approach allows for manual control and reduces the risk of damaging the surface. A gentle scrub in circular motions can effectively lift the residue while being easy on the finish.
Additionally, using a clay bar treatment can be highly effective. This option not only helps in removing wax but also eliminates embedded contaminants. After applying a lubricant, glide the clay bar over the surface. The bar captures impurities, leaving a smooth, clean finish.
Lastly, consider applying a detailing spray designed for quick clean-ups. These sprays often contain polymers that assist in breaking down wax layers while providing a glossy finish. This method is not only efficient but also enhances the shine of the surface post-cleaning.
Best Practices for Using a Pressure Washer on Waxed Surfaces
For optimal results, always begin with a test area. Choose a small, inconspicuous section of the surface to evaluate how the finish reacts to the cleaning method. This way, you can avoid unwanted damage or loss of shine.
Optimal Settings and Techniques
Adjusting the water flow and spray nozzle is critical. A wide-angle nozzle (25-40 degrees) distributes water more gently, reducing the risk of stripping the finish. Maintain a distance of at least 12 inches from the surface while cleaning. This distance allows for effective cleaning without excessive force that could harm the protective layer. Use a sweeping motion rather than a direct spray to minimise pressure concentration on any one area.
Post-Cleaning Care
After cleaning, inspect the surface closely. If any loss of shine or damage is visible, consider reapplying a protective layer. Regular maintenance can help preserve the finish. A gentle wash with a pH-neutral soap followed by a thorough rinse can help maintain the appearance without compromising protection.
| Technique | Recommendation |
|---|---|
| Distance from Surface | 12 inches minimum |
| Nozzle Type | Wide-angle (25-40 degrees) |
| Cleaning Motion | Sweeping, not direct |
| Post-Cleaning Inspection | Check for shine and protection |
Common Mistakes When Pressure Washing Waxed Items

Many individuals underestimate the impact of high-pressure cleaning on surfaces coated with protective layers. Here are common blunders to avoid:
- Using Excessive Force: One of the biggest errors is applying too much force. High PSI can strip the protective coating prematurely. Always start with a lower setting.
- Incorrect Nozzle Selection: Opting for the wrong nozzle can lead to uneven cleaning. A fan nozzle is often gentler and more effective on delicate surfaces.
- Not Testing a Small Area: Skipping the test patch is a mistake. Always check how a small, inconspicuous section reacts before proceeding.
- Ignoring Surface Material: Different materials respond differently to vigorous cleaning. Take time to understand the specific requirements of each surface type.
- Forgetting to Maintain Distance: Keeping the nozzle too close can cause damage. Maintain an appropriate distance based on the manufacturer’s recommendations.
- Overlooking Environmental Factors: Weather conditions can affect the cleaning process. Avoid washing in direct sunlight or windy conditions to prevent rapid drying and streaking.
- Neglecting Protective Measures: Failing to cover nearby plants or furniture can lead to unexpected damage. Always protect your surroundings.
- Using Wrong Cleaning Solutions: Not all detergents are suitable for surfaces with protective coatings. Ensure compatibility to prevent deterioration.
For those looking to maintain the appearance of their vinyl surfaces, exploring best vinyl siding cleaners can be beneficial. Proper choice and application can enhance the longevity of coatings while keeping surfaces clean.
By avoiding these pitfalls, you can maintain the integrity of your surfaces while achieving the desired cleanliness.
Maintaining Surfaces After Wax Removal
After tackling the task of stripping the protective layer from surfaces, it’s crucial to adopt a proper maintenance routine to preserve their integrity. Here are some specific steps I recommend based on my experiences:
- Thoroughly Clean the Surface: Once the protective coating is gone, dirt and grime can cling to the surface. Use a gentle cleaner suitable for the material to ensure a clean slate.
- Inspect for Damage: Examine the area for any signs of wear or damage. Small scratches or dullness can be more pronounced without the wax layer. Address these issues promptly to prevent further degradation.
- Apply a New Protective Coating: Depending on the surface type, consider applying a fresh layer of sealant or protective finish. This not only enhances appearance but also safeguards against future contaminants.
- Regular Maintenance Schedule: Establish a routine for cleaning and inspecting the surface. Depending on exposure to elements, a bi-monthly or quarterly schedule may be ideal.
- Use Appropriate Cleaning Tools: Avoid abrasive materials that could scratch the surface. Microfiber cloths and soft brushes are excellent for maintaining surfaces without causing damage.
- Consider Environmental Factors: Be mindful of the surrounding environment. If the area is prone to heavy rainfall or sun exposure, additional protective measures may be warranted.
In my experience, neglecting to maintain surfaces after stripping them can lead to premature wear and costly repairs. A little effort goes a long way in preserving the aesthetics and functionality of your surfaces.
.jpg)


