


It’s not uncommon to find yourself in a situation where the attachment of your cleaning unit’s connector becomes loose. If you’re experiencing this issue, check the connection point thoroughly. Ensure that the fittings are clean and free from debris that could interfere with a secure connection. A quick wipe with a clean cloth can make a significant difference.
From my experience, ensuring a snug fit is crucial for optimal performance. Sometimes, simply tightening the connector by hand is all that’s needed. If you notice persistent problems, consider inspecting the rubber O-ring for wear and tear. A damaged ring can lead to leaks and hinder functionality.

In cases where the attachment remains stubbornly insecure, using a wrench can provide additional leverage. Just be cautious not to over-tighten, as this can cause damage to the plastic components. Regular maintenance checks can prevent these issues from arising unexpectedly during usage.
Lastly, never underestimate the importance of using the right accessories designed specifically for your cleaning apparatus. This ensures compatibility and enhances the longevity of the equipment. By following these simple guidelines, you can maintain a reliable and efficient cleaning experience.
Hose Accessibility in Karcher Equipment
In my experience, detaching the supply line from Karcher units is generally straightforward. Most models feature a quick-release mechanism that allows for easy removal. You simply pull the connector, and it separates without hassle. However, always ensure you’ve released any pressure before attempting to disconnect.
Common Issues and Solutions
Sometimes you may encounter difficulties. If the connection feels stuck, check for debris or grime around the fitting. It can obstruct smooth operation. A gentle twist while pulling can often help dislodge it. For models with screw-on fittings, ensure you’re turning it in the correct direction – righty-tighty, lefty-loosey is a reliable rule of thumb.
Maintenance Tips
To prolong the life of your connections, regularly inspect for wear and tear. Replace worn seals promptly to avoid leaks. A little silicone grease applied to the threads can make future detachments easier.
| Model | Connection Type | Ease of Detachment |
|---|---|---|
| K2 Compact | Quick-release | Easy |
| K4 Full Control | Screw-on | Moderate |
| K5 Premium | Quick-release | Easy |
| K7 Smart Control | Quick-release | Very Easy |
With a bit of care and attention, managing connections becomes a breeze, ensuring your cleaning tasks remain efficient and hassle-free.
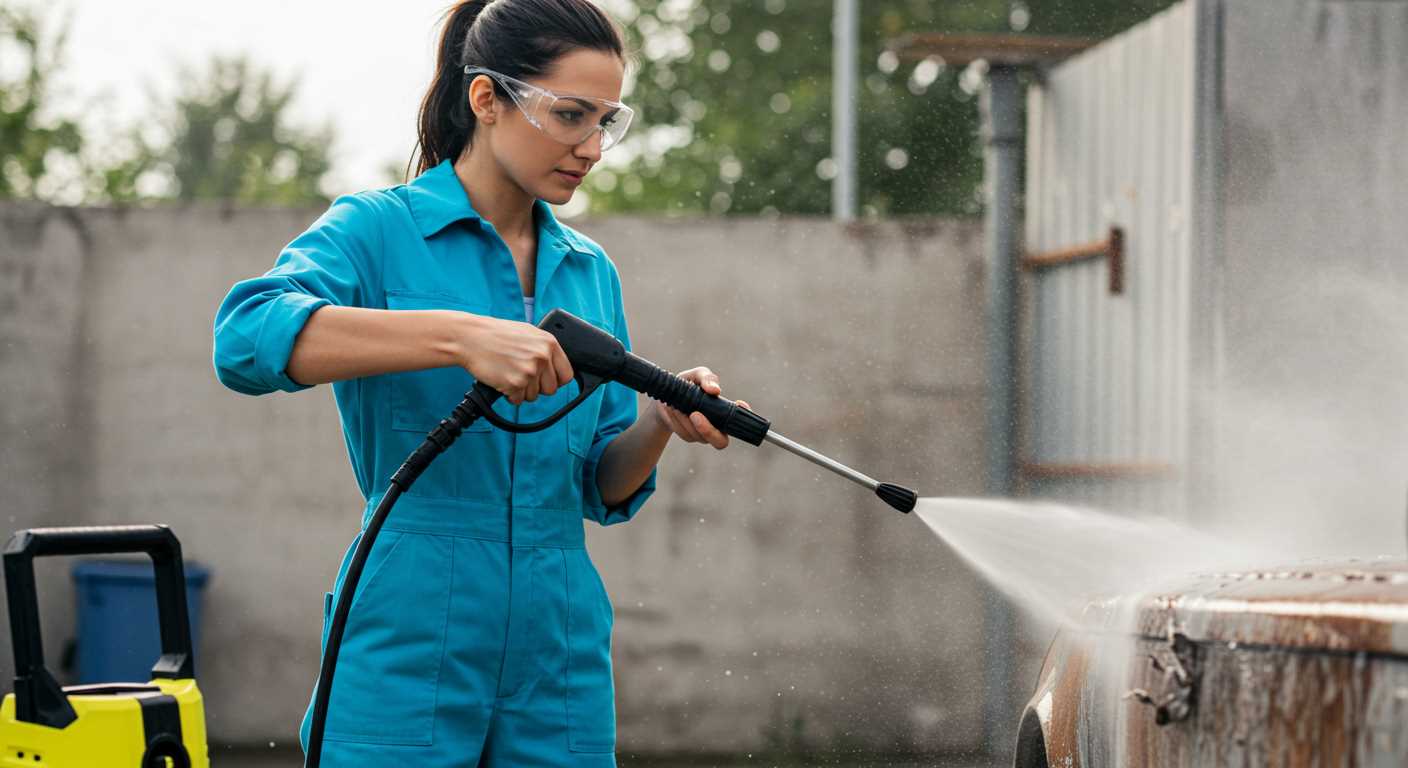
Understanding the Hose Connection Mechanism

To ensure a secure connection with your cleaning unit, follow the steps for proper attachment and detachment. The fitting typically features a quick-release mechanism. Push the connector firmly into the socket until you hear a click, indicating a secure fit. To detach, simply press the release button and pull the connector away. This design prevents accidental disconnections during operation, which I’ve seen happen with less reliable models.
Common Issues and Solutions
Occasionally, users encounter leaks or difficulty in securing connections. Inspect the rubber O-ring within the connector; wear or damage can cause leaks. Replacing this small component can resolve many issues. Additionally, ensure that both connectors are clean. Debris can hinder a proper seal, leading to frustrating performance problems.
Maintenance Tips
Regularly check connection points for any signs of wear. Clean them after each use to prevent build-up of grime. When storing, avoid kinks or sharp bends in the hose, as this can compromise integrity over time. By maintaining these components, you extend the lifespan of your equipment and enhance its reliability during use.
Common Issues with Hose Detachment
Experiencing unexpected disconnection during use can be frustrating. I’ve encountered this issue multiple times, and there are a few common culprits to consider. First, always check the fittings. Over time, wear and tear can cause these to loosen. Ensuring a snug fit can prevent unwanted separations. Regularly inspect for any signs of damage, such as cracks or wear on the connectors; replacing worn components is vital.
Another frequent problem arises from improper alignment. When the unit is in use, if the attachment is not aligned correctly, it can lead to pressure build-up and subsequent detachment. Make sure everything is straight and locked in place before starting. During my years in the field, I’ve learned that a simple visual inspection can save a lot of hassle later.
Don’t overlook the importance of maintaining the equipment. Build-up of dirt and debris around the connection points can hinder performance and lead to separation. Regular cleaning of the connection area with a damp cloth or brush helps maintain a solid grip. I often recommend a routine maintenance schedule to my clients to ensure longevity and reliability.
Lastly, temperature fluctuations can affect the materials used in connectors. Extreme heat or cold can cause them to expand or contract, potentially leading to detachment. If you’re working in varying conditions, consider using materials with better temperature resilience. This minor adjustment can make a significant difference in performance.
By addressing these key points, you can minimise the risk of disconnection and enhance your experience. My advice is based on years of hands-on experience, and I’ve seen how simple preventative measures can lead to a more reliable and enjoyable cleaning process.
Steps to Safely Remove the Hose
Begin by ensuring that the device is powered off and unplugged. This eliminates any risk of accidental activation during the detachment process.
Next, locate the connection point between the water supply and the cleaning tool. Often, a simple twist or push is all that’s needed. Apply gentle pressure while turning to avoid damaging the fitting.
Check for Residual Pressure
Before proceeding, release any remaining pressure. This can usually be done by pressing the trigger on the gun until no water escapes. It’s a crucial step to avoid unexpected sprays that could cause injury.
Detach with Care
Now, grasp the connection firmly and twist counterclockwise or follow the specific instructions for your device model. If resistance is felt, check for any locking mechanisms. In some cases, a slight wiggle can help loosen stubborn connections.
After successful detachment, inspect both ends for any signs of wear or damage. This ensures that future connections remain secure and leak-free. For those looking to maintain their garden equipment, consider exploring the best corded garden vacuum options available.
How to Reattach the Hose Properly
To securely fasten the connector, align it with the outlet on your device and press firmly until you hear a click. This sound indicates that it’s locked in place. I recall a time when I was in a rush and didn’t push hard enough; the connector popped off mid-task, leading to an unexpected mess.
Inspect the rubber gasket inside the coupling before reattachment. A damaged or worn-out gasket can lead to leaks. I’ve had to replace gaskets more than once because I overlooked this detail. Always keep a few spares handy; they’re inexpensive and can save you from headaches down the line.
Ensure that everything is clean before connecting. Dirt or debris can cause misalignment, which ultimately affects performance. After a long day of use, I’ve made it a habit to wipe down all connections. A clean surface makes a world of difference.
Once attached, gently tug on the connection to confirm it’s secure. I’ve seen too many colleagues skip this step and regret it later when they face sudden pressure loss. A quick check can prevent unnecessary interruptions during work.
Lastly, store your equipment properly after use. Coiling it without kinks protects the integrity of the connections and extends the lifespan of your components. I’ve learned this the hard way; a few rough handling sessions led to premature wear and costly repairs. Treat your tools with care, and they’ll serve you well.
Maintenance Tips to Prevent Hose Problems
Regular inspections are key. Check for wear and tear at the connectors and along the length of the tube. Look for cracks, abrasions, or bulges that could lead to leaks or detachment during use.
Always store your equipment properly. Coiling the tube loosely avoids kinks and prevents damage. Use a reel or holder designed for such equipment to keep everything tidy and functional.
Use the right fittings. Ensure all connections are compatible and secure. Mismatched parts increase the risk of disconnections and leaks, so double-check specifications before making a purchase.
Keep the connection areas clean. Dirt and debris can compromise seals and lead to issues. A quick wipe down after each use can save you from bigger problems later.
Don’t overextend the tube during operation. Pay attention to your workspace and avoid pulling or stretching the tube beyond its limits. This can create stress points that could lead to failure.
Consider a protective sleeve. Covering the tube with a protective layer can shield it from abrasions and environmental factors that may cause premature wear.
Finally, follow the manufacturer’s maintenance guidelines. Each model has specific recommendations that can prolong the life of your equipment and prevent common issues.
Identifying Compatible Hoses for Your Karcher Model
Compatibility is key when selecting a replacement for your cleaning equipment’s tubing. Each model has specific requirements that ensure proper functionality. Always check the model number before purchasing a new piece.
Key Features to Consider
- Diameter: Most models use either 6mm or 8mm diameters. Verify which size matches your device.
- Connector Type: Look for specific fittings, like bayonet or quick-release connections, depending on your model.
- Length: Choose a length that suits your cleaning needs. Longer lengths offer more flexibility, while shorter ones can reduce pressure loss.
Recommended Sources for Purchase
- Official Retailers: Always consider purchasing from authorised dealers to ensure authenticity.
- Online Marketplaces: Websites like Amazon or eBay often have user reviews, helping gauge the quality.
- Local Hardware Stores: Visiting a physical store allows for direct inspection of items.
In my experience, compatibility issues often arise from overlooked details. I once had a client who purchased a generic replacement only to find it didn’t fit properly. After a few frustrating attempts, we discovered that a small difference in diameter was the culprit. Avoid such hassles by double-checking specifications before making a decision.
Consult your user manual for guidance on compatible accessories. Many manufacturers provide a list of approved products that guarantee optimal performance. This diligence will save time and enhance your cleaning experience.
What to Do If the Hose Is Stuck
If you encounter a situation where the tubing is stuck, follow these steps for resolution:
- Inspect the Connection: Examine both ends of the connector for any debris or damage. A quick clean-up can often solve the problem.
- Apply Lubrication: Use a silicone-based lubricant around the joint. This can help ease the attachment and allow for smoother removal.
- Twist Gently: While pulling, twist the fitting slightly. This movement can break any suction or binding that may have formed.
- Warm It Up: If the fitting is plastic, applying gentle heat with a hairdryer can expand the material, making it easier to detach.
- Use a Tool: If hand strength isn’t enough, a pair of pliers can provide the extra grip needed. Wrap the fitting with a cloth to prevent damage.
- Check for Kinks: Sometimes, a kink can create pressure against the fitting. Straightening the tubing may relieve the tension.
If these methods do not yield results, consider consulting a service professional to avoid damaging your equipment.
When to Seek Professional Help for Hose Issues
Seek assistance from a professional if you’ve tried basic troubleshooting techniques without success. For example, if detachment or leaks persist after reattachment, it’s a sign that something more serious might be at play. Over the years, I’ve encountered numerous situations where DIY fixes simply weren’t enough, and a technician was required to identify underlying issues.
Another indicator is if you notice unusual noises or vibrations during operation. These can be symptoms of internal damage that could lead to more significant problems if left unaddressed. It’s better to consult an expert than risk further damage to your equipment.
Also, if you’re using a non-standard model or an accessory that doesn’t fit well, it’s wise to consult with a professional. I’ve seen cases where incorrect parts have caused significant issues. You can avoid costly repairs by ensuring compatibility. Speaking of which, check out electric pressure washer brands for reliable options.
If you’re unsure about the symptoms or your troubleshooting efforts seem inadequate, don’t hesitate to reach out to a service centre. They have the expertise to diagnose problems efficiently and ensure your equipment runs smoothly. Trust me, this can save you time and money in the long run.
FAQ:
Can the hose be disconnected from the Karcher pressure washer?
Yes, the hose on a Karcher pressure washer can be disconnected. Most models feature a quick-release mechanism that allows you to easily detach the hose for storage or replacement. It’s advisable to consult your specific model’s manual for detailed instructions on how to do this safely.
Is it possible for the hose to come out during operation?
While it is generally designed to stay secured during use, there are instances where the hose might come loose, especially if it is not properly attached or if there is excessive pressure. Regularly checking the connections and ensuring that the hose is seated correctly can help prevent this issue.
What should I do if the hose keeps coming out of the pressure washer?
If the hose repeatedly comes out of the pressure washer, first ensure that it is attached correctly and that there is no damage to the connection points. If the problem persists, inspect the hose for wear and tear or consider replacing it. Additionally, check the pressure washer’s fittings to make sure they are not worn or damaged.
Are there different types of hoses for Karcher pressure washers?
Yes, Karcher offers various types of hoses that are compatible with their pressure washers. These can differ in length, diameter, and material. Depending on your cleaning needs, you may choose a high-pressure hose or a more flexible option. Always ensure that the hose you select is compatible with your specific model for optimal performance.
How can I prevent the hose from disconnecting while I use the Karcher pressure washer?
To prevent the hose from disconnecting during use, make sure it is properly attached at both ends: to the pressure washer and to the gun or nozzle. Regular maintenance, such as checking for wear and ensuring that all connections are secure, can also help. If you notice any damage or excessive wear, replacing the hose may be necessary to maintain safe operation.
Does the hose come out of the Karcher pressure washer?
Yes, the hose can be detached from most Karcher pressure washer models. To remove the hose, you typically need to press a release button or twist the hose connector, depending on the specific model you have. This feature allows for easy storage and the option to replace the hose if it becomes damaged. Always refer to the user manual for detailed instructions on your particular model to ensure proper handling and maintenance.
.jpg)
.jpg)


