


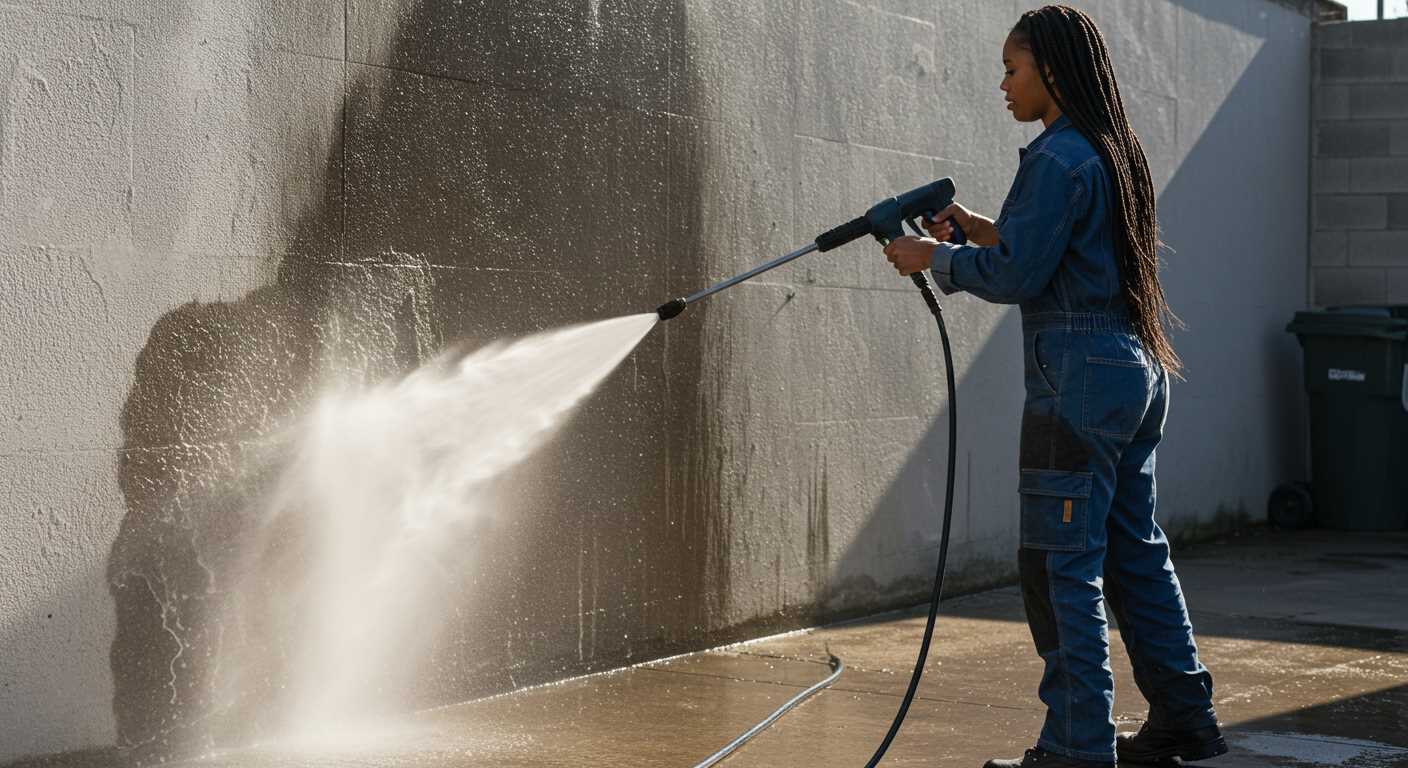
Always select the right nozzle for each task. I vividly recall a time I tackled a stubborn oil stain on my driveway. Armed with a zero-degree nozzle, I blasted away not just the grime but also a portion of the pavement! Opting for a wider fan spray would have saved my driveway and still delivered a satisfactory clean.
Regular maintenance is key. I learned this the hard way during a summer when my unit sputtered and failed after only a few uses. A simple routine of checking the filters, ensuring no debris clogs the intake, and inspecting hose connections can save you from frustration when you need your equipment most.

Adjust the pressure settings based on the surface. On one occasion, I decided to clean my wooden deck. Initially, I used a high-pressure setting, which left me with splintered boards. Lowering the pressure and using a wider spray pattern restored my deck without damage, proving that a gentle approach often yields better results.
Always keep your equipment clean. After a particularly muddy job, I neglected to rinse my machine and ended up with a build-up that affected performance. A quick wash after every use can extend the life of your unit and maintain optimal performance.
Selecting the Right Nozzle for Your Task
Choose a nozzle based on the task at hand. For heavy-duty jobs, a zero-degree nozzle delivers a concentrated jet that can strip paint or remove tough grime. I recall a time when I tackled an old deck; the zero-degree attachment was a game changer, cutting through years of buildup in no time.
Common Nozzle Types
| Nozzle Type | Angle | Best For |
|---|---|---|
| 0° | Concentrated | Heavy-duty cleaning |
| 15° | Very Narrow | Removing tough stains |
| 25° | Narrow | General cleaning tasks |
| 40° | Wide | Delicate surfaces |
| Soap | Wide spray | Applying detergent |
Considerations for Selection
Evaluate the surface material and the type of dirt you’re dealing with. For instance, softer surfaces like wood require a wider spray angle to avoid damage. I once made the mistake of using a narrow nozzle on a wooden fence; it left noticeable grooves. Always test on a small area first to gauge the impact.
Lastly, ensure compatibility with your equipment. Different models may have specific nozzle fittings. I always check compatibility before making a purchase. Investing in a versatile nozzle set can pay off, giving you options for a variety of cleaning tasks without the need for frequent replacements.
Understanding Pressure Settings for Different Surfaces
Adjusting the force of water correctly for each surface is key. For delicate materials like wood decking, a setting around 1200-1500 PSI works wonders without causing damage. I recall a time when I underestimated the power and used a higher setting, which resulted in splintered wood and a less than ideal finish.
Concrete and Brick
For tougher surfaces like concrete or brick, aim for 2500-3000 PSI. This level effectively removes stubborn stains and dirt. I once tackled a heavily soiled driveway that had seen better days. Using the right pressure not only cleaned it thoroughly but also preserved the integrity of the surface.
Vehicles and Outdoor Furniture
When cleaning vehicles or outdoor furniture, keep it to a maximum of 1900 PSI. I learned this the hard way when I accidentally blasted the paint off a classic car. A gentler approach with the right setting restored my confidence in the equipment while ensuring the finish remained intact.
Preparing Your Surface Before Washing
Start by clearing the area of any obstacles, including furniture, potted plants, and debris. This simple step allows for an unobstructed wash and prevents potential damage to items you may overlook.
Next, inspect the surface for loose paint, dirt, or grime. For wooden decks, check for splinters or rotting areas. If you notice any, consider sanding or repairing these spots beforehand; it makes a significant difference in the final result.
After clearing and inspecting, wet the surface lightly. This helps to loosen stubborn stains and makes it easier for the cleaner to work effectively. I often use a garden hose to dampen the area before starting any washing process.
Utilising Detergents
If you’re dealing with particularly tough stains, applying a suitable detergent can be beneficial. Choose a cleaner appropriate for the surface type–be it concrete, wood, or plastic. Allow it to sit for a few minutes to break down the dirt, but don’t let it dry completely.
Safety Measures
Lastly, ensure you wear appropriate safety gear. Goggles and gloves protect against flying debris and harsh chemicals. I’ve learned the hard way that a small oversight can lead to discomfort or injury, so it’s best to be cautious.
Choosing the right cleaning solution for your needs
For achieving optimal results, selecting an appropriate cleaning solution is paramount. I recall a project where I tackled a heavily soiled patio. Initially, I used just water, which barely made a dent. After some research, I opted for a biodegradable detergent specifically designed for outdoor surfaces. The transformation was remarkable; grime and mildew vanished with minimal effort.
Consider the type of surface you’ll be cleaning. For brick or concrete, a heavy-duty cleaner with mould and mildew inhibitors works wonders. On the other hand, delicate surfaces like wood require a gentler solution to prevent damage. Always check the manufacturer’s recommendations for compatibility with your equipment.
Concentrated formulas are often more effective than standard ones. Diluting them according to instructions ensures maximum performance while saving money. I once used a concentrated cleaner diluted at the recommended ratio, and it cut through grease on my driveway like a hot knife through butter.
Environmental factors are worth considering too. If you’re working near plants or grass, choose eco-friendly products. One time, I mistakenly used a harsh chemical around my flowerbeds, and it took weeks for the plants to recover. Always read labels and look for certifications that indicate a product’s environmental safety.
Finally, don’t forget to test any solution on a small, inconspicuous area first. I learned this lesson the hard way when a potent cleaner left a discolouration on a patio stone. A quick test can prevent costly mistakes and ensure the longevity of your surfaces.
Maintaining Your High-Pressure Cleaner for Longevity
Regularly check and change the oil in your machine. I’ve seen many models suffer due to neglected oil, leading to engine wear. Always use the recommended type for your specific unit; this simple act can extend its life significantly.
Cleaning the filter is another task that can’t be overlooked. A clogged filter restricts airflow and decreases performance. I recommend inspecting it after every few uses and cleaning it according to the manufacturer’s guidelines. For those who also maintain aquariums, you might find the technique of cleaning filters without harming beneficial bacteria useful; check out this resource.
Pay attention to hoses and connections. Look for cracks or leaks which can compromise your unit’s efficiency. I recall a time when a small leak turned into a significant issue during a crucial job. Regularly inspect and replace damaged parts promptly to prevent further complications.
After each use, flush the system with clean water to remove any remaining detergent or debris. This practice prevents build-up that can clog internal components. I always recommend running the cleaner for a few minutes after switching to water alone.
Finally, store your equipment in a dry place, away from extreme temperatures. I’ve seen units succumb to rust and corrosion simply because they were left outside. A little care in storage goes a long way in ensuring your machine is ready for the next task.
Safety Precautions While Using a Pressure Cleaner
Always wear appropriate protective gear. At a minimum, use safety goggles, gloves, and sturdy footwear. This prevents injuries from flying debris and the high-velocity water stream.
Before starting, check the area for hazards. Look for power lines, fragile objects, or uneven surfaces. Clear the vicinity of people and pets to avoid accidents.
- Inspect Equipment: Regularly examine hoses, nozzles, and the machine itself for wear and tear. A small crack can lead to dangerous water sprays.
- Electric Units: For electric models, ensure cords are undamaged and use a GFCI outlet. Avoid using extension cords unless rated for outdoor use.
- Gas Units: Use these outdoors only, as they emit carbon monoxide. Always allow them to cool before refueling.
Maintain a safe distance from surfaces. The force of the water can cause injury or damage if too close. Start with a wider nozzle and increase pressure only if necessary.
- Never point the nozzle at yourself or others.
- Avoid using ladders; instead, consider a telescoping wand for hard-to-reach areas.
Familiarise yourself with the machine’s operation. Understanding how it functions enhances safety. For a deeper insight, check this resource on how a pressure cleaner works.
After use, securely store the equipment. Drain hoses and nozzles to prevent freezing or damage. Proper storage extends the life of your tools.
Common mistakes to avoid when using a high-pressure cleaner
Using a high-pressure cleaner can lead to fantastic results if you steer clear of common pitfalls. Here are crucial mistakes that I’ve observed over the years and how to avoid them:
1. Ignoring surface compatibility
Not every surface is suitable for high-powered cleaning. Using excessive force on delicate materials can cause irreversible damage. Always check the manufacturer’s recommendations for surface types.
- Brick and concrete can withstand high pressure.
- Wood requires a gentler approach; use a lower setting.
- Vinyl siding should be cleaned with care to avoid warping.
2. Overusing cleaning agents
Many people believe that more detergent means better cleaning. This isn’t true; excessive soap can leave residues that attract dirt. Here’s how to manage it:
- Follow dilution ratios on the cleaning solution label.
- Rinse surfaces thoroughly after using any cleaning agents.
- Test the solution on a small, inconspicuous area first.
3. Not maintaining a consistent distance
Keeping the nozzle too close to the surface can lead to damage. A consistent distance helps achieve even cleaning without harming materials. Aim for:
- 18-24 inches for tough surfaces like concrete.
- 24-36 inches for softer materials like wood.
4. Neglecting safety gear
It’s tempting to skip personal protective equipment, but this is a mistake. Always wear:
- Safety goggles to protect your eyes from debris.
- Gloves to safeguard your hands from chemicals and high pressure.
- Sturdy footwear to prevent slipping.
5. Rushing the process
Patience pays off. Many users rush through tasks, leading to missed spots or incomplete cleaning. Take your time to do it right:
- Start with a thorough rinse to remove loose dirt.
- Apply cleaning solutions and allow them to sit for the recommended time.
- Work methodically to ensure all areas are covered.
Avoiding these mistakes will make your cleaning tasks more effective and prolong the life of your equipment. With the right approach, you can achieve impressive results and maintain your surfaces in prime condition.
Tips for Storing Your Pressure Cleaner Properly
Ensure the unit is completely drained of water. Leaving residual moisture can lead to mould growth or component damage. After use, disconnect the hose and trigger gun, then run the machine for a few seconds to expel any remaining liquid.
Store in a dry, cool place, away from direct sunlight. Extreme temperatures can affect the integrity of seals and cause plastic parts to become brittle. A garage or shed is ideal, but avoid areas prone to dampness.
Wrap the electrical cord neatly and secure it to prevent tangling or damage. I’ve seen cords fray because they were carelessly coiled. Use cable ties or hooks if needed to keep things tidy.
Remove any attachments, like nozzles and detergent tanks, before storage. Place them in a separate container to avoid loss and ensure they remain clean. I learned this the hard way when I misplaced a critical nozzle after leaving it attached.
For electric models, consider removing the battery if applicable. Storing batteries at full charge can reduce lifespan. Instead, store them in a cool, dry place at around 50% charge.
Finally, periodically check your equipment during the off-season. Start it up to ensure everything functions correctly. I’ve often found that a quick run can highlight issues before they become serious problems. Regular checks can save time and money in the long run.
.jpg)


