


Begin with assembling all the components. Ensure the water inlet filter is clean and properly attached. This small step can prevent clogs and maintain optimal performance.
Next, connect the hose to the water source. Turn on the tap fully to allow for a steady flow. I’ve found that a consistent water supply is vital; it not only aids in effective cleaning but also prolongs the life of your machine.
After securing the water connection, plug in the device and power it on. You’ll notice a pressure build-up. It’s essential to let it run for a minute to ensure everything is functioning correctly. In my experience, this initial check can save you from potential mishaps later on.

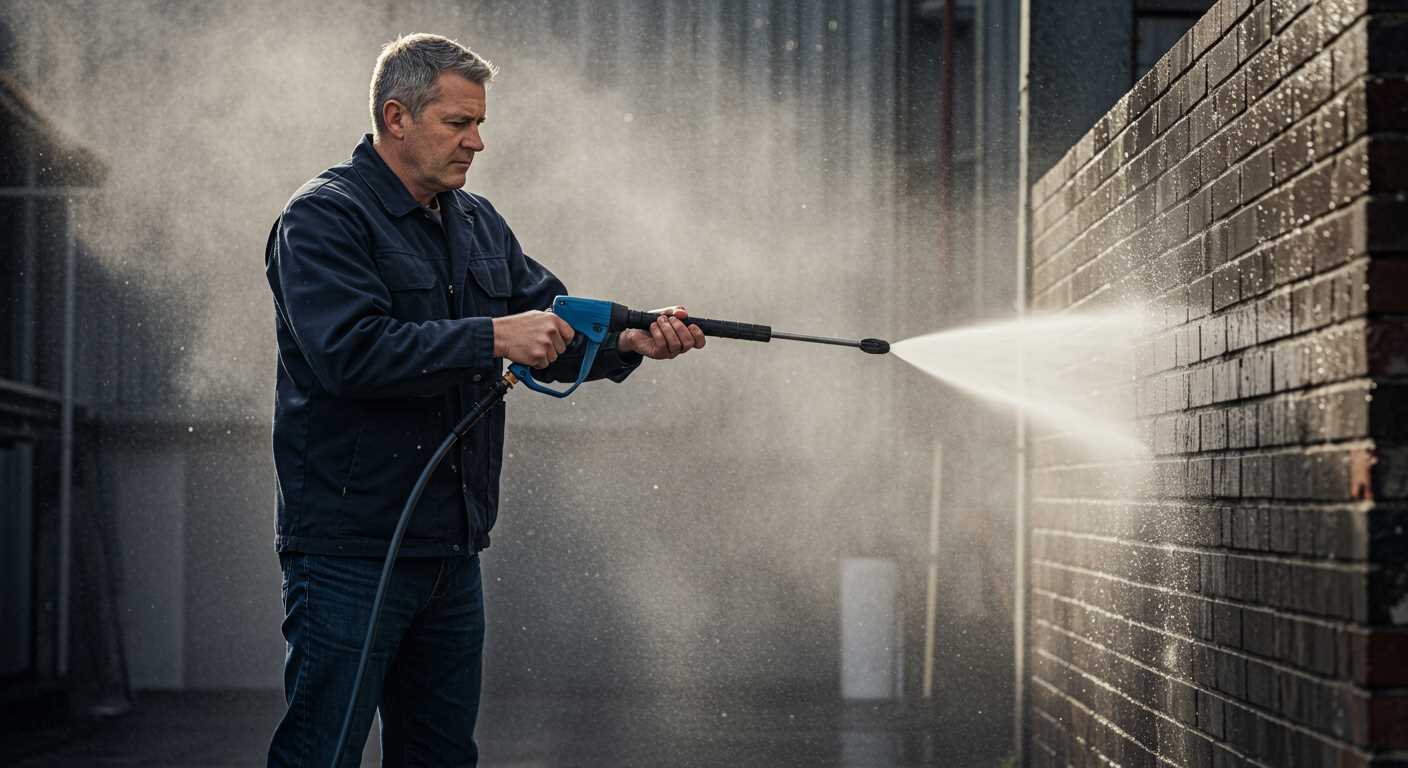
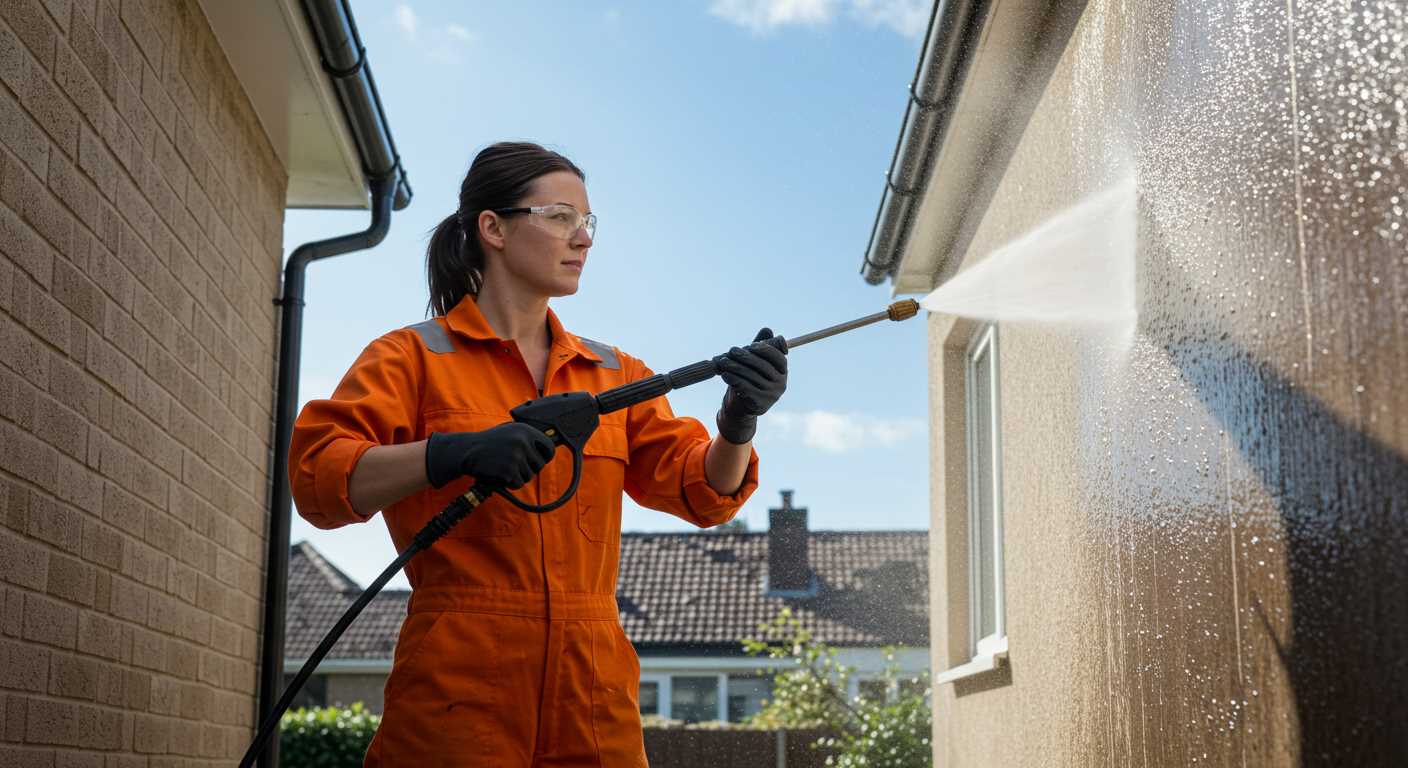
When you’re ready to start cleaning, choose the right nozzle. Each nozzle serves a specific purpose; for instance, a wider spray is ideal for delicate surfaces, while a concentrated one can tackle stubborn dirt. I’ve learned the hard way that using the wrong nozzle can damage some surfaces, so always select wisely.
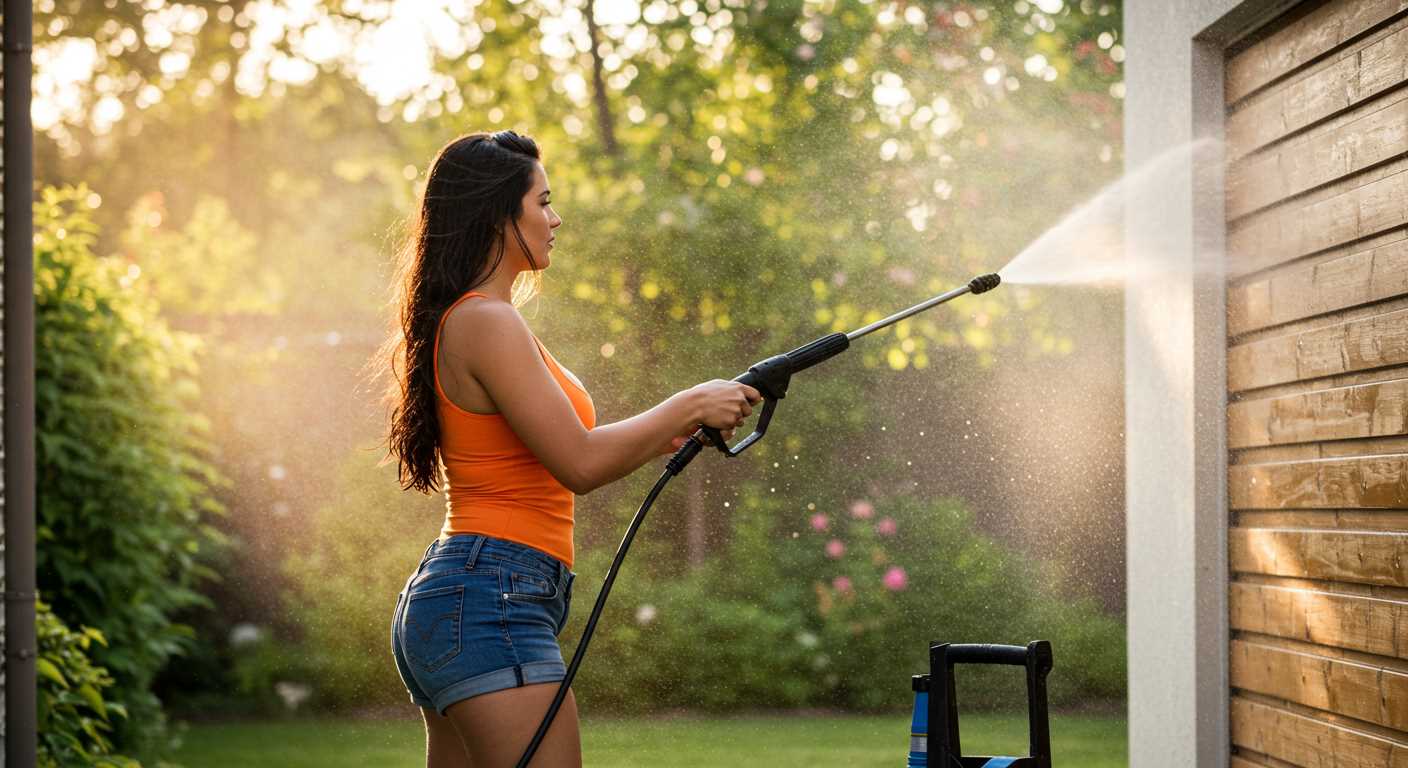
For the best results, maintain a distance of about 30 cm from the surface you’re cleaning. This distance helps prevent damage while still providing an effective clean. Remember, consistent motion is key; avoid staying in one spot for too long. This technique will ensure an even clean.
Finally, after finishing your tasks, remember to turn off the water supply and disconnect the hose. It’s a simple yet crucial step that prevents any water damage or leaks. I can’t stress enough how important this is for maintaining the longevity of your equipment.
Operating the Karcher K4 Model
Before switching on the machine, ensure that the water supply is connected and the hose is firmly attached. I remember the first time I neglected this step, and it led to a frustrating start. The next crucial aspect is to select the right nozzle for the task. The K4 usually comes with a variety of nozzles, and each serves a specific purpose. For instance, the fan nozzle is perfect for general cleaning, while the rotary nozzle tackles stubborn grime. Always check which one suits your cleaning needs best.
Adjust the pressure settings according to the surface you are working on. Too high a pressure can damage delicate surfaces like wood or paint, which I learned the hard way during a deck cleaning session. For tougher surfaces like concrete, feel free to crank it up. Always begin with the lowest setting and increase as necessary.
When you’re ready to start, press the trigger to release water. Maintain a steady hand and keep the nozzle at a consistent distance from the surface–about 30cm is ideal for most tasks. I once got too close while cleaning my car, and it left marks that took a lot of effort to polish out.
Make sure to move the nozzle in a sweeping motion. I’ve found that working from the top down prevents dirt from settling on already cleaned areas. If you encounter stubborn stains, pause and let the water pressure do its work for a moment before resuming. Patience pays off!
| Task | Nozzle Type | Pressure Setting |
|---|---|---|
| Car Cleaning | Fan Nozzle | Medium |
| Patio Cleaning | Rotary Nozzle | High |
| Wood Deck | Fan Nozzle | Low |
| Concrete Driveway | Rotary Nozzle | High |
After finishing, turn off the water supply and release the pressure by pulling the trigger until the machine stops. This keeps it in good shape for the next time. I always take a moment to clean the filter and nozzle to prevent clogs. Trust me; this little habit saves a lot of hassle down the line.
Lastly, store your equipment properly. I learned the importance of this after a winter left my machine in less than ideal condition. Keep it dry and protected from the elements, and it will serve you well for years.
Setting Up Your Karcher K4 Pressure Washer
Begin with ensuring the unit is placed on a stable surface. I recommend a flat area away from any obstructions. Connect the water supply to the inlet valve, making sure the hose is securely fastened to avoid leaks. Always check the hose for any damage before attaching it.
Water Supply Connection
Use a garden hose that’s at least 7.5 metres long for optimal flow. Ensure the water source is turned on before you proceed with the next steps. I’ve encountered cases where users forgot to turn on the tap, leading to frustration when the unit wouldn’t start. It’s a simple but crucial step!
Powering Up
Once the water is connected, plug the power cable into a suitable electrical outlet. Make sure the socket is rated for the wattage of the device. I’ve seen instances where inadequate power supply caused performance issues. After plugging in, switch the machine on and allow it to prime for a few seconds before pulling the trigger. This ensures the system is filled with water and ready to go.
Lastly, inspect the nozzle and select the appropriate one for your cleaning task. Each nozzle serves a different purpose, so choosing the right one can significantly enhance your cleaning results. In my experience, having the right attachment saves time and effort, making the whole process much smoother.
Connecting the Water Supply to Your Pressure Washer
To establish a reliable water connection, begin by locating a suitable water source. Ensure the tap is operational and free from any debris that might obstruct flow. I often recommend using a garden hose of at least 7.5 metres, as longer hoses can lead to decreased water pressure. Attach the hose securely to the tap, making sure there are no leaks.
Fitting the Hose
Once your hose is connected to the water supply, the next step is to link it to the machine. Locate the water inlet on your device; it’s typically situated at the rear. Using the quick-connect fitting, attach the other end of your hose. A tight seal is crucial, so ensure it’s snug but avoid over-tightening, which can cause damage.
Checking for Leaks
After making all connections, turn on the water supply. It’s wise to inspect for any leaks at both the tap and the machine. If you notice any water seeping, recheck the fittings. In my experience, even a small leak can affect performance, so it’s best to address it before you begin cleaning.
Choosing the Right Nozzle for Your Cleaning Task
The right nozzle can make all the difference in achieving optimal results during your cleaning tasks. I’ve spent years testing various attachments, and I can tell you that selecting the appropriate one is crucial for both efficiency and effectiveness. Each nozzle serves a specific purpose, so understanding their features is key to getting the best outcome.
Types of Nozzles
There are generally three main types of nozzles: the fan, the rotary, and the soap nozzle. The fan nozzle offers a wide spray pattern, ideal for broader surfaces like decks and patios. It disperses water evenly, making it perfect for rinsing away dirt without causing damage. In contrast, the rotary nozzle produces a concentrated jet of water, which is excellent for stubborn grime and tougher surfaces, such as driveways and concrete. Lastly, the soap nozzle is designed for applying detergent. It has a wider spray that helps distribute cleaning agents effectively, ensuring a thorough wash before rinsing.
Choosing Based on the Surface
When deciding which nozzle to use, consider the surface you’re cleaning. For delicate materials like painted surfaces or wood, I always recommend starting with the fan nozzle on a lower setting to avoid causing any harm. For stone or brick, the rotary attachment shines, cutting through dirt and moss with ease. If you’re tackling a vehicle, the soap nozzle is ideal for applying detergent, followed by the fan nozzle for rinsing. Remember, using the wrong nozzle can lead to damage, so take a moment to assess the task at hand.
Adjusting the Pressure Settings for Different Surfaces
For optimal cleaning results, adjusting the pressure settings is vital based on the surface type. Here’s a breakdown based on my experience:
- Concrete: Use a high-pressure setting. When tackling driveways or patios, the maximum pressure works best to remove stubborn stains and grime.
- Wood: Opt for a medium pressure. Too high can damage the surface, so a setting around 1000-1500 PSI is ideal for decks and fences.
- Vehicles: Lower the pressure significantly. Around 1200 PSI will effectively clean without risking paint damage. Always use a suitable nozzle designed for car cleaning.
- Brick: A medium to high pressure setting is typically effective. Start with a lower setting and gradually increase if necessary, ensuring not to chip the bricks.
- Glass: Always use the lowest pressure setting. A gentle wash with a wide-angle nozzle prevents breakage and removes dirt safely.
Testing the pressure on a small, inconspicuous area first can save you from damaging surfaces. It’s a simple precaution I’ve learned over the years. Each surface presents unique challenges, and recognising those can make all the difference in your cleaning outcome.
For those interested in additional tips on precision and technique, check out this insightful guide on how to can diced tomatoes with a pressure cooker. The principles of careful application and adjustment apply across various cleaning tasks.
Starting and Stopping the Equipment Safely
To initiate the cleaning device, follow these steps:

- Ensure the unit is connected to the water source and the hose is properly affixed.
- Insert the power plug into a suitable electrical outlet.
- Turn the water supply on fully to prevent damage.
- Press the power button to activate the motor.
- While holding the trigger on the lance, allow the machine to build up pressure, then release the trigger to start cleaning.
Stopping the unit is equally straightforward:
- Release the trigger on the lance to cease water flow.
- Switch off the power button to cut electrical supply.
- Disconnect the power plug from the outlet.
- Turn off the water source to prevent leaks.
- Detach the hose and lance once the pressure has fully released.
Always remember to follow these protocols to enhance safety and prolong the life of your equipment. In my experience, skipping even one step can lead to unnecessary complications or damage. For example, I once neglected to turn off the water supply before disconnecting the hose, resulting in a spray that soaked me and my workshop. It was a lesson learned the hard way!
After each use, ensure everything is clean and dry before storing. This practice helps maintain the integrity of the device and prepares it for the next task.
Cleaning Techniques for Various Outdoor Surfaces
For effective outdoor maintenance, understanding surface types is key. Each surface requires a different approach to ensure thorough cleaning without damage.
Concrete driveways and patios are robust but can accumulate grime. Use a narrow nozzle for focused cleaning, and maintain a distance of about 12 inches to avoid etching the concrete. A steady back-and-forth motion works wonders.
Wooden decks demand a gentler approach. Opt for a wide nozzle and keep the pressure low. This prevents splintering while still removing dirt and mildew. Always test a small area first to gauge the wood’s reaction.
For vehicles, using a medium pressure setting with a suitable nozzle is best. Wash from a distance of at least 2 feet to avoid damaging the paint. A dedicated car cleaning detergent can enhance results.
Fences, whether wooden or vinyl, can benefit from a similar method as decks. Use a wide spray to cover larger areas while keeping the pressure moderate. This prevents wear on the surface while effectively removing dirt.
Roof cleaning is a delicate task. A low-pressure setting is necessary to prevent shingle damage. Use a wide nozzle and focus on using a cleaning solution designed for roofs to eliminate algae and moss.
| Surface Type | Nozzle Type | Pressure Setting | Technique |
|---|---|---|---|
| Concrete | Narrow | High | 12 inches distance, back-and-forth |
| Wooden Deck | Wide | Low | Test area first, gentle motion |
| Vehicles | Medium | Medium | 2 feet distance, use car detergent |
| Fences | Wide | Medium | Gentle approach, avoid splintering |
| Roofs | Wide | Low | Specialised roof cleaner, cautious distance |
For those considering alternatives, exploring options like briggs and stratton pressure washer can yield excellent results tailored to your needs.
Maintaining Your Karcher K4 After Use
After finishing your cleaning tasks, it’s crucial to take a few minutes for upkeep. Disconnect the water supply and make sure the machine is turned off. This prevents any residual pressure build-up, ensuring safety for future operations. I remember the first time I neglected this step; I ended up spraying myself during the disconnection process, which was quite the surprise!
Cleaning the Filter and Nozzle
Regularly check and clean the water filter to avoid clogs. A simple rinse under running water usually does the trick. Similarly, inspect the nozzle for debris. A blocked nozzle can lead to uneven spraying and reduced performance. I’ve had days where a quick clean saved me from frustrating results on stubborn dirt.
Storing Your Equipment Properly
Once everything is clean, store the unit in a dry place, preferably indoors. Keeping it away from extreme temperatures will prolong its lifespan. I’ve learned the hard way that leaving it outside during winter can damage the internal components. Wrap the power cord neatly to prevent tangling, and ensure all accessories are stored together for easy access next time.
Troubleshooting Common Issues with the Cleaner
Should you encounter any problems while operating your unit, addressing them promptly can save time and effort. Here are some frequent issues and their solutions based on my hands-on experience.
No Water Flow
- Check the water supply: Ensure that the tap is fully open and that there are no kinks in the hose.
- Inspect the filter: A clogged filter can restrict water flow. Remove it and clean it regularly.
- Verify connections: Ensure that all connections are secure and free from leaks.
Unit Not Starting
- Power supply: Confirm that the unit is plugged in and that the outlet is working. Try another appliance in the same outlet.
- Reset: If the unit has a reset button, press it. Sometimes, this resolves minor electrical issues.
- Overheating: Allow the machine to cool down if it has been running for an extended period. This can prevent overheating problems.
Low Pressure Output
- Nozzle cleaning: A blocked nozzle can reduce pressure. Clean or replace it as needed.
- Check for leaks: Examine hoses and connections for any leaks that could be causing a drop in pressure.
- Adjust settings: Ensure the pressure settings are appropriate for the task at hand.
Excessive Vibration or Noise
- Loose components: Inspect the unit for any loose parts. Tighten any screws or bolts that may have come loose during use.
- Check the pump: If the pump is damaged or worn, it may cause excessive noise. Consider professional evaluation or replacement.
These tips should help you troubleshoot most common issues effectively. However, if problems persist, consulting the manual or contacting customer support may be necessary for more complex challenges.
Storing Your Karcher K4 for Longevity
After finishing your tasks, it’s crucial to store your equipment properly to ensure it lasts. First, disconnect the water supply and let the machine run for a few seconds to clear any remaining water from the system. This step prevents internal components from freezing or corroding during storage.
Cleaning Before Storage
It’s wise to clean the exterior and any accessories. Wipe down the housing with a damp cloth and make sure to remove any dirt or grime. For the nozzles, a quick rinse and inspection for blockages will keep them functional for future use. Store the detergent tank empty, as residue can harden and clog the system.
Optimal Storage Conditions
Position the unit in a dry, cool area, avoiding direct sunlight or extreme temperatures. If you can, store it indoors; basements or utility rooms work well. If indoor storage isn’t an option, consider a protective cover. Lastly, ensure the power cord is coiled neatly to prevent fraying or damage. Following these steps will help maintain the performance and longevity of your equipment.
FAQ:
What are the key steps to set up my Karcher K4 pressure washer?
To set up your Karcher K4 pressure washer, first, find a flat and stable surface where you can work. Connect the hose to the water inlet on the machine, ensuring it’s tightly secured. Next, attach the spray gun to the high-pressure hose and then connect the hose to the pressure washer. Fill the detergent tank if you’re using detergent, and then plug in the machine. Finally, turn on the water supply and power on the pressure washer to start using it.
Can I use my Karcher K4 pressure washer for cleaning my car?
Yes, the Karcher K4 is suitable for cleaning vehicles. It’s advisable to use a gentle nozzle or attachment to avoid damaging the paintwork. Start from the top of the car and work your way down, keeping the nozzle at a safe distance from the surface. You can also use a specific car shampoo in the detergent tank for better results. Rinse thoroughly to remove any soap residue after cleaning.
What types of surfaces can I clean with the Karcher K4 pressure washer?
The Karcher K4 pressure washer is versatile and can be used on various surfaces, including patios, decks, driveways, and vehicles. It is effective on concrete, wood, and brick surfaces. However, for delicate surfaces like painted walls or vehicles, it’s important to use the appropriate nozzle and pressure settings to prevent damage.
How do I maintain my Karcher K4 pressure washer for longevity?
To maintain your Karcher K4, regularly check and clean the water filter to prevent blockages. After each use, empty the detergent tank and run clean water through the machine to clear any residual detergent. Store the pressure washer in a dry place, and protect it from extreme temperatures. Periodically inspect the hoses and connections for any signs of wear or damage, and replace them as necessary to ensure optimal performance.
What should I do if my Karcher K4 pressure washer is not starting?
If your Karcher K4 is not starting, first check that it is plugged in and the power supply is functioning. Ensure the water supply is turned on and that the hose is not kinked or blocked. If the machine still does not start, inspect the thermal relief valve; it might have activated due to overheating. Allow the machine to cool down before attempting to restart. If problems persist, consult the user manual or contact customer support for further assistance.
How do I set up my Karcher K4 pressure washer for the first time?
To set up your Karcher K4 pressure washer, begin by ensuring you have all the components: the main unit, high-pressure hose, trigger gun, and any included nozzles. First, connect the high-pressure hose to the pressure washer and the trigger gun, ensuring they click into place securely. Next, attach the water inlet filter to the water supply hose and connect it to the water inlet on the pressure washer. Ensure the water supply is turned on. Finally, plug the unit into a power outlet, and you are ready to operate the pressure washer.
What are the best practices for using my Karcher K4 pressure washer to clean my patio?
When using the Karcher K4 to clean your patio, start by removing any loose debris, such as leaves or dirt, to ensure a more effective clean. Use the appropriate nozzle, typically a wide fan spray for broader surfaces. Hold the trigger gun at a consistent distance of about 30 cm from the patio surface to avoid damage. Begin washing from one end and work your way to the other, overlapping each pass slightly. For tougher stains, you may want to apply a suitable detergent using the detergent nozzle before rinsing. Always remember to follow safety precautions, such as wearing protective eyewear and avoiding directing the spray at people or pets.
.jpg)


