


For optimal results, always ensure the unit is set to the appropriate pressure level for your specific cleaning task. I recall a time when I was cleaning an old patio; using too high a setting not only made the job more difficult but also damaged the surface. Adjusting the pressure appropriately can enhance performance while protecting surfaces.
At the heart of these machines lies an electric motor or petrol engine. This component is responsible for driving a pump, which pressurises the water. I’ve personally observed various models, and the motor’s power can significantly affect efficiency. A robust motor often translates to quicker cleaning times and less water waste.
The pump is where the magic happens. It draws in water and compresses it to high pressure. During my years in the industry, I’ve tested different types of pumps, and I found that axial pumps tend to last longer under regular use compared to other types. Regular maintenance, such as checking for leaks and ensuring proper lubrication, can prolong the lifespan of this crucial part.
Water flows through a nozzle, which constricts the flow and increases velocity. I once used a nozzle with an adjustable spray pattern on a particularly stubborn stain, and I was amazed at how the narrow jet cut through grime effortlessly. Selecting the right nozzle for the task can make all the difference in achieving a spotless finish.
Finally, incorporating detergent can enhance cleaning power. I’ve experimented with various cleaning solutions, and I recommend using those specifically designed for the machine to avoid potential damage. Pre-soaking the surface can also aid in loosening dirt, making the high-pressure application more effective.
Understanding the Mechanics of High-Pressure Cleaners
To achieve optimal cleaning results, these machines utilise a simple yet effective mechanism. Water is drawn from a source, typically a garden hose, and is then pressurised by an internal pump. This pressurisation dramatically increases the water’s force, enabling it to remove dirt, grime, and stubborn stains from surfaces.
During my time testing various models, I discovered that the pump’s quality is paramount. A robust pump ensures longevity and consistent performance. For instance, I’ve seen units with ceramic pistons outperform others with plastic components, especially when tackling heavy-duty tasks. The type of motor also plays a significant role; electric motors are quieter and more suitable for residential use, while petrol engines tend to deliver higher pressure for commercial applications.
Another critical factor is the nozzle design. Different nozzles provide varying spray patterns–from a concentrated jet for tough spots to a wide fan for rinsing large areas. I recall a project where I switched nozzles mid-clean to adapt to different surfaces, achieving a thorough clean without damaging delicate materials.
For anyone looking to maximise their cleaning efficiency, consider using detergents designed specifically for these units. They enhance the cleaning process, especially for grease and oil stains. I’ve personally tested various cleaning agents and found that using them in conjunction with the machine’s capabilities yields impressive results.
Don’t overlook the importance of maintenance. Regular checks on the hoses and connections can prevent leaks and ensure your equipment runs smoothly. I once neglected a small crack in a hose, which led to a significant drop in performance during a critical job–lesson learned! For those interested in home preservation, techniques like how to can carrots without a pressure cooker can be equally important as maintaining your cleaning tools.
Understanding these elements will not only enhance your cleaning experience but also prolong the life of your equipment. Happy cleaning!
Understanding the Basic Components of Karcher Pressure Washers
For optimal cleaning, knowing the parts of these machines is crucial. Here’s a breakdown of the fundamental components that contribute to their performance:
- Motor: The heart of the system, it powers the pump. Electric motors are common, while some models may use petrol engines for higher pressure output.
- Pump: This component pressurises the water, transforming it into a powerful jet. There are different types of pumps, with axial pumps being prevalent due to their reliability and efficiency.
- Water Inlet: This is where the water enters the machine. It’s typically designed to prevent contamination, ensuring that only clean water is used for cleaning tasks.
- High-Pressure Hose: A durable hose that withstands the intense pressure generated by the pump. Length varies, allowing flexibility in movement while cleaning.
- Gun and Nozzles: The gun controls the flow of water. Nozzles can be swapped out to adjust the spray pattern and pressure, catering to different cleaning needs.
- Detergent Tank: Many units come equipped with a tank for cleaning agents. This allows for enhanced cleaning, especially when paired with a car wash foam cannon for pressure washer.
- Wheels and Frame: A robust frame provides stability while wheels facilitate easy manoeuvrability, crucial for larger areas.
In my experience, understanding these components not only aids in maintenance but also enhances the user experience. Knowing how to troubleshoot minor issues can save time and effort, allowing for a more efficient cleaning process.
Motor-Driven Pumping Mechanism
In these cleaning machines, the motor is the heart that drives everything. When the device is switched on, electric current flows to the motor, causing it to rotate at high speeds. This rotation is crucial as it directly impacts the pump’s performance. The motor’s output is transferred to the pump through a connecting shaft. This connection is designed to ensure that even the most powerful motors can efficiently energise the pumping system without losing momentum.
Pump Design and Functionality
The pump itself typically consists of a series of pistons or a diaphragm that generates high pressure. As the motor spins, it activates these components, creating a vacuum that draws water from the attached hose. I remember testing different models, and the efficiency of the pump always amazed me. The better the motor, the more consistently the water was drawn in and expelled at high pressure. This relationship is vital; a weak motor will struggle to sustain the pressure levels needed for effective cleaning.
Impact of Motor Power on Cleaning Performance
The power of the motor doesn’t just determine how fast the water flows; it also influences the pressure created. Higher-rated motors can produce stronger jets, making it easier to remove stubborn dirt and grime. During my years of working with these devices, I often noticed that machines with robust motors could tackle tough cleaning tasks with greater ease. It’s fascinating how the synergy between the motor and the pump translates into real-world results, such as restoring a weathered driveway or rejuvenating a patio without excessive effort.
The Role of Water Inlet and Outlet in Pressure Generation
The water inlet and outlet are fundamental components that significantly influence the efficiency of a cleaning machine. The inlet draws water from a source, typically a tap, while the outlet directs the high-speed stream onto surfaces. This process is where the magic of pressure generation occurs.
In my experience, a well-designed inlet facilitates a steady flow of water, ensuring that the pump operates optimally. If the inlet is partially blocked or the hose is kinked, the pump may struggle to draw sufficient water. This can lead to inconsistent performance and lower output pressure. I recall a situation where a colleague faced issues with their device, only to discover that a simple kink in the hose was the culprit, drastically affecting pressure levels.
Optimising Water Flow
Equally crucial is the outlet, which must be designed to handle the high flow rates generated by the pump. A narrow or obstructed outlet can create back pressure, which not only hampers efficiency but can also damage internal components over time. I’ve seen units fail prematurely due to improper outlet design, leading to costly repairs. Ensuring that the outlet is clear and properly sized allows for maximum pressure delivery, enhancing the overall cleaning experience.
A tip I often share is to regularly check both the inlet and outlet for any debris or blockages. This simple maintenance task can prolong the life of the equipment and maintain its performance. In my years of testing various models, I’ve learned that the longevity and effectiveness of the system largely depend on the health of these two components.
Adjusting Pressure Levels for Different Cleaning Tasks
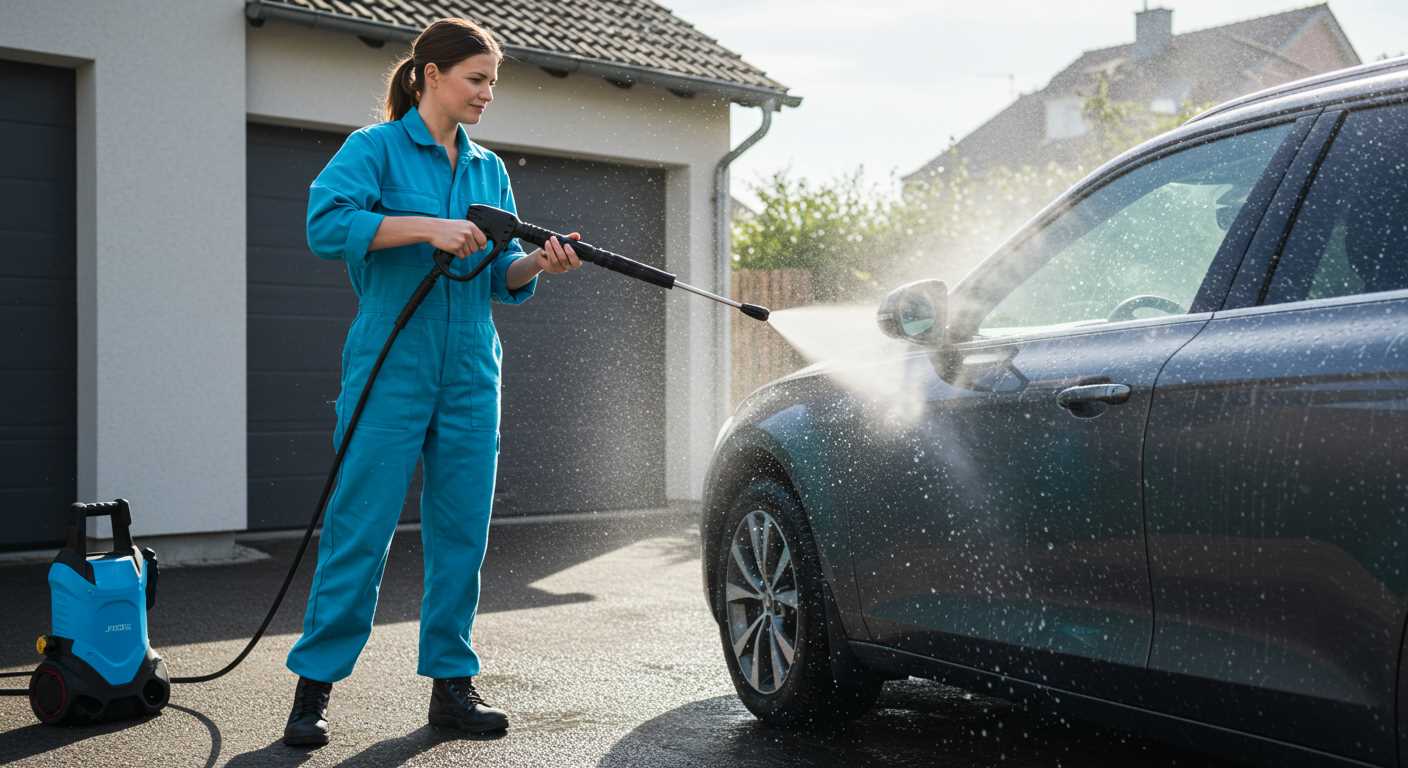
When it comes to tackling various cleaning challenges, adjusting the force of the water jet can make all the difference. For instance, while cleaning a car, I usually dial down the intensity to avoid damaging the paintwork. A setting around 120 bar works wonders for loosening dirt without risk. On the other hand, for tough jobs like removing grime from driveways, I crank it up to about 150-160 bar, which blasts away stubborn stains effectively.
Choosing the Right Nozzle
Another aspect that significantly impacts performance is the nozzle selection. I often switch between nozzles depending on the task. A wide-angle nozzle is perfect for delicate surfaces, providing a gentle spray that covers more area without causing harm. Conversely, a narrow nozzle directs a concentrated stream, ideal for those tougher spots like oil stains or ingrained dirt. I once used a narrow nozzle on a particularly stubborn patio stain, and the effective concentration of the jet made quick work of it.
Understanding Surface Materials
Different materials require different approaches. For wood decks, I recommend a lower pressure alongside a fan nozzle to avoid splintering. On concrete or brick, higher pressure is usually safe, but I keep an eye on the condition of the surface. I remember a time when I overdid it on an old brick wall; the force was too much, and I ended up eroding some of the mortar. Always assess the material first and adjust accordingly to prevent damage.
Types of Nozzles and Their Impact on Cleaning Performance
Choosing the right nozzle is critical for achieving optimal results during cleaning tasks. Each nozzle type offers distinct spray patterns and pressure levels that cater to various surfaces and grime types.
The 0-degree nozzle produces a concentrated jet, perfect for removing stubborn stains from hard surfaces such as concrete. I remember tackling a particularly stubborn oil stain on my driveway with this nozzle; it was like wielding a tiny sword against dirt. However, this nozzle can damage softer materials, so caution is necessary.
For a wider spray, the 15-degree nozzle is a solid choice. It strikes a balance between power and coverage, making it suitable for tasks like stripping paint or cleaning decks. I used this nozzle while refurbishing an old patio, and the results were impressive without harming the wood.
The 25-degree nozzle is useful for general cleaning tasks. I often reach for it when washing vehicles or cleaning outdoor furniture. Its wider spray pattern covers more area, reducing the time spent on cleaning while still being effective against moderate dirt.
For delicate surfaces, the 40-degree nozzle shines. It disperses water over a larger area with lower pressure, making it ideal for washing cars or cleaning windows. I learned this the hard way when I accidentally used a more powerful nozzle on my car, leading to scratches. The gentler approach keeps surfaces safe and spotless.
Some models come with adjustable nozzles, allowing for quick changes between spray patterns without swapping attachments. This versatility is particularly handy when moving between different cleaning tasks. I often switch from a tight spray for tough spots to a wider spray for rinsing off soap, saving both time and effort.
Ultimately, understanding the impact of each nozzle type on cleaning efficiency can dramatically enhance your cleaning experience. Selecting the right one not only improves results but also protects surfaces from damage, ensuring that every cleaning session is a success.
How Detergents Enhance the Cleaning Process

Using the right detergent can significantly elevate the cleaning outcome. I’ve often found that selecting a suitable cleaning solution tailored to the surface type makes a noticeable difference. For instance, when tackling oil stains on a concrete driveway, an alkaline-based detergent can break down the grease effectively, allowing water to wash it away more easily.
Surfactants in detergents lower the surface tension of water, allowing it to penetrate grime and dirt more effectively. This means that stubborn deposits become easier to dislodge. I remember one instance where a customer was struggling with mud caked on their patio. After applying a specially formulated patio cleaner, the mud practically lifted away under the force of the water.
It’s important to apply the detergent correctly. Typically, you’ll want to pre-soak the area with the cleaning solution and let it sit for a few minutes. This dwell time allows the detergent to work on the dirt. I often tell users to avoid letting it dry out, as this can diminish its effectiveness.
When mixing detergents, always follow the manufacturer’s guidelines for dilution ratios. Using too much can create excess foam, which may hinder performance. From my experience, a well-balanced mixture ensures optimal cleaning without unnecessary waste. Here’s a quick reference table for common detergent types and their applications:
| Detergent Type | Ideal For | Notes |
|---|---|---|
| Alkaline | Grease, Oil | Effective on hard surfaces; avoid on painted surfaces. |
| Acidic | Mineral Deposits | Great for removing rust stains; use with caution on metals. |
| Biodegradable | General Cleaning | Environmentally friendly; safe for most surfaces. |
| Specialty Cleaners | Wood, Glass | Formulated for specific materials; ensures no damage. |
After applying the detergent and allowing it to dwell, switching to a suitable nozzle with a wider spray pattern can help rinse away the loosened dirt more effectively. It’s all about working smarter, not harder. In my years of testing, I’ve found that integrating the right cleaning agents with equipment can turn a tedious task into a quick and successful project.
Maintenance Tips for Long-lasting Performance
Regularly inspect and clean the filter to prevent debris from clogging the system. I remember one instance when I neglected this simple task, and it resulted in reduced water flow and a significant drop in cleaning power. A clean filter ensures optimal performance.
After each use, ensure you drain the water from the unit and the hose. This practice helps prevent internal components from corroding and extends the lifespan. I’ve had machines that lasted much longer simply because I was diligent about this step.
Keep the nozzle clean. A blocked nozzle can lead to uneven spray patterns and reduced pressure. I often use a pin to clear out any debris that accumulates. It’s a quick fix that can make all the difference in achieving a consistent spray.
Check the seals and O-rings regularly for wear and tear. These components often go unnoticed but are crucial for maintaining pressure. I’ve had to replace them a few times, and doing so promptly saved me from more extensive repairs later on.
Store the equipment in a dry place, away from extreme temperatures. I learned the hard way that freezing conditions can damage the pump. Keeping the unit in a stable environment significantly contributes to its longevity.
Use only the recommended detergents. Some cleaners can cause damage to internal parts. I’ve come across models that suffered from using harsh chemicals not intended for them. Always read the guidelines to avoid unnecessary repairs.
Lastly, during long periods of inactivity, consider running the device occasionally. This keeps the motor lubricated and the seals flexible. I’ve found that a little maintenance goes a long way in preserving performance and reliability.
Common Troubleshooting Steps for Karcher Pressure Washers
Begin with checking the power source. Ensure the unit is connected properly, and the outlet is functional. A simple test can save a lot of time; plug in a different device to confirm the outlet works.
Water Supply Issues
- Examine the water inlet filter. Debris can accumulate, restricting flow. Clean it periodically for optimal performance.
- Verify the hose for kinks or leaks. A damaged hose can significantly affect water pressure. Replace it if necessary.
- Ensure the water supply is adequate. Check that the tap is fully open and that the hose is submerged if required.
Pressure Problems
- If you notice reduced pressure, inspect the nozzle. Clogs can form from dirt or detergent residues. Clean or replace as needed.
- Adjust the pressure settings based on the task. Using low pressure on tough stains can be ineffective, while high pressure on delicate surfaces may cause damage.
- Inspect the pump for any signs of wear or damage. A malfunctioning pump can result in inadequate pressure. Regular maintenance is key to longevity.
For any persistent issues, consult the user manual. It often contains specific troubleshooting guidance tailored for your model. If problems continue, reaching out to customer service can provide additional support. Remember, regular maintenance not only prevents issues but also extends the lifespan of your equipment.
.jpg)


