
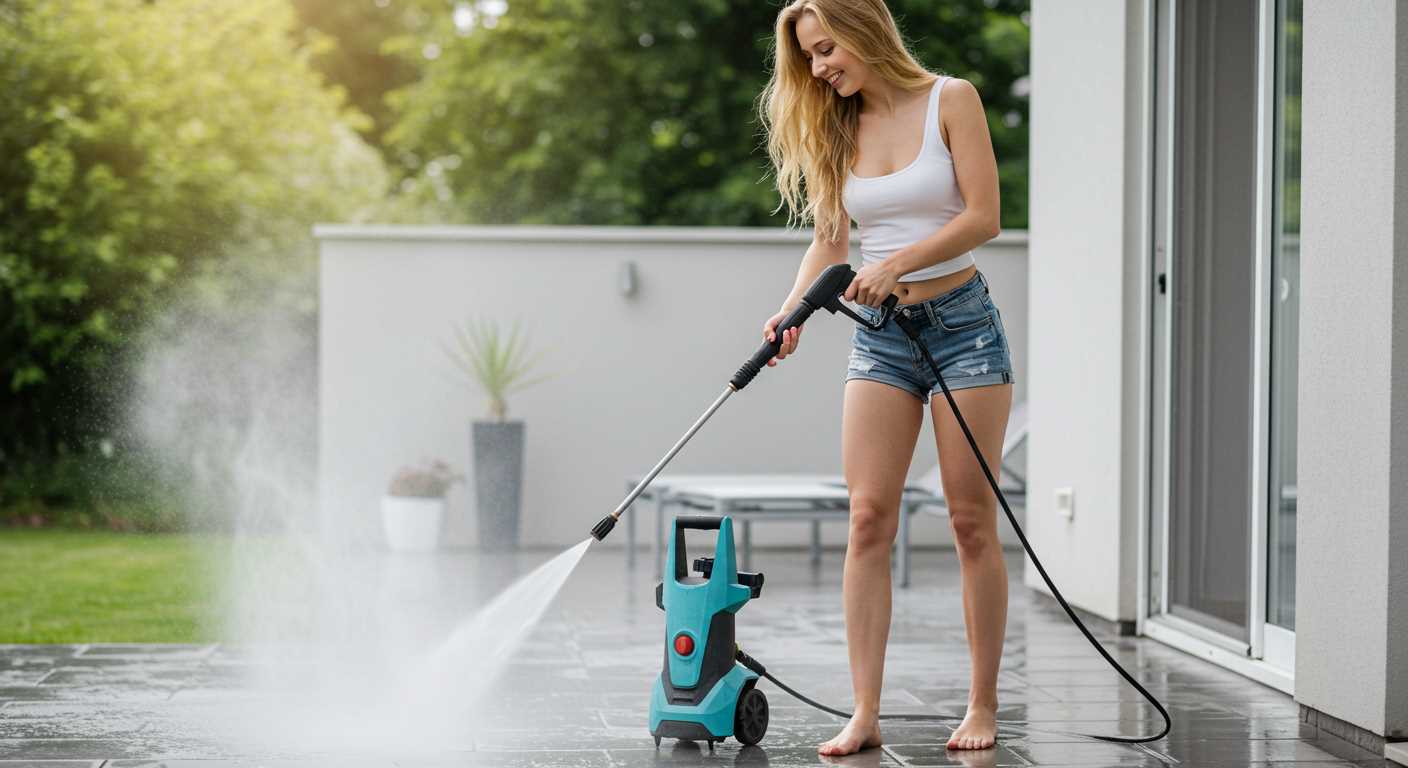


To connect your Greenworks cordless cleaning device, first, ensure that the battery is fully charged. A reliable power source is crucial for optimal performance. Once charged, insert the battery into the designated compartment until you hear a click, indicating a secure fit.
Next, attach the water supply hose to the inlet on the unit. It’s essential to check that there are no leaks at the connection point. A tight seal ensures that the system maintains pressure and delivers consistent water flow. If you’re using a garden hose, ensure it’s properly connected to your water source and free from kinks.

After securing the water supply, turn on the water to allow it to fill the system before starting the device. This helps to avoid air pockets that can affect performance. You may notice a slight delay as the pump primes itself, which is perfectly normal.
Once everything is set, power on your device. Adjust the nozzle according to the task at hand–a wider spray for rinsing larger areas or a narrower jet for more stubborn grime. My experience has shown that a quick test spray can help you gauge the pressure and make necessary adjustments.
Connecting Your Greenworks Cleaning Equipment
First thing’s first: ensure the battery is fully charged. There’s nothing worse than being halfway through a task and realising you’ve run out of power. Once that’s sorted, it’s time to make the connections.
Attach the hose to the unit securely. Look for the inlet where the hose connects; it should click into place. Avoid overtightening, as this can lead to leaks. I’ve seen many people struggle with this, but a firm, steady hand usually does the trick.
Water Supply Setup
Next, connect your garden hose to the other end. Ensure the hose is free from kinks, as they can restrict water flow. I remember one time I was about to start cleaning my patio when I spotted a kink in the hose. A quick fix saved me a lot of hassle. Turn on the water supply before starting the machine; this will help prime the system.
Powering Up
Once everything is connected, insert the battery into the unit. A slight click will indicate that it’s secured. Ensure the safety lock is off before operating. I’ve learned the hard way that overlooking this step can lead to unnecessary frustration.
Finally, adjust the nozzle to your desired setting. Different tasks require varying pressure levels. For instance, a wider spray is perfect for rinsing off dirt, while a concentrated jet is ideal for tough stains. My personal favourite is using the narrow setting for stubborn grime on outdoor furniture.
| Task | Nozzle Setting |
|---|---|
| Washing cars | Wide spray |
| Cleaning patios | Narrow jet |
| Rinsing off surfaces | Medium spray |
Once you’ve set everything up, pull the trigger to start cleaning. Enjoy the satisfaction of seeing your space transformed with ease!
Understanding the Components of Your Greenworks Pressure Washer
Familiarising yourself with the elements of your cleaning device can significantly enhance your experience. The main components include the motor, pump, hose, and nozzle. Each part plays a pivotal role in ensuring optimal performance.
Motor and Pump
The motor powers the unit, while the pump generates the water flow and pressure. It’s essential to ensure both components are in good condition. I once had a model where the motor struggled due to prolonged use. Regular maintenance checks can prevent such issues, ensuring longevity and reliability.
Hose and Nozzle
The hose is your lifeline, transporting water from the source to the nozzle. A high-quality, flexible hose reduces the chances of kinks that could hamper flow. The nozzle, on the other hand, allows you to control the spray pattern. Switching nozzles based on the task can save time and improve results. For instance, using a narrow spray for stubborn stains works wonders. I’ve often found that the right attachment can make a significant difference in cleaning efficiency.
Additionally, for those interested in practical applications, consider exploring how to can green beans with a pressure cooker. It’s a useful skill that pairs well with various outdoor activities, including maintaining your garden equipment.
Understanding these elements will empower you to make informed decisions, whether it’s during maintenance or choosing the right settings for different tasks.
Preparing Your Cleaning Device for Use
Before using your cleaning equipment, ensure it’s ready for action. First, check the battery level; a fully charged battery will give you the best performance. I recall a time when I started a big outdoor project only to find the battery was low, which cut my work short. Always charge it fully beforehand.
Inspecting Attachments and Hoses
Next, examine all attachments and hoses for any signs of wear or damage. Look for cracks, leaks, or blockages. A colleague of mine once had a hose burst mid-clean, creating a mess and wasting valuable time. Make sure connections are tight and secure to prevent any mishaps during use.
Water Supply Check
Ensure you have a suitable water source ready. If you’re using a water tank, check the level and make sure it’s clean. I’ve learned the hard way that dirty water can clog the system and affect cleaning efficiency. If you’re looking to enhance your results, consider using a pressure washer car pre cleaner for the best finish.
Attaching the Hose to the Cleaning Device
Start by ensuring that the unit is turned off and unplugged. Locate the hose connector on the device, which is typically found at the front. Align the end of your hose with the connector, ensuring that any O-ring is properly seated to prevent leaks. Firmly push the hose into the connector until you hear a click or feel it lock into place. If your model includes a quick-connect feature, simply push the connector until it secures automatically.
Securing the Hose
After attaching the hose, give it a gentle tug to ensure it is firmly connected. Check for any visible gaps or misalignments, which might indicate an improper fit. If your model has a secondary locking mechanism, engage it to further secure the connection. This step is crucial to prevent disconnections during use, which can lead to pressure loss or even accidents.
Final Checks Before Use
Inspect the hose for any kinks or damages that might affect performance. Make sure the other end of the hose is connected to a water source and that the water supply is turned on. Once everything is checked, you’re ready to operate the unit. Remember, a well-secured hose is key to a smooth and effective cleaning session.
Connecting the Spray Gun to the Hose
To ensure proper operation, attach the spray gun securely to the hose. Align the connection points, then push the spray gun onto the hose until you hear a click, indicating a secure fit. This connection must be tight to prevent leaks during use.
- Inspect both the spray gun and hose for any signs of wear or damage. Replace if necessary.
- Ensure the locking mechanism on the spray gun is engaged after connecting.
- If your model includes an adjustable nozzle, select the desired setting before locking the connection.
After attaching the gun, check the connection by gently pulling on the spray gun to confirm it is secure. A loose connection can lead to reduced performance or water leakage.
Once connected, turn on the water supply, but do not activate the trigger yet. This allows the hose to fill with water and clears any air pockets. After a few moments, you can safely squeeze the trigger to start using your equipment.
In my experience, ensuring a tight connection between the spray gun and hose is fundamental. I’ve encountered issues in the past when connections were overlooked, leading to frustrating interruptions during cleaning tasks. Always double-check your connections for a smooth operation.
Setting Up the Battery for Operation
Begin by locating the battery compartment on your unit. Ensure the device is turned off before proceeding. Carefully slide open the battery cover to access the compartment.
- Take the fully charged battery and align it with the connectors inside the compartment.
- Gently press down until you hear a click, indicating a secure connection.
- Close the battery cover firmly to prevent any moisture ingress during use.
It’s vital to check the battery’s charge level before each use. If the indicator lights show low power, recharge the battery fully to ensure optimal performance. I’ve often found that starting with a well-charged battery makes a significant difference in the effectiveness of the cleaning task at hand.
After securing the battery, give the unit a quick inspection. Look for any signs of wear or damage around the battery compartment. A well-maintained battery area can prevent operational issues during your cleaning activities.
Finally, if you’re not using the equipment for an extended period, remove the battery and store it in a cool, dry place. This practice prolongs battery life and ensures readiness for your next cleaning project.
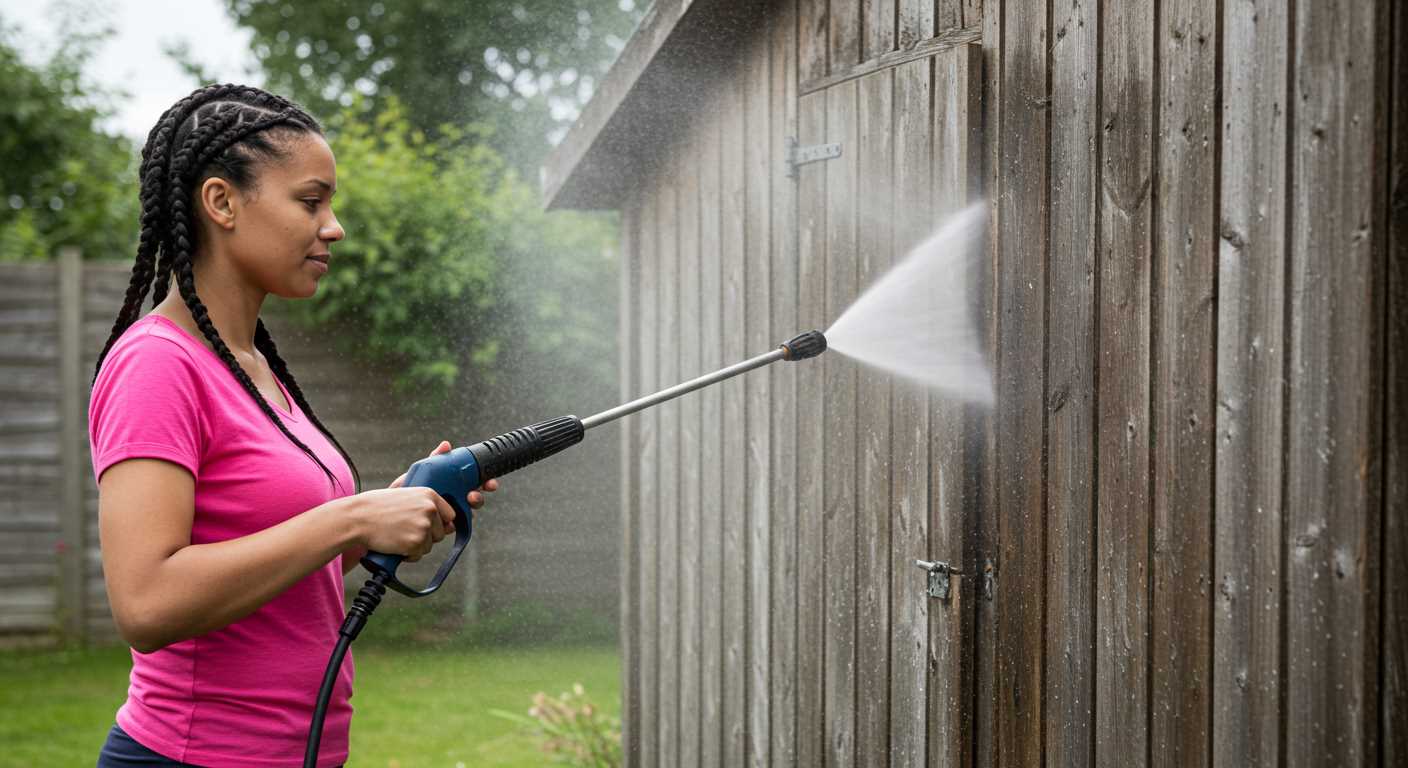
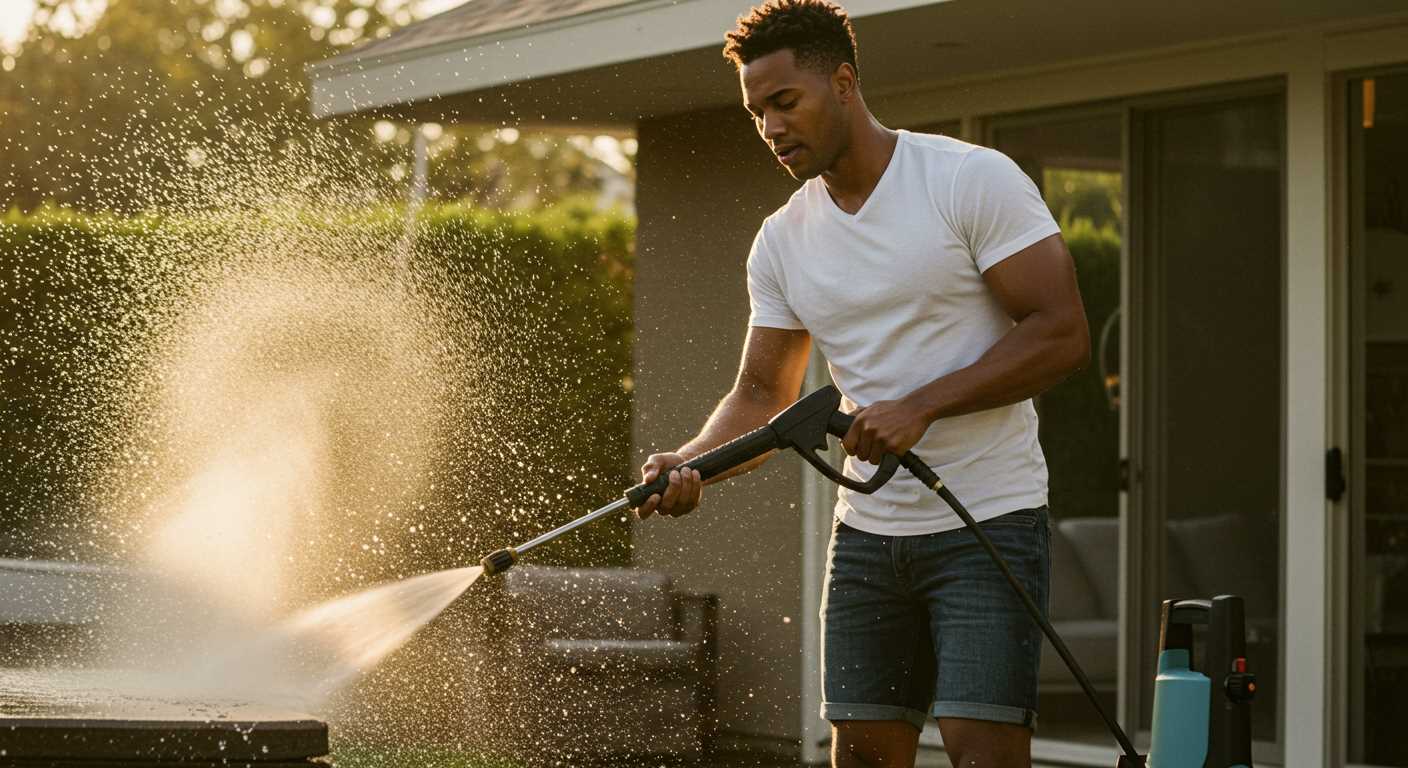
Choosing the Right Nozzle for Your Cleaning Task
For specific cleaning jobs, selecting the appropriate nozzle is paramount. Each nozzle type offers distinct spray patterns that cater to various tasks. The common options include 0°, 15°, 25°, and 40° nozzles, as well as a soap nozzle.
The 0° nozzle delivers a concentrated jet, perfect for tough stains like oil or grime on concrete surfaces. I once tackled a stubborn oil patch in my driveway with this nozzle. The results were impressive, as it removed the stain effortlessly.
The 15° variant provides a broader spray, ideal for stripping paint or cleaning heavy dirt from brickwork. I remember using it on an old garden shed. The nozzle worked wonders, making the peeling paint come off in no time.
The 25° nozzle is great for general cleaning tasks like washing vehicles or cleaning decks. This is my go-to when I clean my car, as it effectively removes dirt without damaging the finish.
For delicate surfaces, the 40° nozzle is perfect. I’ve used it on windows and wooden furniture, achieving a thorough clean without risking any damage. It’s gentle yet efficient.
Lastly, the soap nozzle is designed for applying detergent. It’s particularly useful for pre-soaking surfaces before a thorough rinse. I often use it on my patio furniture to ensure a deep clean before rinsing off with a different nozzle.
Remember to adjust the nozzle according to the task at hand. Using the wrong one can lead to damage or ineffective cleaning. Knowledge of your equipment can significantly enhance your cleaning experience.
Testing the Connection Before Use
Always begin by ensuring that all components are securely fastened. A loose connection can lead to leaks or insufficient water pressure, which may affect your cleaning performance. After assembling the unit, perform a quick visual inspection of the hose, gun, and any attachments.
Conduct a Leak Test
With everything connected, activate the system without engaging the trigger on the spray gun. Check for any signs of water leakage at the connections. If you notice any drips, tighten the fittings until the flow is contained. This will save time and ensure optimal functioning once you start using the machine.
Check Water Flow
Next, while still not pulling the trigger, turn on the water supply to observe the flow rate. Make sure the water is flowing freely through the hose and into the machine. A restricted flow can indicate kinks in the hose or blockages. Addressing these issues early can prevent operational problems later.
Maintaining Your Cleaning Device After Use
After finishing your tasks, it’s important to take a few minutes to care for your equipment. Start by draining any remaining water from the hose and unit. Leaving water inside can lead to damage and mould growth. Simply disconnect the hose from the unit and spray gun, allowing any residual water to flow out.
Cleaning the Nozzles
Next, inspect and clean the nozzles. Over time, they can get clogged with debris. A simple solution is to use a small pin or needle to clear any blockages. This ensures that the water flow remains strong for your next use. I always keep a small toolkit handy for this purpose.
Storing the Equipment Properly
Finally, store your device in a dry, cool place. If you’re using a battery-operated model, remove the battery and store it separately. This prevents any discharge issues and keeps the battery in good condition. I made the mistake of leaving a battery in once, and it led to a lot of hassle. Proper storage extends the lifespan of your cleaning equipment significantly.
.jpg)


