


For those looking to maximise their cleaning efficiency, integrating an abrasive cleaner with a high-pressure fluid system is a smart move. This combination is particularly useful for stripping away stubborn paint, rust, or grime from various surfaces. By using a device that blends pressurised water with an abrasive material, you can achieve results that are not only impressive but also time-saving.
From my experience, the heart of this operation lies in the nozzle design. A well-engineered nozzle allows for optimal mixing of water and the abrasive medium, creating a fine but powerful stream that can tackle even the toughest jobs. During my years testing different models, I found that adjusting the nozzle’s angle can greatly influence the cleaning performance. A more acute angle provides a concentrated jet, while a broader angle disperses the abrasive for larger coverage.

Another key aspect is the choice of abrasive material. Common options include silica sand, baking soda, or even crushed glass. Each type has its unique properties, and selecting the right one can significantly affect the outcome. For instance, silica sand is highly effective for heavy-duty tasks, while baking soda is gentler and ideal for delicate surfaces. It’s crucial to match the abrasive to the job at hand to avoid damaging the underlying material.
In my work, I often emphasised the importance of safety when using these tools. Protective gear, including goggles and respiratory masks, is non-negotiable as fine particles can become airborne. Proper maintenance of the equipment also ensures longevity and optimal performance. Regularly checking hoses and connections helps prevent leaks and maintains consistent pressure, which is essential for effective operation.
Understanding the Mechanism Behind Abrasive Cleaning Attachments
For optimal results, always begin with the right nozzle size when attaching an abrasive cleaning tool to your high-pressure unit. A smaller nozzle increases pressure, enhancing the stripping power of the abrasive material being used. I’ve found that a 0.5 mm nozzle often strikes the perfect balance between pressure and material flow, allowing for efficient removal of stubborn coatings.
When mixing the abrasive material, consistency is key. A fine-grit media works best for detailed work, while coarser materials excel in heavy-duty applications. I recall tackling a rusted metal fence using a coarse medium; the results were astonishing, stripping away years of neglect with minimal effort. Always ensure the material is dry to avoid clumping, which can hinder performance.
Monitoring your equipment during operation is essential. Keep an eye on the pressure gauge; if you notice a drop, it could indicate a blockage in the media feed. Regular maintenance checks on the attachment can prevent these issues. I once experienced a frustrating delay because of a simple blockage that could have been avoided with a quick inspection.
Using this setup requires specific techniques. Maintain a consistent distance from the surface being cleaned, generally around 8 to 12 inches, to ensure even coverage and to avoid damage. I learned this the hard way while working on a delicate wooden surface, where getting too close resulted in gouging.
Finally, after every session, clean the attachment thoroughly. Residual media can clog the system if left unattended. I developed a habit of rinsing my tools immediately after use, ensuring a longer lifespan and peak performance for future projects. This small step made a noticeable difference in maintaining efficiency over the years.
Understanding the Basics of Sandblasting
When it comes to removing stubborn paint or rust, sandblasting provides an effective solution. The process involves propelling abrasive material at high velocity to clean or etch surfaces. In my experience, choosing the right media is crucial. Common options include silica sand, glass beads, and aluminum oxide. Each type has its specific applications and effects on different materials.
The equipment typically consists of a blasting pot, an air compressor, and a nozzle. The blasting pot holds the abrasive material and delivers it to the nozzle, where compressed air propels it towards the surface. I’ve found that maintaining the right air pressure is key; too low and the media won’t reach the surface effectively, too high and it can cause damage.
Proper safety gear is non-negotiable. A full-face respirator, gloves, and protective clothing are essential. I once witnessed a colleague neglecting safety measures, resulting in an eye injury. The importance of safety cannot be overstated, especially when working with fine particles that can become airborne.
Surface preparation is critical. Before starting, ensuring the area is clean and free from debris can vastly improve results. In my earlier days, I often rushed this step, leading to unsatisfactory finishes. Now, I always take the time to prepare properly, which makes a noticeable difference.
Lastly, practice makes perfect. I recall my first attempts were filled with frustration and uneven results. Over time, I developed a steady hand and an eye for controlling the angle and distance of the nozzle. This skill greatly enhances efficiency and the quality of the finish.
Components of a Pressure Washer Sandblaster
To achieve optimal results with a sandblasting attachment, understanding its components is key. The main elements include a nozzle, a sand tank, a hose, and an adapter for the cleaning unit. Each piece plays a vital role in combining high-pressure water and abrasive materials for effective cleaning.
Nozzle: This directs the water and abrasive mixture onto the surface. The size and shape are crucial; a wider nozzle covers more area, while a narrower one provides more concentrated force. I’ve often experimented with various nozzles, finding that the right choice drastically affects the cleaning efficiency.
Sand Tank: This reservoir holds the abrasive material–often silica sand or glass beads. A well-designed tank ensures a steady flow of the abrasive into the water stream. When I first started using these systems, I learned the importance of keeping the tank clean to prevent clogs that could hinder performance.
Hose: A robust, high-pressure hose connects the sand tank to the nozzle. The hose must withstand the force of the water while allowing the abrasive to flow smoothly. I’ve had hoses of varying qualities, and investing in a durable one pays off in terms of longevity and effectiveness.
Adapter: This piece connects the sandblasting attachment to the cleaning unit. Compatibility is crucial; using the wrong adapter can lead to leaks and inefficiencies. I’ve often helped friends choose the right adapters to ensure seamless integration, avoiding frustrating setbacks during projects.
For those looking to enhance their cleaning tasks, consider using a brick cleaner for pressure washer. It complements the sandblasting technique by effectively removing stubborn stains and debris.
Setting Up Your Cleaning Equipment for Abrasive Blasting
Begin with a thorough inspection of the equipment. Ensure that the water supply is connected and that there are no leaks in the hoses. A tight connection prevents pressure loss, which can affect performance.
Next, attach the abrasive media container to the nozzle assembly. Most systems come with a specific connector that fits the media hose. Double-check that it is secure to prevent any unexpected disconnections during operation.
Adjust the nozzle size according to the task at hand. A smaller nozzle creates a more concentrated stream, ideal for precise work, while a larger one covers broader areas. Test different nozzles on a scrap surface to find the best fit for your project.
| Nozzle Size | Application | Recommended Media |
|---|---|---|
| 2.0 mm | Detail work | Fine sand or glass beads |
| 4.0 mm | General cleaning | Coarse sand or garnet |
| 6.0 mm | Heavy-duty stripping | Steel shot or aluminium oxide |
Adjust the media flow rate to match the pressure setting. A higher flow rate is suitable for tougher materials, while a lower rate works better for delicate surfaces. Use the control valve to fine-tune this during operation. If you notice excessive dust or debris, decrease the flow to maintain visibility and control.
Before starting, wear appropriate safety gear. Goggles and a respirator are non-negotiable. I once overlooked this and had a regrettable encounter with flying particles–never again. Proper attire protects against the abrasive media and any contaminants in the environment.
After everything is set, conduct a test run on an inconspicuous area. This step is crucial to confirm that the settings are correct and that the media is effectively removing material without damaging the surface underneath. Adjust as necessary based on the results.
Once satisfied, proceed with the main project, regularly checking the equipment for any signs of wear or malfunction. Keeping a close eye on performance ensures consistent results and prolongs the lifespan of your gear. Happy blasting!
Choosing the Right Abrasive Material for Your Project
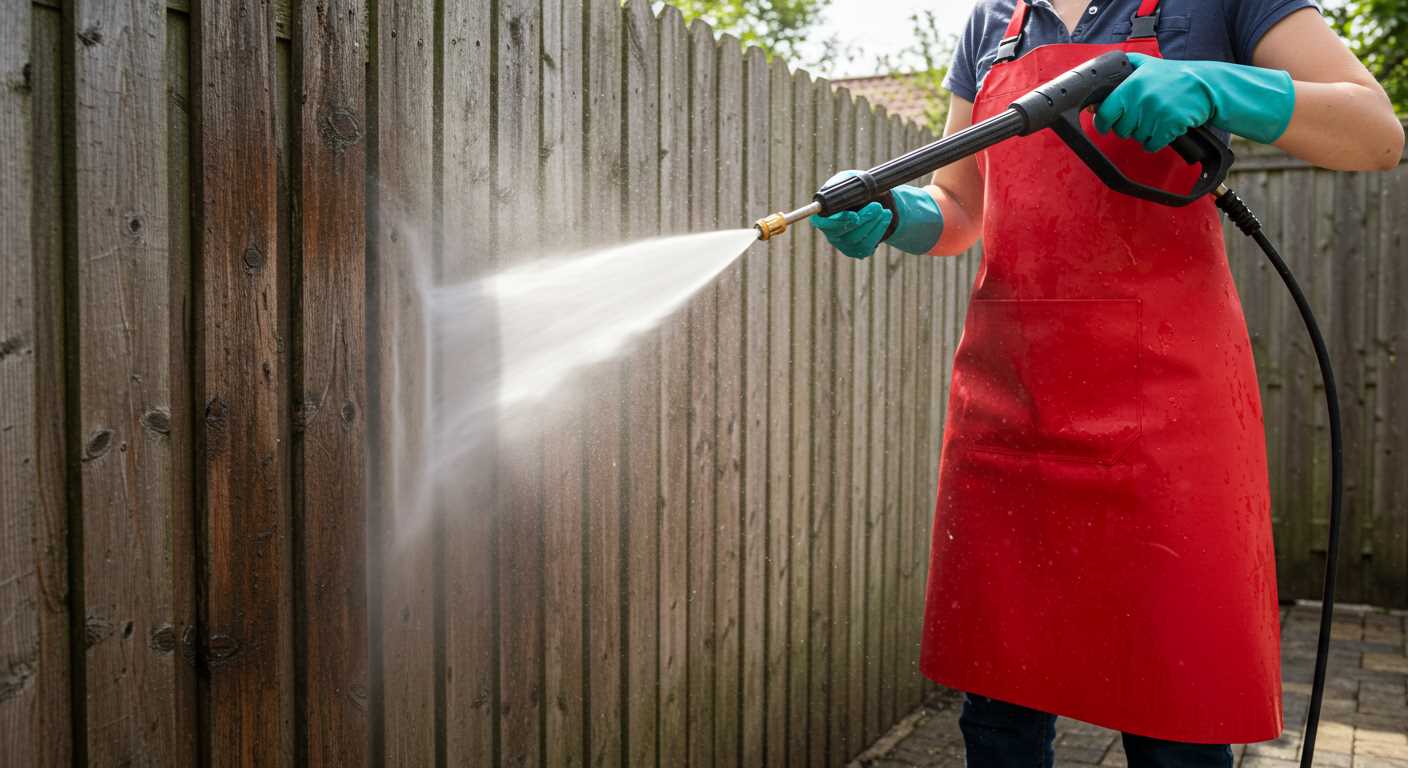
When selecting the right abrasive for your task, it’s crucial to consider the surface and the results you want to achieve. For softer surfaces like wood, I recommend using baking soda or crushed walnut shells. They provide a gentle touch without damaging the material. I remember a project where I had to strip paint from an old wooden fence; using walnut shells made the job efficient while preserving the wood’s integrity.
Types of Abrasives
For metal surfaces, aluminium oxide is a fantastic choice. It’s durable and effective in removing rust and old paint. I once tackled a rusty metal gate using this abrasive, and it worked wonders, leaving the surface smooth and ready for a fresh coat of paint. On the other hand, if you’re working with brick or concrete, consider using silica sand or garnet. They’re more aggressive and can handle tougher materials without breaking down too quickly.
Consider the Size of Abrasive Particles
Another factor to keep in mind is the size of the abrasive particles. Finer particles can produce a smoother finish, while coarser options are better for heavy-duty cleaning. I often adjust the particle size based on the project requirements. For instance, a car restoration project I once undertook required a finer abrasive to achieve that perfect finish without scratches. Experimenting with different sizes can lead to better outcomes on various surfaces.
Always remember to review safety guidelines and wear appropriate protective gear when handling abrasives. This precaution protects not only your health but also enhances the overall experience of your cleaning project.

Safety Precautions While Using a Sandblaster
Always wear appropriate personal protective equipment (PPE) to safeguard against flying debris and inhalation of harmful particles.
- Respiratory Protection: Use a high-quality respirator designed for dust and particulate matter. Ensure it fits properly to provide maximum protection.
- Eye Protection: Safety goggles or a full face shield are non-negotiable. Regular glasses won’t offer adequate protection against projectiles.
- Skin Protection: Long sleeves, gloves, and durable clothing are essential to shield your skin from abrasives and chemicals.
Conduct a thorough inspection of the equipment before starting. Check hoses, connections, and any parts that may wear over time. Leaks can lead to dangerous situations, so it’s better to be safe than sorry.
- Environment: Work in a well-ventilated area to minimise dust accumulation. If indoors, use exhaust fans to keep air circulating.
- Surface Preparation: Clear the work area of any unnecessary items to reduce tripping hazards and keep your focus on the task at hand.
Be mindful of the material you’re blasting. Some surfaces can release harmful substances when abrasive materials hit them. Always check for potential hazards in the material before starting.
- Abrasive Choice: Select the right type of abrasive material. Some can create harmful dust; using safer alternatives can mitigate risks.
- Disposal: Follow local regulations for disposing of used abrasives and debris, especially if toxic substances are involved.
Maintain a safe distance from others while operating the equipment. Ensure that bystanders are at least 20 feet away, and use barriers if necessary to keep people from wandering into the work zone.
Finally, never underestimate the power of knowledge. Familiarise yourself with the user manual and the specific safety recommendations for your equipment. Each model may have unique features that require special attention.
Common Applications for Pressure Washer Sandblasting
When it comes to utilising a sandblasting setup, there are several specific applications where this method truly shines.
1. Surface Preparation
- Automotive Restoration: Stripping paint and rust from vehicles before repainting can rejuvenate old cars, making them look like new. A sandblaster is ideal for reaching intricate areas.
- Metal Fabrication: Preparing metal surfaces for welding or painting ensures better adherence and durability. Removing old coatings and contaminants is crucial in this process.
- Concrete Cleaning: For surfaces like driveways or patios, sandblasting effectively removes stains, dirt, and old sealants, restoring the original look.
2. Industrial Applications
- Shipbuilding: Removing scale, rust, and old paint from ships and boats is essential for maintenance and longevity. Sandblasting provides a thorough clean in hard-to-reach areas.
- Construction: Sandblasting is often used to prepare surfaces for coatings that protect against corrosion and wear in heavy machinery and structures.
- Restoration Projects: Historical buildings and monuments benefit greatly from careful sandblasting, as it removes layers of grime without damaging underlying materials.
Using a sandblaster also allows for the application of various finishes, like textures or patterns, giving materials a unique character. For automotive enthusiasts, applying a fresh coat of wax after cleaning can enhance shine and protection. Check out the best car wax for pressure washer for optimal results.

In summary, whether for personal projects or professional use, sandblasting serves as a versatile tool across different industries, providing effective surface treatment that enhances longevity and aesthetics.
Maintenance Tips for Your Sandblasting Equipment
Regular cleaning of the nozzle is paramount. I remember a time when I neglected this step, and it led to uneven blasting patterns. A simple rinse after each use can prevent clogs and ensure consistent performance.

Inspect and Replace Wear Parts
Check the hoses and fittings for wear and tear regularly. I once had a burst hose during a project, which could have been avoided with routine inspections. Keep spare parts on hand, such as nozzles and gaskets, to minimise downtime.
Abrasive Material Management
Store abrasives in a dry place to avoid moisture damage. Damp materials can clump together and lead to inconsistent flow. I learned this the hard way when a project got delayed due to a moisture-affected batch. Always keep your materials in sealed containers when not in use.
After each session, clear out any leftover abrasive from the equipment. This prevents contamination and ensures that only the desired material is used in future jobs. Invest in a dedicated vacuum or collection system for easy cleanup.
Finally, check the air supply regularly if your system uses compressed air. Moisture in the air lines can lead to rust and decreased efficiency. I once had to pause a project to drain the compressor, which taught me the value of proactive maintenance.
FAQ:
What is a pressure washer sandblaster and how does it function?
A pressure washer sandblaster is a tool that combines the power of a pressure washer with a sandblasting attachment. It uses high-pressure water to propel abrasive materials, like sand or other media, at surfaces for cleaning or stripping purposes. The pressure washer generates a strong water jet, while the sandblasting attachment mixes the abrasive material into the water flow, allowing for a more aggressive cleaning action. This combination helps remove stubborn dirt, paint, or rust from various surfaces effectively.
Can I use any type of sand with a pressure washer sandblaster?
No, not all types of sand are suitable for use with a pressure washer sandblaster. It’s best to use specific abrasive materials that are designed for such applications, like silica sand or garnet. These materials are typically finer and more uniform, which ensures they can be effectively mixed with water and propelled through the nozzle. Using the wrong type of sand can cause clogs or damage the equipment.
What safety precautions should I take when using a pressure washer sandblaster?
When using a pressure washer sandblaster, it’s important to wear protective gear to safeguard yourself from the abrasive material and high-pressure water. This includes safety goggles, gloves, a mask or respirator, and long sleeves. Make sure to work in a well-ventilated area, as the dust created during the sandblasting process can be harmful if inhaled. Additionally, ensure that bystanders are kept at a safe distance to avoid any injury from flying debris.
How do I set up a pressure washer sandblaster for use?
Setting up a pressure washer sandblaster involves several steps. First, connect the sandblasting kit to your pressure washer according to the manufacturer’s instructions. Typically, this includes attaching the sand pickup hose to the sandblaster and the nozzle to the pressure washer wand. Next, fill the sandblaster’s container with the appropriate abrasive material. Once everything is connected, adjust the pressure settings on your washer for optimal performance, usually around 2000-3000 PSI, and ensure that your water supply is adequate. Finally, test the setup on a small area to check the effectiveness before proceeding with larger surfaces.
What surfaces can a pressure washer sandblaster be used on?
A pressure washer sandblaster is versatile and can be used on a variety of surfaces. Common applications include concrete, brick, stone, metal, and wood. It’s particularly useful for removing paint, rust, or old coatings from these materials. However, caution should be taken when using it on softer surfaces, as the abrasive action can damage them. Always test the sandblaster on a small, inconspicuous area before tackling larger jobs to ensure it won’t harm the surface.
How does a pressure washer sandblaster work?
A pressure washer sandblaster combines the power of a pressure washer with the abrasive action of sandblasting. Essentially, it uses high-pressure water to propel abrasive materials, such as sand or glass beads, onto a surface. The process begins with the pressure washer, which generates a strong stream of water. This water is then mixed with the abrasive material in a special attachment or nozzle. When the mixture is sprayed onto the surface, the high-pressure water stream carries the abrasive particles, effectively cleaning or stripping the surface of paint, rust, or other contaminants. The result is a thorough cleaning that can prepare surfaces for painting or restoration.


.jpg)


