
.jpg)


.jpg "How does a pressure washer surface cleaner work")
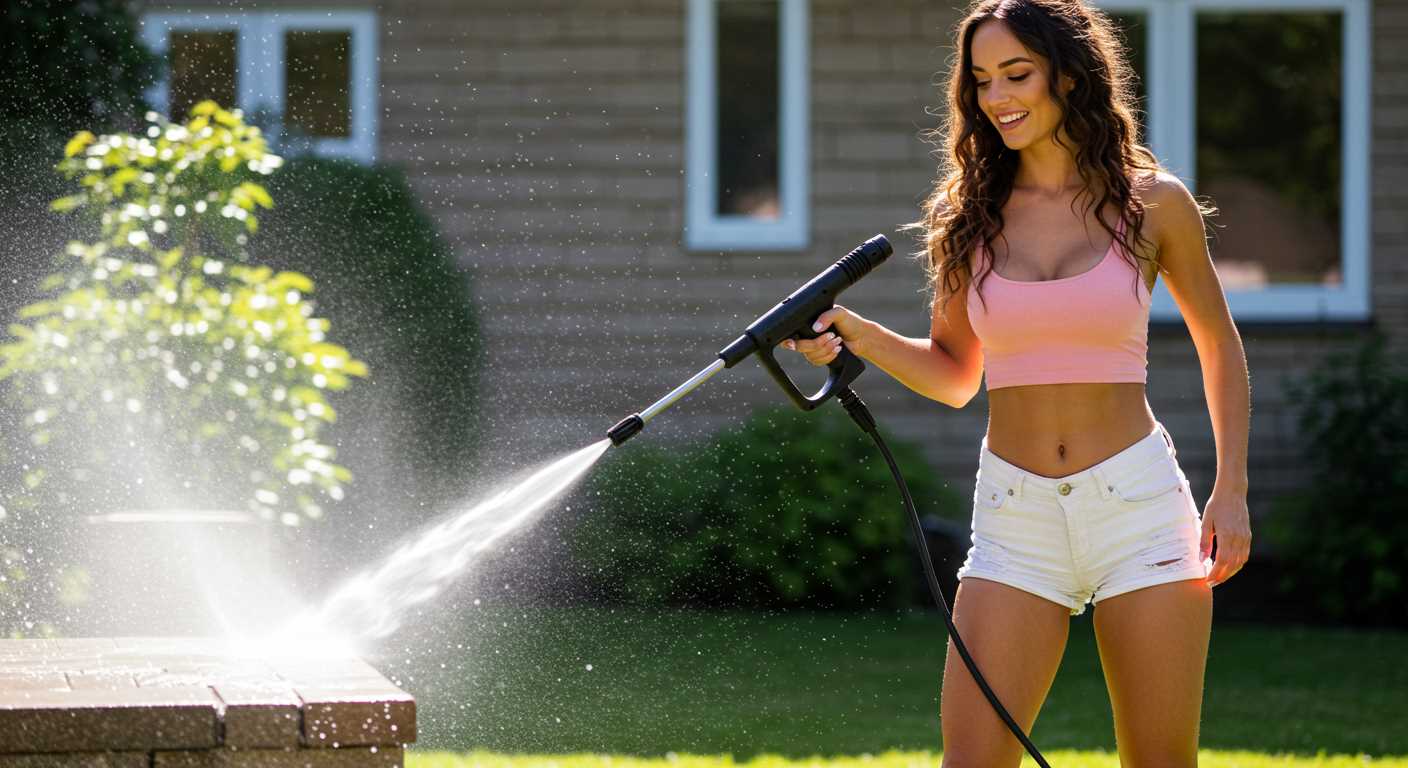
If you’re looking to achieve a spotless finish on your outdoor surfaces, investing in a surface cleaning tool can make a significant difference. During my decade of experience in the cleaning equipment industry, I’ve tested various models and have seen firsthand the outstanding results they deliver. These devices are designed to enhance the cleaning process by providing a consistent and even application of water pressure, making them ideal for large areas.
At the heart of these tools is a rotating arm equipped with multiple nozzles. Each nozzle is strategically positioned to spray water at high velocity, effectively removing grime, dirt, and mildew. This setup not only speeds up cleaning time but also ensures that surfaces are not damaged by uneven pressure, which is a common risk when using a standard nozzle. I remember using one for the first time on a patio; the difference was remarkable. What used to take hours of scrubbing was done in mere minutes.

When selecting a model, consider the size and type of area you plan to clean. Larger nozzles may cover more ground quickly, but they might not reach into tight corners. For instance, I often recommend a unit with adjustable nozzles for versatility. This feature allows you to tailor the cleaning experience based on the specific requirements of your project. After years in this field, I’ve realised that understanding the equipment’s capabilities can lead to significantly better results.
Using this tool effectively also involves maintaining the right distance from the surface being cleaned. Too close, and you risk damaging the material; too far, and the cleaning won’t be effective. A sweet spot is typically around 4-6 inches, but always check the manufacturer’s guidelines for best practices. My first attempt at cleaning a driveway was a lesson in distance control; it took a few tries, but I eventually perfected my technique, resulting in a spotless finish.
Understanding the Mechanics of a Surface Cleaning Tool
For optimal results, focus on the rotational mechanism at play in these attachments. When the device is engaged, water is directed through dual nozzles that spin at high speed. This creates a broad cleaning path, significantly reducing the time spent on arduous tasks. The design allows for even distribution of force, enhancing efficiency across various surfaces.
It’s crucial to select the right nozzle size for your specific needs. Smaller nozzles concentrate pressure, ideal for stubborn stains, while larger ones cover more ground quickly. This versatility is beneficial for tackling diverse materials, from concrete to wood decking.
In my experience, maintaining a consistent distance between the cleaner and the surface is key. Too close, and you risk damaging the material; too far, and you won’t achieve the desired cleanliness. I recommend a distance of around six inches for most surfaces. Adjust as necessary based on your observations.
Always remember to prepare the area before starting. Remove any loose debris and obstacles. This practice not only helps in achieving better results but also prolongs the lifespan of your cleaning gear. I’ve seen too many people skip this step, only to face frustrating delays later on.
Lastly, don’t overlook the importance of routine maintenance for your equipment. Regularly check for clogs in the nozzles and clean them as needed. A little attention goes a long way in ensuring your tools continue to perform at their best. I’ve found that a quick inspection before each use can save hours of headache down the line.
Understanding the Components of a Surface Cleaner
To achieve optimal results, focus on the main parts of a cleaning device. The housing, typically made of durable plastic or metal, protects internal components and ensures longevity. A well-constructed shell resists impacts and weather, making it crucial for outdoor tasks.
Rotating arms are a key feature. They house nozzles that spin at high speeds, delivering concentrated streams of liquid. This action amplifies cleaning power while covering a larger area, which is ideal for patios and driveways. I remember using a model with dual rotating arms; it cut my cleaning time significantly during a large project.
Another important element is the nozzle configuration. Different sizes and angles affect the spray pattern. Opt for adjustable nozzles to tailor the output to various surfaces. I often switch between wide and narrow patterns depending on the level of grime I encounter.
Connecting mechanisms also play a role. Quick-connect fittings allow for easy attachment and detachment from hoses. This simplicity can save you time and effort, especially during extensive cleaning sessions. I once spent a frustrating hour dealing with a stubborn connection; now I always prioritise models with user-friendly fittings.
Lastly, the wheels make maneuverability easier. Ensure your device has sturdy, lockable wheels for stability on uneven ground. I’ve had my fair share of wobbly cleaners, and trust me, a stable base is non-negotiable for effective cleaning.
When selecting a system, consider investing in a pressure washer for drives and patios to complement your cleaner. The right combination will enhance your cleaning efficiency and outcomes.
How Water Pressure Affects Cleaning Performance
For optimal results, the water force must align with the cleaning task at hand. In my experience, varying levels of force can drastically change the effectiveness of cleaning, especially on different surfaces.
Understanding Pressure Levels
Higher water force generally means better cleaning outcomes, but there are nuances:
- Light tasks: For delicate surfaces like painted wood or soft masonry, a force of around 1000-1500 psi is usually sufficient. Too much force can damage these materials.
- Medium tasks: For patios or driveways, 2000-3000 psi is ideal. This range effectively removes dirt and grime without risking surface integrity.
- Heavy tasks: For tough jobs like removing oil stains from concrete, 3000 psi or more may be necessary. This level can penetrate deeply into porous surfaces.
Impact of Nozzle Selection
The nozzle type also plays a vital role in how force is applied. A narrow spray pattern concentrates the force in a smaller area, enhancing cleaning efficiency but requiring caution to avoid damage. In contrast, a wider spray distributes the force, which is gentler but may require more time to achieve the same result.
- Zero-degree nozzle: Produces a concentrated jet, ideal for tough stains but can harm softer materials.
- 15-degree nozzle: Offers a balance, suitable for most surfaces while still being aggressive enough for stubborn dirt.
- 25-degree nozzle: Gentle enough for painted surfaces, reducing the risk of damage.
- 40-degree nozzle: Best for rinsing, providing a soft spray for delicate tasks.
During my time in the field, I often adjusted the force based on surface type and desired outcome. For example, I tackled a grimy driveway that seemed impossible to clean with lower forces. By switching to a higher force setting and a 15-degree nozzle, the results were remarkable, revealing a like-new surface beneath years of buildup.
Ultimately, finding the right balance between water force and nozzle choice is key to achieving great cleaning results. Adjusting these variables can make all the difference and save time and effort in the long run.
The Role of Rotating Nozzles in Surface Cleaning
Rotating nozzles enhance cleaning efficiency by creating a concentrated circular spray pattern. This design allows for deeper penetration into dirt and grime, making them ideal for stubborn stains. In my experience, using a unit equipped with a rotating nozzle significantly reduces the time needed for tough cleaning tasks.
These nozzles typically feature multiple jets that spin at high speed, resulting in a wider coverage area. I recall tackling a particularly grimy driveway; switching to a rotating nozzle transformed the job. Instead of back-and-forth scrubbing, the powerful rotation blasted away the muck with minimal effort. This efficiency is not just a convenience; it also conserves water, as the targeted action means less liquid is needed overall.
Moreover, the adjustable nature of many rotating nozzles allows for versatility. I often recommend units with interchangeable nozzles for different cleaning tasks, as they provide flexibility to adapt to various surfaces, from delicate tiles to rugged concrete.
One thing to keep in mind is maintenance. Regularly checking and cleaning the rotating mechanism ensures optimal performance. Clogged jets can hinder the rotation, which I learned the hard way during a job that turned into a tedious process due to a neglected nozzle. A quick clean restored its impressive power.
In summary, incorporating rotating nozzles into cleaning routines not only amplifies the effectiveness of cleaning tasks but also promotes a more enjoyable experience. The difference is palpable, and I’ve seen firsthand how it can turn a daunting chore into a manageable one, saving both time and effort.
Choosing the Right Surface Cleaner for Various Materials
For optimal results, selecting the appropriate cleaning attachment is key. Different materials require distinct approaches based on their sensitivity and durability. I recall a project where a homeowner wanted to refresh their driveway. The surface was asphalt, and I recommended a model specifically designed for this material. It cleaned effectively without damaging the surface, which can happen with high-intensity tools.
Concrete Surfaces
For concrete, a robust attachment with higher pressure capabilities is ideal. These cleaners typically have multiple rotating jets that can tackle tough stains and grime. I once dealt with a commercial property where years of oil spills had left the concrete unsightly. Using a heavy-duty cleaner helped restore the surface, impressing the property manager. Always check the manufacturer’s guidelines to avoid choosing an incompatible model.
Wood Decks and Fencing
When it comes to wooden surfaces, caution is essential. Opt for a gentle cleaner with adjustable pressure settings. I remember a client who wanted to rejuvenate a weathered deck. By using a low-pressure cleaner designed for wood, I managed to lift grime while preserving the wood’s integrity. A higher pressure could have splintered the boards, leading to costly repairs.
Always consider the material’s age and condition. If a surface is particularly delicate or has not been maintained, a less aggressive approach is advisable. In such cases, a detergent application followed by a gentle clean can yield excellent results without risking damage.

In summary, understanding the material you’re working with and selecting the right cleaning attachment based on that knowledge will significantly enhance your cleaning efficiency and protect the surfaces you’re treating. Remember to assess each project individually for the best outcome.
Preparing Surfaces Before Using a Surface Cleaner
Begin with a thorough inspection of the area to identify any loose debris, dirt, or contaminants that could interfere with the cleaning process. Remove any larger items like furniture, toys, or garden equipment. It’s crucial to clear the space to allow for proper movement and access.
Next, sweep or vacuum the surface to eliminate dust and smaller particles. This step prevents them from being driven into the surface by high-speed jets, which could cause damage. For delicate materials, such as certain types of wood or concrete, consider using a soft-bristled broom to avoid scratches.
Pre-Treatment for Stains
If you encounter stubborn stains, pre-treat them with an appropriate cleaning solution. For oil or grease stains, a degreaser can be effective. Make sure to follow the product instructions carefully. Allow the solution to sit for a few minutes before proceeding with the cleaning equipment.
For specific materials like leather, refer to a detailed guide such as the how to clean leather ultimate guide for leather cleaning. This will ensure that you use the right techniques and products to avoid any damage.
Safety Measures
Always wear protective gear, including gloves and goggles, to shield yourself from any flying debris or cleaning chemicals. Be aware of your surroundings, especially if working near windows or delicate plants. Ensure that the area is clear of pets and children to prevent accidents.
Common Mistakes When Using a Surface Cleaner
One frequent error is rushing the cleaning process. Many users think that moving quickly will yield better results, but in reality, maintaining a steady pace allows the rotating nozzles to effectively eliminate grime and stains. Slow down to ensure thorough cleaning.
Using the wrong nozzle size is another typical oversight. Each attachment is designed for specific tasks. A nozzle that is too wide might not provide enough pressure for detailed spots, while a narrower one could cause damage to softer surfaces. Always check compatibility before starting.
Another common mistake is neglecting to clear the area of debris and obstacles. I’ve had my fair share of mishaps with rocks and branches. They can not only hinder your progress but also pose safety risks. Inspect the area beforehand to avoid unexpected interruptions.
Overlapping cleaning passes often leads to streaks and uneven results. I’ve seen many users go back and forth without realising that consistent coverage is key. Aim for overlapping only slightly, ensuring that each section is adequately addressed without redundancy.
Ignoring the manufacturer’s guidelines can lead to equipment damage. I remember a time when I attempted a cleaning job without referring to the specifications. It resulted in a malfunction that set me back several hours. Always read the manual for recommended practices and maintenance tips.
Lastly, some people underestimate the importance of the right cleaning solution. Not all detergents are suitable for every type of surface. I’ve wasted time using a powerful cleaner on a delicate surface, which resulted in more harm than good. Choose the right agent based on the material and the type of stains you’re dealing with.
| Mistake | Description | Consequence |
|---|---|---|
| Rushing the Process | Cleaning too quickly | Incomplete removal of dirt |
| Wrong Nozzle Size | Using an incompatible attachment | Surface damage or ineffective cleaning |
| Neglecting Area Clearance | Not removing debris before cleaning | Safety hazards and interrupted workflow |
| Overlapping Passes | Cleaning the same area too much | Streaks and uneven results |
| Ignoring Guidelines | Not following manufacturer instructions | Potential equipment damage |
| Wrong Cleaning Solution | Using inappropriate detergents | Surface harm and ineffective results |
Maintenance Tips for Longevity of Surface Cleaners
Regularly inspect the unit for any signs of wear or damage. I remember once overlooking a small crack in the casing, which eventually led to a more significant malfunction. Catching these issues early can save time and money in the long run.
After each use, rinse the cleaner thoroughly with clean water. This simple step prevents debris and cleaning agents from clogging the nozzles and other components. I’ve seen units rendered ineffective simply because they weren’t rinsed properly after a heavy-duty job.
Storage Practices
Store in a dry, cool place to prevent rust and corrosion. During winter months, I keep mine in a heated garage, as extreme cold can damage seals and gaskets. Covering the unit with a protective cloth can also keep dust and grime at bay.
Routine Maintenance Checks
Regularly check the rotating nozzles for blockages or damage. A friend of mine neglected this and ended up with uneven cleaning results. A simple inspection can keep the performance consistent. Additionally, lubricating moving parts according to the manufacturer’s guidelines ensures smooth operation and extends the lifespan of the equipment.
Comparing Surface Cleaners to Traditional Pressure Washing Methods
Using a rotating attachment significantly enhances cleaning efficiency compared to standard nozzles. I recall a job involving a large concrete driveway that had accumulated years of grime. With a conventional nozzle, it took hours to cover the area, but switching to a rotary tool cut the time in half while delivering a uniform finish.
Speed and Effectiveness
The difference in time taken is substantial. A rotary attachment allows for multiple jets to clean simultaneously, while traditional methods rely on a single stream. This means:
- Reduced cleaning time, which is beneficial for larger areas.
- Less fatigue during extended use, as the effort is distributed across a wider surface.
- Fewer passes required to achieve the desired cleanliness.
Surface Damage Considerations
When tackling delicate surfaces, the choice of cleaning method is crucial. I’ve seen traditional nozzles cause etching on softer materials like wood or certain types of masonry. In contrast, a rotary attachment, when used correctly, tends to distribute pressure more evenly, reducing the risk of damage. Here’s what to keep in mind:
- Always test on an inconspicuous area first.
- Adjust the pressure settings to match the material type.
- Use appropriate attachments for specific surfaces to prevent wear.
In my experience, while traditional methods can still be effective for smaller jobs, rotary attachments provide a more versatile approach for a range of cleaning tasks. Embracing this technology not only saves time but enhances the quality of the results. Whether it’s a patio, driveway, or wooden deck, choosing the right tool can make all the difference.
.jpg)
.jpg)


