


For those looking to enhance their cleaning experience, setting the right output level on your cleaning machine is key. I recall my early days in the industry when I first encountered the frustration of an inadequate spray. It was a learning moment; I quickly realised that the nozzle selection and the adjustments on the machine itself could drastically change results. Use a nozzle with a smaller opening for a more concentrated stream, perfect for tough stains, or switch to a wider nozzle for broader coverage on less stubborn areas.
Another crucial factor is the flow rate. Many overlook the simple task of checking the inlet settings. Ensuring that the water supply is sufficient can dramatically influence performance. I once worked with a unit that was struggling due to a partially blocked hose. Cleaning it out not only improved the flow but also saved time on the job. Regular maintenance of hoses and connections can prevent these pitfalls.

Lastly, don’t neglect the importance of a proper power source. The energy level supplied to your device can make a world of difference. I often encountered situations where units would underperform simply because they weren’t plugged into an adequate outlet. Always verify that the voltage matches the specifications provided in the manual to avoid any issues. Combining these elements can lead to a significant improvement in the overall effectiveness of your cleaning sessions.
Adjusting the Output of Your Honda Cleaning Equipment
Begin with the nozzle selection based on the task at hand. A narrow nozzle will increase the intensity while a wider one decreases it. For instance, when tackling stubborn dirt, a 0-degree nozzle works wonders, but for gentle cleaning, a 25-degree may serve you better.
Steps to Modify the Flow Rate
- Locate the control knob, typically situated on the unit. This dial is your primary means of modifying the flow.
- Turn the knob clockwise to elevate the output. A few turns can significantly enhance the force.
- Test the output by pulling the trigger. Keep an eye on the spray pattern; it should match your requirements.
- If necessary, make further adjustments until you achieve the desired effect.
Tips for Optimal Performance
- Regularly check for clogs in the nozzle, as this can impede performance.
- Make sure to maintain the equipment; clean filters and hoses contribute to better functionality.
- Be mindful of the surface you’re working on; different materials require varying intensities for effective cleaning.
- Always test on a small area first, especially with delicate surfaces, to avoid damage.
In my experience, taking the time to fine-tune the output can save you from frustration and lead to outstanding results. Always approach each cleaning task with the right setup and knowledge, and you’ll find the process much more enjoyable.
Understanding Pressure Washer Components
Familiarity with the inner workings of your cleaning machine can significantly enhance its operation. Each component plays a crucial role in delivering the desired performance. Here’s a breakdown of the primary parts to consider.
Key Components
| Component | Description |
|---|---|
| Motor | Drives the pump, converting electrical energy into mechanical energy, impacting overall efficiency. |
| Pump | Generates the force needed to propel water through the nozzle, varies in type and capability. |
| Nozzle | Determines the spray pattern and intensity, affecting how effectively dirt is removed. |
| Hose | Transfers water from the machine to the nozzle, varying in length and durability. |
| Trigger Gun | Controls water flow, allowing for precise application during cleaning tasks. |
Maintaining Components
Regular maintenance is paramount. After each use, check hoses for leaks and ensure fittings are tight. Keeping the motor clean will prolong its life, while inspecting the nozzle for clogs can prevent performance issues. I recall a time when a simple cleaning of the nozzle saved me from a frustrating day of ineffective washing. Understanding these parts allows for better troubleshooting and prolongs the lifespan of your equipment.
Identifying the Pressure Adjustment Knob

Look closely at the unit. The control for modifying the intensity is typically a prominent dial or knob located near the handle or on the front panel. It’s usually labelled with terms indicating flow rates or intensity settings. This design makes it accessible for quick modifications during operation.
Visual Cues
Often, the knob features colour coding or markings, which can guide you to the appropriate setting for your task. For instance, a green zone might indicate low intensity for delicate surfaces, while red could signify high intensity for tougher jobs.
Operational Insight
In my experience, if you turn the knob clockwise, it usually increases the flow, while counterclockwise decreases it. Make sure to test different settings on a small, inconspicuous area first, as excessive force can damage certain materials. Over the years, I’ve seen many users overlook this crucial step and end up with unintended results.
Always remember to consult the user manual specific to your model for the most accurate guidance. Each unit may have unique features that can affect operation. Familiarising yourself with these details will enhance your overall experience.
Checking the Current Pressure Settings
Begin by connecting your device to a water supply and starting the engine. Once it’s running, observe the gauge on the unit to see the current output. This reading indicates the level of force being applied through the nozzle. Knowing this information helps determine if any modifications are needed for your tasks.
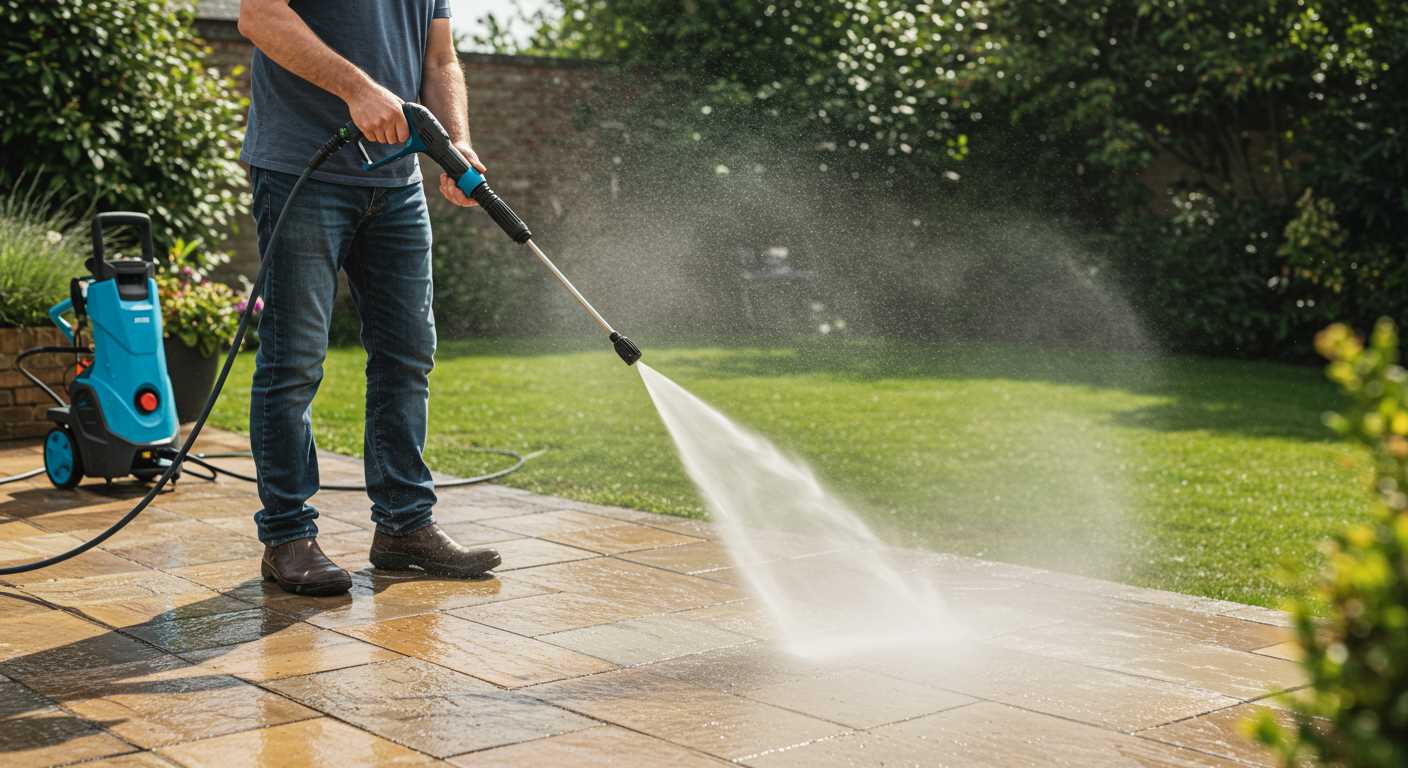
Using the Nozzle to Test Output
Switch to different nozzles to evaluate how the intensity changes. Each nozzle has a specific spray angle and force. For instance, a narrow nozzle will provide a concentrated stream, while a wider one disperses the water more. Testing each nozzle gives you insight into which settings might require an upgrade or reduction based on the surface you’re cleaning.
Assessing Cleaning Effectiveness
After testing, check the results on the surface you’re working on. If the cleaning doesn’t meet your expectations, revisit the readings and experiment with various configurations. Sometimes, a slight modification can lead to significant improvements in performance. Similarly, just like maintaining optimal conditions for your aquarium, like understanding how to clean a freshwater fish tank, requires fine-tuning, so does achieving the best output from your equipment.
Adjusting the Pressure for Different Tasks
For effective cleaning, tailoring the intensity of the water stream is key. Each task demands a different level of force. For instance, when tackling stubborn grime on concrete surfaces, a higher setting around 3000 PSI can be effective. However, for washing vehicles, dial it down to around 1500-2000 PSI to avoid damaging the paintwork.
Recommended Settings for Common Tasks
| Task | Recommended PSI |
|---|---|
| Concrete Driveways | 3000-4000 PSI |
| Wood Decks | 1200-1500 PSI |
| Cars and Motorcycles | 1500-2000 PSI |
| Patios and Outdoor Furniture | 2000-2500 PSI |
| House Siding | 1500-3000 PSI |
Tips for Specific Jobs
When cleaning delicate surfaces like wood, using a wider spray nozzle can help distribute the force evenly, preventing damage. I’ve learned through experience that alternating between nozzles can yield better results. For example, I often use a 25-degree nozzle for vehicles, which allows for a good balance of cleaning power without risking scratches.
For heavy-duty tasks like removing paint or heavy mildew, using the maximum setting with a turbo nozzle can save time and effort. Just be cautious and test a small area first to confirm it won’t cause any unwanted effects.
Always keep in mind the material you’re working with and adjust accordingly. This way, you not only achieve a cleaner surface but also extend the life of the items being cleaned.
Testing the Pressure After Adjustment
After completing the modifications to the force output, it’s vital to evaluate the results effectively. Here’s how to confirm your changes have made a difference.
Using a Pressure Gauge
One of the most reliable methods is to utilise a manometer. Here’s the process:
- Attach the gauge to the outlet of the unit securely.
- Start the engine and allow it to reach its operational speed.
- Observe the reading on the gauge. It should reflect the desired force level you aimed for during the adjustments.
Performing a Test Clean
Another effective way to assess the modifications is by conducting a practical cleaning task:
- Select a typical surface or object you frequently clean.
- Use the nozzle type that matches the task at hand.
- Initiate the cleaning process and observe the efficiency of the equipment. A well-tuned machine will remove dirt and stains with ease.
Pay attention to the spray pattern and the cleaning speed. If the force is too low, you may notice streaks or residual grime. Conversely, excessive force can cause damage to delicate surfaces.
After these tests, if the output still doesn’t meet expectations, recheck the modifications made. Sometimes, minor tweaks to the settings can yield significant improvements. Trust your observations; they’re as valuable as any gauge reading.
Troubleshooting Common Pressure Issues
Loss of output force can stem from various sources. Start by inspecting the water inlet for blockages. Debris or mineral build-up can significantly hinder flow. Clear any obstructions, and ensure the hose isn’t kinked or damaged. A quick rinse of the inlet filter can often resolve this issue.
Examining the Nozzle
Check the nozzle size and condition. A worn or incorrect nozzle can lead to a weak stream. Switching to a different nozzle size tailored for your task can restore the intended performance. Always clean the nozzle or replace it if it shows signs of wear or clogging.
Inspecting the Pump and Hoses
Regularly inspect the pump for leaks or signs of wear. A faulty pump may struggle to maintain adequate force. If leaks are detected, replacing seals or gaskets might be necessary. Additionally, examine all hoses for leaks. Even a small crack can lead to significant drops in output, so replace any compromised sections immediately.
Maintaining Optimal Pressure Levels
To ensure your cleaning device operates efficiently, regularly monitor and maintain ideal force levels tailored to specific tasks. A few simple practices can significantly enhance performance and longevity.
- Routine Checks: Inspect the device before each use. Look for wear and tear, especially in hoses and connections, which can lead to leaks and inconsistent performance.
- Cleaning Filters: Clean or replace filters as needed to prevent blockages that can alter performance. A clogged filter can restrict flow, affecting the overall effectiveness of your equipment.
- Use Appropriate Nozzles: Selecting the right nozzle for your task can greatly influence the outcome. For delicate surfaces, opt for a wider spray angle, while tougher surfaces might require a more focused jet.
- Monitor Water Supply: Ensure a steady and adequate water supply. Insufficient water can cause the device to work harder, leading to potential damage and reduced efficiency.
After any adjustments, it’s wise to run a quick test to confirm everything is operating smoothly. This is also a good time to check for any unexpected issues. If you encounter problems, such as your unit refusing to start, further troubleshooting may be necessary. For guidance, refer to this resource on troubleshooting starting issues.
Engaging in these practices not only optimises performance but also prolongs the life of your equipment. Staying proactive in maintenance can save you from costly repairs down the line.
Using Nozzles to Influence Pressure
Choosing the right nozzle is crucial for achieving desired outcomes with your cleaning equipment. Each nozzle delivers a different spray pattern and force, allowing you to tailor your approach to various tasks. For instance, a zero-degree nozzle provides a concentrated stream, ideal for tough stains on concrete, while a wider 40-degree nozzle disperses water over a larger area, making it perfect for rinsing surfaces without risking damage.
Understanding Spray Patterns
During my time in the industry, I learned that not all nozzles are created equal. The colour coding of nozzles–typically red, yellow, green, and white–indicates their spray angle and intensity. A red nozzle, which has a narrow angle, can strip paint but should be handled with care to avoid surface damage. On the other hand, a green nozzle offers a balance between power and coverage, making it versatile for most cleaning applications.
Swapping Nozzles for Optimal Results
Switching nozzles is simple and can significantly impact your cleaning efficiency. I recall a project where I had to clean an old wooden deck. Initially, I used the yellow nozzle and struggled with stubborn grime. After realising the wood could withstand a gentler touch, I switched to the green nozzle, which effectively lifted the dirt without risking splintering the surface. This experience reinforced how crucial it is to match the nozzle to the material and job at hand.
Consulting the User Manual for Specific Models
Referencing the user manual is paramount for tailored adjustments. Each model has unique specifications that dictate how alterations should be made. I recall encountering a particular machine where the manual provided insight into a hidden setting that drastically improved its performance. Skipping this resource often leads to trial and error, which can be frustrating and time-consuming.
Always check for the section dedicated to settings and adjustments. Manufacturers often detail the recommended parameters for various tasks, which can save you a significant amount of hassle. I once had a client who was struggling with their unit, only to discover that the manual indicated a simple switch that needed to be flipped to optimise functionality.
Pay attention to diagrams and illustrations within the document. These visual aids can clarify the location of components and adjustments, making the process easier. I remember helping a friend who misinterpreted a diagram, thinking a component was for another purpose entirely. Once he followed the manual correctly, his efficiency skyrocketed.
Don’t overlook maintenance guidelines either. The manual often includes tips on upkeep that directly influence performance. I’ve seen machines that were inadequately maintained yield unsatisfactory results, simply because the owner neglected to follow the scheduled maintenance outlined in the manual.
Lastly, if you’re ever in doubt, reaching out to the manufacturer’s support can provide clarity. They can offer insights that might not be included in the manual. I had a situation where a customer was unsure about settings for a specific task. A quick call to the manufacturer revealed expert advice that turned their experience around completely.


.jpg)


