


To maximise the performance of your cleaning device, start with the nozzle selection. Using a nozzle that matches the task at hand is crucial. For heavy-duty jobs, a narrow spray angle is best, while a wider angle works well for lighter cleaning. This simple switch can significantly influence the force of the water stream, making your cleaning efforts more efficient.
Next, examine the water supply. Ensure that the inlet has a strong and steady flow. A weak water source can lead to a decrease in output, causing the machine to struggle. I once encountered this issue during a backyard project; a quick check revealed a kinked hose that was restricting water flow. Once addressed, my equipment operated flawlessly.
Don’t overlook the importance of maintaining the unit. Regularly clean or replace filters to prevent clogs that can hinder performance. I’ve seen firsthand how a clean filter can restore a unit’s power, making it feel like a brand-new machine. It’s a small maintenance step that pays off in the long run.
Lastly, always refer to the manufacturer’s guidelines. Each model has specific recommendations for optimal operation. During my years in the industry, I found that following these guidelines not only enhances efficiency but also prolongs the life of the equipment. Trust me, a little attention to detail goes a long way.
Adjusting Output on Your Cleaning Unit

Begin by locating the adjustable nozzle on the lance. This is typically at the end of the spray gun. Turn it to switch between different spray patterns, which can help modify the flow. For a more concentrated jet, twist it to the narrow setting; for a wider spray, choose the broader option.
Modifying the Flow Rate
Next, examine the control dial on the unit itself. Depending on the model, this dial may be marked with various symbols indicating different intensity levels. Turning the dial clockwise usually increases the stream’s intensity, while counterclockwise decreases it. Adjust the setting until you achieve the desired output for your cleaning task.
Using Accessories for Further Control
Utilise different nozzles or attachments that come with your unit. These accessories are designed for specific applications and can greatly influence the effectiveness of your cleaning efforts. For instance, a turbo nozzle can amplify force for tough stains, while a detergent nozzle allows for the application of cleaning solutions. Experiment with these tools to see what works best for your project.
Understanding Pressure Settings on Ryobi Models
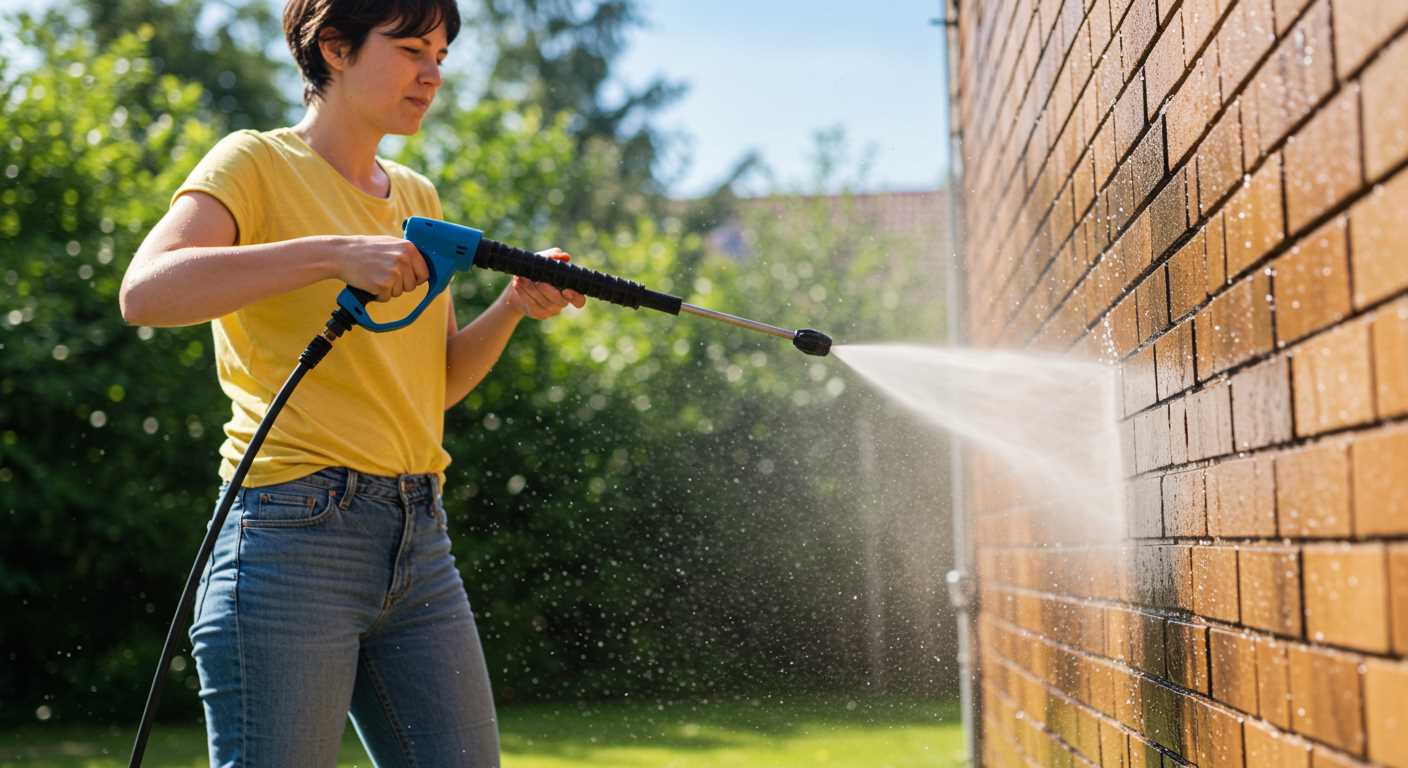
For optimal cleaning, it’s important to grasp the various settings available on your Ryobi machine. Each model typically features multiple nozzles or lance options, allowing for tailored performance based on the task at hand. For instance, a 15-degree nozzle is ideal for tackling tough stains on concrete, while a 40-degree option is better suited for delicate surfaces like wood or vehicles.

During my time testing these machines, I found that matching the correct nozzle to the surface not only enhances cleaning efficiency but also prevents potential damage. The adjustable features on some models allow you to fine-tune the output. If your unit has a variable pressure dial, experimenting with different levels can yield surprising results, especially on stubborn grime.
When considering the right model, it’s worth checking out reviews and comparisons, such as those found in the best electric pressure washers guide. This can provide insights into which units offer the most versatility and reliability for various cleaning tasks.
Lastly, don’t forget to review your user manual. It often contains specific information tailored to your unit’s capabilities and recommendations for optimal use. Understanding these settings can make a significant difference in achieving the best results for your cleaning projects.
Locating the Pressure Adjustment Dial
For those unfamiliar, the dial for modifying the intensity of the stream is often situated on the front panel of your unit, close to the handle. In many cases, it resembles a round knob that can be easily turned clockwise or counterclockwise to enhance or reduce the force of the water flow. Sometimes, it’s marked with clear indicators or numbers to guide you in selecting the desired setting.
Visual Identification
Upon closer inspection, you might find that the dial is typically coloured differently than the surrounding components, making it easier to spot. If you’re having trouble, refer to the user manual; it contains a diagram that highlights its exact location. During my years working with various models, I often helped customers locate this dial, and I found that once they did, they felt much more confident in operating their equipment.
Practical Tips
Before making any adjustments, ensure the machine is powered off to avoid any accidental activation. It’s also wise to check the nozzle type you’re using, as different nozzles can affect the overall experience. A good practice is to adjust the dial incrementally while observing the changes in the stream. This approach allows for fine-tuning based on the task at hand, whether it’s cleaning a patio or washing a vehicle.
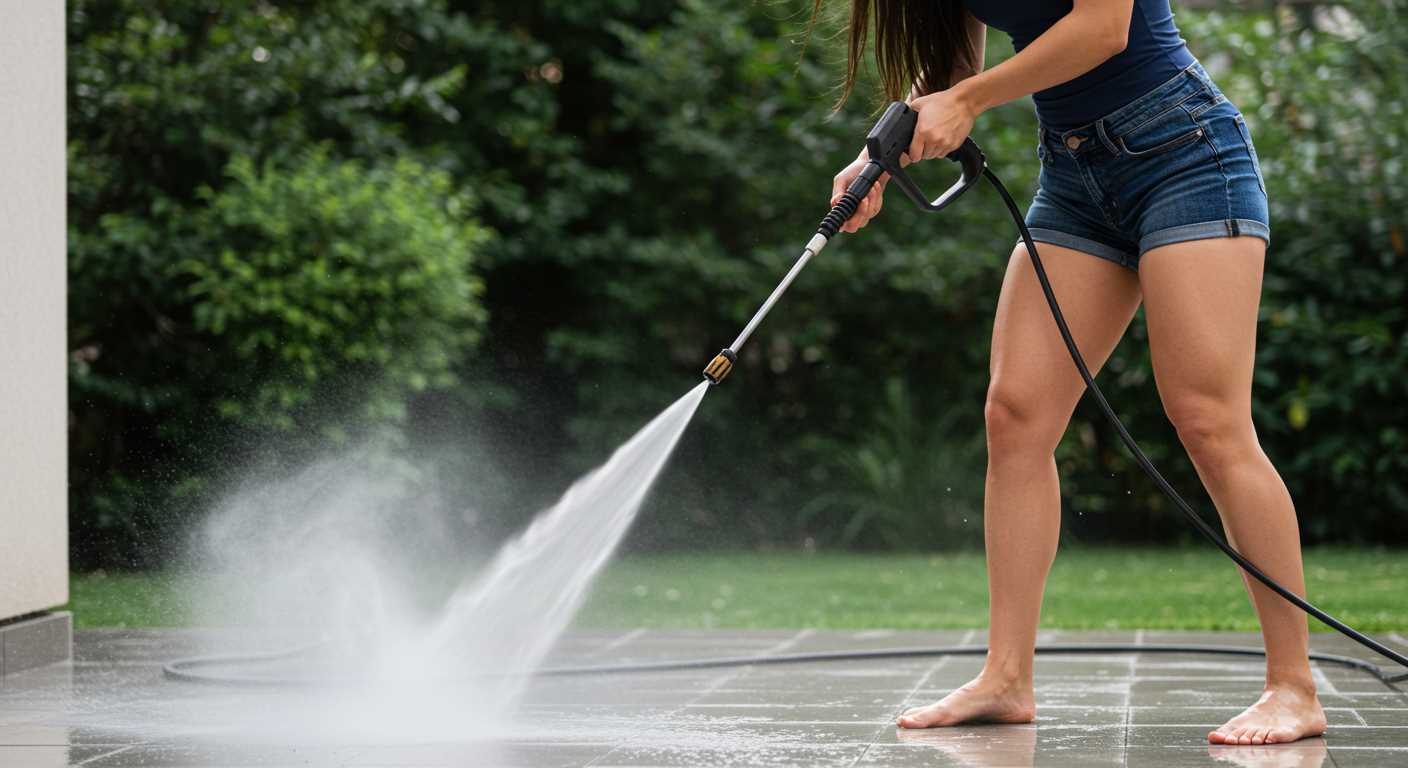
Adjusting Pressure for Different Cleaning Tasks
For a variety of cleaning jobs, selecting the right force can make all the difference. I’ve tackled everything from a greasy driveway to delicate garden furniture, and each task required a unique approach. Here’s a breakdown of how to determine the most suitable setting based on the surface and grime you’re dealing with.
| Cleaning Task | Recommended Setting (PSI) | Tips |
|---|---|---|
| Concrete Driveway | 2500 – 3000 | Use a narrow nozzle for best results. |
| Wood Deck | 500 – 1500 | Opt for a fan spray to avoid damaging the wood. |
| Outdoor Furniture | 1000 – 1500 | Keep a distance of at least 2 feet to prevent chipping. |
| Vehicles | 1200 – 1900 | Use a soap nozzle for pre-soaking, then rinse with a wider spray. |
| Windows | 1000 – 1200 | A circular motion helps avoid streaks. |
| Brick or Stone Walls | 2000 – 2500 | Adjust the angle to avoid forcing water behind the bricks. |
In my experience, starting with a lower setting is wise. You can always increase the force if needed, but starting too high can damage surfaces and create unnecessary mess. Always test a small area first to ensure compatibility with the material.
Lastly, remember that using the right nozzle is equally crucial. Switching between nozzles allows for better control over the flow and concentration of the stream, tailored to each job at hand. This combination of force and nozzle selection can significantly enhance your cleaning efficiency and outcomes.
Identifying the Right Nozzle for Desired Pressure
Choosing the correct nozzle is vital for achieving optimal cleaning results. Each nozzle type delivers a different spray pattern and intensity, allowing you to tailor the output to your specific task.
- 0-degree nozzle: Produces a concentrated, pinpoint stream, perfect for stubborn stains on hard surfaces like concrete. Use it cautiously to avoid damage.
- 15-degree nozzle: Offers a narrow spray that effectively removes grime from tough surfaces, such as brick and stone. Ideal for outdoor cleaning projects.
- 25-degree nozzle: This wider spray is suitable for general cleaning tasks, such as washing vehicles or siding. It balances pressure and area coverage.
- 40-degree nozzle: Provides a gentle mist, perfect for delicate surfaces like windows or painted materials. Great for rinsing without causing damage.
- Soap nozzle: Designed specifically for applying soap or detergent, this nozzle mixes cleaning solutions with water for better penetration of dirt.
When I first started using high-pressure cleaning equipment, I made the mistake of using the wrong nozzle for various jobs. For instance, using the 0-degree nozzle on my car left some minor scratches. Understanding the appropriate nozzle makes a huge difference in outcomes.
Always assess the surface type and the level of dirt before selecting your nozzle. Keep a variety of nozzles on hand for versatility in cleaning tasks. Switching nozzles is usually quick, so it’s worth the effort to achieve the desired result effectively.
In my experience, having the right nozzle can save significant time and effort while ensuring surfaces remain undamaged. Test different nozzles on less visible areas first to gauge their effectiveness and adjust your approach accordingly.
Testing Adjustments with Water Flow
To effectively evaluate modifications made to your machine, run a simple test using water flow. This method allows you to observe changes in real-time, ensuring your settings meet the required cleaning needs.
Initial Setup for Testing
Follow these steps to prepare for the test:
- Connect the garden hose securely to the inlet of the machine.
- Attach the appropriate nozzle based on the task at hand.
- Ensure the water supply is turned on fully to avoid interruptions.
Conducting the Water Flow Test
Once set up, proceed as follows:
- Start the unit and observe the water flow from the nozzle.
- Make incremental changes to the adjustment dial while watching the spray pattern.
- Note how the flow rate and intensity of the spray alter with each modification.
For light tasks, such as washing cars or garden furniture, a gentle flow should suffice. For tougher jobs like cleaning patios or driveways, a stronger, more focused stream is required. Adjust accordingly until you achieve the desired effect.
Remember, the goal is to find a balance that allows for thorough cleaning without damaging the surface. After testing, always revert to your preferred setting for regular use, ensuring consistent performance for your cleaning tasks.
Common Issues When Adjusting Pressure
Inconsistent water flow is a frequent challenge. If the stream fluctuates while you’re trying to alter settings, check for blockages in the nozzle or hoses. A clogged nozzle can significantly impact performance, so ensure it’s clean and free from debris.
Another issue I’ve encountered is the machine not responding to changes in settings. This can happen if the adjustment dial is stuck or malfunctioning. Regular maintenance can prevent this; lubricating the dial can keep it operating smoothly. If it remains unresponsive, consult the user manual for troubleshooting steps or consider contacting customer support.
Using the wrong cleaning attachment can lead to unsatisfactory results. Each nozzle has a specific purpose, and using one meant for a lower intensity can result in poor cleaning performance. Always match the nozzle to your intended task to achieve optimal outcomes.
Watch out for leaks in the hoses or connections, which can lead to reduced force. Conduct a thorough inspection of all hoses and fittings before starting your work. If you discover any leaks, replace the damaged part to restore efficiency.
Also, be mindful of the water source. If you’re drawing from a tank rather than a direct supply, ensure that the water level is sufficient. Low water levels can cause the machine to struggle, affecting performance. If you’re cleaning vehicles, consider using a quality car shampoo to use with pressure washer for better results.
Finally, temperature can play a role. If the water is too cold, it may not clean effectively. Conversely, extremely hot water can damage certain components. Always refer to the manufacturer’s recommendations for the suitable water temperature.
Safety Precautions While Adjusting Pressure
Always disconnect the power source before starting any modifications. This simple step can prevent accidental activation, which is crucial when you’re tinkering with settings. Ensure the unit is cooled down, as components can retain heat even after use, posing a burn risk.
Protective Gear is a Must
Wearing safety goggles is non-negotiable. Water jets can travel at incredibly high velocities, and even a small stone can become a dangerous projectile. Gloves are also advisable to prevent any potential skin irritation from cleaning agents or water at high temperatures.
Check Your Surroundings
Always inspect the area for hazards. Clear away any debris or obstacles that could cause slips or trips. Ensure that bystanders, particularly children and pets, are at a safe distance. A clear workspace not only enhances safety but also makes the task more manageable.
Maintaining Your Pressure Washer for Optimal Performance
Regular upkeep of your cleaning equipment significantly enhances its longevity and efficiency. I’ve found that dedicating a few minutes after each use can save hours of frustration later. For instance, always flush the machine with clean water post-usage to remove detergent residue and dirt. This simple step prevents clogs and keeps components in top shape.
Routine Checks
Inspect hoses and connections frequently for wear and tear. A small crack can lead to leaks and decreased performance. Ensure all fittings are tight and secure to avoid any loss of flow. I remember a time when I neglected a minor hose issue, and it cost me a good chunk of time and effort during a cleaning job.
Storage Tips
Store your unit in a dry, sheltered location. Extreme temperatures can damage internal components. If you’re not using it for a while, consider draining the fuel and running the engine until it stalls to prevent fuel degradation. This practice has saved many of my clients from starting problems during their next cleaning session.
.jpg)
.jpg)


