
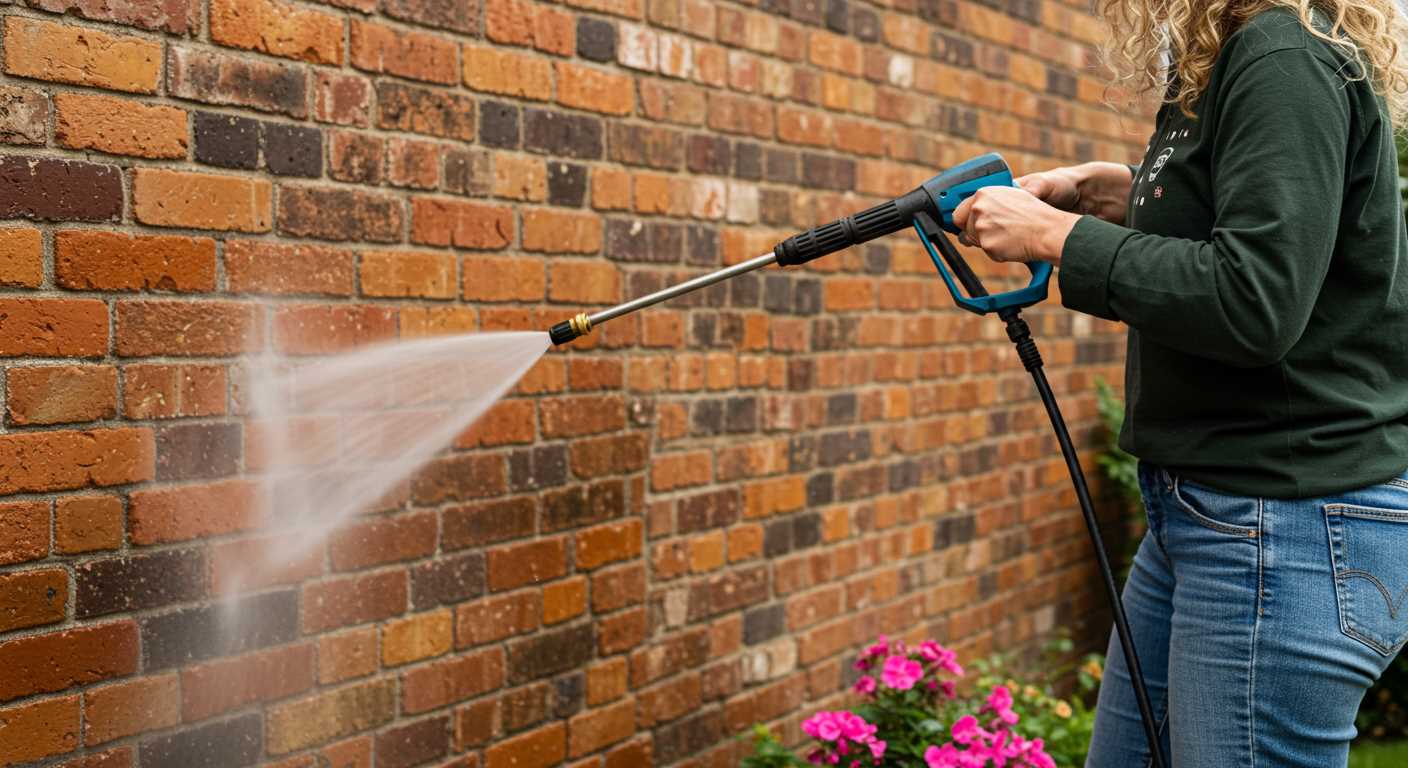


For seamless operation, ensure that your attachment fits securely to the connector of your cleaning device. Align the metal fitting with the corresponding inlet, pushing it gently until you hear a click, indicating a proper lock. This simple step guarantees that water flows efficiently, avoiding leaks that could disrupt your cleaning tasks.
From my years of experience, I’ve found that using a little lubrication on the rubber O-ring can prevent wear and tear, extending the life of both the accessory and the machine. A few drops of silicone lubricant will reduce friction and help create a tight seal, making your setup more reliable. Always check the O-ring for any signs of damage before every use; a small crack can lead to frustrating leaks.

After connecting, turn on the device briefly to test for any leaks. If you notice water escaping, disconnect and recheck the connection. I recall a time when I overlooked this step, resulting in a messy workspace and wasted time. A quick inspection can save you from those pitfalls and keep your equipment in top condition.
Connecting Your Equipment to the Paxcess Cleaner
Ensure a secure connection by following these simple steps:
- Inspect the attachment points on your unit and the connector end of your tubing. Make sure there are no obstructions or debris.
- Align the connector with the inlet on your machine. It should fit snugly; if not, check for any damage.
- Firmly push the connector into the inlet. You should hear a click that indicates it’s locked in place.
- To release, press the release button on the connector while gently pulling it away from the inlet.
- Once connected, turn on the water supply to check for any leaks. If you notice any, recheck the connection.
Using the right equipment enhances your cleaning experience. For further insights into portable options, check out the best portable pressure washers.
Identifying the Correct Hose Type for Your Paxcess Pressure Washer
Choosing the right pipe for your cleaning device is crucial for optimal performance. In my experience, the first step is to check the specifications provided by the manufacturer. Look for the diameter and length requirements, which are often listed in the user manual. Typically, a diameter of 1/4 inch is standard, but some models may require a larger size for high flow rates.
Next, consider the material. Reinforced thermoplastic is common and offers durability without compromising flexibility. I’ve had great success with those that resist kinking, as it can be quite frustrating when working in tight spaces. A rubber option might provide added resilience, especially if you’re working in environments with extreme temperatures.
Compatibility is another key factor. Ensure that the end fittings match the connectors on your equipment. Mismatched fittings can lead to leaks and reduced performance. If you’re unsure, take the old pipe to a hardware store to find an exact match.
| Feature | Recommendation |
|---|---|
| Diameter | 1/4 inch (check your model) |
| Material | Reinforced thermoplastic or rubber |
| Length | Choose based on your working area (typically 25-50 feet) |
| Fittings | Ensure compatibility with your connectors |
Lastly, I recommend checking online reviews and forums specific to your brand. Insights from other users can provide hints on which types work best and any potential issues you might face with certain options. I once wasted time on a model that looked good but ended up being incompatible due to a minor fitting difference. Avoid that hassle by doing your research.
Gathering Necessary Tools and Accessories for Assembly
Before diving into the setup process, ensure you have all the tools and accessories at your fingertips. This will streamline your experience and help avoid any interruptions. Here’s a list of what you’ll need:
Tools Required

- A pair of adjustable wrenches: These will help you secure fittings without damaging them.
- Flathead and Phillips screwdrivers: Useful for any small adjustments or securing components.
- Teflon tape: This ensures a watertight seal on threaded connections, preventing leaks.
Accessories to Consider
- Extra nozzles: Different tasks require different spray patterns, so having a selection on hand is beneficial.
- Extension wand: If you need to reach high or distant areas, an extension wand will be invaluable.
- Protective gear: Safety goggles and gloves should always be worn to protect against splashes and debris.
From my experience, having everything ready not only saves time but also enhances the overall efficiency of the setup process. I once started without checking my tools, which led to a frustrating delay. Now, I always ensure my workspace is organised and well-equipped before I get to work.
Once you have gathered your tools and accessories, you’ll be well-prepared to connect everything seamlessly. Happy cleaning!
Preparing the Cleaner for Hose Connection
Ensure the unit is on a stable, level surface to prevent any tipping during operation. Disconnect from any power source to eliminate risks while setting things up. Inspect the inlet port where the water supply will connect; it should be free of debris for optimal performance.
Before attaching the water supply line, check the fittings for damage. Any wear can lead to leaks, so replace if needed. Make sure your water supply is adequate; typically, a minimum flow rate of 5 litres per minute is required. This ensures that the equipment functions correctly without overheating.
Adjust the pressure settings to the lowest level initially. This precaution helps prevent any accidental splashing or damage when you start the connection process. Also, ensure that any additional accessories, such as nozzles or extensions, are compatible with your unit. This attention to detail can save you time and frustration down the line.
Lastly, have a clean bucket or container on hand to catch any residual water that may escape during the connection. This small step keeps your workspace tidy and prevents any unnecessary slipping hazards. With everything in place, you’re ready to proceed with connecting the water supply line efficiently.
Attaching the Hose to the Water Inlet of the Pressure Washer
Ensure the water supply is turned off before you begin. Connect the end of your water supply pipe to the inlet on the unit. Make sure the connection is firm yet not overtightened. A snug fit is all that’s required to prevent leaks.

Securing the Connection
After positioning the connector, it’s beneficial to use a wrench to tighten the fitting slightly. Be cautious; overtightening can damage the threads. In my experience, a light turn with a wrench does the trick. Always check for any leaks after making the connection.
Final Checks
Before starting the machine, ensure that the connector is aligned properly and that there are no kinks in your supply line. I’ve seen many units underperform simply due to poor alignment of the inlet. Run a quick visual inspection to confirm everything is in place and ready for operation.
Securing the Hose Connection to Prevent Leaks
Ensure a tight fit by hand-tightening the connector until it feels snug. Over-tightening can damage the threads, so a firm grip without excessive force works best. After connecting both ends, turn on the water supply and check for any leaks. This initial test helps identify issues before you start using the equipment.
If you notice any drips, disconnect the fittings and inspect for debris or damage. Clean the threads thoroughly. Applying plumber’s tape to the male threads can enhance the seal and further prevent leaks. Wrap the tape around the threads in a clockwise direction, ensuring it’s not too thick, which could hinder the connection.
After reattaching, perform another leak test to confirm the integrity of the connection. If leaks persist, consider replacing any worn washers or seals, as these components can wear out over time and compromise the seal.
Regular maintenance checks on your connections can save time and water. It’s a good practice to inspect the fittings before each use, ensuring everything remains in optimal condition. Keeping a spare set of washers on hand can also be a lifesaver in case of unexpected leaks.
Connecting the Spray Nozzle to the Water Supply Line
Ensure the spray gun is securely attached to the water supply line. Align the connection points carefully, taking note of any grooves or notches designed for a snug fit. It’s crucial to twist the nozzle onto the line until you feel resistance; this indicates that the threading is engaged properly. If misaligned, you risk cross-threading, which can lead to leaks.
Before tightening, inspect the rubber O-ring located at the base of the nozzle. A damaged O-ring can cause leaks, so replace it if necessary. Once confirmed, hand-tighten the connection, ensuring it’s snug but not overly tight to avoid damaging the components.
After securing the attachment, check for any movement by gently tugging on the nozzle. If it feels stable, you’re ready to proceed. For additional assurance, consider using thread seal tape on the threads for an extra layer of protection against leaks.
Finally, after everything is connected, turn on the water supply to test for leaks. If any are detected, re-torque the connection. You want a tight seal without excessive force. For those looking to upgrade their equipment, exploring the selling pressure washer options might be beneficial.
Testing the Assembly for Proper Functionality
Once the connections are made, it’s time to verify that everything is functioning as intended. I recommend starting with a visual inspection. Check all fittings and joints for any signs of misalignment or damage. Ensure that each part is securely attached; any loose connections can lead to leaks or inefficient operation.
Conducting a Preliminary Leak Test
With the unit powered off, turn on the water supply and observe the connections closely. Look for any drips or moisture at the joints. If you notice any leaks, you may need to tighten the fittings or replace seals. During my time in the field, I’ve found that a simple tightening often resolves minor issues.
Performing a Functional Test
Next, proceed to power on the unit. Start with a low-pressure setting to assess performance. As you pull the trigger on the spray gun, monitor the flow of water. A consistent stream indicates proper assembly. If the spray is erratic or weak, it could signal an obstruction or an issue with the setup. In one instance, I discovered that a kink in the line was causing a significant drop in pressure. Always check for kinks or twists in the line, as they can impede water flow.

.jpg)


