


For optimal results, it’s best to use a temperature of around 60°C. This will enhance the cleaning efficiency, especially for tough grime and grease. Make sure your unit is compatible with heated solutions; check the specifications in the manual or consult the manufacturer. Using a non-compatible model can lead to damage.
Begin with a quality hose that can withstand higher temperatures. I often recommend using a reinforced rubber or thermoplastic option. These materials are more durable and less likely to degrade when exposed to heat. Always inspect your connections for leaks before starting your cleaning session; a small leak can turn into a bigger issue if left unattended.
When setting up, ensure that the inlet is securely attached to your water source. I once had a frustrating experience with a loose connection that caused an inconsistent flow. It’s vital to have a snug fit to maintain pressure. If your equipment allows for quick disconnect fittings, invest in a set. They make the process much easier and quicker, especially when switching between tasks.

Adjust your nozzle to a wider spray pattern for heated applications. This not only helps distribute the heat evenly but also prevents surface damage. I learned this the hard way with a narrow nozzle that caused blistering on a delicate surface. Always test on a small, inconspicuous area first before tackling larger sections.
After use, clean your system thoroughly. Residual heat can cause buildup, which may affect performance over time. I recommend running a cleaning solution through the system to clear out any debris. This simple step can prolong the lifespan of your equipment and keep it functioning at its best.
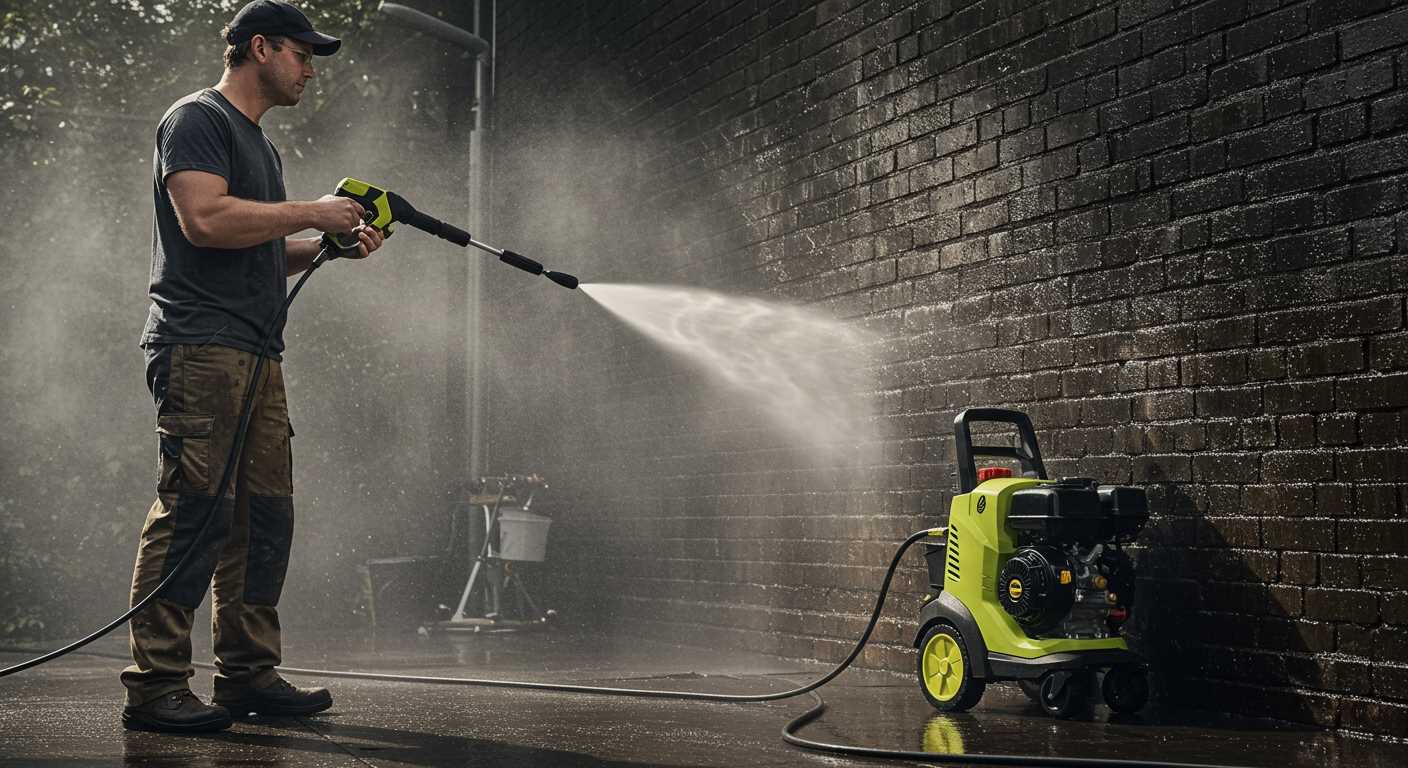
Connecting Heated Liquid to a Cleaning Unit
To integrate heated liquid into your cleaning unit, start by ensuring your equipment is compatible with higher temperatures. Most models have specifications indicating the maximum temperature they can handle. Check your user manual for this crucial information.
The next step involves using the right hoses. Standard hoses may not withstand the increased heat and pressure. Invest in high-temperature-rated hoses, typically made from materials like rubber or reinforced thermoplastic. These hoses are designed to resist deformation and bursting, ensuring safety during operation.
Once you have the proper hoses, attach them to the inlet of your machine. It’s vital to secure all connections tightly to prevent leaks. Use hose clamps for added security. The outlet should also be equipped with a suitable nozzle that can handle elevated temperatures. I recommend a turbo nozzle for its effectiveness in breaking down tough grime.
Before you begin, fill your tank with the appropriate cleaning solution. Always dilute it according to the manufacturer’s guidelines. Too concentrated a mix can cause damage to the unit. After filling, connect the heated liquid source. If you’re using a separate heater, ensure the connections are robust and leak-free.
Once everything is in place, turn on your unit and allow it to warm up. Monitor the pressure gauge; it should stabilise within the optimal range specified in your manual. If you notice fluctuations, inspect your connections and hoses for any signs of wear or damage.
| Component | Recommended Material |
|---|---|
| Hoses | High-temperature rubber or thermoplastic |
| Nozzle | Turbo nozzle for hot applications |
| Cleaning Solution | Follow manufacturer’s dilution guidelines |
For more insights on whether to choose a gas or electric model, check out this pressure washer gas or electric comparison. The right choice plays a significant role in your cleaning efficiency, especially when using heated solutions.
Selecting the Right Pressure Washer for Hot Water Use
For optimal performance with elevated temperatures, choose a unit specifically designed for this purpose. Look for models featuring a robust heating element, typically rated between 1500 to 2000 watts, capable of reaching temperatures up to 200°F. This ensures thorough cleaning, especially for tough grease and grime.
Check the material of the internal components. Stainless steel coils are preferable, as they withstand high temperatures and resist corrosion. Additionally, reinforced hoses rated for hot liquids prevent potential hazards during operation.
Consider the flow rate as well. A higher GPM (gallons per minute) translates to better cleaning efficiency. Aim for units that offer at least 3 GPM, which allows for quicker coverage of larger areas.
Don’t overlook the pressure rating, either. A range between 1500 to 3000 PSI is ideal for most heavy-duty tasks. The combination of high pressure and temperature facilitates the removal of stubborn stains, making your cleaning jobs more effective.
Lastly, investigate the brand’s reputation and warranty offerings. Reliable manufacturers often provide robust service plans and support, which can be invaluable if issues arise with your equipment. Investing in a quality model saves time and ensures longevity for your cleaning tasks.
Understanding the Required Attachments and Accessories
For optimal performance, ensure you have a robust array of components. Investing in quality fittings and hoses increases efficiency and extends the lifespan of your equipment. A high-temperature rated hose is non-negotiable; it must withstand elevated pressures without compromising integrity. Look for options made from materials like rubber or reinforced PVC to resist wear and tear.
Key Components to Consider
Incorporate a suitable trigger gun designed for high-temperature applications. This not only enhances comfort during use but also improves control over the flow. Additionally, a compatible nozzle set allows for versatility in cleaning tasks. Different spray patterns can tackle various surfaces effectively, from delicate materials to tougher grime.
Additional Accessories for Enhanced Functionality
Consider a quality inline heater if your model doesn’t support high heat. This accessory can significantly improve cleaning efficiency. A pressure gauge is another useful tool, providing real-time feedback on system performance. Don’t overlook the importance of a reliable detergent injector; it helps in applying cleaning agents seamlessly during operation. Lastly, think about storage solutions for your equipment. A dedicated space prevents damage and keeps everything organised for your next project.
For those who appreciate documenting their work, capturing the process is easy with a digital camera or digicam. It helps share results or troubleshoot issues effectively.
Preparing the Pressure Cleaner for Hot Liquid Connection
Begin by ensuring your unit is powered off and disconnected from any power source. Safety is paramount; I’ve seen too many accidents occur from neglecting this step. Next, inspect the hoses for wear or damage. A compromised hose can lead to leaks, especially under higher temperatures. Replace any frayed or cracked hoses before proceeding.
Once the hoses are checked, verify that your machine is compatible with elevated temperatures. Some models can handle up to 90°C, while others fall short. Consult your user manual or manufacturer specifications to confirm limits. In my experience, using a machine rated for higher temperatures significantly enhances cleaning efficiency, especially for grease and grime.
Connection Preparation
After confirming compatibility, it’s time to prepare the connections. Use silicone or Teflon tape on threaded connections to ensure a tight seal. This prevents leaks that can compromise performance. I’ve often encountered issues where improper sealing led to reduced pressure and inconsistent spray patterns.
Next, assemble the necessary fittings that may be required for the connection. Ensure that all components are clean and free from debris. A clean connection is essential for optimal performance. If possible, test the connections with cold liquid first to check for leaks before introducing heated liquid. This step can save you from unexpected surprises during the cleaning process.
Final Checks
Finally, check the temperature gauge on the unit if it has one. Familiarise yourself with how your machine responds to heat. I recall one occasion when I underestimated the temperature setting, leading to an unpleasant experience. Understanding your equipment’s capabilities will enhance your cleaning experience and ensure longevity.
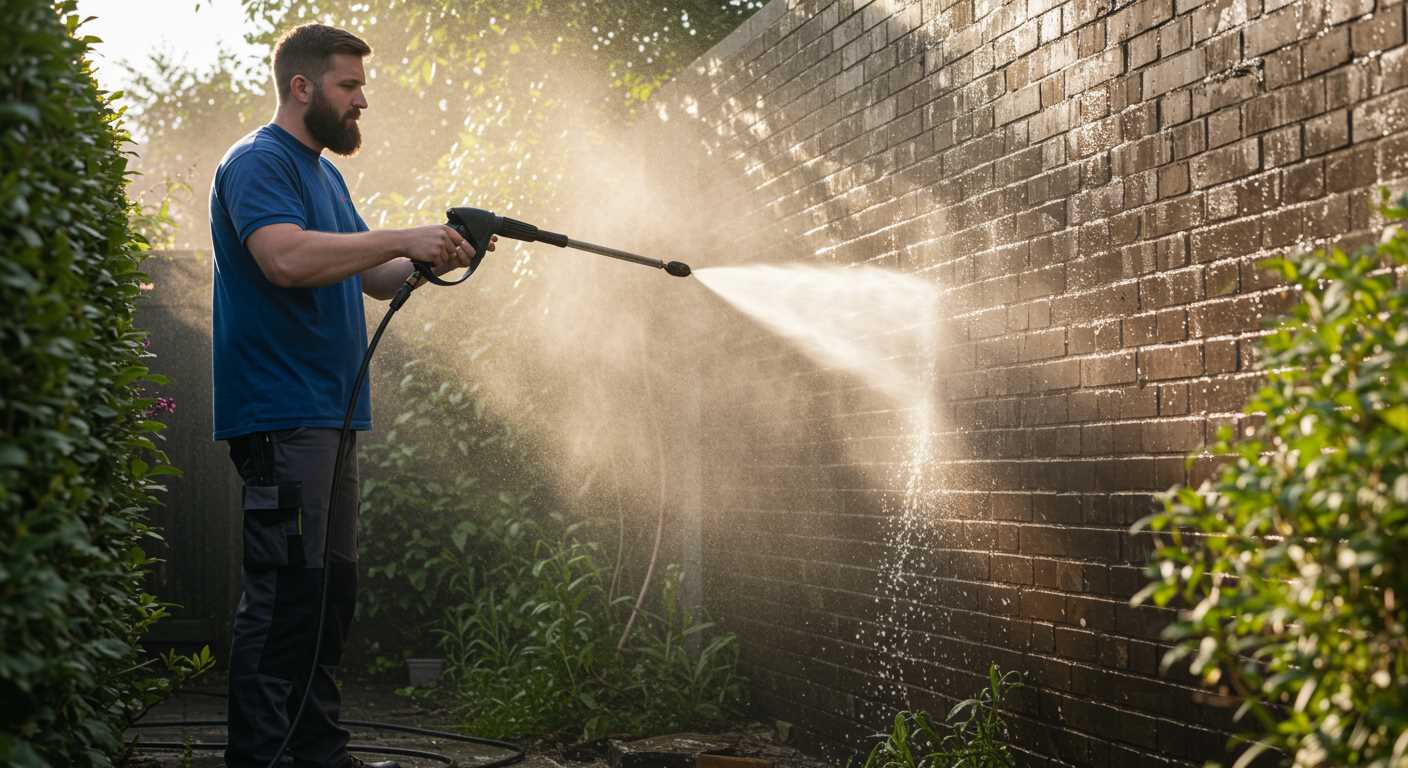
Connecting the Hot Water Supply to the Pressure Washer
Begin by ensuring the source of heated liquid is compatible with your cleaning unit. I’ve encountered models that handle temperatures up to 90°C, but always verify the specific limits indicated in the manual. A misstep here can lead to damage, so double-check your equipment’s specifications.
Utilise a robust connection hose designed for high temperatures. When I first started, I noticed some hoses weren’t rated for extreme heat, leading to leaks and inefficiency. Invest in a high-quality, heat-resistant hose to prevent future complications.
Next, secure the hose to both the water source and the machine. Use appropriate fittings; I’ve found that quick-connect fittings save time and frustration, especially in busy environments. Make sure they are tightened adequately to avoid any leaks during operation.
Check for any kinks or bends in the hose before starting. A colleague of mine once experienced a significant drop in performance due to a simple kink in the line. Straighten the hose to ensure a smooth flow of the heated liquid.
Once everything is connected, perform a quick test run. Watch for any leaks at the joints and listen for unusual sounds from the machine. I always make it a point to run the system briefly before diving into a full cleaning session. This helps identify any potential issues early on.
Finally, monitor the temperature gauge on your unit during use. I’ve seen many operators neglect this step, which can lead to overheating and subsequent repairs. Keeping an eye on the temperature will ensure longevity and reliability in your cleaning tasks.
Testing for Leaks and Ensuring Proper Functionality
After connecting your heating system to the cleaning unit, the next step is to verify that everything is functioning optimally. Here’s how to carry out effective checks:

- Visual Inspection: Start with a thorough visual examination of all joints and hoses. Look for any signs of water seeping out or damp spots that could indicate a leak.
- Pressure Test: Before full operation, run the system at a low pressure for a few minutes. Observe any unusual noises or vibrations that may signal issues.
- Temperature Check: Ensure that the heating unit is reaching the desired temperature. Use a thermometer to confirm that the output is within the specified range. If it’s not, there might be an issue with the heating element.
In my experience, I’ve encountered various units where minor leaks were often overlooked. A simple tightening of connections resolved many headaches. Here’s a quick checklist to follow:
- Verify that all fittings are securely fastened.
- Check for cracks or wear in the hoses.
- Inspect seals and gaskets for damage.
- Monitor the connections for any signs of moisture during the initial operation.
Once you’re satisfied that there are no leaks, it’s time to test the equipment under operating conditions. Use the following guidelines:
- Run a Cleaning Cycle: Engage in a brief cleaning session to ensure everything operates smoothly. Pay attention to the consistency of the output and any irregularities in performance.
- Monitor for Leaks: Keep an eye on connections throughout the cleaning cycle, as sometimes leaks may only become apparent under pressure.
- Review Output Quality: Assess the effectiveness of the cleaning. If the results aren’t satisfactory, it may indicate a need for adjustment or further inspection.
Throughout my career, I’ve learned that taking the time to properly check for leaks and functionality can save a lot of time and cost in the long run. Regular maintenance checks also contribute to the longevity of the equipment.
Maintaining Your Pressure Washer After Hot Water Use
After utilising elevated temperatures, it’s crucial to follow a meticulous maintenance routine to prolong the lifespan of your equipment and ensure optimal performance. Here are key steps I recommend based on years of hands-on experience.
Flush the System
- Immediately after use, run the machine with cold liquid for several minutes. This process helps remove any residual heat and contaminants.
- Ensure that the nozzle is set to a low-pressure setting during this flushing phase to prevent any potential damage.
Inspect and Clean Components
- Examine hoses and connections for any signs of wear or damage. Elevated temperatures can weaken materials over time.
- Check the spray gun and nozzle for clogs or debris. A fine brush can be useful for cleaning out any blockages.
- Inspect the inlet filter to ensure it’s free from sediment and build-up. Replace it if necessary.
These simple checks can save you from costly repairs down the line. After every session involving high temperatures, I’ve found it beneficial to keep a log of any maintenance steps taken. This helps track the condition of different components over time.
Regular Oil Changes
- For models with an engine, frequent oil changes are necessary. High temperatures can affect oil viscosity, leading to inadequate lubrication.
- Refer to the manufacturer’s guidelines for the right type of oil and change intervals.
In my experience, adhering to a strict maintenance schedule not only enhances performance but also provides peace of mind knowing your equipment is in top shape. Whenever I’ve neglected these steps, it’s often led to frustrating issues during future operations.
Storage Considerations
- Store the unit in a cool, dry place to prevent any residual moisture from causing corrosion or internal damage.
- Consider using a cover to protect it from dust and debris when not in use.
Implementing these practices will ensure your equipment remains reliable and efficient for years to come. I’ve seen too many machines fail prematurely due to lack of proper care, so take the time to maintain yours after every heated application. It pays off in the long run.
FAQ:
What tools do I need to attach hot water to my pressure washer?
To attach hot water to your pressure washer, you’ll typically need a few basic tools. These include a wrench or pliers to secure the connections, a suitable hot water inlet hose that can withstand high temperatures, and possibly an adapter if your pressure washer’s inlet does not fit the hose directly. Additionally, ensure that you have access to a hot water source, such as a hot water tap or boiler. Always check your pressure washer’s manual to confirm compatibility with hot water use.

Can all pressure washers handle hot water, and how can I tell if mine can?
Not all pressure washers are designed to handle hot water. Most electric pressure washers are made for cold water use only, while many gas-powered models can accommodate hot water. To determine if your pressure washer can handle hot water, check the manufacturer’s specifications in the user manual or on their website. Look for terms like “hot water capable” or “temperature rating” that indicates the maximum water temperature your machine can handle without damage.
What are the benefits of using hot water with a pressure washer?
Using hot water with a pressure washer offers several advantages. Hot water can effectively break down grease, oil, and other stubborn stains that cold water may struggle with. This makes it particularly useful for cleaning vehicles, machinery, and outdoor surfaces like driveways and patios. Additionally, hot water can kill certain types of bacteria and mould, providing a more thorough clean in areas where hygiene is a concern, such as kitchens or bathrooms.
Are there any risks involved in using hot water with a pressure washer?
Yes, there are some risks associated with using hot water in a pressure washer. First, using water that exceeds the manufacturer’s recommended temperature can damage the pump or other components, leading to costly repairs. Furthermore, hot water can cause burns if it comes into contact with skin, so safety precautions should be taken, like wearing protective gear. Always ensure that the pressure washer is on a stable surface to prevent accidents and maintain a safe working environment.
How do I connect the hot water supply to my pressure washer?
To connect the hot water supply to your pressure washer, first ensure that the machine is turned off and disconnected from the power source. Locate the water inlet on your pressure washer and attach the hot water inlet hose. If necessary, use an appropriate adapter to ensure a secure fit. Connect the other end of the hose to your hot water source, making sure to tighten all connections to prevent leaks. Once everything is secure, turn on the hot water supply and then power on the pressure washer to begin using hot water for your cleaning tasks.
.jpg)


