


Begin by selecting a high-quality check mechanism that matches the specifications of your cleaning apparatus. A reliable component is crucial for preventing backflow and ensuring optimal performance during operation. Trust me, I’ve seen too many setups fail because the wrong part was chosen.
Next, ensure you have the right tools handy: a wrench, pliers, and Teflon tape. The installation process becomes straightforward when you’re prepared. Over the years, I’ve learned that a little preparation goes a long way, saving you time and hassle.
Begin the installation by locating the inlet side of your device. This is where you will place the check mechanism. Carefully unscrew the existing connector, and make sure to clean any debris or old sealant from the threads. I can’t stress enough how important this step is; any residue can compromise the seal and lead to leaks later on.
Wrap the threads of the fitting with Teflon tape to create a watertight seal. This small detail has saved me from countless leaks. Then, firmly attach the check mechanism by screwing it into place. Make sure it’s snug but avoid over-tightening, which can damage the threads. I’ve seen this mistake more times than I’d like to admit.
Once everything is connected, double-check your work and ensure all parts are secure. Finally, turn on the device and observe for any leaks. If everything is functioning correctly, you’re good to go. I’ve always found satisfaction in seeing a job well done, especially when it comes to ensuring efficient operation of cleaning equipment.
Attaching a Check Valve to Your Cleaning Equipment
Begin by ensuring that your device is turned off and disconnected from the power supply. Gather the necessary tools: a wrench, Teflon tape, and the check valve itself. Position the valve in line with the water inlet, ensuring the flow direction arrow matches the water flow direction in your system.
Wrap the threads of the valve with Teflon tape to enhance the seal and prevent leaks. This small step can save you from future headaches. Next, carefully thread the valve onto the inlet and use a wrench to tighten it securely, but avoid over-tightening, which can damage the fittings.
After installation, reconnect the water source and power. Turn on the unit and observe for any leaks around the valve. If everything looks good, you’re ready to operate. Regularly check the valve for wear and replace it as necessary to maintain optimal performance.
| Step | Action |
|---|---|
| 1 | Turn off and disconnect the equipment. |
| 2 | Gather tools: wrench, Teflon tape, check valve. |
| 3 | Position the valve with flow direction arrow aligned. |
| 4 | Wrap threads with Teflon tape. |
| 5 | Tighten valve with a wrench (do not over-tighten). |
| 6 | Reconnect water source and power. |
| 7 | Check for leaks and perform regular maintenance. |
In my experience, a well-installed unit can significantly increase reliability and performance. This simple addition can prevent backflow issues that could lead to equipment damage or inefficiency. Regular maintenance and checks keep everything functioning smoothly. Don’t overlook this crucial component in your setup!
Selecting the Right Non Return Valve for Your Pressure Washer
Choose a model that matches the specifications of your high-pressure machine. Look for ratings that align with your model’s maximum pressure and flow rate to ensure compatibility.
Materials and Durability
Consider the materials used in the construction. Brass and stainless steel are robust options that withstand high pressures and resist corrosion. Avoid plastic components, as they may not hold up under intense conditions.
Size and Fitting Type
- Measure the inlet and outlet diameters of your equipment to select the correct size.
- Check the fitting type–threaded or push-fit–to ensure a secure connection.
In my experience, mismatched sizes can lead to leaks or malfunctions, so double-check your measurements.
Flow Direction
- Pay attention to the flow direction indicator on the device.
- Installing it incorrectly will result in backflow issues, impacting performance.
I’ve witnessed several users struggle with this, leading to unnecessary repairs. Always ensure the flow direction aligns with your unit’s design.
Pressure Rating
Verify that the pressure rating of the device exceeds your washer’s maximum output. Opting for a higher rating provides an added safety margin, which I’ve found invaluable during heavy-duty tasks.
Brand Reputation
Research reputable manufacturers known for their reliability. Trusted brands often offer better customer support and warranties, which I’ve relied on in case of any issues.
Price vs. Quality
Avoid the temptation of the cheapest option. Investing in a quality component often pays off in longevity and performance. I’ve often seen budget choices fail prematurely, leading to higher costs in the long run.
By focusing on these factors, you can ensure your component functions efficiently, contributing to a seamless cleaning experience. Trust your instincts and draw from your experiences to make an informed decision.
Gathering Necessary Tools and Materials for Installation
Before starting installation, ensure you have the right tools and materials at your disposal. Having everything ready will save time and frustration during the process.
Required Tools
- Wrench set: A variety of sizes will help tighten fittings securely.
- Screwdriver: A flathead and Phillips are usually sufficient for most configurations.
- Pliers: Adjustable pliers are handy for gripping and turning fittings.
- Tape measure: Useful for ensuring proper lengths and fittings.
- Safety goggles: Protects your eyes from debris during installation.
- Gloves: Prevents cuts and improves grip on slippery components.
Materials Needed
- Check valve: Ensure it’s compatible with your equipment’s specifications.
- Hoses: Quality hoses that can withstand high pressure are vital.
- Sealant tape: Helps prevent leaks at threaded connections.
- Fittings: Collect the right type and size needed for connections.
- Adapters: May be necessary to fit various sizes of pipes together.
Having everything on hand will make the whole process smoother. In my experience, missing even one small item can lead to delays and unnecessary trips to the store. Always double-check your inventory before getting started.
Preparing Your Pressure Washer for Valve Installation
Before diving into the installation process, ensure your equipment is properly readied. Start by disconnecting the power source and detaching any hoses connected to the unit. This prevents accidental activation while you work. A simple check of the manufacturer’s guidelines can provide specific instructions tailored to your model, ensuring a smooth experience.
Inspecting Components
Examine the current setup for wear or damage, especially in the areas surrounding the connections. Look for cracks or signs of leakage; these can hinder the performance of the new component. If you spot any issues, consider replacing those parts to maintain optimal functionality. Make sure all surfaces are clean and free of debris, as this will facilitate a better seal for the new installation.
Safety Measures
Wear appropriate protective gear, including gloves and safety goggles, to prevent injury while handling the equipment. It’s also wise to work in a well-ventilated area to avoid inhaling any fumes or vapours from cleaning solutions or lubricants. If you’re considering starting a business, investing in quality products is key–check out this list of pressure washers to start a business.
Identifying the Correct Location for the Non Return Valve
To ensure optimal performance, place the valve close to the pump inlet. This positioning reduces the risk of backflow, maintaining pressure and preventing damage to the system.
Consider these key points for location selection:
- Accessibility: Ensure the area is easily reachable for maintenance and inspections. Avoid cramped spaces that could complicate future repairs.
- Alignment: The valve should align with existing fittings and hoses. Misalignment can lead to leaks or inefficient operation.
- Protection: Choose a spot shielded from debris and environmental factors. This prevents contamination that could compromise functionality.
- Flow direction: Confirm the valve’s orientation matches the flow of water. Incorrect installation will obstruct performance.
During my time in the cleaning equipment sector, I encountered various setups. One memorable instance involved a unit where the valve was placed too far from the pump. The result? Frequent pressure drops and frustrating downtime. After relocating it closer, the performance improved significantly. It’s these real-world lessons that highlight the importance of the correct positioning.
Keep in mind the specific requirements of your setup. If unsure, consult the manufacturer’s guidelines or seek advice from experienced users. This can save you time and prevent potential issues down the line.
Removing Existing Components to Install the Non Return Valve
Start by disconnecting your cleaning device from the power source and water supply. This ensures safety during the process. Next, locate the inlet hose and the connection point where it attaches to the unit. You may need a wrench to loosen the fitting. Keep a bucket handy to catch any residual water that may spill out.
Once the hose is disconnected, you must remove any existing fittings that could obstruct the new assembly. Pay close attention to washers or seals that might be present; they are often the source of leaks if not replaced. If the original component is stuck, applying some penetrating oil can help loosen it up. After removing the old parts, inspect the fitting area for any debris or corrosion that could hinder a proper seal for the new equipment.
Inspecting and Preparing the Fitting Area
After cleaning the area, check the threads on the fittings. If they appear damaged, consider using a thread sealant tape to ensure a watertight connection. This step will save you from potential headaches later on. Additionally, verify that the replacement unit is compatible in size and type with the fittings on your device, as mismatched components can create further complications.
Final Checks Before Installation
Before proceeding with the installation, double-check that you have all necessary parts and tools at hand. Having everything organised will streamline your workflow. Once you’re ready, you can move on to positioning the new component securely, ensuring it aligns correctly with the inlet. Taking these steps will lay a solid foundation for a successful upgrade to your cleaning equipment.
Attaching the Non Return Valve to the Pressure Washer
Begin by positioning the washer securely on a stable surface. Ensure that the machine is powered off and disconnected from any water source to prevent accidents. Grab your new component and inspect it for any visible defects. A quick check can save you time later on.
Next, you’ll want to locate the inlet or pump area where the device will be integrated. Typically, this is near the hose connection. Align the component with the threads, ensuring the orientation suits the flow direction indicated on the part. This is critical; an incorrect setup can lead to malfunctions.
Securing the Component
Using your wrench, carefully tighten the fitting. Avoid over-tightening, as this can damage the threads or the component itself. A snug fit is sufficient to create a proper seal. If you have plumber’s tape, wrapping the threads before securing can enhance the seal and prevent leaks.
| Step | Action |
|---|---|
| 1 | Position the machine on a stable surface. |
| 2 | Inspect the new component for defects. |
| 3 | Align the component with the inlet area. |
| 4 | Secure using a wrench, ensuring a snug fit. |
| 5 | Use plumber’s tape for added sealing if desired. |
Final Checks
Once secured, inspect the area for any gaps or misalignments. After everything looks good, reconnect the water source and power on the machine. Run a quick test to ensure everything is functioning correctly and that no leaks are present. Listening for unusual sounds during operation can also help identify potential issues early on.
Ensuring Proper Seals and Connections During Installation
Achieving a watertight seal is critical during the installation process. I recall a time when I worked on a unit that had persistent leaks, which turned out to be due to improperly fitted connections. Always inspect the sealing surfaces before you start. They should be clean, free from debris, and undamaged. A little dirt or a small scratch can compromise the integrity of the seal, leading to unwanted leaks.
Utilising PTFE Tape
Applying PTFE tape is one of the simplest yet most effective methods for ensuring a secure connection. Wrap the tape around the threaded ends of your fittings, but avoid overdoing it–two to three wraps is usually sufficient. This tape not only lubricates the threads, making assembly easier, but also fills in any minor gaps, preventing leaks. I’ve seen many installations fail simply because the tape was applied incorrectly or not at all.
Checking Tightness
After securing everything, always double-check the tightness of the connections. Use a wrench but be cautious; overtightening can damage components. A snug fit is all you need. After I’ve made the connections, I often run a quick test to check for leaks. It’s better to catch any issues now than during your first use. If you do notice any leaks, tightening slightly or reapplying tape can often solve the problem.
Remember, the longevity and performance of your equipment depend on these small but significant details. Taking the time to ensure proper seals and connections will save you from headaches down the line.
Testing the Pressure Washer After Valve Installation
Before hitting the power switch, make sure to double-check all connections. I once missed a small leak that led to a frustrating day of constant adjustments. Once everything looks secure, turn on the water supply and let it run through the unit without engaging the motor. This step allows you to identify any potential leaks in the assembly.
Next, engage the machine briefly to observe its performance. Listen for unusual sounds that might indicate a problem. A well-fitted component will operate smoothly and quietly. If you hear hissing or see water spraying from unexpected areas, shut down immediately and reassess your connections.
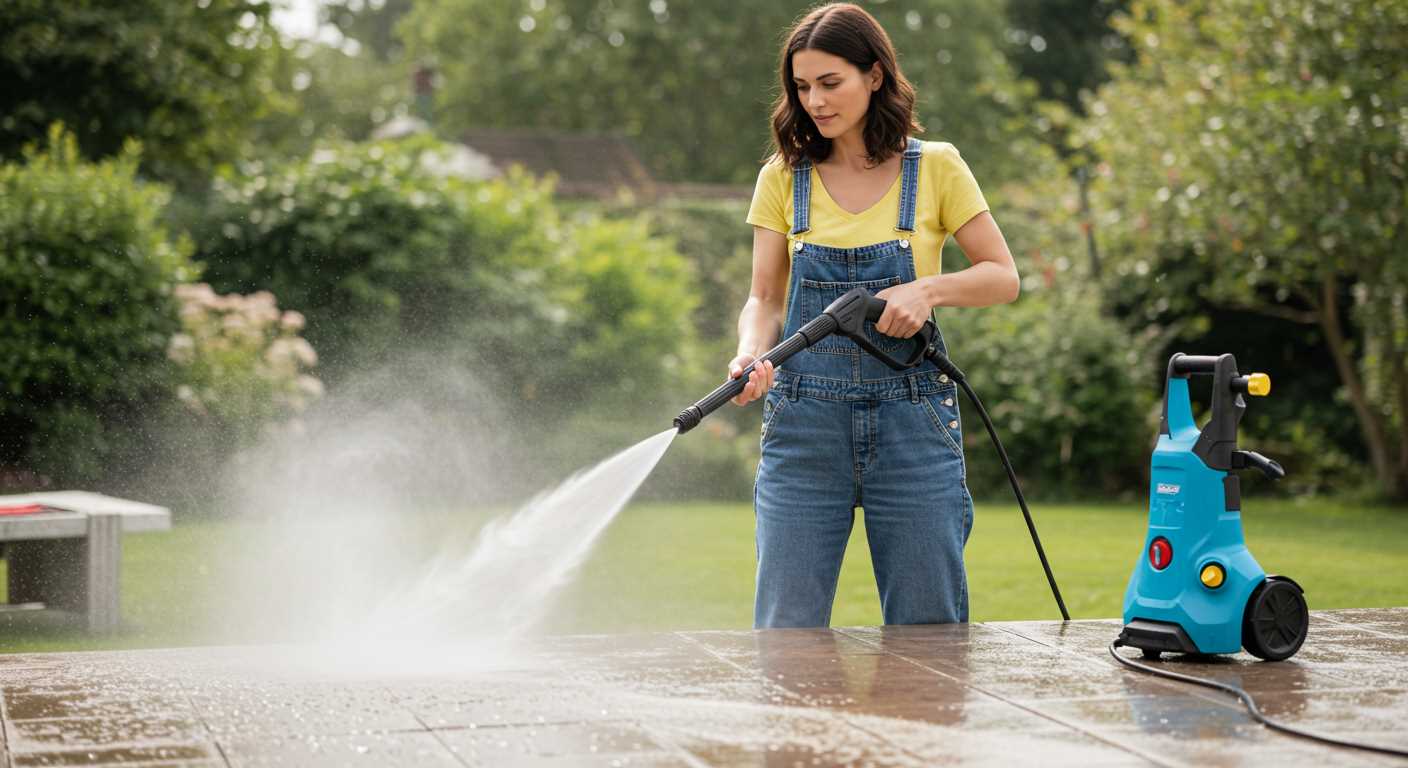
After confirming that everything is functioning properly, take the time to run a few tests on various surfaces. I recommend starting with a simple cleaning task, like washing a patio or driveway. This will help you gauge the effectiveness of the installation. If the water flow is consistent and pressure is adequate, you’ve successfully completed the task.
Don’t forget to clean the unit after use. Residue can build up and affect performance over time. For tough spots, consider using the best audio scrubber program to maintain your equipment in top condition. Regular maintenance ensures longevity and reliable performance, which I’ve learned is key to avoiding frustration in the long run.
Maintaining the Non Return Valve for Longevity
Regular inspections and cleaning are vital to ensure prolonged functionality. I recommend checking the component every few months, especially if you use your equipment frequently. A simple visual inspection can reveal cracks or wear. If you notice any debris or sediment accumulation, clear it immediately. This small step can prevent larger issues down the line.
Utilising the Correct Lubricants
Applying the right lubricants can significantly enhance the lifespan of the device. I’ve found that silicone-based lubricants work wonders, as they provide a protective layer without attracting dirt. Avoid petroleum-based products, as they can degrade seals over time. A light application on the threaded areas during maintenance can keep everything running smoothly.
Storing Your Equipment Properly
When not in use, proper storage is key. Ensure that it is kept in a dry, cool space to prevent any moisture damage. I’ve had instances where neglecting this led to corrosion and rust, which could have been easily avoided. Additionally, detaching the component during long periods of inactivity can prevent strain on the fittings and seals.
FAQ:
What tools do I need to attach a non-return valve to my pressure washer?
To attach a non-return valve to your pressure washer, you will typically need the following tools: a wrench or pliers for tightening fittings, a screwdriver for securing any clamps, and possibly Teflon tape to ensure a leak-proof seal. Additionally, having a bucket or towel handy can help catch any water that may spill during the installation process.
Can I install a non-return valve on my pressure washer myself, or should I hire a professional?
Installing a non-return valve on a pressure washer can be a straightforward task if you have basic plumbing skills and the right tools. If you feel comfortable working with the fittings and connections, you can likely do it yourself by following a guide or tutorial. However, if you are uncertain or uncomfortable with DIY tasks, hiring a professional might be a safer choice to avoid any potential issues.
What are the benefits of using a non-return valve on my pressure washer?
Using a non-return valve on your pressure washer helps to prevent backflow, which can protect the pump from damage and maintain optimal pressure levels. This valve ensures that water only flows in one direction, reducing the risk of contaminants entering the system and extending the lifespan of your equipment. Additionally, it can improve the overall efficiency of your pressure washing tasks.
Where exactly should I install the non-return valve in my pressure washer setup?
The non-return valve should be installed on the inlet side of your pressure washer, between the water supply and the pressure washer itself. This placement ensures that water flows into the machine without the risk of backflow. Make sure to consult the manufacturer’s manual for specific instructions regarding your model, as placement may vary slightly.
What should I do if my non-return valve is leaking after installation?
If your non-return valve is leaking, first check all connections to ensure they are tight and secure. If the fittings are loose, use your wrench or pliers to tighten them. If the leak persists, inspect the valve for any visible damage or wear. In some cases, replacing the valve or using Teflon tape on the threads may resolve the issue. If you are unable to fix the leak, consider reaching out to a professional for assistance.
What tools do I need to attach a non-return valve to my pressure washer?
To attach a non-return valve to your pressure washer, you will typically need a few basic tools. Start with a wrench or pliers to loosen and tighten fittings. A screwdriver might be necessary if there are any screws involved in securing the valve. Depending on the design of your pressure washer, you may also need a pipe cutter or hacksaw if you require custom pipe lengths. Always ensure you have safety goggles on while working to protect your eyes from potential debris.

.jpg)


