


For an effective cleaning experience, ensure your liquid solution container is securely fixed to the machine’s inlet. This will allow for a steady flow of the cleaning solution when in use. Begin by selecting a compatible attachment that fits snugly onto the inlet of your device.
Step one: Gather the necessary tools. A wrench may be required to tighten connections, ensuring there are no leaks during operation. It’s also wise to have some plumber’s tape on hand, which can help create a watertight seal around the connection points.
Step two: Before making any connections, disconnect the device from the power supply. Safety should always come first. Once you’ve ensured that the unit is off, locate the inlet where the cleaning solution will be introduced. Clean the threads to remove any debris that could hinder a proper seal.

Step three: Carefully screw the container onto the inlet, making sure it aligns correctly to avoid cross-threading. If you encounter resistance, back off and realign. After it’s securely in place, wrap the threads with plumber’s tape for added security. This small step can prevent leaks and improve the longevity of your connections.
Once everything is connected, turn on the machine and test the flow of the cleaning solution. If you’ve followed these guidelines, you should see a steady stream of the cleaning agent mixing with the water, enhancing your cleaning tasks significantly.
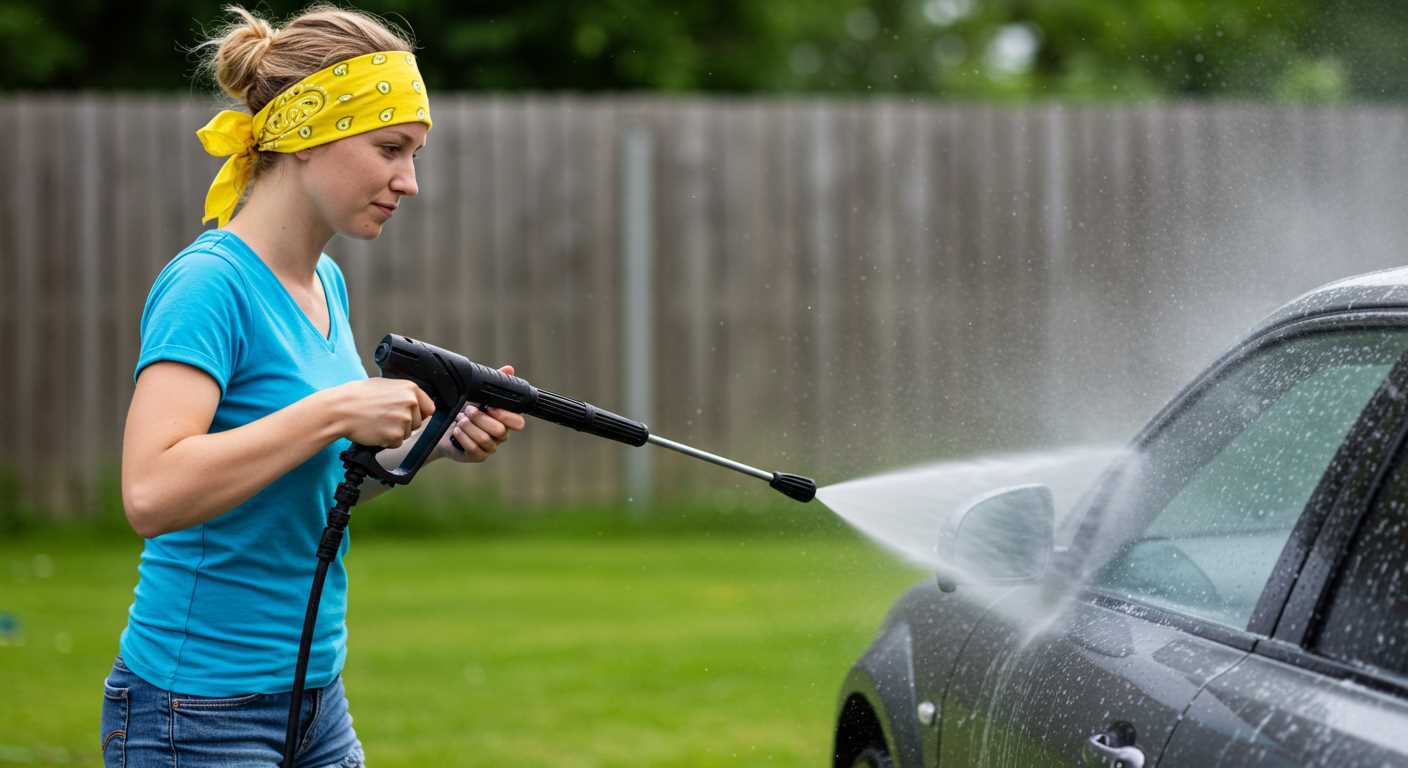
Attaching Cleaning Solution Unit to Your High-Pressure Cleaner
First, identify the right fittings on your high-pressure unit. Most models have a dedicated inlet for the cleaning solution, usually located near the nozzle connection. If your machine doesn’t have this, you might need a compatible attachment that allows for the integration of a cleaning solution unit.
Proper Connection Steps
Make sure to begin with a clean surface; residue from previous uses can cause issues. Align the solution intake tube with the designated port and ensure it fits snugly. If your setup requires it, use a hose clamp to secure the connection. This prevents any leaks that could compromise your cleaning process. Double-check that the connection is tight but not overly forceful to avoid damaging the fittings.
Loading the Cleaning Solution
When it comes to the cleaning agent, always choose a product that’s compatible with your equipment. Pour the solution into the tank carefully. Using a funnel may help to avoid spills. Once filled, give the tank a gentle shake to mix the solution if required. Activate the system and let the mixture flow through the lines. You should notice a change in the spray pattern, indicating that the cleaning agent is being delivered properly.
After use, remember to clean the system. This prevents any residue buildup that can affect future operations. Flush the lines with clean water to ensure everything remains in top condition.
Choosing the Right Soap Dispenser for Your Pressure Washer
I remember the first time I tried to clean the patio using a high-powered cleaner without the right liquid container. It was a wasted effort; the results were lacklustre. Selecting a suitable liquid container is key to achieving the best cleaning outcomes. Look for a model that matches your machine’s specifications. Compatibility is paramount; not all canisters fit every unit.
Consider the capacity of the container. A larger reservoir means fewer refills, which can save time during extensive cleaning tasks. However, if you’re working on smaller projects, a compact option might suffice. Pay attention to the material too; durable plastics resist chemicals better and withstand wear. I once had a container that cracked after just a few uses due to harsh chemicals.
Check for adjustable settings. Some containers allow you to modify the flow rate of the liquid, helping you control the concentration based on the task at hand. This flexibility can be invaluable when switching between different surfaces, like concrete and wood.
Ease of installation is another aspect to consider. A straightforward design simplifies the setup process, allowing you to get to work quickly without fussing over complicated instructions. I’ve had my share of frustrating experiences with overly complex models that took longer to set up than the actual cleaning.
Lastly, think about the type of cleaning solutions you’ll use. Some containers are designed for specific formulations, while others are more versatile. If you plan to experiment with various cleaners, choose one that accommodates a range of products. My best experiences came from using a multi-purpose container that handled everything from car wash solutions to biodegradable cleaners with ease.
Gathering Necessary Tools and Materials
Before proceeding, ensure you have the following tools and materials handy: a suitable nozzle for your unit, a compatible container for the cleaning solution, and a wrench or pliers for securing connections. It’s also wise to include a funnel to minimise spills while filling your container.
I remember the first time I attempted this task, I underestimated the importance of having everything ready. I had to run to the store halfway through, which can be frustrating when you’re eager to get started. Avoid that hassle by checking off this list before you begin:
- Cleaning Solution: Choose a detergent formulated for use with high-pressure equipment. Always read the label to ensure compatibility.
- Nozzle Selection: A low-pressure nozzle is ideal when applying the cleaning agent. This prevents foaming and ensures even coverage.
- Connection Tools: Keeping a wrench or pliers nearby helps tighten fittings securely, preventing leaks.
- Measuring Cup: If your cleaning solution needs to be diluted, a measuring cup will help you get the right proportions.
- Protective Gear: Safety goggles and gloves are advisable to protect your eyes and skin from any chemicals.
Having these items at hand will facilitate a smoother process and enhance your cleaning experience. I’ve often found that preparation is half the battle won, leading to a more enjoyable and effective outcome. Trust me, it’s worth the extra few minutes spent gathering these essentials.
Preparing the Pressure Washer for Attachment
Firstly, ensure the device is completely powered down and disconnected from any electrical source. A quick check of the power cord and plug for any damage is wise. Safety first; this is a crucial step to avoid any mishaps.
Next, inspect the garden hose; it should be free from kinks or blockages. A clear water supply is essential for optimal performance. Attach the hose securely, verifying that all connections are tight to prevent leaks during use.
Checking the Nozzle
Choose the appropriate nozzle for your task. The soap nozzle usually has a larger opening, allowing for effective mixing of the cleaning solution with water. It’s often marked for easy identification. Swapping out nozzles is straightforward, but always double-check that the one you select fits snugly.
Testing the Equipment
Before introducing any cleaning agents, run the device with just water for a minute. This step helps to prime the system and ensures everything is functioning correctly. Look for any unusual noises or leaks. If everything runs smoothly, you’re ready to move on to the next phase.
Identifying the Attachment Point for the Soap Dispenser
Locate the right spot for connecting your cleaning solution container. Most units have a designated inlet near the spray gun or at the end of the high-pressure hose. This is typically a quick connect fitting or a threaded port, allowing for easy integration.
In my experience, it’s essential to ensure that the connection is secure to prevent leaks. Check your owner’s manual; it usually contains a diagram showing the exact location. If you misplaced the manual, a quick online search using your model number can yield helpful results.
After finding the attachment point, inspect it for any debris or damage. A clean and intact connection ensures optimal performance. I once encountered a situation where a client had trouble with their equipment, and a simple blockage at the inlet was the culprit. Regular maintenance can help avoid such issues.
Here’s a quick reference table for common attachment points based on popular brands:
| Brand | Attachment Point |
|---|---|
| Karcher | Quick connect near the spray wand |
| Sun Joe | Threaded port on the high-pressure hose |
| RYOBI | Inlet located behind the handle |
| Husqvarna | At the rear of the housing near the pump |
Once you confirm the attachment point, you’re ready to proceed with the next steps for connecting the cleaning solution apparatus. Ensure everything aligns properly to maximise performance during use.
Connecting the Soap Dispenser to the Pressure Washer
Begin by ensuring that both units are powered down and disconnected. Locate the inlet, typically found at the front of your cleaning machine. Attach the feed tube from the container directly to this inlet. It should fit snugly; a loose connection can lead to leaks and inefficient performance.
Securing the Connection
Once the tube is in place, make sure to tighten any locking mechanisms or clips that may be present. This step is crucial to prevent any disconnection during operation. I’ve seen many users overlook this detail, resulting in frustrating interruptions while working. Always double-check that everything is firmly in position.
Testing the Setup
Before engaging the cleaning function, test the assembly by turning on the machine without activating the nozzle. Observe for any leaks around the connection points. If all appears well, proceed by adding your chosen cleaning solution to the container. Start the washer and engage the nozzle briefly to ensure the mixture is being drawn in properly. This preliminary check can save you time and hassle later on.
From experience, a well-connected setup not only enhances cleaning efficiency but also prolongs the lifespan of your equipment. It’s worth taking those few extra moments to ensure everything is correctly fitted before diving into your cleaning task.
Securing the Dispenser Properly
To ensure a stable and leak-free connection, use a robust fastening method. I recommend tightening the connector securely with a wrench, but be cautious not to overtighten, as this could damage the fittings. It’s best to check for snugness regularly, especially after several uses.

Utilising Hose Clamps
Hose clamps are an excellent choice for enhancing stability. Position the clamp over the connection point and tighten it until it feels secure. This prevents any accidental disconnections during operation. I’ve seen too many setups fail simply because a connector wasn’t properly secured–take my word for it, a few minutes spent double-checking your work can save a lot of hassle later.
Testing for Leaks
After securing everything, turn on the system at low pressure to test for leaks. Look for any signs of soap solution escaping from the joints. If you spot any, turn off the unit immediately and address the issue. It’s far better to catch leaks before you start cleaning than to deal with a soapy mess mid-task. For further guidance on securing connections, check out this resource: .
Testing the Soap Dispenser Functionality
After setting everything up, it’s time to check if the suds system operates correctly. Begin by filling the container with your chosen cleaning solution. Make sure it’s compatible with the machine you’re using, as not all formulations work with every unit.
Next, switch on the equipment, ensuring it’s set to low pressure. This prevents any potential damage to the unit or your surfaces. Aim the nozzle towards a flat surface, preferably a test area like an old patio or driveway. Pull the trigger and observe the flow of the cleaning agent. It should start to mix with the water almost immediately.
Observing the Mixture and Application
Watch for a steady stream of foam. If you notice interruptions or weak output, it may indicate a blockage in the line or an issue with the connection. Disconnect and inspect all fittings, ensuring everything is secured and clear of debris. Reinserting the components correctly can often resolve these minor issues.
Once you see a consistent flow, adjust the nozzle for a wider spray pattern. This allows for even coverage over larger areas. Test different distances from the surface to find the optimal spray technique. The mixture should cling to surfaces effectively, allowing it to penetrate dirt and stains for maximum cleaning power.
Final Checks and Adjustments
After testing, it’s wise to rinse a small area to see how well the solution performs in actual cleaning conditions. If the results are satisfactory, you’re ready to tackle your main cleaning tasks. If not, consider adjusting the concentration of the solution or checking for any remaining issues in the setup. A little troubleshooting goes a long way in ensuring the best results.
Troubleshooting Common Issues with Cleaning Solutions Containers
To resolve problems with your cleaning solution container, first check for clogs in the tubing. If the flow of liquid is inconsistent, it’s often due to a blockage. Clear any debris or residue that may have built up over time. A simple flush with water can often do the trick.
Leakage Problems
If you notice any leaks, inspect the connectors and seals. Worn-out seals can cause leaks, so replacing them can prevent further issues. Ensure all connections are tight; sometimes, a quick adjustment is all that’s needed. If leaks persist, consider using plumber’s tape on threaded connections for a better seal.
Inadequate Mixing of Solutions
In instances where the cleaning solution isn’t mixing well, check the container’s intake hose. It should be submerged in the solution without any air gaps. If the hose is too short or improperly positioned, it may not draw liquid effectively. Adjust the hose length or position it correctly to ensure proper mixing.
- Ensure the hose is fully submerged in the cleaning solution.
- Inspect for any kinks or bends in the hose that may restrict flow.
- Consider using a different cleaning solution if the current one is too thick.
For those who encounter performance issues, verify that the container is compatible with your cleaning device. Some units require specific types of containers or solutions. Always consult the manufacturer’s guidelines for compatibility.
Finally, if you’re experiencing poor performance, clean the filter regularly. A dirty filter can hinder performance significantly. Remove it, rinse with water, and reinstall it to keep everything functioning smoothly.
Maintaining the Soap Dispenser for Longevity
Regular upkeep of your cleaning agent reservoir can significantly extend its lifespan and enhance performance. Here are a few straightforward recommendations based on my hands-on experience.
Routine Cleaning
- After each use, flush the tank with clean water to remove any residue. This prevents clogs and ensures that the next cleaning session starts fresh.
- Periodically disassemble the components for a more thorough cleaning. Use a soft brush to remove any build-up, especially in the nozzle and tubing.
Proper Storage
- Store the tank in a cool, dry place to prevent damage from extreme temperatures. Avoid leaving it outside or in direct sunlight.
- Ensure that all parts are dry before storing to prevent mould and mildew from developing.
Using quality cleaning solutions also plays a vital role in the longevity of your equipment. Cheaper products might save you money in the short term, but they can lead to more wear and tear. If you’re on a budget, consider options that are under £100 yet still effective.
Pay attention to any changes in performance, such as reduced flow or inconsistent dispensing. These can be early signs that maintenance is required. By following these practices, you’ll ensure your cleaning agent reservoir remains in great shape for years to come.
.jpg)


