


To create a robust cleaning machine that rivals commercial options, focus on selecting high-quality components. Start with a powerful engine; I recommend a reliable gasoline engine with at least 6.5 horsepower. This ensures you have the necessary force to tackle stubborn dirt and grime effectively.
Next, source a compatible pump. A triplex pump is an excellent choice due to its durability and consistent performance. Look for a model that operates efficiently within the range of 2500 to 3000 PSI. This balance will provide the cleaning power needed for various surfaces without risking damage.

Consider the frame as well. A sturdy, welded steel frame will not only support the components but will also withstand the rigours of outdoor use. I’ve seen too many setups fail due to flimsy construction that can’t handle the stress of regular operation.
Don’t overlook the hoses and fittings. Opt for high-pressure hoses rated for the maximum PSI your pump produces. High-quality connections prevent leaks and ensure seamless flow, which I found crucial during practical tests. Lastly, assembling everything with care and precision will make a significant difference in the machine’s longevity and performance.
Constructing a High-Performance Cleaning Machine
Choose a robust engine with a minimum output of 5 horsepower for optimal performance. I’ve found that Honda and Kohler engines are dependable choices, offering longevity and reliability. Pair the engine with a quality pump capable of handling at least 3000 PSI–brands like General Pump are worth considering.
Component Selection
Use a heavy-duty frame to support the machine, as stability is critical during operation. A tubular steel frame, preferably with a powder-coated finish, will resist corrosion and last longer. Ensure the wheels are large and durable; I recommend pneumatic tyres for easy manoeuvrability across different terrains.
Assembly Tips
Secure the engine and pump with appropriate mounting brackets to minimise vibrations. Use high-tensile bolts and nuts to prevent loosening during use. When connecting the pump to the engine, opt for a reliable belt and pulleys; I’ve had great success with Gates belts that offer excellent grip and durability. Remember to adjust the tension properly to avoid slippage.
Choosing the Right Components for Your Pressure Washing Machine
Opt for a reliable engine, as it serves as the heart of the system. I’ve seen countless units fail due to subpar motors. Look for reputable brands like Honda or Kohler. Their engines not only deliver power but also durability. A minimum of 5 horsepower is advisable for most tasks.
The pump selection is equally critical. Choose between axial and triplex pumps. Triplex pumps often provide better longevity and performance, especially for heavy-duty applications. In my experience, brands like AR and Cat offer exceptional reliability.
For the nozzle, consider adjustable options. I recall a project where a fixed nozzle limited versatility, hindering the effectiveness on different surfaces. An adjustable nozzle allows you to switch between low and high pressure effortlessly, making it perfect for various cleaning tasks.
Don’t overlook the importance of the belt. A high-quality, reinforced belt can withstand prolonged use without slipping. I recommend checking for brands that offer heat-resistant materials, as they enhance lifespan in demanding conditions.
Choosing the right frame is also a key factor. A robust, corrosion-resistant frame will ensure stability and longevity. I once had a machine that rusted within a year due to a low-quality frame, which was a costly mistake. Look for powder-coated steel or aluminium options.
Lastly, consider the wheels. Large, sturdy wheels can make a significant difference when manoeuvring over uneven terrain. I learned the hard way with small, flimsy wheels that made transport a struggle during a job. Go for at least 10-inch wheels for better mobility.
Understanding the Belt Drive Mechanism
The core of a reliable cleaning system lies in its mechanism. A well-designed system can significantly enhance performance and extend the lifespan of the components. The mechanism I’m referring to is based on a series of pulleys and belts that transmit power from the engine to the pump. This setup offers distinct advantages over direct drive systems.
Key Advantages
- Reduced Vibration: The isolation provided by the belt system minimises vibrations, leading to quieter operation and less wear on the pump and engine.
- Improved Torque Management: The mechanism allows for better torque distribution, enabling higher efficiency during use.
- Flexibility in Placement: The separation of the engine and pump opens up various configuration options, allowing for customised layouts based on specific needs.
- Heat Dissipation: The belt mechanism can help dissipate heat more effectively, reducing the risk of overheating during prolonged usage.
Components to Consider
When selecting components for this setup, focus on quality and compatibility. Here are some recommendations:
- Pulleys: Choose pulleys made from durable materials like aluminium or steel. Ensure they have the correct diameter to achieve the desired RPM for the pump.
- Belts: Opt for heavy-duty belts that can withstand high tension and frequent use. Look for options with reinforced fibres for added strength.
- Mounting Brackets: Secure mounting is critical. Use robust brackets that can hold both the engine and pump firmly in place, reducing the chances of misalignment.
- Engine and Pump Compatibility: Ensure the engine’s horsepower matches the pump’s specifications to maximise efficiency and prevent overloading.
By carefully selecting and assembling these components, you can create a robust cleaning unit that delivers consistent performance for years. My own experience has shown that investing time in understanding and optimising this mechanism pays off in spades.
Assembling the Frame for Stability
For a robust setup, focus on using high-quality materials for the frame. I recommend steel or heavy-duty aluminium, as they provide the necessary sturdiness to withstand vibrations and impacts during operation. In my experience, a well-constructed frame can significantly extend the lifespan of your equipment.
Choosing the Right Dimensions
When crafting the framework, ensure accurate measurements to maintain balance and stability. A rectangular design often works best, with dimensions around 36 inches long and 24 inches wide. This gives ample room for components while keeping the overall weight manageable.
Connection Points and Reinforcement
Weld or bolt connection points firmly, as they are critical for reducing flex. I’ve seen too many setups fail because of weak joints. Adding diagonal braces can enhance rigidity, especially in larger frames. If you opt for bolts, choose grade 8 or higher for maximum strength.
| Material | Advantages | Disadvantages |
|---|---|---|
| Steel | Highly durable, great strength | Heavy, prone to rust if not treated |
| Aluminium | Lightweight, resistant to corrosion | Less strength compared to steel, can bend |
Don’t forget to consider the weight distribution of the entire assembly. Place heavier components lower in the frame to enhance stability. In one project, I positioned the motor and pump closer to the ground, which made a noticeable difference in handling during use.
Lastly, a solid base is key. Whether you’re using wheels or a stationary setup, ensure that the base is wide enough to prevent tipping during operation. A well-constructed frame not only improves performance but also enhances safety. Trust me, investing time in this aspect pays off in the long run.
Installing the Engine and Pump Safely
Before you start the installation, ensure you have the right tools: a socket set, wrenches, and a torque wrench for precise fastening. Safety gear is a must–gloves and safety glasses protect against any accidental mishaps during assembly.
Securing the Components
Position the engine and the pump on the frame. Use rubber mounts to absorb vibrations, reducing wear on the components and enhancing stability. Align the pump and engine shafts carefully; misalignment can lead to premature failure. A straight-edge tool can help ensure they are perfectly aligned before securing them in place.
Connecting the System
Attach the drive system using high-quality belts. Make sure the tension is adjusted correctly; too loose and the performance will be affected, too tight and you risk damaging the bearings. Check the manufacturer’s specifications for the correct tension levels. Once everything is connected, perform a thorough inspection to ensure all connections are tight and secure. Conduct a dry run before filling the system with water to confirm there are no leaks and everything operates smoothly.
Connecting the Belt System Properly
Ensure all components align accurately to prevent premature wear and inefficiency. Misalignment can lead to increased vibration and noise, shortening the lifespan of the machinery.
Steps for Proper Connection
- Begin by positioning the motor and pump at the correct distance. Use a measuring tool to confirm the spacing is consistent with the specifications of your selected components.
- Install the pulleys, ensuring they are secured tightly to both the motor shaft and the pump shaft. Double-check the tightness of the fastening hardware to avoid slippage.
- Use a straight edge to verify that the pulleys are parallel. If they are not, adjust the positioning of the motor or pump accordingly. This step is crucial for smooth operation.
- Attach the connecting mechanism while ensuring it is neither too tight nor too loose. A proper tension allows for efficient power transfer without causing strain on the parts.
- After assembly, rotate the motor manually to ensure that everything moves freely without obstruction. Listen for any unusual sounds that might indicate misalignment.
Tensioning the Connection
Adjust the tension of the connection by following these guidelines:
- Use a tension gauge to measure the appropriate tension based on the specifications provided by the component manufacturers.
- Make incremental adjustments, testing the system after each alteration to assess performance.
- A well-tensioned connection should allow for slight deflection when pressed, but must not feel overly slack or tight.
Regularly inspect the connection for signs of wear or misalignment during maintenance checks. A proactive approach ensures longevity and optimal performance of your equipment.
Setting Up the Water Supply System
Start with a reliable source. A garden hose with a minimum diameter of 5/8 inch is ideal for ensuring a steady flow. If you’re using a water tank, ensure it has a capacity that can sustain your operations for extended periods. I’ve often seen setups fail due to inadequate water supply, so make sure your source can deliver at least 5 gallons per minute.
Next, install a filter at the inlet to the pump. This prevents debris from entering the system, which can cause clogs and damage. I always recommend a mesh filter with a 100-micron rating. It’s a small investment that saves a lot of headaches down the line.

Ensure all connections are watertight. Use Teflon tape on threaded joints to prevent leaks. Nothing disrupts a cleaning session like a slow drip or a full-blown leak. I learned this lesson the hard way during a job when I had to stop halfway through to replace a leaking fitting.
Position the pump below the water source to avoid air entering the line. If gravity isn’t on your side, consider a self-priming pump. It can draw water from below without fuss. I’ve had good experiences with self-priming models, especially in locations where elevation is an issue.
It’s wise to add a pressure gauge in the system. This will help you monitor the water pressure and adjust accordingly. Too much pressure can lead to damage, while too little can result in ineffective cleaning. I’ve had clients call me frustrated with their results, only to find out they were operating below the required pressure.
Finally, always test the system before starting a job. Run water through it for a few minutes to check for leaks and ensure everything is functioning correctly. This step is crucial. I’ve seen too many professionals skip this, only to face delays and dissatisfaction later. Remember, the quality of your work is only as good as the systems you have in place.
| Component | Recommendation |
|---|---|
| Hose Diameter | 5/8 inch minimum |
| Filter | 100-micron mesh filter |
| Connection Sealing | Teflon tape for threaded joints |
| Pump Position | Below water source or self-priming |
| Pressure Monitoring | Install a pressure gauge |
For more insights on related technology, check out this article on are digital cameras and scanners input or output devices.
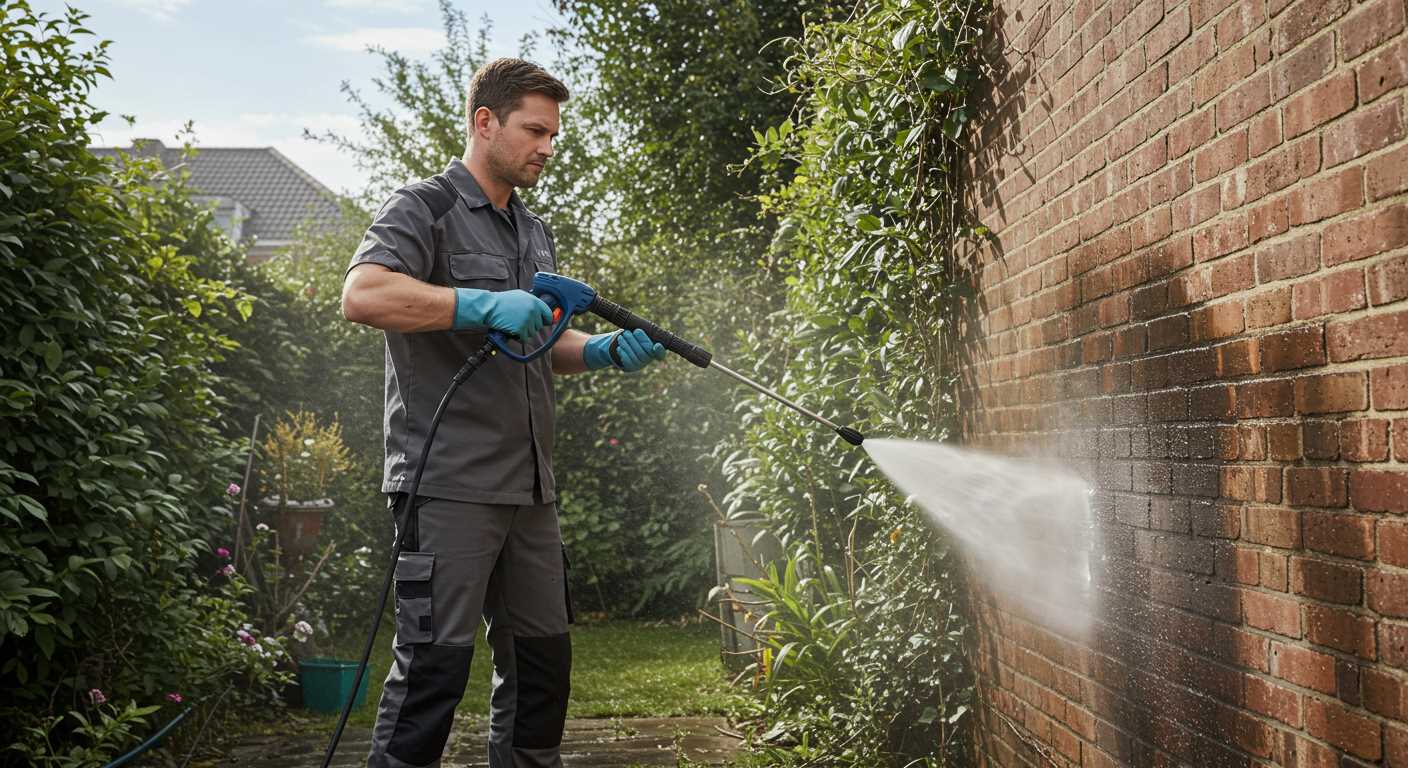
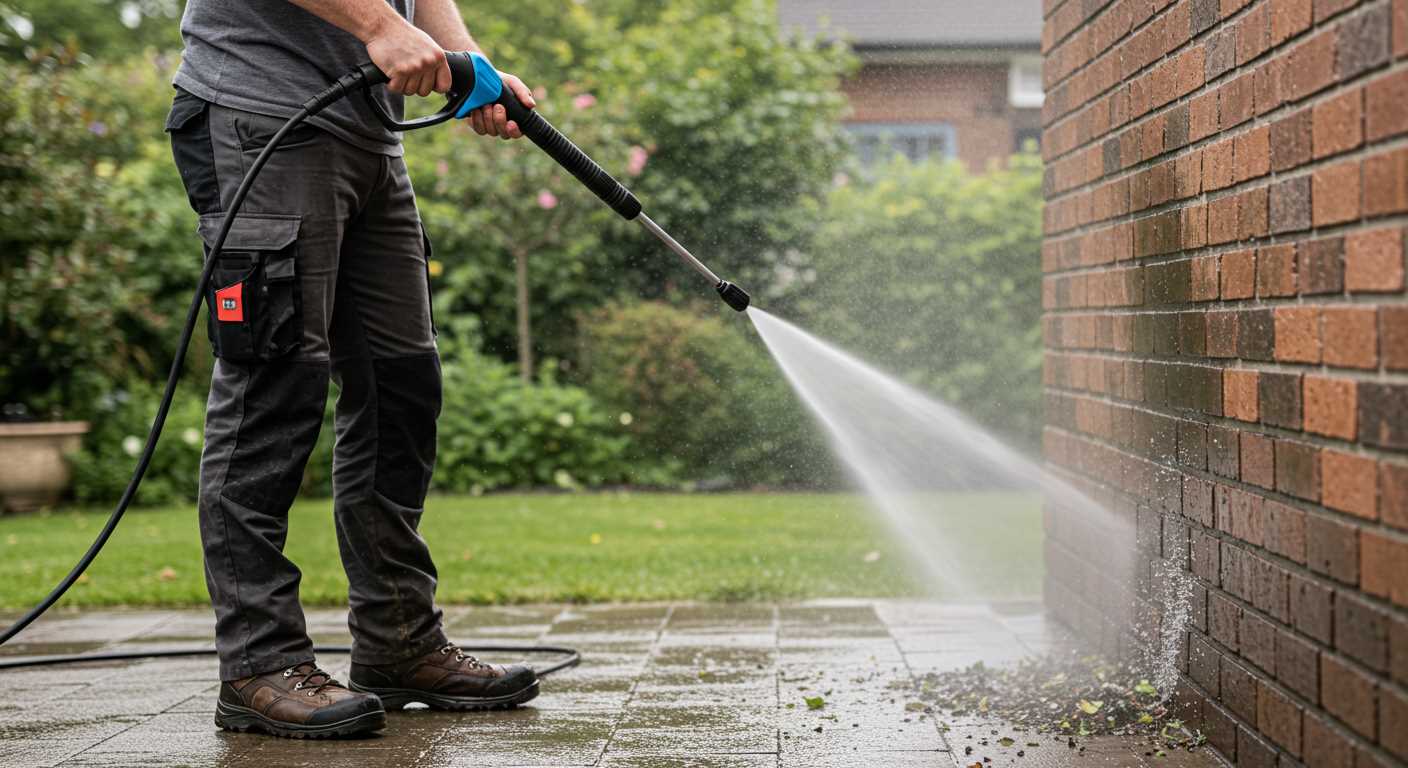
Testing the Equipment for Performance
Begin testing by ensuring your unit is properly assembled and all components are securely fixed. Fill the tank with clean water and make sure the engine has the right amount of fuel and oil. Start the engine and let it warm up for a few minutes before initiating any tests. This ensures that the components are adequately lubricated and ready for operation.
Measuring Pressure Output
Utilise a pressure gauge to monitor the output during operation. Connect the gauge to the nozzle and run the machine at full throttle. Ideal pressure levels typically range from 2000 to 3000 PSI, depending on the pump specifications. If the reading falls below this range, inspect the pump and connections for leaks or clogs that may be affecting performance.
Assessing Water Flow Rate
Next, measure the water flow rate, as this is critical for efficiency. Use a container with a known volume, such as a 5-gallon bucket, and time how long it takes to fill it. A good flow rate for most setups is around 2.5 gallons per minute (GPM) or higher. If your readings are lower, check for kinks in the hoses, blockages, or restrictions in the intake system.
During testing, observe the operation for any unusual noises or vibrations. These can indicate misalignment or wear in the components. Regularly check the belt tension; it should be firm but not overly tight, allowing for optimal power transfer without causing additional strain on the engine.
Lastly, perform a cleaning test on a surface. This practical evaluation provides insight into the effectiveness of your apparatus. Adjust the nozzle settings and distance from the surface to find the optimal cleaning power while ensuring you do not damage the material. Document your findings for future reference and adjustments.
Maintaining Your Belt Drive Pressure Washer
Regular upkeep is key to ensuring longevity and performance. I recommend creating a maintenance schedule that includes the following tasks:
- Check the Oil: Always inspect the engine oil level before use. Change the oil every 50 hours of operation to keep the engine running smoothly.
- Inspect the Cooling System: Ensure that the cooling fins on the engine are clean and free of debris. This prevents overheating during extended use.
- Examine the Pump: Look for any leaks or signs of wear. If the seals appear damaged, replace them immediately to avoid pump failure.
- Inspect the Belts: Regularly check the tension and condition of the belts. Worn or frayed belts can lead to slippage or breakage, affecting performance.
- Clean the Filters: Dirty water filters can cause pump damage. Clean or replace filters as needed to maintain optimal water flow.
After a day of heavy use, I often take the time to wipe down the exterior and remove any accumulated grime. This not only keeps the equipment looking good but also helps in spotting potential issues early.
It’s also beneficial to store the unit in a dry, sheltered location to protect it from the elements. Exposure to moisture can lead to rust and corrosion over time. If you’re considering other cleaning techniques, you might want to explore sandblasting with a high pressure cleaner is that possible for more versatility.
Lastly, keep an eye on the hoses. Inspect them for kinks or cracks that could lead to leaks. Replacing damaged hoses promptly can save you from larger issues down the line.
Common Issues and Troubleshooting Tips
When the machine refuses to start, the first step is to check the fuel level. I once faced a situation where a simple oversight of an empty tank led to hours of frustration. Ensure the fuel is fresh and not contaminated. If the engine turns over but fails to start, inspect the spark plug. A worn or fouled plug can prevent ignition, so replacing it often resolves the issue.
Poor Water Pressure
If the output lacks power, verify the water supply. A blocked inlet filter can impede flow–clean it regularly. Another common culprit is a kinked hose, which I’ve encountered multiple times. Inspect the entire length of the hose for any bends or blockages. If everything appears clear, consider the pump; worn seals or internal damage can lead to decreased performance. In these cases, a rebuild or replacement might become necessary.
Unusual Noises
Strange sounds often indicate a problem. A high-pitched squeal can signal a misaligned pulley or worn bearings in the pump. I recall a time when a grinding noise led to a complete pump failure. Regular maintenance checks can help identify these issues before they escalate. If you hear knocking, stop immediately to avoid further damage. Tightening loose components may alleviate the noise, but persistent sounds should prompt a deeper inspection.

.jpg)


