
.jpg)


.jpg "How to change the nozzle on a ryobi pressure washer")
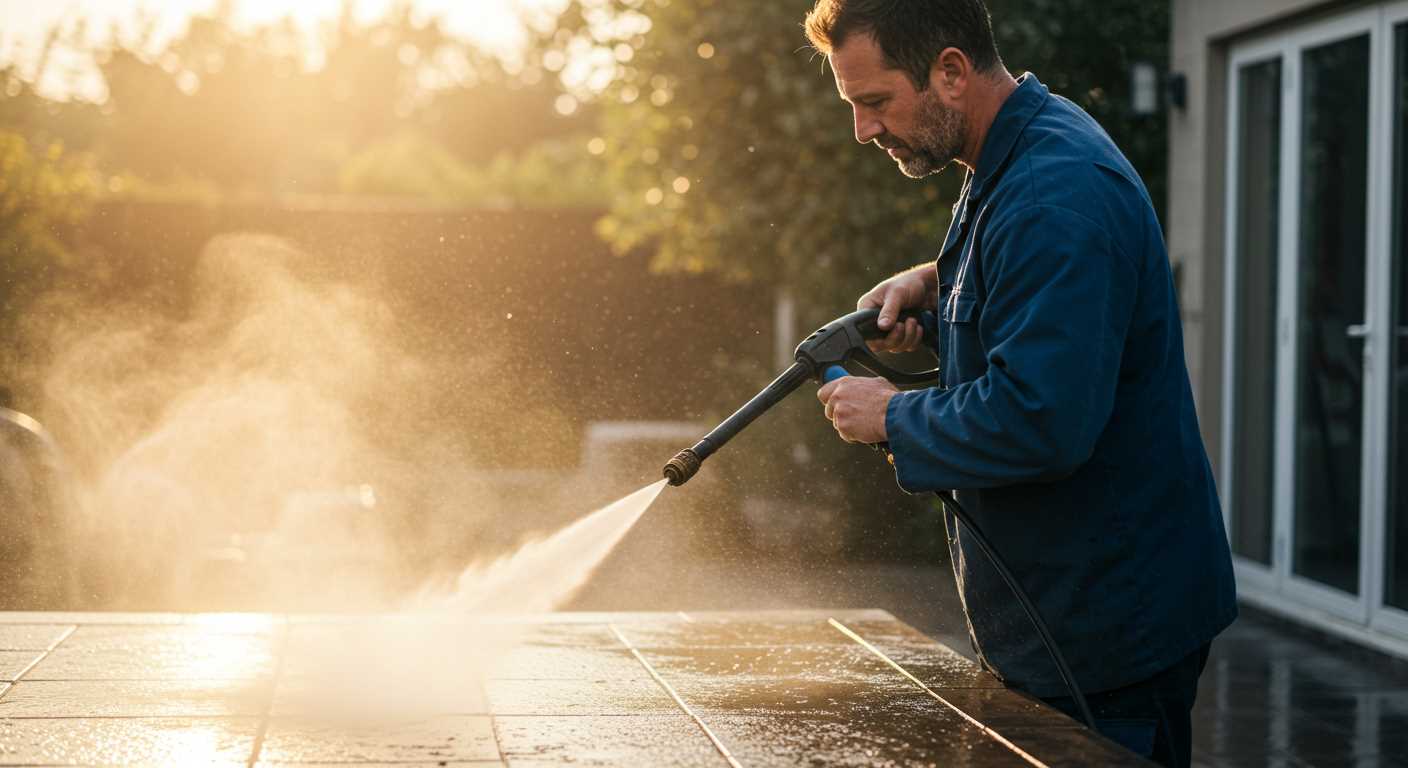
For an optimal cleaning experience, selecting the right attachment for your high-pressure cleaner is paramount. I recall a time when I faced stubborn grime on my patio; a simple swap of the tip transformed my approach, making the task not only quicker but more satisfying. Knowing which accessory to use can save both time and effort, enhancing the overall effectiveness of your cleaning routine.
Begin by ensuring your device is powered down and disconnected from any water supply. This precaution not only guarantees safety but also prevents any accidental operation while you’re working. I often found it helpful to keep the manual handy, as it provides specific guidance tailored to the model, which can streamline the process significantly.

Once ready, grasp the existing tip firmly, applying a gentle twist while pulling it away from the lance. Some models may require a slight push before it releases. This method has served me well over the years, avoiding any unnecessary frustration. After removing the current attachment, simply align the new one with the opening, ensuring it clicks into place securely. A snug fit is essential to prevent leaks and ensure maximum performance during use.
Lastly, test your equipment with a short burst of water to confirm everything is functioning as intended. I’ve learned that taking these extra moments to check can save a lot of hassle later. Each time I switch attachments, I remind myself of the vast difference a single accessory can make in the cleaning process.
Swapping Out Spray Tips on Your Pressure Cleaner
First off, ensure your device is powered down and disconnected from any water source. I’ve seen too many people rush this step, only to encounter mishaps. With the unit off, locate the attachment point for the spray tip; it’s typically right at the end of the wand.
Using a simple twist motion, grip the existing spray tip firmly and rotate it counterclockwise. Some models might require a bit of force, but it should release without too much hassle. If it feels stuck, check for any locking mechanisms that may need disengagement.
Once removed, take your new spray tip and align it with the connector. A gentle push followed by a clockwise twist should secure it in place. Make sure it’s snug but don’t over-tighten, as this can cause damage or misalignment.
After securing the new tip, reconnect your water source and power up the machine. Test the new setting on a small area to ensure it’s working as expected. When I first switched out a spray tip for a more concentrated stream, I was amazed at how much quicker I could tackle tough grime.
Remember, different tips serve unique purposes–from wide fans for gentle cleaning to narrow jets for stubborn stains. Keeping a few on hand can really expand your capabilities. Each tip can transform your cleaning experience, so don’t hesitate to experiment with different ones for various surfaces.
Identifying the Correct Nozzle Type for Your Pressure Washer
First, determine the application: cleaning vehicles, patios, or delicate surfaces. Each task requires a specific attachment for optimal results. For instance, a wide-angle sprayer is perfect for larger areas, while a narrow stream works best for tough grime.
Understanding Nozzle Ratings
Nozzles are usually colour-coded. Yellow typically denotes a 15-degree spray, ideal for stripping paint or heavy stains, while green represents a 25-degree spray, suitable for general cleaning tasks. A white attachment, with a 40-degree angle, is gentle enough for washing cars or windows. Remember to verify the ratings and colour codes in your user manual.
Compatibility and Fit
Next, check the fitting type. Some models use quick-connect fittings, while others may require screws or clips. Measure the diameter of your current attachment if you’re unsure. This ensures you purchase the right replacement, avoiding frustration during your cleaning tasks.
In my experience, having a variety of attachments on hand saves time and enhances efficiency. I once tackled a massive driveway project, switching between a narrow jet for stubborn stains and a wide spray for quick rinsing. Each nozzle’s unique function made the task manageable and effective.
For any cleaning endeavour, selecting the appropriate attachment streamlines the process, ensuring you achieve the best possible outcome. Don’t hesitate to consult your manual or a retailer for clarification on which accessory suits your model and needs best.
Gathering Necessary Tools for Nozzle Replacement
To efficiently swap out your spray attachment, you’ll need a few specific items. First, grab a pair of adjustable pliers. These will help loosen any stubborn fittings. Sometimes, connections can be tighter than expected, and having a reliable tool on hand makes a difference.
Next, a flathead screwdriver can come in handy. While not always necessary, it can assist in prying off any clips or retaining rings if your model has them. Don’t forget a clean rag or cloth; it’s useful for wiping down the area and ensuring no dirt interferes with the new attachment.
Additional Supplies
Consider having a bucket or a basin nearby. This allows you to catch any residual water that may drip during the replacement. If you have a multi-tool or a socket set, these can be useful for various adjustments, depending on your model’s design.
Lastly, always check the user manual for specific requirements or recommendations. It’s surprising how often I’ve seen people overlook this, only to find themselves without the right equipment. Gathering these tools ahead of time will make the process smoother and quicker.
Disconnecting from Power and Water Supply
Always ensure the machine is unplugged before starting any maintenance. This step prevents accidental activation while working on it. Locate the power cord and remove it from the outlet. If your equipment has a GFCI plug, press the reset button to ensure it’s completely off.
Next, turn off the water supply. Locate the faucet connected to the unit and twist it clockwise to stop the flow. After that, disconnect the water supply hose from the inlet. Be prepared for some residual water to spill out; have a towel handy to catch any drips.
For enhanced safety, it’s advisable to release any remaining pressure in the system. Squeeze the trigger on the gun to purge any trapped water. This action ensures that no water is left in the hoses or the unit, minimising the risk of damage during the nozzle swap.
Now, with everything disconnected, your equipment is ready for a thorough inspection or any changes needed. If you’re considering other tools for various tasks, you might want to check out the best air compressor for continuous use for added versatility in your cleaning arsenal.
Removing the Existing Nozzle from the Lance
To detach the current attachment from the lance, securely grip the lance with one hand while using the other to twist the existing accessory counterclockwise. Most models feature a simple twist mechanism, making it straightforward. If it feels stuck, check for any debris or grime that might be causing the obstruction.
In my experience, applying a bit of penetrating oil can help if the attachment is particularly stubborn. Let it sit for a few minutes, then repeat the twisting action. If you encounter resistance, avoid using excessive force as this could damage the lance or the attachment.
Once the accessory is free, inspect the lance for any signs of wear or damage. This is a good opportunity to clean the area to ensure a tight seal with the new accessory. For those dealing with tougher cleaning tasks, such as cleaning natural stone with a pressure washer, keeping the lance in good condition is crucial for optimal performance.
After successfully removing the old attachment, you’re ready for the next step in fitting the new one. Always ensure that the new accessory aligns properly with the lance for an effective cleaning experience.
Attaching the New Nozzle Securely
Align the new attachment with the lance, ensuring it fits snugly. A proper fit prevents leaks and maintains optimal performance. Apply a slight twisting motion while pushing it onto the lance for a secure connection. Listen for a click or feel a subtle resistance indicating it’s locked in place.

Locking Mechanism Check
Always inspect the locking mechanism after securing the attachment. Some models include a pin or clip that must be engaged. Make sure it’s fully seated to avoid any accidental detachment during operation.
Final Inspection
Before activating the machine, double-check all connections. Look for any signs of misalignment or gaps. This step is crucial to ensure safety and functionality. A quick visual inspection can save you from potential mishaps later.
| Step | Description |
|---|---|
| 1 | Align the new attachment with the lance. |
| 2 | Twist while pushing for a snug fit. |
| 3 | Check the locking mechanism if present. |
| 4 | Perform a final inspection before use. |
Testing Your Equipment After Nozzle Replacement
After installing the new attachment, it’s time to verify its performance. Follow these steps for a thorough evaluation:
- Reconnect Water Supply: Ensure that the water source is securely attached. Check for any leaks at the connection point.
- Reconnect Power: Plug in the unit, making certain that the power cord is in good condition and free from damage.
- Start the Machine: Turn on the equipment and let it run for a minute to build up pressure. Listen for unusual noises that could indicate an issue.
- Test Different Settings: Adjust the settings to see how the equipment performs with the new attachment. Experiment with various pressure levels if applicable.
- Check Spray Pattern: Aim at a suitable surface and observe the spray pattern. It should be even and consistent, without drips or interruptions.
- Inspect for Leaks: While operating, examine the attachment and connection points for any signs of leaking water, which could indicate a poor fit.
- Test on a Surface: Use the tool on an actual surface, such as concrete or decking, to evaluate its cleaning efficiency. Note how well it tackles grime and dirt.
In my experience, these steps not only ensure the equipment operates correctly but also help identify any potential concerns before starting a larger project. Occasionally, I’ve found that a new attachment can modify the way the machine functions, so it’s wise to stay vigilant.
If everything seems to be functioning as expected, you’re ready to tackle your cleaning tasks. If issues arise, double-check the installation or consult the manual for troubleshooting tips.
Maintaining Nozzles for Longevity and Performance
Regular upkeep of your washing accessories significantly enhances their lifespan and efficiency. From my years of experience, I’ve seen many operators overlook the importance of maintenance, leading to subpar results and premature wear.
Cleaning After Use

Always rinse your attachments after each job. Residue from soaps or debris can build up, affecting performance. Use warm water and a soft brush to ensure all particles are removed.
- Detach the attachment from the lance.
- Submerge it briefly in warm soapy water.
- Gently scrub with a brush, paying attention to any small openings.
- Rinse thoroughly and allow to air dry completely before storage.
Storage Tips
How you store your accessories impacts their condition. Avoid placing them in damp areas or exposed to direct sunlight, which can cause materials to warp or degrade over time. Instead:
- Store in a cool, dry place.
- Use a dedicated container to prevent accidental damage.
- Avoid stacking heavy items on top, which could bend or break components.
In my experience, using a small bag or box specifically for these parts keeps everything organised and protected. This goes a long way in maintaining their functionality for future tasks.
Regular Inspections
Check your attachments periodically for cracks or wear. A small fissure can lead to larger issues down the line. I recommend inspecting them before each major use. Look for:
- Signs of wear on the connection points.
- Any discolouration indicating damage.
- Clogs within the spray openings.
By maintaining diligence in these areas, you ensure optimal performance and longevity of your washing components, saving time and money in the long run.

.jpg)


