


Begin by selecting the right nozzle for your task. A 25-degree or 40-degree nozzle is typically ideal for most surfaces. I’ve found that the wrong nozzle can lead to damage rather than restoration. For example, using a narrow nozzle on softer materials might etch the surface, which is something I’ve seen happen far too often.
Next, ensure you prep the area effectively. Remove any furniture, planters, and debris. I remember a time when I underestimated the importance of this step; it resulted in a messy scene and a longer clean-up process. Taking a few minutes to clear the space can save a lot of hassle down the line.
Before you start, soak the area lightly with water. This helps to loosen dirt and grime. In my experience, a quick rinse makes the subsequent process much smoother. Once the area is damp, you can apply a suitable detergent if you’re dealing with stubborn stains. I often recommend a biodegradable option to protect surrounding plants.

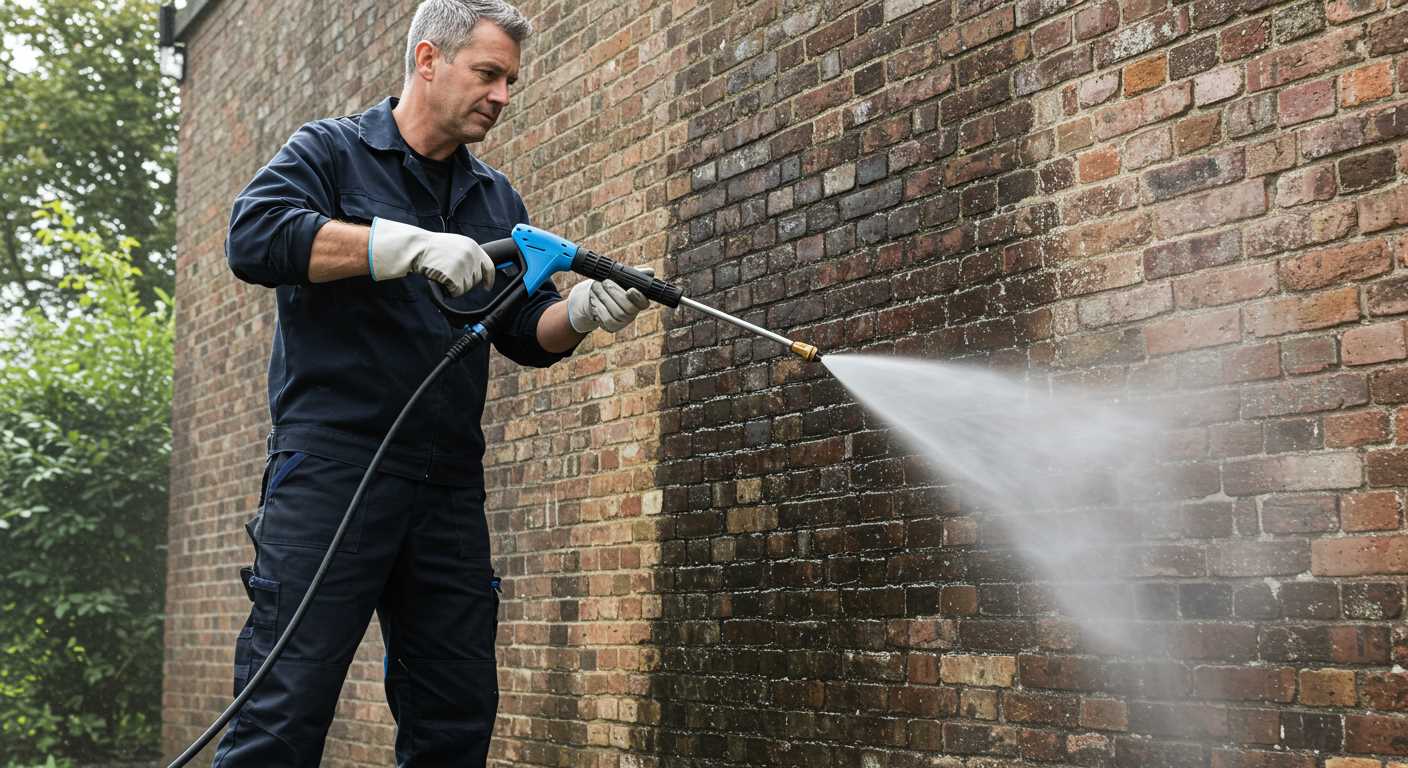
When you’re ready, keep the nozzle at a consistent distance of around 12 to 18 inches from the surface. Moving too close can cause unwanted marks, while being too far may reduce the effectiveness of the wash. I recall the first time I used a machine; I was too aggressive and ended up with uneven patches–a lesson learned the hard way.
Finally, rinse thoroughly to remove any soap residue. A second pass can help ensure that everything is washed away properly. After completing the job, let the area dry completely before replacing furniture or decorations. This not only looks better but also prevents accidental slips on wet surfaces. Trust me, a little patience goes a long way in achieving the best results.
Steps for Refreshing Your Outdoor Surface
Begin by clearing the area of any furniture, plants, or debris. This ensures that the entire surface is accessible and prevents any damage to surrounding items. I’ve seen too many people skip this step, only to regret it later when they accidentally spray their garden furniture.
Next, choose a suitable nozzle for your device. A wide-angle nozzle works well for general washing, while a narrower one can tackle stubborn stains. I remember using a 25-degree nozzle on my own surface, and the results were impressive. Adjust the pressure according to the material’s condition; too high can cause damage.
Pre-Treatment Application
Consider applying a cleaning solution specifically designed for outdoor surfaces. Pre-treating the area helps to break down grime and mildew. I often mix a solution of water and a mild detergent, allowing it to sit for about 10-15 minutes. This time frame is crucial; it lets the cleaner penetrate the dirt effectively.
Washing Technique
Begin washing from one corner and work your way across, maintaining a consistent distance from the surface–about 12 to 18 inches. Use a sweeping motion, overlapping each pass to ensure complete coverage. I found that going too close can lead to etching, while being too far reduces cleaning effectiveness.
| Task | Time (minutes) |
|---|---|
| Preparation | 10 |
| Pre-Treatment | 15 |
| Pressure Washing | 30-60 |
| Drying Time | 60 |
After completing the washing, rinse the area thoroughly with plain water to remove any residual cleaner. I’ve learned that leaving any cleaning solution behind can lead to slippery conditions once it dries.
Finally, allow the surface to dry completely. This is the best time to inspect for any missed spots or stains that may need another round of treatment. With a little care and the right technique, your outdoor area can look brand new again.
Choosing the Right Pressure Washer for Your Patio
For optimal results, select a model boasting at least 2000 PSI and 1.8 GPM. This balance provides sufficient power to tackle stubborn stains while being gentle enough not to damage your surfaces. I recall a project where I used a washer with a lower PSI. The results were less than satisfactory, requiring additional effort and time.
Electric units are ideal for residential use, especially if you have a smaller area to maintain. They are quieter and easier to handle. I’ve often chosen electric models for my own tasks, appreciating their convenience and ease of storage. However, if you’re dealing with extensive or heavily soiled areas, consider gas-powered options. These machines tend to have higher pressure ratings and longer run times, which can be invaluable for larger projects.
Pay attention to attachments. A rotating nozzle can significantly enhance your cleaning efficiency. I once used a standard nozzle on a particularly grimy outdoor space and switched to a rotating attachment halfway through. The difference was astonishing; it cut my cleaning time in half. Additionally, surface cleaners can expedite the process for larger expanses, allowing for a consistent finish.
Lastly, consider weight and portability. If you plan to move the equipment around frequently, look for models with wheels and a manageable weight. I’ve struggled in the past with bulky units that were a chore to manoeuvre. A lightweight design can make all the difference in efficiency and comfort during extended use.
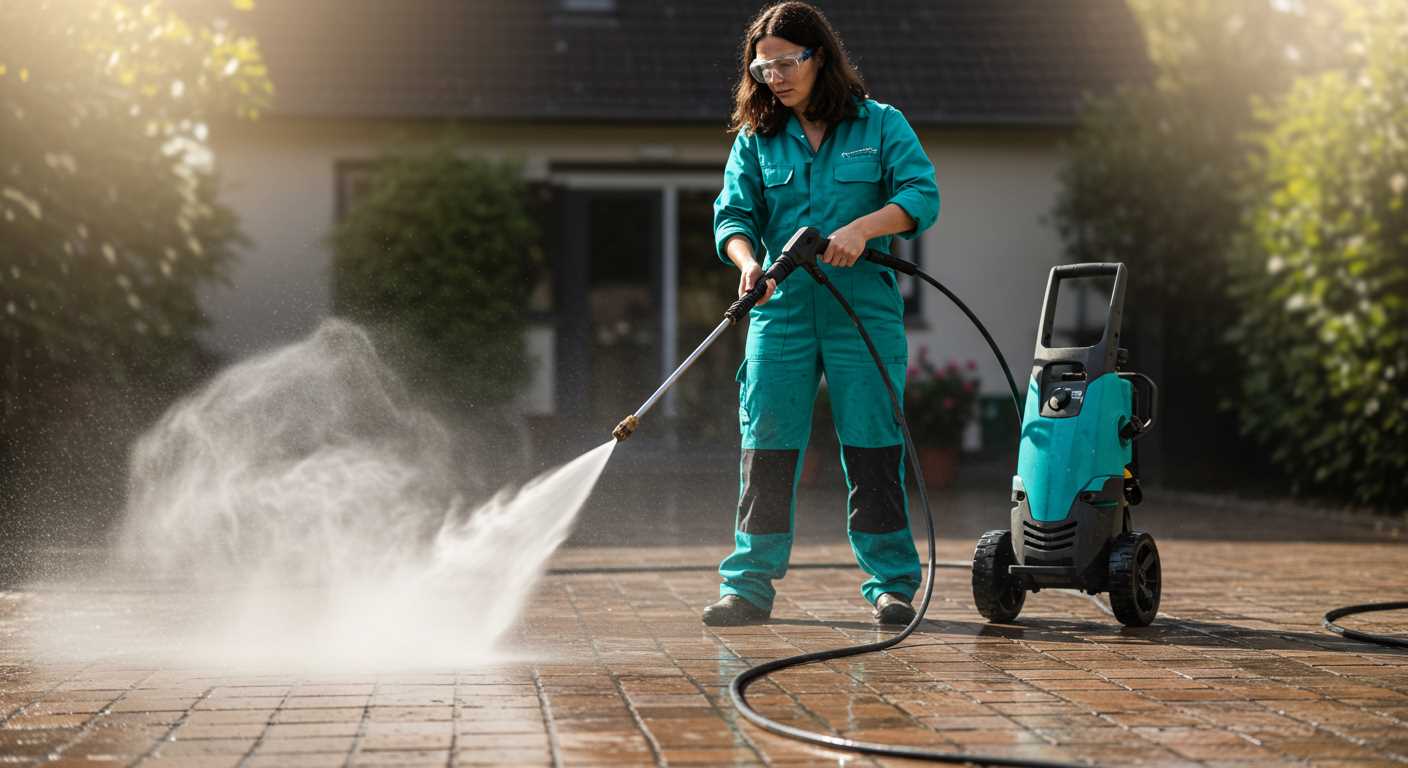
Preparing Your Patio for Cleaning
Ensure the area is free from furniture, planters, and any decor. This not only protects your belongings but also allows for unobstructed access. I once made the mistake of leaving a few potted plants around, and ended up with muddy water splashing all over them. Lesson learned!
Next, sweep the surface thoroughly to remove loose debris, dirt, and leaves. A broom or a leaf blower works wonders here. If you skip this step, you might find that the grime gets pushed around instead of washed away, resulting in more work later.
Inspect for any cracks or damages. It’s wise to address these issues before proceeding. I encountered a situation where a neglected crack worsened due to water penetration, leading to costly repairs. A simple check can save you a headache down the line.
Gather your supplies. In addition to your cleaning machine, have an outlet hose for pressure washer ready. This piece of equipment ensures you have ample water flow, making the task smoother.
Finally, consider pre-treating any stubborn stains with a suitable cleaning solution. I’ve found that applying a solution and letting it sit for a few minutes can significantly enhance the outcome. Just be cautious and follow the manufacturer’s instructions for any chemicals used.
Selecting the Appropriate Cleaning Solution

Start by identifying the type of stains or grime on the surface. For oil and grease, a degreaser works wonders. If it’s just dirt and grime, a standard all-purpose cleaner will suffice.
- For oil stains: Look for a concentrated degreaser. I’ve had good results with products that contain citrus solvents. They break down the oil effectively without damaging the surface.
- For mildew and mould: A mixture of bleach and water can do the trick. Use a ratio of one part bleach to ten parts water. Always wear gloves and a mask when handling bleach.
- For general dirt: An all-purpose cleaner diluted with water is often enough. Choose one that is biodegradable if you’re concerned about the environment.
Mix the chosen solution according to the manufacturer’s instructions. I often find that using too much product doesn’t yield better results; it may even leave a residue.
Test your solution on a small, inconspicuous area first. This helps to ensure compatibility and avoid any unexpected reactions. I’ve seen instances where certain cleaners discolour or damage the surface, so a simple test can save you a lot of trouble.
Consider using a solution applicator or a garden sprayer for even distribution. It’s easier than pouring directly and helps cover larger areas quickly. I recommend letting the solution sit for a few minutes to penetrate the grime before rinsing.
- Safety first: Always wear protective gear, including gloves and goggles, especially when working with harsh chemicals.
- Environmentally friendly options: Vinegar and baking soda can also serve as natural alternatives for light cleaning tasks. They’re less harsh and safe for most surfaces.
Keep in mind that the right solution can make a significant difference in the effectiveness of your cleaning efforts. Choosing wisely not only enhances the outcome but also prolongs the life of your surfaces.
Setting Up the Pressure Washer Safely
Always begin by inspecting your equipment thoroughly. Check for any leaks in hoses and ensure connections are tight. I once missed a small crack in a hose, which led to a messy surprise during a job. Replace any damaged parts before starting.

Position the unit on a stable, dry surface, away from any obstacles. A slip hazard can occur if water pools around the machine. I learned this the hard way when I had to wrestle with a slipping unit while trying to keep it steady. Ensuring a solid footing prevents accidents.
Before plugging it in, double-check the power source. Use an outdoor extension cord rated for heavy-duty use. When I first started, I used a regular cord, and it overheated, causing a power outage. Avoid that headache by investing in the right equipment from the start.
Wear appropriate safety gear: goggles, gloves, and sturdy shoes. I’ve encountered debris flying unexpectedly while operating a machine, and trust me, a good pair of goggles saved me from an eye injury more than once.
Ensure the area is clear of people and pets. I always take a moment to inform my neighbours when I’m about to start, just to keep everyone safe. You wouldn’t want a curious child or pet wandering into the line of fire.
Adjust the nozzle to the appropriate setting for your task. Starting at a lower pressure can prevent damage to surfaces. I learned that lesson after leaving a lasting mark on a patio because I went straight in with the highest setting. Take it slow and test on a small, inconspicuous area first.
Understanding Pressure Settings for Concrete
Adjust the settings to suit the task at hand. For tougher stains and grime, a higher PSI is necessary, but for regular maintenance, a lower setting suffices. I recall a time when I tackled a particularly stubborn oil stain on a driveway. Initially, I used 3000 PSI, but I quickly realised that 1500 PSI did the job without risking damage.
Recommended Pressure Levels
- Light cleaning: 1200 – 1500 PSI
- Moderate stains: 2000 – 2500 PSI
- Heavy-duty removal: 2500 – 3000 PSI
Tips for Adjusting Pressure
- Always start at the lowest setting to avoid any unintended damage.
- Gradually increase the pressure until you find the optimal setting for the specific task.
- Use a fan nozzle for broader coverage, which allows for lower pressure while still being effective.
During my years in the field, I learned that the distance from the surface matters too. Keeping the nozzle about 12–18 inches away helps prevent etching and ensures an even clean. Testing on a small area first gives you confidence before proceeding to larger sections.
In my experience, a common mistake is to set the pressure too high right away. I once damaged a surface by not paying attention to the PSI; it took extra time to repair. So, always prioritise caution–it’s easier to increase pressure than to fix damage caused by excessive force.
Techniques for Evenly Cleaning the Surface
For an even finish, maintain a consistent distance from the surface, ideally around 12 to 18 inches. This helps prevent uneven patches while ensuring thorough removal of dirt and grime. I recall a time when I got too close, and it resulted in streaks that took longer to rectify.
Adopt a systematic approach by working in sections. Divide your area into manageable parts, overlapping slightly with each pass. This method guarantees that no spots are overlooked, and it’s especially useful if you’re tackling stubborn stains. I remember dividing my own space into quadrants and moving methodically, which made the task feel less daunting.
Adjust the nozzle to a wide fan spray for broader coverage initially, switching to a narrower jet for tougher stains. This was a game changer for me; I used to stick with one setting and would often miss spots or spend too long on easy areas. Experimenting with the spray patterns improved my results significantly.
Incorporate a side-to-side motion rather than up and down. This reduces the risk of leaving behind streaks or lines. I learned this the hard way after noticing uneven patches while re-evaluating my work. A consistent lateral movement ensures uniform application of force.
Don’t forget to keep your nozzle level to the surface. Tilting it can cause uneven wear and a patchy appearance. I made the mistake of angling my nozzle during a particularly tough stain removal, only to find that it created more work for me later.
Once you’ve finished, inspect your work from different angles to catch any missed spots. I often find that what looks great from one perspective can reveal hidden areas needing attention from another. A final pass can make all the difference in achieving a pristine look.
Dealing with Stubborn Stains and Algae
For persistent marks and green growth, a targeted approach is crucial. Start by applying a suitable cleaner directly onto the stained areas. Opt for a solution specifically designed for tough surfaces, ensuring it can tackle both organic matter and grease. Allow the cleaner to sit for at least 15 minutes; this dwell time helps to break down the grime.
After the solution has worked its magic, use a stiff-bristled brush to scrub the areas. This manual agitation can significantly enhance the effectiveness of the cleaning agent, particularly for ingrained stains. Focus on one small section at a time to maintain thoroughness.
Next, adjust your machine to a higher flow rate but keep the pressure moderate to prevent damage to the surface. Aim the nozzle at a slight angle to dislodge any remaining debris without causing wear. If stubborn algae persists, consider a second application of cleaner followed by another round of scrubbing and rinsing.
For particularly tough cases, a mixture of vinegar and baking soda can serve as a natural alternative to commercial products. Apply the paste to the stains, let it sit, then scrub and rinse thoroughly. Stay vigilant about these areas; regular maintenance can prevent future build-up.
Should you require additional equipment, like air compressors for drying or other tasks, check out the best air compressor for cnc machines to enhance your toolkit.
| Stain Type | Recommended Treatment |
|---|---|
| Oil and Grease | Commercial degreaser, scrub, rinse |
| Algae | Chlorine bleach solution, scrub, rinse |
| Rust | Rust remover, scrub, rinse |
| General Dirt | All-purpose cleaner, scrub, rinse |
Rinsing and Finishing Touches After Washing
After completing the initial washing, it’s time to rinse away any remaining cleaning solution or debris. I always recommend starting from one end and moving systematically to the opposite side. This ensures no spots are missed and helps control the flow of water. A wide spray nozzle works well here; it allows for even coverage without the risk of damaging the surface.
Check for any areas that may need additional attention. Sometimes, stubborn stains or residue can require a second pass. If you notice any spots, adjust the angle of the nozzle to concentrate the water flow on those areas. This technique can be particularly helpful for corners or edges where dirt tends to accumulate.
Once rinsing is complete, inspect the entire area for consistent results. It’s often helpful to take a step back and evaluate the surface from a distance, as this can reveal sections that may have been overlooked. If everything looks good, allow the area to dry naturally. I’ve found that letting the surface air dry helps to avoid water spots and ensures a thorough finish.
Finally, consider applying a sealant once the surface is completely dry. This not only enhances the appearance but also provides an additional layer of protection against future stains and weathering. I’ve seen remarkable results with sealants, as they can prolong the life of the surface and make future maintenance much easier.
Maintaining Your Concrete Surface Post-Cleaning
To preserve the appearance and longevity of your outdoor area, regular maintenance is key. After you’ve completed the washing, here are some targeted steps I recommend based on years of experience.
- Seal the Surface: Applying a sealant is crucial. It protects against moisture and stains. Choose a high-quality product that suits your specific surface type. I often suggest doing this every couple of years to keep it looking pristine.
- Regular Sweeping: Make it a habit to sweep away debris, leaves, and dirt weekly. This prevents build-up and reduces the chances of stains forming over time.
- Spot Treatment: Address stains immediately. Have a dedicated cleaner on hand for oil or food spills. The quicker you treat them, the easier they come off.
- Inspect for Cracks: After washing, take a moment to inspect the surface for any cracks or chips. If you find any, repair them promptly to prevent further damage. I’ve seen minor issues turn into major repairs if left unattended.
- Control Vegetation: Trim back any nearby plants or grass that might encroach on your space. Roots and vines can compromise the integrity of your surface over time.
In my experience, these straightforward steps can significantly extend the life of your outdoor area while keeping it looking its best. Routine care pays off, so make it part of your seasonal checklist.
.jpg)


