
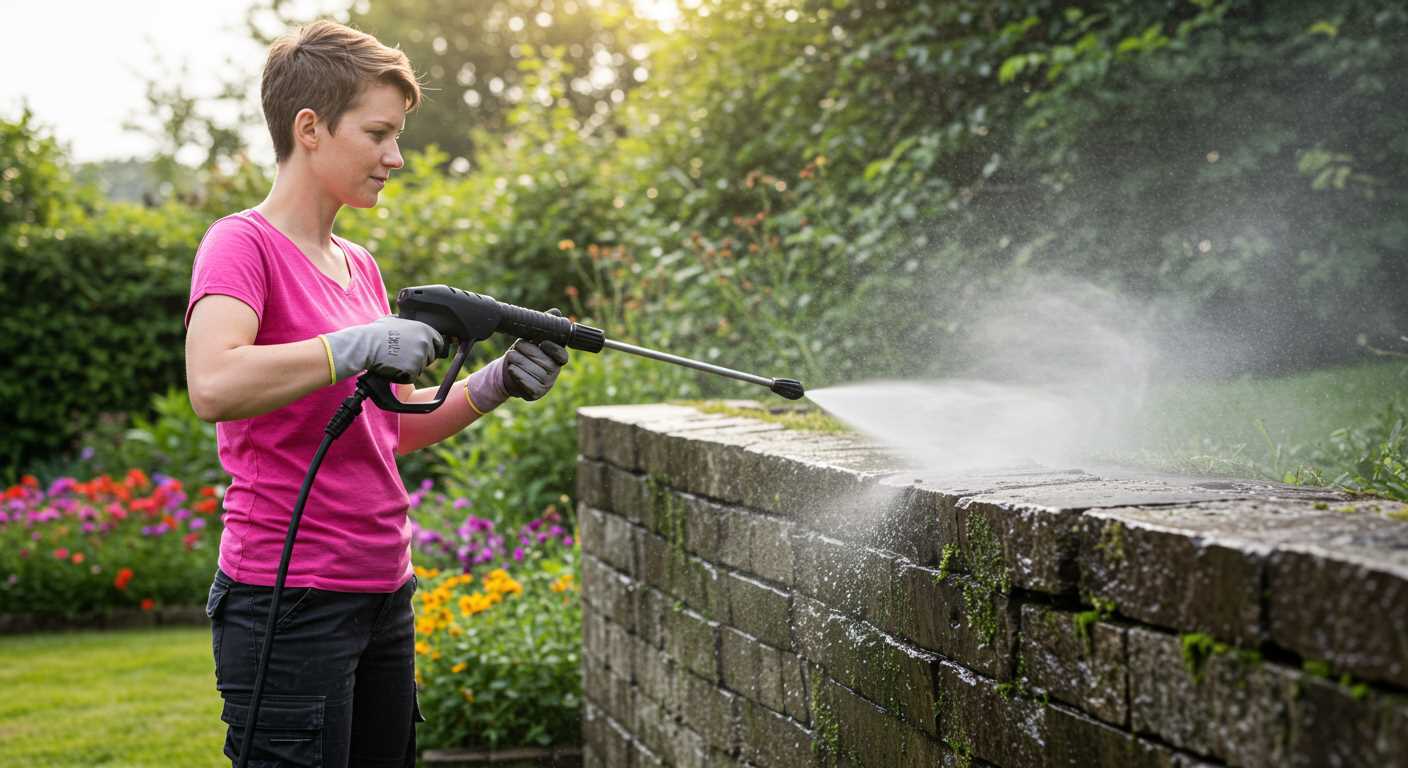


Begin by selecting the right nozzle for your task; a 25-degree nozzle works wonders for most surfaces. I recall the first time I tackled a worn-out surface; using the wrong attachment led to streaks and frustration. The correct choice can truly make a difference in achieving a uniform finish.
Next, ensure you have a sturdy surface to stand on. I once underestimated the importance of a stable footing and ended up slipping, which turned a simple job into a minor mishap. An even platform will not only keep you safe but also allow for more efficient manoeuvring of your equipment.
Mix a suitable cleaning solution with water in the tank of your machine. During my years in the industry, I found that a mild detergent can help lift stubborn stains without damaging the surface. Always remember to test any solution on a small, inconspicuous area first; one bad experience can lead to costly repairs.
Adjust the pressure on your machine according to the surface you’re working on. High pressure can damage delicate surfaces, so I often start with a lower setting and gradually increase it if needed. This approach saves time and prevents unnecessary damage.
Finally, keep a consistent distance from the surface while working. I’ve learned that too close can cause etching or chipping, while too far may not yield satisfactory results. A distance of about 12 inches typically strikes the right balance, ensuring thorough treatment without harm.
Effective Techniques for Revitalising Your Outdoor Surface
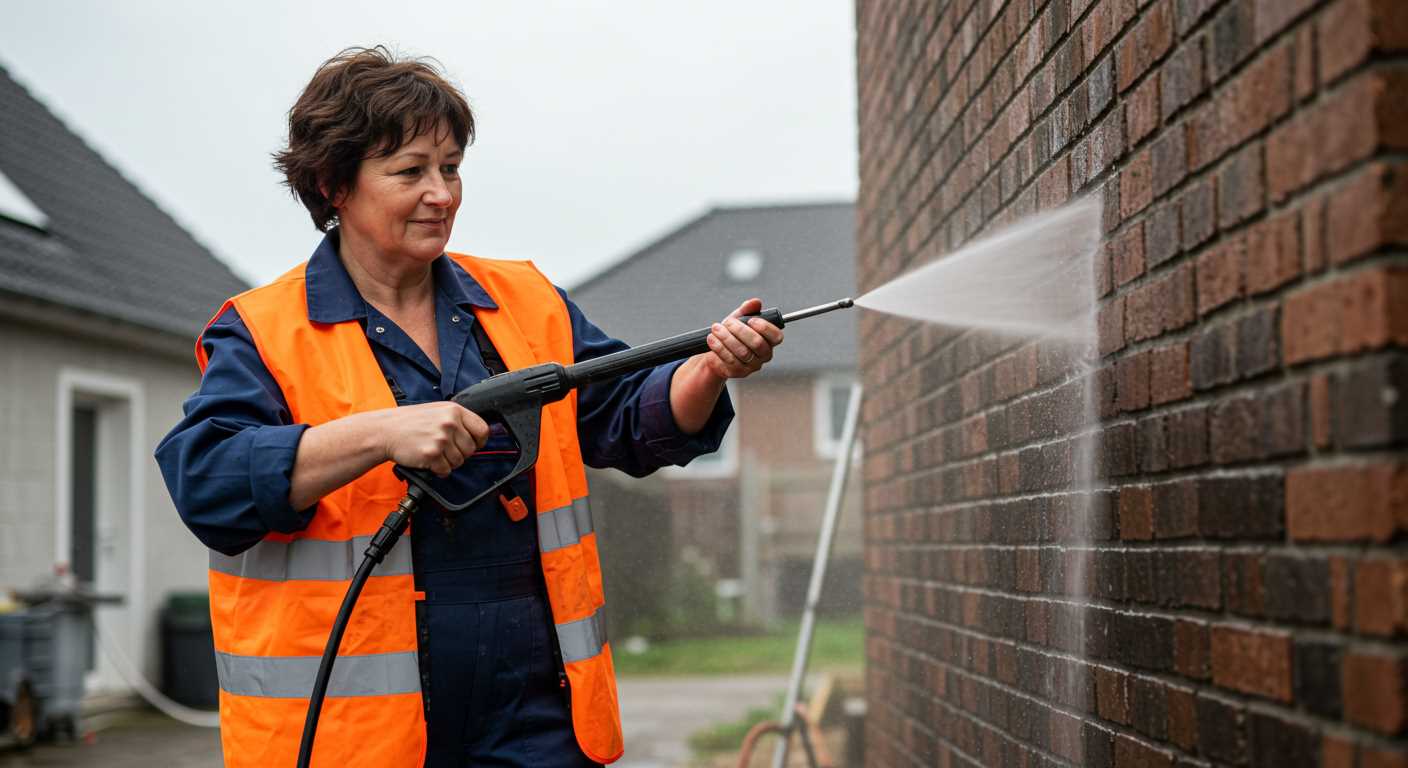
Begin by selecting the right nozzle. A 25-degree or 40-degree nozzle works best for these surfaces, providing a wider spray that prevents damage. I’ve seen too many people jump straight to the narrow nozzle, thinking it would make the job easier, only to end up with chipped edges. Trust me, a broader spray is your friend.
Next, adjust the pressure settings on your machine. For most surfaces, 1500-2000 PSI is sufficient. If the pressure is too high, you risk harming the joints between the stones. A few years back, I had a client who insisted on maxing out the pressure, and we ended up replacing several stones. Save yourself the hassle.
Technique Matters
Always work in sections. Start at the farthest point from your exit route and move backwards. This prevents stepping on freshly cleaned areas. I remember one summer afternoon, I made the mistake of cleaning towards the exit. It was a muddy mess by the time I reached the end.
Keep the nozzle at a consistent distance–about 12 to 18 inches from the surface. Too close, and you risk gouging; too far, and you won’t achieve the desired results. I often demonstrate this to newcomers, showing them how the angle and distance impact the effectiveness of the cleaning.
Post-Cleaning Care
After the job, allow the area to dry completely before applying any sealant. This step is often overlooked, but moisture can lead to trapped air bubbles, ruining the finish. I’ve seen countless projects fail at this stage due to impatience.
Consider applying a joint stabiliser if the gaps between stones are significant. It helps maintain the integrity of the structure and can prevent weeds from sprouting up later. Trust me, I’ve had my share of battles with persistent weeds!

Follow these guidelines, and you’ll see remarkable results. The satisfaction of a well-maintained outdoor area is worth the effort and attention to detail.
Choosing the Right Pressure Washer for Your Brick Patio
Selecting the appropriate equipment for your outdoor surfaces is crucial. I’ve tested numerous models over the years, and certain features consistently stand out as beneficial when tackling tough grime.
- Pressure Rating: Look for a unit with a pressure range of 1300 to 2300 PSI. This range provides sufficient power without the risk of damaging delicate surfaces.
- Water Flow Rate: Aim for a minimum of 1.5 GPM (gallons per minute). Higher flow rates ensure thorough rinsing and help dislodge dirt effectively.
- Nozzle Options: A unit with interchangeable nozzles is invaluable. A wide-angle nozzle (25°-40°) works well for general cleaning, while a narrow nozzle (0°-15°) can handle tougher stains.
- Electric vs. Gas: Electric models are quieter and easier to maintain, making them suitable for residential use. Gas units offer more power but come with a higher maintenance demand.
- Weight and Portability: Consider the weight of the machine. A lightweight model is easier to manoeuvre, especially across uneven surfaces.
- Hose Length: A longer hose (at least 25 feet) provides flexibility and reduces the need for repositioning the unit frequently.
In my experience, a well-chosen device can make a significant difference in the outcome. For instance, I once opted for a gas model with a high PSI rating for a large outdoor area. While it performed admirably, I soon realised the noise and weight became cumbersome for regular use. On the other hand, an electric model I bought later proved effective for smaller areas and required minimal upkeep.
Always check for customer reviews and specific product tests. These insights can guide you toward a model that meets your needs. Investing time in selecting the right equipment will pay off in the ease and quality of your outdoor maintenance tasks.
Preparing the Patio Area Before Pressure Washing
Clear the surface of any furniture, planters, and decorative items. This creates an unobstructed area, allowing for thorough cleaning and preventing damage to your belongings. I once neglected this step, and the results were less than ideal–furniture left in place ended up splattered with dirt and debris.
Check for loose bricks or stones. If you spot any, take the time to secure them. A couple of years back, I encountered a similar situation, and not addressing it resulted in more extensive repairs later on. A quick inspection can save you headaches down the line.
Remove any organic matter like leaves or moss. I remember a job where I overlooked this and ended up with clogged nozzles during the wash. A simple broom can work wonders here, making the process smoother.
Consider the surrounding areas as well. Protect nearby plants and delicate surfaces with tarps or plastic sheeting. I’ve seen beautiful gardens damaged simply because someone didn’t take this precaution. It’s worth the effort to ensure everything stays intact.
Gather necessary tools and safety gear. Goggles and gloves are essential to protect yourself from flying debris. I once got a small pebble in my eye while washing, which was a painful reminder to always gear up.
Finally, check your water supply and drainage. Ensure that your hose is long enough to reach all areas, and that there’s proper drainage to avoid flooding. I’ve learned this the hard way after experiencing a mini lake on my driveway during a wash. A little foresight goes a long way.
Selecting the Appropriate Nozzle for Brick Cleaning
Choosing the right nozzle is crucial for achieving the best results when washing outdoor surfaces. For most tasks involving hard surfaces, a 25-degree nozzle is ideal. It provides a good balance between pressure and coverage, allowing you to remove dirt without damaging the material.
Understanding Nozzle Types
Different nozzles serve specific purposes. The zero-degree nozzle delivers the most concentrated stream, perfect for stubborn stains but risky for softer materials. The 15-degree option offers a powerful jet that can tackle more challenging grime but requires caution. The 40-degree nozzle is excellent for rinsing and broader coverage; however, it lacks the pressure necessary for deep cleaning.
Pressure Adjustment and Safety
Always start with a wider angle and adjust as needed. If you notice that the dirt isn’t coming off, switch to a narrower angle. Make sure to maintain a safe distance from the surface to prevent any chipping or damage. With the right nozzle selection, you’ll find that the task becomes more efficient and effective.
Applying Cleaning Solution for Stubborn Stains
For those persistent blemishes that resist standard methods, a tailored cleaning solution can make a significant difference. I’ve experimented with various formulas over the years, and here are the most effective options I recommend.
- Oxygen Bleach: A safe choice for outdoor surfaces, it lifts stains from organic matter like moss and algae. Mix according to the package instructions and apply generously.
- Vinegar and Baking Soda: This duo works wonders on mildew. Sprinkle baking soda over the stained area, then spray with vinegar. Let it fizz for about 15 minutes before rinsing.
- Commercial Concrete Cleaners: Look for those designed for tough stains. Follow the manufacturer’s directions for dilution and application. Always test in an inconspicuous area first.
- Dish Soap and Warm Water: For grease spots, a mixture of dish soap and warm water can break down oils effectively. Scrub the area gently before rinsing.
Always apply the solution using a garden sprayer or a brush to ensure even coverage. Allow the mixture to sit for the recommended time to penetrate the stains fully. Afterward, rinse thoroughly before using any high-powered equipment.
When I first started tackling tough spots, I learned the hard way that rushing the process leads to unsatisfactory results. Patience is key–let the cleaning solution do its job before resorting to more aggressive methods.
After applying the solution, I often follow up with a softer brush to agitate the area gently, ensuring the cleaning agents lift the stains effectively. Then, a thorough rinse is essential to remove any residue.
Stubborn stains may require repeated treatments, so don’t be discouraged if the first application doesn’t yield perfect results. Keep at it, and your surfaces will eventually reflect the effort you’ve put in.
Techniques for Pressure Washing Brick Without Damage
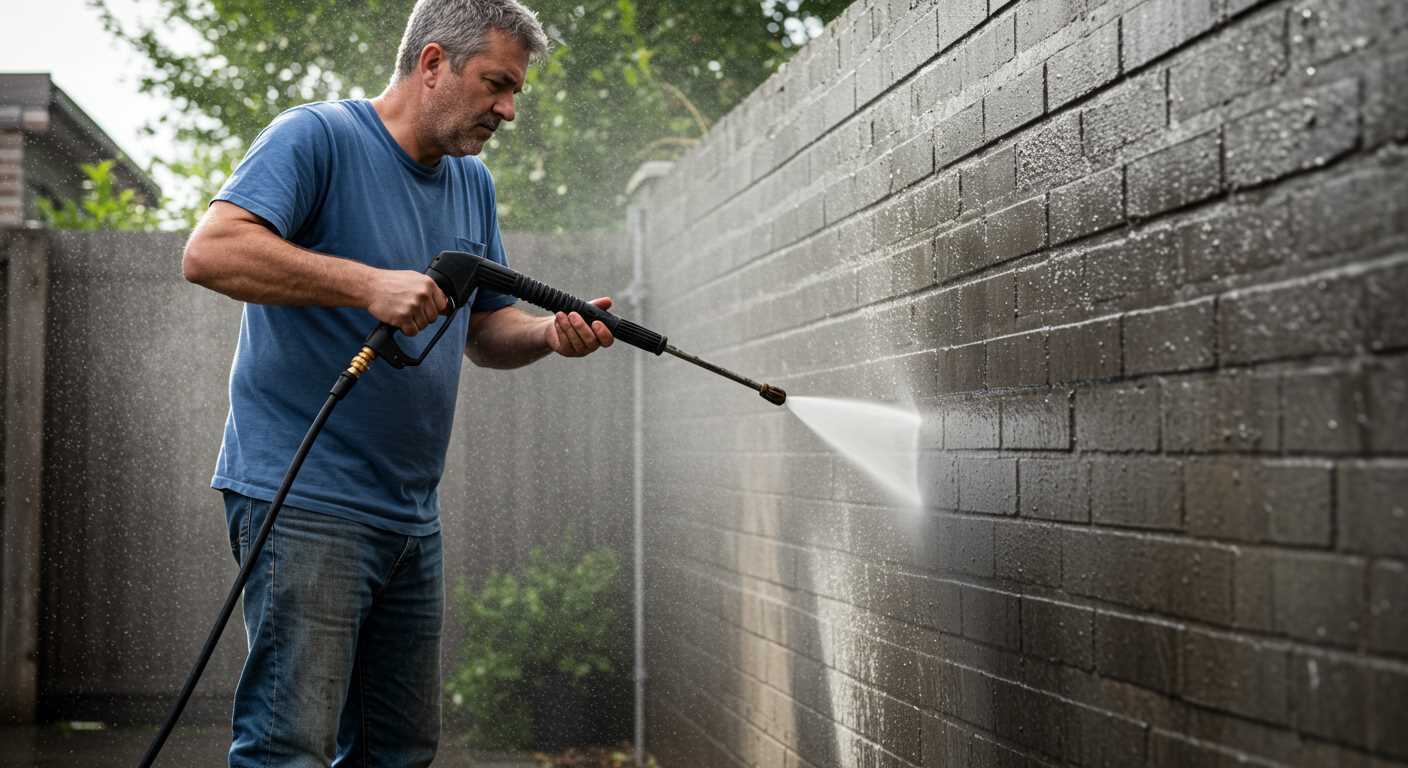
To maintain the integrity of your outdoor surfaces, adjust the pressure setting to a lower level, ideally between 1200 to 2000 PSI. This range effectively removes dirt without causing harm. Always test on a small, inconspicuous area before proceeding with the larger sections.
Angle and Distance Matter
Hold the nozzle at a 45-degree angle and maintain a distance of at least 12 to 18 inches from the surface. This prevents direct, concentrated streams from eroding the mortar between the units. Move the wand in a sweeping motion, allowing the water to lift grime rather than blasting it away.
Consistency is Key
Work systematically in sections, ensuring you don’t miss spots. Overlapping your strokes slightly helps avoid streaks and ensures even cleaning. If stubborn residues persist, consider using an industrial pressure washer with a detergent feature to tackle tough stains without excessive force.
| Technique | Description |
|---|---|
| Pressure Setting | Use 1200 to 2000 PSI for safe cleaning. |
| Distance | Maintain 12 to 18 inches from the surface. |
| Nozzle Angle | Keep at a 45-degree angle for effective grime removal. |
| Systematic Approach | Work in sections, overlapping strokes. |
Employing these techniques will ensure a thorough cleanse while preserving the structure and appearance of your outdoor surfaces.
Post-Cleaning Care and Maintenance for Brick Patios
After completing the cleaning, ensure to allow the surface to dry thoroughly. This helps in preventing mould and mildew growth. I’ve learned that applying a sealant can significantly enhance longevity. Choose a breathable sealant suitable for porous surfaces; this allows moisture to escape while protecting against stains and weather damage.
Routine Inspections and Upkeep
Regular checks are crucial. Inspect the joints between the stones for cracks or missing mortar. Repair these promptly to avoid larger issues down the line. I often suggest using a mixture of sand and polymeric filler; it offers flexibility and strength, which is vital for maintaining the integrity of the surface.
Seasonal Preparation
Before winter, give the area a thorough inspection. Remove any debris and ensure the drainage is clear. A good tip I picked up is to consider applying a leaf blower to clear fallen leaves; this prevents them from staining the surface. If snow is common in your area, avoid using salt, as it can cause spalling. Instead, opt for sand to improve traction.
For those interested in cleaning other household items, check out this guide on how to clean oven with steam cleaner. It’s a handy resource for maintaining the cleanliness of your home.
Common Mistakes to Avoid When Using a Pressure Washer
One of the biggest pitfalls is using too high a setting on the machine. I remember the first time I cranked up the pressure to maximum, thinking it would yield better results. Instead, I ended up damaging the surface, creating pitting and discolouration. Always start at a lower setting and gradually increase it if necessary.
Skipping the pre-treatment step can lead to frustrating outcomes. I once tackled a particularly stubborn area without applying a cleaning solution first. The result? Hours wasted on scrubbing and redoing the work. Applying a suitable detergent allows dirt and grime to loosen, making the job much simpler.
Not maintaining a consistent distance from the surface is another common error. I learned this the hard way; standing too close caused uneven cleaning and left streaks. Keeping a distance of about 12 to 18 inches is ideal for achieving an even wash while protecting the surface.
Many overlook the importance of proper nozzle selection. I’ve seen friends use the wrong attachment and end up with either ineffective cleaning or worse, surface damage. Each nozzle has a specific purpose; for delicate surfaces, a wider spray angle is safer and more effective.
Ignoring surrounding areas can lead to unintended messes. I once forgot to cover nearby plants and furniture, resulting in overspray that made a mess of everything. Always protect your surroundings before starting; it saves time and effort in the long run.
Lastly, neglecting to rinse thoroughly can leave residues that attract dirt more quickly. After one session, I noticed stains returning sooner than expected because I hadn’t rinsed properly. A good rinse ensures that all cleaning agents are removed, prolonging the cleanliness of the area.
.jpg)


