


Begin by selecting a nozzle with an appropriate spray pattern, typically a 25-degree or 40-degree tip. This choice is crucial for achieving the right balance between pressure and coverage. I recall a time when I used a 15-degree nozzle, thinking it would yield better results. While it did blast away grime, it also dislodged some of the joint sand between the units, which created more work in the long run.
Before you start, ensure that the area is free from furniture and debris. I once overlooked this step, and it led to a frustrating afternoon of moving patio chairs and tables around. After clearing the space, wet the surface lightly to loosen any stubborn dirt. This little trick can save you time and effort, as I’ve learned from experience.

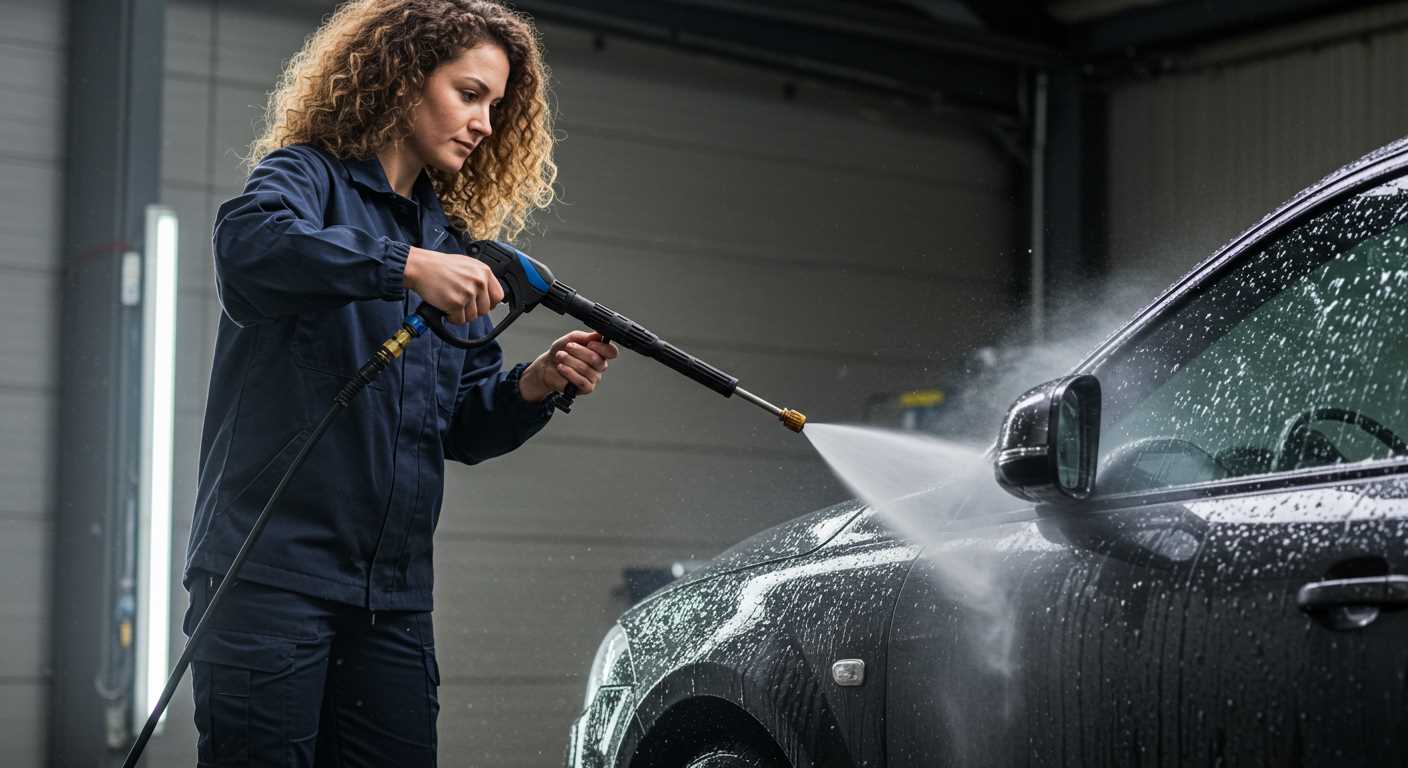
Once you’re set up, maintain a consistent distance of about 12 inches between the nozzle and the surface. Too close, and you risk damaging the material; too far, and the results may be lacklustre. During my early days of testing equipment, I learned this the hard way when I accidentally chipped a few units by getting too aggressive. Slowly and steadily is the name of the game.
Finally, don’t forget to rinse thoroughly. I’ve seen people finish their tasks only to find streaks left behind, which can be disappointing. A good rinse not only enhances the appearance but also prepares the surface for any sealing treatment you might consider later. Taking these steps can transform your outdoor areas, making them look as good as new.
Effective Techniques for Revitalising Your Outdoor Surface
Begin by selecting a nozzle that delivers a fan spray pattern. A 25-degree nozzle generally works best for outdoor surfaces, ensuring you can remove dirt without damaging the material. Adjust the pressure to around 2000-3000 PSI, depending on the condition of the surface. Always test a small, inconspicuous area first to check for any adverse effects.
Preparation Steps
Before you start, clear the area of furniture, plants, and debris. This not only makes your task easier but also prevents any accidental damage. It’s wise to use a broom to sweep away loose particles, allowing for a more thorough job. If there are any weeds or grass growing in the joints, consider using a weed killer a few days prior to your cleaning session.
Technique for Optimal Results
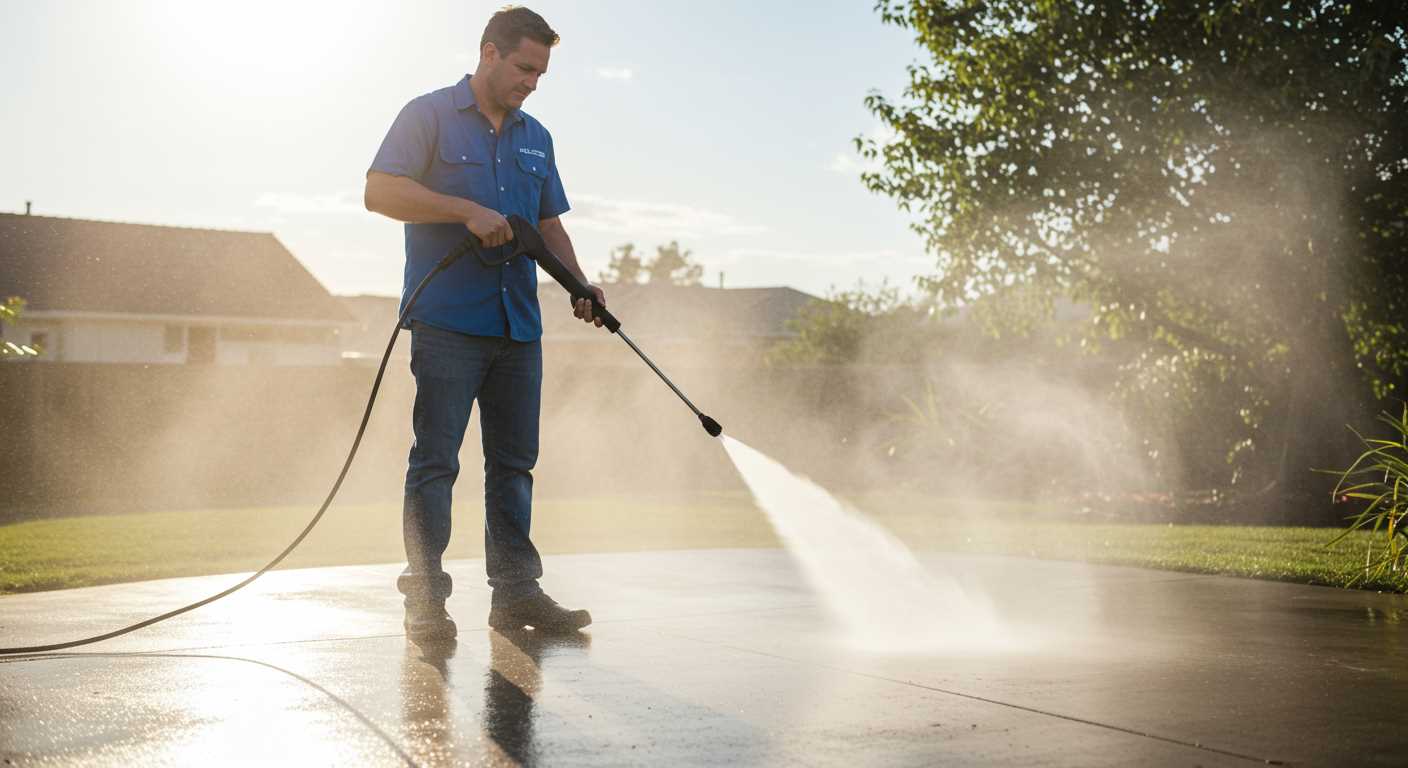
Position the nozzle approximately 12 inches from the surface, using a steady, sweeping motion. Keep the wand moving to avoid concentrating the pressure on a single spot, which could lead to etching or damage. For stubborn stains, you might need to pause briefly over the area, but be cautious. If you notice water pooling, adjust your technique to maintain an even flow.
After cleaning, rinse the area thoroughly with clear water to remove any residual detergent or debris. Allow it to dry completely before replacing any furniture or plants. This ensures that everything stays looking sharp and well-maintained.
Reflecting on my years in the cleaning equipment field, I recall one instance where a homeowner was overwhelmed by the state of their outdoor surface. After following these steps, the transformation was remarkable, and the satisfaction on their face was priceless. It’s rewarding to witness the impact of proper maintenance.
Choosing the Right Pressure Washer for Brick Pavers
For optimal results, opt for a unit that delivers a minimum of 3000 PSI. This level of force is effective in removing stubborn dirt and stains without damaging the surface. I recall using a lower-pressure model once; it took ages to see any real progress, and I ended up frustrated. A higher PSI was a game changer for me.
Flow Rate Matters
Pay attention to the flow rate, measured in gallons per minute (GPM). A higher GPM enhances cleaning efficiency, allowing the water to wash away debris more effectively. I found that a balance of around 3.5 GPM works wonders. This combination ensures that dirt doesn’t just get pushed around but is actively lifted away.
Nozzle Selection
Choosing the right nozzle can make all the difference. A 15-degree or 25-degree nozzle is ideal for hard surfaces, providing a concentrated stream that penetrates grime. I once experimented with a wider nozzle and regretted it; the results were lacklustre. Additionally, consider using a rotary or turbo nozzle for stubborn areas–these can really amp up the cleaning power.
Preparing the Area for Cleaning
Before initiating the washing process, it’s vital to ensure the work area is properly prepared. Start by removing any furniture, planters, or other obstacles that might hinder access to the surfaces. This will not only facilitate a thorough job but also prevent any potential damage to your belongings.
Next, inspect the surface for loose debris, such as leaves, dirt, or stones. A quick sweep can make a significant difference in the effectiveness of the task. If you encounter any weeds or grass growing between the joints, consider pulling them out or applying a suitable herbicide to avoid interference during the procedure.
Safety is paramount. Ensure you wear appropriate gear, including goggles and sturdy footwear, to protect yourself from flying debris and water pressure. Check for any electrical outlets or fixtures in the vicinity that might be affected by the water spray.
Consider the weather conditions as well; avoid working on windy days, as this can cause dirt and debris to scatter and make cleaning less effective. Ideally, choose a day when the sun isn’t too harsh, as excessive heat can dry out cleaning solutions too quickly, hindering their effectiveness.
Plan your approach by determining the best angle for the spray. This can help you avoid pushing dirt into unwanted areas and ensure the job is done efficiently. It’s often helpful to start from one end and work your way to the other, allowing for a systematic approach that covers every inch.
| Preparation Step | Description |
|---|---|
| Clear Area | Remove furniture and obstacles. |
| Sweep Surface | Eliminate loose debris and dirt. |
| Inspect for Weeds | Remove or treat weeds between joints. |
| Wear Safety Gear | Use goggles and sturdy footwear. |
| Check Weather | Avoid windy or excessively hot days. |
| Plan Spray Angle | Determine the most effective angle for spraying. |
Following these steps will streamline your work and enhance the results, allowing you to achieve the best possible outcome with your cleaning efforts.
Understanding the Right Cleaning Solution
For optimal results, select a solution specifically designed for the materials in question. I recall a project where I used a standard detergent, and the outcome was far from satisfactory. It left a residue that attracted dirt. Switching to a specially formulated cleaner made all the difference; it lifted grime effectively without leaving any remnants.
Always read labels carefully. Some products are too harsh and can damage the surface, while others may not be strong enough to tackle stubborn stains. I’ve found that eco-friendly options work surprisingly well. They’re tough on dirt but gentle on the environment, which is a win-win in my book.
Mixing your own solution can also be beneficial. A combination of vinegar and baking soda can create a powerful yet safe cleaner. This was my go-to for a particularly stained area, and I was amazed at how well it worked. Just remember to test any solution on a small, inconspicuous area first to ensure compatibility.
Consider the condition of the area too. If it hasn’t been maintained for a while, a pre-treatment might be necessary. Applying a cleaner and allowing it to sit for a short time can loosen tough stains, making the following wash much easier. I’ve seen areas transform after just a little patience.
Finally, keep in mind the weather conditions. Avoid cleaning during high heat, as solutions can dry too quickly, leading to streaks. I once made that mistake and ended up redoing the entire job. Aim for a cooler day or early morning when conditions are more favourable for application.
Setting Up the Pressure Washer for Optimal Results
Begin by ensuring the unit is on a flat surface, ideally close to a water source. This reduces the risk of tripping over hoses and allows for easy access to fresh water. Connect the garden hose to the washer’s inlet, checking for any leaks. A tight fit is essential to maintain pressure.
Next, select the appropriate nozzle. For most surfaces, a 25-degree nozzle works well, providing a good balance between pressure and coverage. If you’re tackling tough stains, consider switching to a 15-degree nozzle for a more concentrated stream. Remember, using a narrower nozzle increases pressure but can also risk damaging the surface if not handled carefully.
Adjust the pressure settings according to the condition of the surface. Lower settings are advisable for older or fragile materials, reducing the risk of chipping or cracking. Conversely, more robust surfaces can handle higher pressure, making quick work of stubborn dirt.
Before starting the machine, ensure the detergent tank is filled if you’re using a cleaning solution. This can enhance results, particularly for ingrained stains. Mix the solution as per manufacturer instructions to avoid any mishaps. Always test the solution on a small area first to gauge its effect.
Finally, conduct a quick check of all connections–hoses, nozzles, and detergent tanks–before powering up. A well-set unit leads to fewer interruptions during the task, allowing for a smoother experience and more effective results. With everything in place, you’re ready to tackle the cleaning efficiently.
Techniques for Cleaning Brick Pavers
Start by selecting the right nozzle for your task. A 25-degree nozzle is generally effective for removing dirt without causing damage. Position the nozzle about 12 inches away from the surface to avoid chipping or eroding the material. I’ve seen too many people get too close, resulting in unnecessary repair work.
Angle and Movement
Angle your wand at approximately 45 degrees while working. This technique helps to lift grime and debris rather than push it deeper into the joints. Move the wand in a consistent left-to-right motion, overlapping each stroke slightly. I recall a particular job where a haphazard approach left streaks and required a second pass. The methodical approach saved time and ensured a thorough job.
Sectional Cleaning
Breaking your work into sections is wise. It allows you to focus on one area at a time, preventing the solution from drying out before you can rinse it away. I’ve found that tackling smaller sections not only makes the process manageable but also guarantees a uniform finish. After rinsing an area, inspect it closely; sometimes, stubborn stains might require a second application of your cleaning solution.

For those dealing with particularly stubborn stains, consider applying a pressure washer for decks and fences to target the most problematic areas. This equipment can provide extra power and precision, making the task less laborious.
Dealing with Stubborn Stains and Moss
If you’re facing persistent marks or moss growth, don’t fret. One of the most effective methods I’ve found involves a combination of a targeted solution and a methodical approach. Start by applying a dedicated moss remover or a mix of water and white vinegar on the affected areas. Let it sit for about 15-20 minutes; this allows it to penetrate and loosen the moss grip.
After soaking, use a stiff-bristled brush to agitate the area gently. This action breaks up the moss structure and helps lift stains. Be careful not to scratch the surface–gentle pressure is key. Rinse the area thoroughly before proceeding with the high-powered tool.
Adjust the nozzle of your cleaning device to a wider spray pattern. A fan spray will prevent damage while still providing enough force to dislodge any remaining debris. Move in a sweeping motion, overlapping each pass slightly to ensure no spots are missed. For particularly stubborn stains, consider using a rotating surface cleaner attachment. This tool can make short work of ingrained dirt without risking surface damage.
For oil or grease stains, a degreaser can work wonders. Apply it to the stain and let it sit for a while before rinsing. Follow up with your high-powered tool to wash away the remnants. If you still see a faint mark, repeat the process until satisfied.
Finally, once everything is clean, consider applying a sealant. It not only enhances appearance but also provides a protective barrier against future growth and stains. I’ve seen numerous surfaces maintain their pristine look for much longer after using a quality sealant.
Post-Cleaning Care for Brick Pavers
After completing the washing process, attention to detail ensures the longevity and appearance of your surface. Here are some steps to follow:

- Inspect the area for any missed spots or remaining debris. A quick visual check can save you time later.
- Allow the surface to dry completely before proceeding with any sealing or maintenance. This may take a few hours depending on the weather conditions.
- Consider applying a sealant designed for your specific surface type. This can help protect against stains and enhance colour.
From my experience, a quality sealant can make a significant difference. I once worked on a project where the owner skipped sealing after cleaning. Within months, the original beauty faded, and stains became more challenging to remove.
Regular upkeep is key. Here’s what I recommend:
- Implement a routine sweeping schedule to prevent dirt and debris from settling into joints.
- For seasonal maintenance, wash the area lightly to remove any accumulated grime.
- Address any new stains immediately with appropriate cleaning solutions to prevent them from setting.
Additionally, monitor for the growth of moss or weeds in joints. A simple mixture of vinegar and water can help manage these unwanted guests without harming the surface.
Lastly, if you notice any loose or uneven sections, repair them promptly. This not only improves safety but also maintains the aesthetic appeal. I’ve seen how small repairs can prevent larger issues down the line.
Safety Precautions While Using a Pressure Washer
Always wear protective gear. This includes safety goggles to shield your eyes from debris, gloves to protect your hands, and sturdy footwear to guard your feet. I once made the mistake of wearing flip-flops during a job, and I ended up with a painful injury when a small rock flew up. Lesson learned.
Check your equipment before use. Inspect hoses for leaks, and ensure that all connections are secure. I remember a time when I overlooked a frayed hose, which resulted in a sudden burst of water that startled me and caused a slip. A quick visual check can prevent accidents.
Maintain a safe distance from surfaces. High-pressure streams can cause injury or damage if misdirected. I recommend keeping the nozzle at least two feet away from the surface you’re working on. I’ve seen too many people accidentally gouge wood or damage paint jobs because they aimed too close.
Be cautious of surrounding areas. Watch out for breakables, plants, and people nearby. I once sprayed a neighbour’s flower bed and caused quite a mess. It’s best to clear the area of any items that could be damaged or cause a distraction.
Never aim the nozzle at yourself or others. This might seem obvious, but it’s easy to lose focus. During a demonstration, I nearly aimed it at my colleague as I turned around. Maintaining awareness of your surroundings is key to avoiding mishaps.
Use the right detergent and avoid harsh chemicals that can be harmful to the environment. While I’ve tested various cleaning agents, I always recommend eco-friendly options. If you’re unsure, check the label for safety precautions and recommendations.
Keep children and pets away from the work area. The noise can be startling, and the water pressure can be dangerous. I always set up barriers or ask family members to stay inside while I work.
For additional tips on cleaning other items, consider checking out this resource on how to clean an old fish tank. Safety is paramount, and it’s wise to approach any cleaning task with caution and awareness.
.jpg)


