


First and foremost, a thorough rinse using a high-powered sprayer can yield remarkable results. Begin by ensuring all electrical components are adequately shielded with plastic bags or waterproof covers. This simple precaution prevents water damage and keeps sensitive areas safe during the process. I remember the first time I attempted this approach; I neglected to cover a few connectors and learned the hard way about potential pitfalls.
Next, apply a targeted degreaser to any heavily soiled sections, allowing it to sit for a few minutes. This step is crucial, as it breaks down stubborn grime and oil that water alone cannot remove. My go-to product is biodegradable and safe for various surfaces, making it a reliable choice for any vehicle enthusiast.

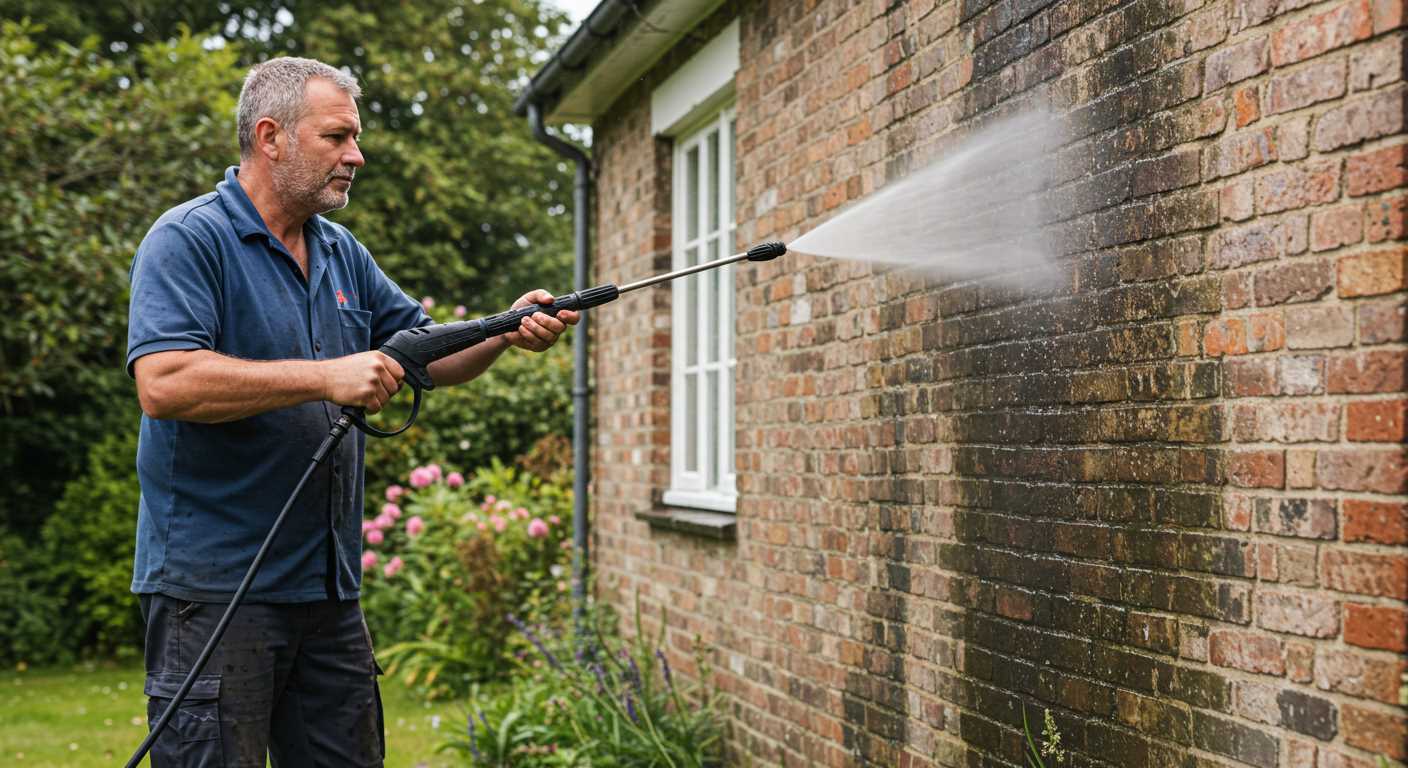
Once the degreaser has had time to work its magic, switch to a fan tip nozzle on your sprayer. This attachment provides a wider spray pattern, ensuring an even distribution of water without concentrating the force in one spot. I often find that this technique prevents damage to delicate components while still delivering a robust clean. Remember, maintaining a safe distance between the nozzle and the surfaces–typically around 12 inches–will help prevent any unintended consequences.
After rinsing the area thoroughly, allow it to air dry or use a soft cloth to wipe down surfaces. This final touch not only enhances the appearance but also helps identify any remaining spots that may need additional attention. From my years of experience, I’ve discovered that a well-maintained inner compartment not only looks appealing but also functions better over time.
Thorough Cleaning of the Engine Compartment
Before starting, ensure the vehicle is cool and the battery is disconnected. This minimises the risk of any electrical issues. I’ve found that using a degreaser beforehand can significantly enhance the outcome. Spray it generously on any greasy areas and allow it to sit for 10 to 15 minutes to break down the grime.
Next, equip yourself with a nozzle that offers a wide spray pattern. A narrow jet can cause damage to sensitive components, while a broader spray is gentle yet effective. Maintain a distance of at least 2 feet from the surface to avoid any potential harm. I’ve seen too many people make the mistake of getting too close.
When applying water, it’s best to start from the top and work downwards. This method ensures that dirt flows away from the clean areas rather than re-soiling them. Pay special attention to areas like the radiator and around the battery, where debris tends to accumulate. A gentle sweep over these areas can yield excellent results.
After rinsing, I recommend using a microfiber cloth to wipe down any lingering moisture. This step helps prevent water spots and keeps components looking fresh. Don’t forget to reconnect the battery once everything is dry. A little maintenance goes a long way in prolonging the life of your vehicle.
| Step | Description |
|---|---|
| 1 | Ensure the vehicle is cool and disconnect the battery. |
| 2 | Apply a degreaser, wait 10-15 minutes. |
| 3 | Select a wide spray nozzle and maintain a safe distance. |
| 4 | Start rinsing from the top and move downwards. |
| 5 | Wipe down surfaces with a microfiber cloth. |
| 6 | Reconnect the battery once everything is dry. |
Preparing the Engine Bay for Cleaning

Before any thorough wash, disconnect the battery to avoid electrical issues. I recall a time when I overlooked this step; it led to a frustrating afternoon of troubleshooting after a simple clean-up. Cover sensitive components like the alternator and air intake with plastic bags to protect them from moisture. This precaution can save you from costly repairs later on.
Next, remove any debris accumulated in the compartment. A quick inspection will help identify leaves, dirt, or other unwanted materials that could obstruct your task. I always keep a small vacuum handy for this purpose; it makes the process quicker and more efficient.
Inspect fluid levels and seals as well. Topping off fluids and ensuring there are no leaks will help maintain the vehicle’s performance. I once encountered a stubborn leak that was only discovered after a cleaning session; it was a hassle that could have been avoided.
Lastly, consider applying a degreaser to particularly grimy areas. Allow it to sit for a few minutes to break down tough grime. This step can significantly enhance the results, as I found out during a particularly dirty job. For those looking to keep things simple, check out options like concrete cleaner without pressure washer for effective alternatives.
Choosing the Right Pressure Washer Settings
Start by selecting a low-pressure setting, typically around 1200 to 1500 PSI. This range is gentle enough to avoid damaging sensitive components while still effectively removing dirt and grime. Gradually increase the pressure if needed, but always err on the side of caution.
Understanding Nozzle Types
Use a wider nozzle, such as a 25-degree or 40-degree, to spread the water’s impact over a larger area. This dispersal reduces the risk of causing harm to delicate parts. A rotating nozzle can also be handy for stubborn spots, but use it sparingly to prevent surface damage.
Water Temperature and Cleaning Solutions
Hot water can enhance cleaning power, especially when dealing with grease. If your model allows it, set the temperature accordingly. For best results, consider adding a suitable detergent. Apply it before rinsing, and follow the manufacturer’s instructions for dilution and application.
Lastly, utilising an extension wand can help reach tight spots without straining. Adjust settings based on your cleaning needs and the surfaces you’re working with, and always test on a small area first to ensure safety.
Selecting Appropriate Cleaning Agents
Always opt for biodegradable and non-corrosive solutions to protect sensitive components. A degreaser is your best ally; it effectively breaks down oil and grime without damaging plastics or rubber. My go-to has been a citrus-based formula. It not only cuts through stubborn residues but also leaves a pleasant scent, transforming the chore into a more enjoyable task.
For tackling stubborn stains, a foaming cleaner works wonders. It clings to surfaces, providing ample dwell time for the agent to penetrate and lift dirt. In my experience, applying it with a foam sprayer yields the best results. Always test a small area first to ensure it won’t harm any finishes.
For those hard-to-reach spots, a diluted vinegar solution can help. It’s excellent for spot cleaning and cutting through mineral deposits. Mix one part vinegar with three parts water, spray it on, and let it sit for a few minutes before rinsing. I’ve used this method countless times, and it’s proven effective without compromising any materials.
When working on electronic components or sensors, a dedicated electronic cleaner is necessary. It evaporates quickly and prevents moisture buildup, ensuring no damage occurs. I always keep a can handy for quick touch-ups.
Lastly, avoid using household cleaners like bleach or ammonia. They can cause irreversible damage to sensitive surfaces and components. Stick to products designed for automotive use; they’re formulated specifically for these applications and deliver safe, reliable results.
Protecting Sensitive Components Before Cleaning
Before beginning the washing process, safeguarding delicate parts is paramount. Here’s a checklist of what to cover or disconnect to avoid damage:
- Battery: Always disconnect the negative terminal to prevent electrical short circuits.
- Air Intake: Seal it with a plastic bag or tape to prevent moisture from entering the intake system.
- Electronics: Cover any exposed wiring, sensors, and connectors using plastic wrap or waterproof tape.
- Fuse Box: Protect this area to avoid any risk of electrical failure.
- Throttle Body: Seal with a bag to prevent water ingress.
In my experience, taking these precautions significantly reduces the likelihood of issues arising post-cleaning. One time, I neglected to cover a sensor and ended up with an error code that took hours to diagnose. A simple plastic bag could have saved me that hassle.

Always check the manufacturer’s guidelines for specific recommendations on protecting components. Some vehicles might have unique features that require extra attention.
Once everything is adequately protected, you can proceed confidently, knowing you’ve minimised potential risks.
Techniques for Pressure Washing the Engine Bay
Begin by ensuring the nozzle is held at a safe distance–around 12 to 18 inches from the surface. This prevents damage to delicate components while still providing ample force to dislodge grime. I often find that a slight angle helps direct the spray without creating a direct impact on sensitive areas.
Utilising a Two-Step Method
Implement a two-step approach for maximum efficacy. Start with a pre-soak using a mild detergent mixed with water. Apply this solution generously, allowing it to penetrate built-up residues for about five to ten minutes. Following that, switch to a high-pressure rinse. This method ensures deeper cleaning, as the detergent loosens stubborn dirt.
Technique for Hard-to-Reach Areas
For tight spaces, a narrow nozzle attachment works wonders. I’ve tackled many intricate areas where debris tends to accumulate by using such an attachment. The focused stream can reach into crevices that are otherwise inaccessible, ensuring a thorough cleanse. After rinsing, I always inspect these spots closely to confirm all contaminants have been removed.
In my experience, alternating between high and low pressure can be beneficial. Use high pressure for flat surfaces and switch to lower pressure for intricate components. This prevents dislodging parts or damaging sensitive wiring. A steady, sweeping motion helps to evenly distribute the water without risking any focal damage.
Finally, always follow up with a gentle drying process, either by air drying or using a microfiber cloth. This step helps avoid water spots and potential corrosion from residual moisture. In my years of working with various cleaning devices, I’ve learned that diligence in every phase of the process yields the best results.
Post-Cleaning Inspection and Maintenance
After you’ve given your compartment a thorough wash, it’s time for a detailed inspection. This step is crucial to ensure everything is functioning as it should. Here’s a checklist to follow:
- Visual Assessment: Look for any signs of damage or wear on components such as hoses, wires, and belts. Pay close attention to any areas where water could have pooled.
- Electrical Connections: Inspect all connectors and wiring. If you notice corrosion or moisture, it’s best to dry and seal these areas promptly.
- Fluid Levels: Check oil, coolant, and brake fluid levels. A thorough wash can sometimes dislodge debris that may affect these readings.
- Moving Parts: Ensure that all parts like fans and pulleys move freely. If anything feels stiff or resistant, it may need lubrication.
- Rubber Seals: Inspect gaskets and seals for cracks or degradation. Replace any that appear compromised to prevent leaks.
Next, maintenance is key to keeping that compartment in top shape:
- Drying: Use a microfiber towel to dry off sensitive areas, especially around electronic components.
- Protective Coating: Consider applying a silicone spray or protectant on plastic and rubber surfaces to prevent cracking and fading.
- Regular Checks: Make it a habit to periodically inspect these components. A quick visual check every few weeks can prevent bigger issues down the line.
- Documenting: Keep a record of your inspections and any maintenance performed. This history can be invaluable for tracking the health of your vehicle.
From my experience, taking these steps post-cleaning can significantly extend the life of the parts under the hood. It’s not just about appearance; it’s about ensuring optimal performance and reliability.
Safety Tips for Using a Pressure Washer
Always wear appropriate personal protective equipment. Safety goggles shield your eyes from debris, while gloves protect your hands from harsh chemicals and high pressure. I recall a day when I neglected my gloves, and a tiny piece of grime flew up, leaving a nasty cut on my hand. Never underestimate the power of those jets.
Maintain a Safe Distance
Keep the nozzle at least two feet away from surfaces. A close range can cause damage, especially on delicate components. I learned this lesson the hard way when I accidentally stripped paint from a part by getting too close. Adjusting your distance prevents unintended wear.
Secure Your Surroundings
Before starting, clear the area of any obstacles, including tools and debris. If you’re working on a slope or uneven ground, take extra care to avoid slips. I once had a close call when I stepped back and tripped over an extension cord. Ensuring a clear, stable workspace minimizes risks significantly.
Check for leaks or exposed wiring before getting started. Water and electricity don’t mix well, and one mishap can lead to serious issues. I always inspect the area thoroughly, as I once found frayed wires near a battery; a potential disaster avoided.
Lastly, keep a fire extinguisher nearby. While unlikely, the risk of combustion from flammable materials or cleaning agents exists. Having a fire extinguisher within reach can provide peace of mind while working. I learned to appreciate this precaution after a friend had a close call with some stray petrol fumes.
.jpg)
.jpg)
.jpg)


