


For optimal results, begin by selecting a nozzle that best suits the surface of your outdoor barriers. A fan nozzle offers a wide spray, which is ideal for larger areas, while a narrow nozzle provides concentrated power for stubborn stains. I’ve often found that starting with a 25-degree nozzle strikes the right balance between coverage and force.
Before you commence, ensure the area is free of furniture or any obstacles. This allows for unhindered access and prevents any accidental damage. During my years in the field, I’ve encountered countless scenarios where a simple rearrangement saved time and effort.
Next, apply a suitable detergent specifically formulated for outdoor surfaces. I recommend letting it sit for 10 to 15 minutes. This dwell time is crucial as it helps to break down grime and dirt, making the subsequent wash more efficient. I recall a project where I underestimated this step; the results were far less impressive than when I allowed the detergent to work its magic.

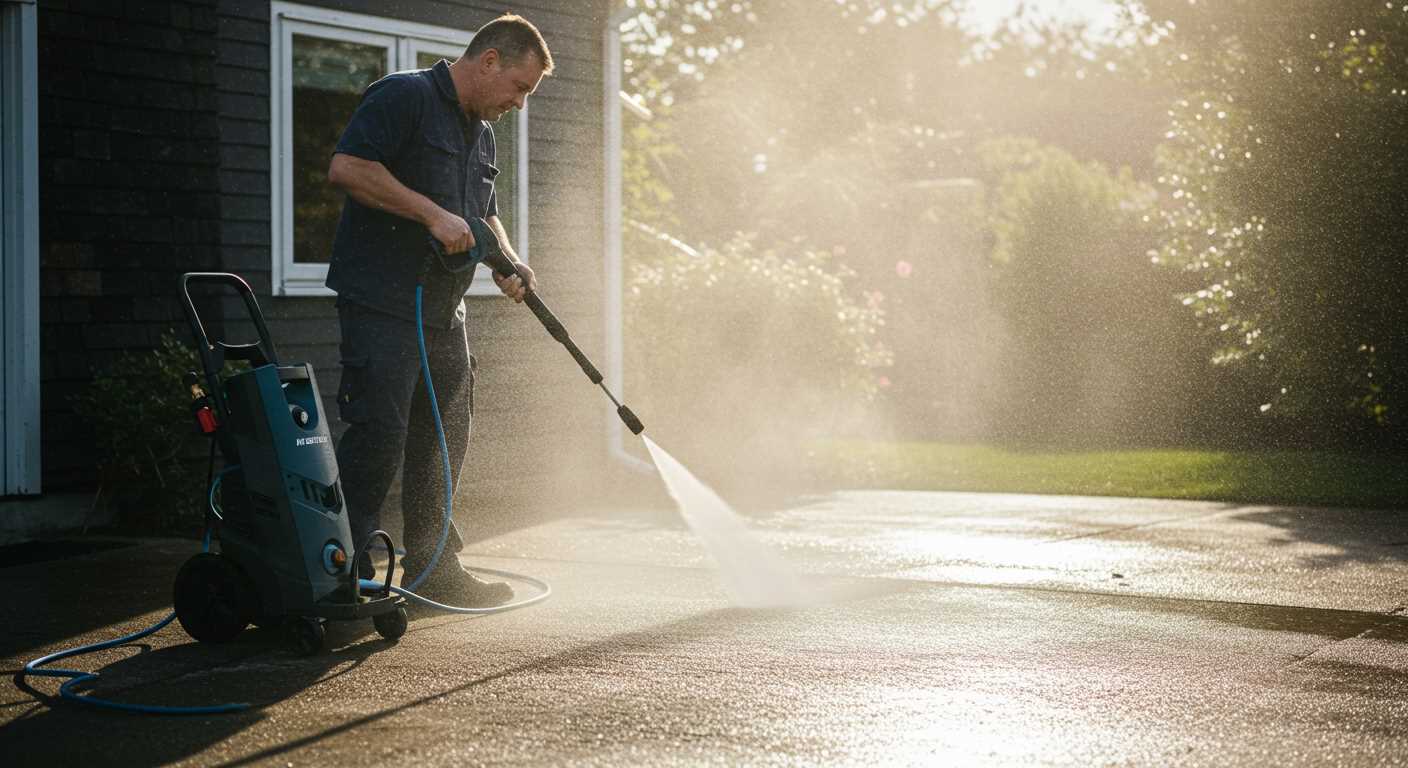
As you begin the rinsing process, maintain a steady distance from the surface to prevent any potential damage. I’ve learned that keeping a distance of about 30 to 45 cm helps maintain the integrity of the material while still delivering powerful cleaning action.
Once you’ve completed the rinsing, take a moment to inspect your work. Spot any areas that may require a second pass, and don’t hesitate to repeat the process. My experience has shown that thoroughness pays off, often leading to results that truly rejuvenate the appearance of your outdoor space.
Optimal Techniques for Revitalising Your Outdoor Barriers
Begin by assembling your equipment: a high-pressure cleaner, suitable nozzle, and protective gear. The adjustable nozzle is crucial; I always opt for a fan spray for wider coverage. This prevents damages while ensuring thorough removal of dirt and grime.
Before starting, inspect the surface. If you encounter any paint or stains, consider pre-treating those areas with a dedicated cleaning solution. Let it sit for a few minutes. This step significantly enhances the outcome, based on my past experiences.
Proper Distance and Movement
Maintaining the right distance from the surface is essential. I recommend keeping the nozzle approximately 30 cm away. This not only protects the material but also optimises the cleaning process. Use a sweeping motion; avoid holding the nozzle in one spot for too long to prevent etching or surface damage.
Post-Cleaning Care
After completing the task, it’s wise to rinse the area with clean water to remove any residual cleaning agents. Following this, check for any missed spots and address them immediately. I often finish by applying a protective treatment to prolong the cleanliness and integrity of the surfaces.
Choosing the Right Karcher Pressure Washer Model
For optimal results, selecting a model that matches your specific needs is key. In my experience, the Karcher K5 is a solid choice for medium-duty tasks. It offers a balance of power and portability, making it great for tackling stubborn stains without being overly cumbersome.
Power Rating and Flow Rate
Look for a unit with at least 145 bar of pressure and a flow rate of around 500 litres per hour. This combination ensures you can handle most outdoor projects effectively. The Karcher K7 is another excellent option for heavy-duty use, boasting a higher power rating, which is beneficial for larger areas.
Accessories and Attachments
The right accessories can enhance your experience significantly. I’ve found that investing in a turbo nozzle can expedite the cleaning process, especially for tougher surfaces. For those looking to maximise their investment, check out this guide on which pressure washer accessories deliver the most bang for the buck. It’s worth exploring various attachments designed specifically for different tasks to ensure versatility.
Preparing Your Fencing for Cleaning
Ensure the area around your structure is clear. Remove any plants, furniture, or decorations that might obstruct access. I once had to pause midway through a task because a bush was in the way; it wasted valuable time. Always check for loose boards or damaged sections; fixing these beforehand saves hassle later. I’ve learned that a quick inspection can prevent further damage during the washing process.
Next, consider the surface material. Wooden structures might require a gentler approach than metal or vinyl. A friend of mine used a stronger setting on wood, resulting in splintering; he had to sand the entire surface afterwards. If unsure, test a discreet area first to gauge how the material responds.
Safety Measures
Wearing appropriate attire is vital. I always put on safety goggles and sturdy shoes before starting. Flying debris can be a hazard, especially with older materials. Ensure pets and children are kept at a safe distance, as the force of the water can be surprising. I recall a time when my dog got curious and ended up soaked–definitely not a fun moment!
Gathering Tools and Equipment
Before beginning, assemble all necessary tools. A good extension cord, surface cleaner attachment, and various nozzles make a significant difference. I often keep a bucket of soapy water handy for stubborn spots; it’s a quick fix if the high-pressure method doesn’t remove all the grime. If your air compressor needs an upgrade, check out this guide on the best air compressor for cold weather to ensure optimal performance during your cleaning tasks.
Selecting the Appropriate Pressure Setting
Start with a lower setting, typically around 1200 to 1500 PSI, to avoid damaging the surface. I recall testing various surfaces, and lower pressure often yields better results without compromising integrity. As you gain confidence, gradually increase the pressure, observing how the material reacts. Each type of surface has its own tolerance level.
Recommended Pressure Levels for Different Materials
| Material Type | Recommended PSI |
|---|---|
| Wood | 1200 – 1500 |
| Vinyl | 1300 – 1600 |
| Metal | 1500 – 2000 |
| Concrete | 2000 – 3000 |
Testing Pressure Settings
Always test on a small, inconspicuous area first. This approach saved me from several mishaps during my early days. If you notice splintering or peeling, lower the pressure. Conversely, if the grime persists, increase it in small increments. This trial-and-error method can prevent costly damage and ensure a thorough cleaning process.
Using Detergents and Cleaning Solutions Safely
Always opt for biodegradable formulations. These are gentler on the environment and reduce the risk of harming surrounding plants and wildlife. I remember a time when I used a harsh chemical, thinking it would give me the best results. Instead, it damaged the vegetation nearby and added more work than necessary.
Before applying any solution, test it on a small, inconspicuous area. This will help you gauge its compatibility with the surface you’re treating. I once had a mishap where a cleaner reacted poorly, leading to discolouration. A simple patch test could have saved me that headache.
Utilise a foam cannon or a dedicated detergent tank if your unit supports it. This ensures an even distribution of the cleaning agent. I’ve often seen people try to pour solutions directly into the nozzle, leading to inconsistent application and a messy experience. Take advantage of the tools designed for this purpose.
Always adhere to the manufacturer’s instructions regarding dilution ratios. Over-concentration doesn’t equate to better results. I vividly recall a situation where I underestimated dilution, leading to excessive foam that took ages to rinse away.
Protect yourself during the process. Use gloves and goggles to shield against splashes. On one occasion, I neglected this advice, and a stray droplet got into my eye. Trust me, safety gear makes a significant difference when working with chemicals.
After completing the task, rinse thoroughly. Residual cleaner can attract dirt, negating your efforts. In my experience, spending a few extra minutes on rinsing pays off in the long run. I’ve seen surfaces that were not rinsed properly become grimy again within days.
Lastly, store any unused solutions correctly. Keep them in a cool, dry place, away from direct sunlight. I learned this the hard way when a bottle of cleaner degraded after being left out, making it ineffective for future use.
Techniques for Cleaning Different Types of Fencing
Choosing the right method can significantly enhance results. Different materials require tailored approaches. Here’s a breakdown based on my experiences:
Wooden Structures
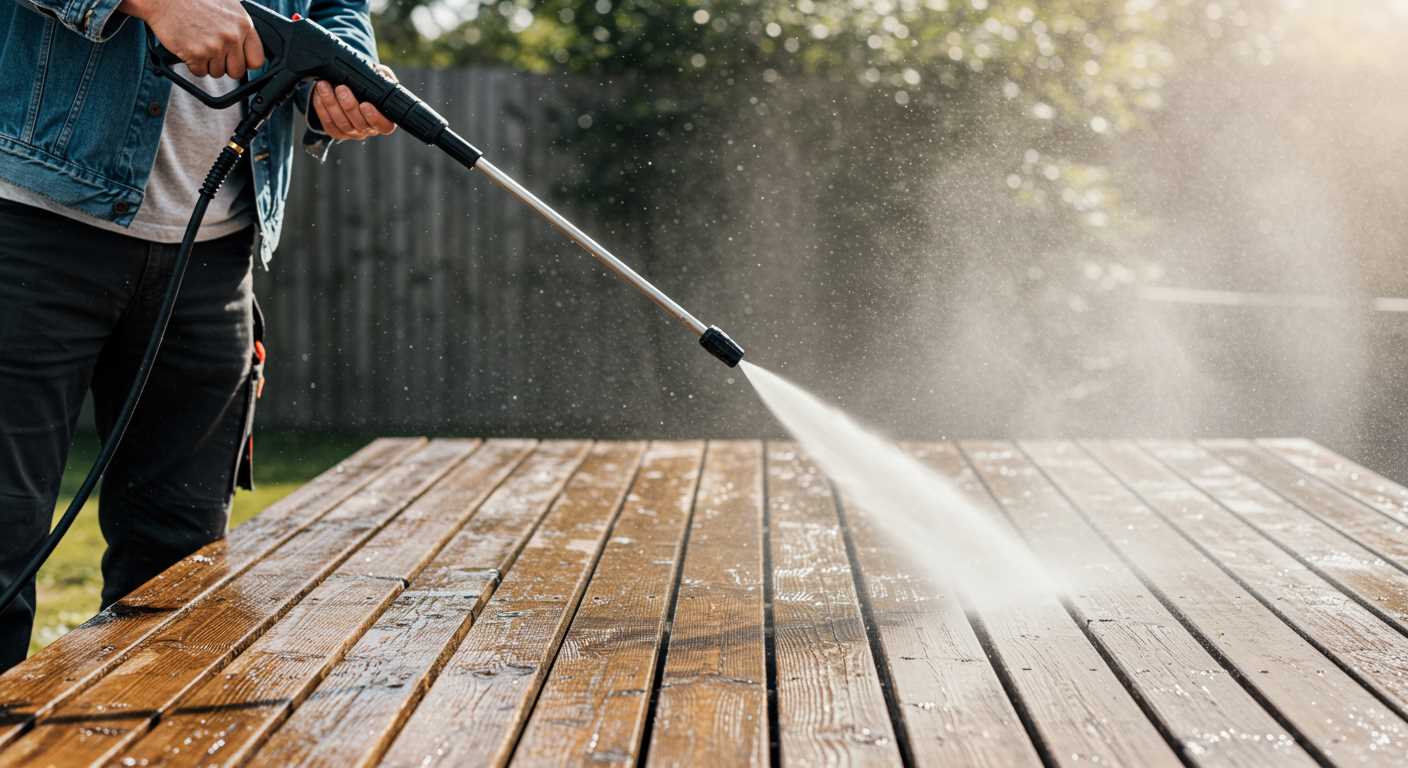
For timber barriers, it’s best to use a wide-angle nozzle. This disperses water over a larger area while avoiding damage. Follow these steps:
- Start from the top and work your way down to prevent streaking.
- Maintain a distance of about 30 cm to avoid splintering.
- Consider applying a wood cleaner beforehand for stubborn stains.
Vinyl Options
Vinyl is durable yet can accumulate grime. A straightforward approach works wonders:
- Utilise a fan nozzle for even coverage.
- Keep the nozzle 25-40 cm away from the surface.
- Incorporate a mild detergent to tackle mould and mildew effectively.
Metal Fences
For steel or wrought iron, safeguarding the finish is key. Here’s what I recommend:
- Opt for a 15-degree nozzle for concentrated power.
- Maintain a distance of 30-50 cm to avoid chipping paint.
- Use a rust-inhibiting cleaner for any oxidation marks.
Chain Link Fencing
Chain link can be tricky due to its structure. Here’s a method that’s worked for me:
- Employ a rotating brush attachment for thoroughness.
- Spray from the top down, ensuring all areas are reached.
- Rinse off debris thoroughly to prevent any residue buildup.
Composite Materials
Composite fencing combines various materials. Here’s the best way to approach it:
- Use a low-pressure setting to avoid damaging the surface.
- Apply a non-abrasive cleaner before rinsing.
- Keep the nozzle at least 30 cm away for safety.
These techniques have proven effective in my experience. Tailoring your approach to the specific material ensures a thorough job without causing damage. Always remember to follow up with a rinse to remove any leftover cleaning agents.
Maintaining a Safe Working Environment
Always wear safety goggles during operation. I recall a time when I neglected this advice, resulting in debris flying into my eyes. It was a painful lesson learned. Protecting your vision is non-negotiable.
Ensure you have appropriate footwear. Non-slip shoes are preferable, especially when working with water and detergents. I once slipped on a wet surface while wearing regular trainers, which created a hazardous situation that could have been avoided.
Keep the area clear of obstacles. Before starting, I make it a habit to remove any items that might pose tripping hazards. This includes toys, garden tools, or anything that could interfere with your movement. A tidy workspace contributes significantly to safety.
Check power cords and connections for damage. I’ve seen cords frayed and exposed, leading to potential electric shocks. Ensure everything is in good condition before plugging in your device.
Be mindful of the water spray direction. Always aim away from yourself and others. I once made the mistake of spraying towards a friend, which was amusing at first but highlighted the importance of controlling the nozzle.
Have a first aid kit nearby. Accidents can happen, and being prepared is wise. I’ve used mine more than once for minor injuries, and it provided peace of mind knowing help was close at hand.
Finally, maintain communication if working with others. I prefer to have a clear plan and signals to ensure everyone knows what to expect. Once, a miscommunication led to a close call. Now, I always confirm everyone’s understanding before starting.
Post-Cleaning Care for Your Fencing
After tidying up your outdoor barriers, a few steps are necessary to ensure longevity and maintain appearance.
- Inspect for Damage: Examine each panel for cracks, loose boards, or rust. Addressing issues promptly can prevent further deterioration.
- Apply Protective Coating: Depending on the material, consider applying wood sealant or metal paint. This adds a layer of protection against moisture and UV rays.
- Regular Maintenance: Schedule periodic checks every few months. This includes removing debris and checking for signs of wear.
- Stain or Paint: If applicable, re-staining or painting is advisable every few years. It not only enhances aesthetics but also acts as a protective barrier.
- Reinforce Stability: Tighten any loose screws or nails. This ensures structural integrity and prevents future issues.
Sharing a quick story, I once overlooked the importance of maintenance after a thorough wash. A year later, my wooden panels faced severe weather damage due to neglect. A simple protective coat could have saved me time and money.
Always prioritise these practices for a durable and appealing outdoor boundary.
Regular Maintenance Tips for Longevity
Inspect your outdoor barrier regularly for signs of wear, such as rust, rot, or loose panels. Address issues immediately to prevent them from escalating. I once overlooked a minor rust spot, and it turned into a larger problem that required more extensive repairs.
Periodic Treatments
Apply a protective sealant every few years. This not only enhances appearance but also forms a barrier against moisture and UV damage. I’ve found that a good quality sealant can add years to the lifespan of timber structures, especially in areas with harsh weather conditions.
Routine Checks and Repairs
Check for loose screws or nails and tighten or replace them as necessary. Keeping everything secure prevents structural weaknesses. I’ve learned that a small investment of time in maintenance can save a lot of effort in repairs down the line.
.jpg)


