


If you’re looking to refresh your outdoor flooring made of timber, I recommend grabbing a broom, a bucket, and some mild detergent. Start by sweeping away leaves, dirt, and debris to create a clean working area. This simple action sets the stage for effective maintenance and helps prevent any lingering grime from becoming a bigger issue.
Mix warm water with a gentle soap, ensuring it’s suitable for your flooring material. A ratio of one cup of soap to a gallon of water works well. Using a stiff-bristled brush, scrub in the direction of the grain. This not only removes surface dirt but also helps preserve the natural look of the timber. Don’t rush; taking your time will yield better results.

After scrubbing, rinse the surface with clean water. A garden hose will do just fine. Aim to remove all soap residue, as it can leave a slippery film if not properly washed away. Pay close attention to corners and crevices where dirt tends to accumulate. For stubborn stains, a paste made of baking soda and water can be applied directly to the affected areas, left for a few minutes, and then scrubbed gently.
Lastly, consider applying a wood sealant once everything is dry. This not only enhances the colour but also provides a protective barrier against future wear and tear. Regular maintenance like this will keep your outdoor area looking inviting and well-cared for, making it a pleasant space for gatherings or quiet moments.
Effective Methods for Maintaining Your Timber Surface
Utilise a combination of hot water and gentle detergent. Fill a bucket with warm water and add a small amount of mild soap. Dip a stiff-bristled brush into the solution and scrub the surface vigorously. This method removes dirt and stains while being gentle on the material. Rinse thoroughly with a garden hose to eliminate any soap residue.
For tougher spots, consider a paste of baking soda and water. Apply it directly to the stained area and let it sit for about 15 minutes. Scrub with a brush, then rinse well. This technique can tackle stubborn marks without causing damage.
Utilising vinegar can be beneficial as well. Mix equal parts of white vinegar and water in a spray bottle. Spray the mixture on the affected areas and leave it for a few minutes. Wipe with a clean cloth or sponge, and rinse with water. Vinegar is a natural cleaner that helps to break down grime effectively.
If mould or mildew is present, a mixture of one part bleach to three parts water can be effective. Apply this solution carefully, ensuring you’re wearing gloves and eye protection. After scrubbing, rinse thoroughly to prevent any bleach residue from harming your timber.
Regular maintenance is key. Sweep away debris and leaves to prevent build-up. Consider applying a protective sealant annually to keep your surface looking fresh and to protect against the elements.
Gathering the Right Cleaning Supplies
To tackle the task effectively, assemble a few key items. You’ll need a broom or a stiff-bristled brush for scrubbing. A bucket is also crucial for mixing your cleaning solution. Make sure to have a garden hose for rinsing, as well as a sponge or cloth to wipe down surfaces. If you have stubborn stains, consider having a putty knife handy for scraping.
Recommended Cleaning Solutions
- For general maintenance, mix warm water with mild dish soap – it’s gentle yet effective.
- For tougher spots, a solution of vinegar and water can work wonders, especially in dealing with mildew.
- Baking soda mixed with water can also create a paste that helps to lift grime.
- If you prefer a commercial product, look for a cleaner specifically designed for outdoor surfaces, ensuring it’s safe for your material.
Always read the label to confirm that the cleaner is suitable for the surface you are treating. For those times when you might need a more robust solution, check out this concrete cleaner with pressure washer for inspiration on powerful options.
Additional Tools
- Protective gear like gloves and goggles to keep yourself safe from chemicals.
- A rake to clear away debris before you begin.
- A towel or dry mop for final touch-ups.
Being prepared with the right tools makes all the difference in achieving a refreshed surface. Each item plays a role in ensuring your efforts yield satisfying results.
Preparing the Deck Surface for Cleaning
Begin by removing any furniture, planters, or decorative items from the area. This clears the path for thorough maintenance and prevents any damage to your belongings. Next, inspect the surface for debris like leaves, twigs, or dirt. A broom or a stiff-bristled brush works well for sweeping away this loose material.
Check for any signs of mould or mildew, especially in shaded areas. If you spot any, treat these spots with a mixture of vinegar and water or a specialised mould remover. Allow the solution to sit for a few minutes to ensure it penetrates effectively before scrubbing with a brush.
Pay attention to the gaps between the boards. Use a putty knife or a similar tool to remove any built-up grime or debris lodged in these spaces. This step prevents dirt from getting pushed around during the cleaning process.
After clearing the surface, it’s wise to assess the condition of the boards. Look for any loose or damaged planks. If you find any, secure them or replace them as needed to avoid hazards during your upkeep routine.
| Task | Recommended Tool |
|---|---|
| Remove furniture and items | None |
| Sweep away debris | Broom or stiff-bristled brush |
| Treat mould or mildew | Vinegar solution or mould remover |
| Clear gaps between boards | Putty knife |
| Inspect for damage | None |
Once you’ve completed these tasks, your surface will be primed and ready for the next steps in your cleaning routine. This preparation ensures that your efforts yield the best results, maximising the longevity and appearance of your outdoor space.
Choosing the Best Cleaning Solution for Wood
Opt for a biodegradable cleaner specifically formulated for natural surfaces. These products are gentle yet powerful enough to remove grime without harming the material. I’ve found that solutions containing sodium percarbonate are particularly effective; they break down dirt and stains while being environmentally friendly.
Mix your chosen cleaner according to the manufacturer’s instructions. Typically, a concentrated formula requires dilution with water. I recommend using a bucket for mixing, ensuring you achieve the right consistency for optimal results.
For stubborn spots, consider adding a small amount of baking soda to your mixture. This natural abrasive can enhance the cleaning power, especially on mildew or algae patches. Just be cautious not to overdo it, as excessive scrubbing can damage the surface.
Before application, conduct a patch test in a discreet area to assess compatibility. This simple step can prevent unexpected discolouration or damage. I recall a time when I skipped this and regretted it. A small patch ended up looking significantly different from the rest.
Always use a soft-bristled brush or a cloth to apply the solution. Avoid abrasive tools that could scratch or scuff the finish. I prefer a long-handled brush, which keeps me at a comfortable distance while providing ample leverage for scrubbing.
Lastly, consider the weather conditions. A cloudy day is ideal, as direct sunlight can cause cleaners to dry too quickly, leading to streaks. I’ve learned this the hard way during a summer clean-up. Timing your cleaning session can make a noticeable difference in the outcome.
Applying the Cleaning Solution Evenly
Begin by pouring the chosen cleaning mixture into a bucket. Aim for a consistency that allows for easy application. Using a long-handled brush or a mop, dip it into the solution, ensuring the bristles are saturated but not dripping excessively.
Technique for Application
- Start at one corner of the area. Work in sections to maintain control and ensure thorough coverage.
- Apply the solution in a sweeping motion. This technique helps to distribute the cleaner uniformly across the surface.
- Overlap strokes slightly to prevent any missed spots, especially in areas that receive direct sunlight, as they can dry quicker.
For stubborn stains, consider using a circular scrubbing motion. This can help break down grime more effectively. Allow the solution to sit for the recommended time specified on the product label to ensure optimal results.
Final Touches
After the cleaning agent has had time to act, rinse with a garden hose, ensuring all residue is washed away. This step is crucial to avoid any slippery surfaces once dried. Check for any areas that may need a second application before the final rinse.
Scrubbing Techniques for Stubborn Stains
For those tough marks that simply refuse to budge, wielding a sturdy scrub brush becomes paramount. I recommend using a stiff-bristled brush, ideally one with a long handle for ease of use. This allows you to apply pressure without straining your back. When targeting a stain, work in small sections to avoid letting the cleaning solution dry out.
Utilising Circular Motions

Adopt a circular scrubbing motion to lift ingrained dirt and grime. This technique helps to break down the particles effectively. Apply firm pressure but be cautious not to damage the surface; you want to invigorate, not scar. For particularly stubborn areas, consider soaking them with your chosen cleaner for a few minutes before scrubbing. This extra time allows the solution to penetrate and loosen the debris.
Incorporating a Scrub Pad
For those really tenacious spots, a scrub pad made of non-abrasive materials can be a game changer. These pads can reach into grooves and crevices that brushes may miss. Pair the pad with a cleaning solution, applying steady pressure while moving in a back-and-forth motion. Rinse frequently to prevent residue buildup. If stains persist, alternate between your brush and pad for optimal results.
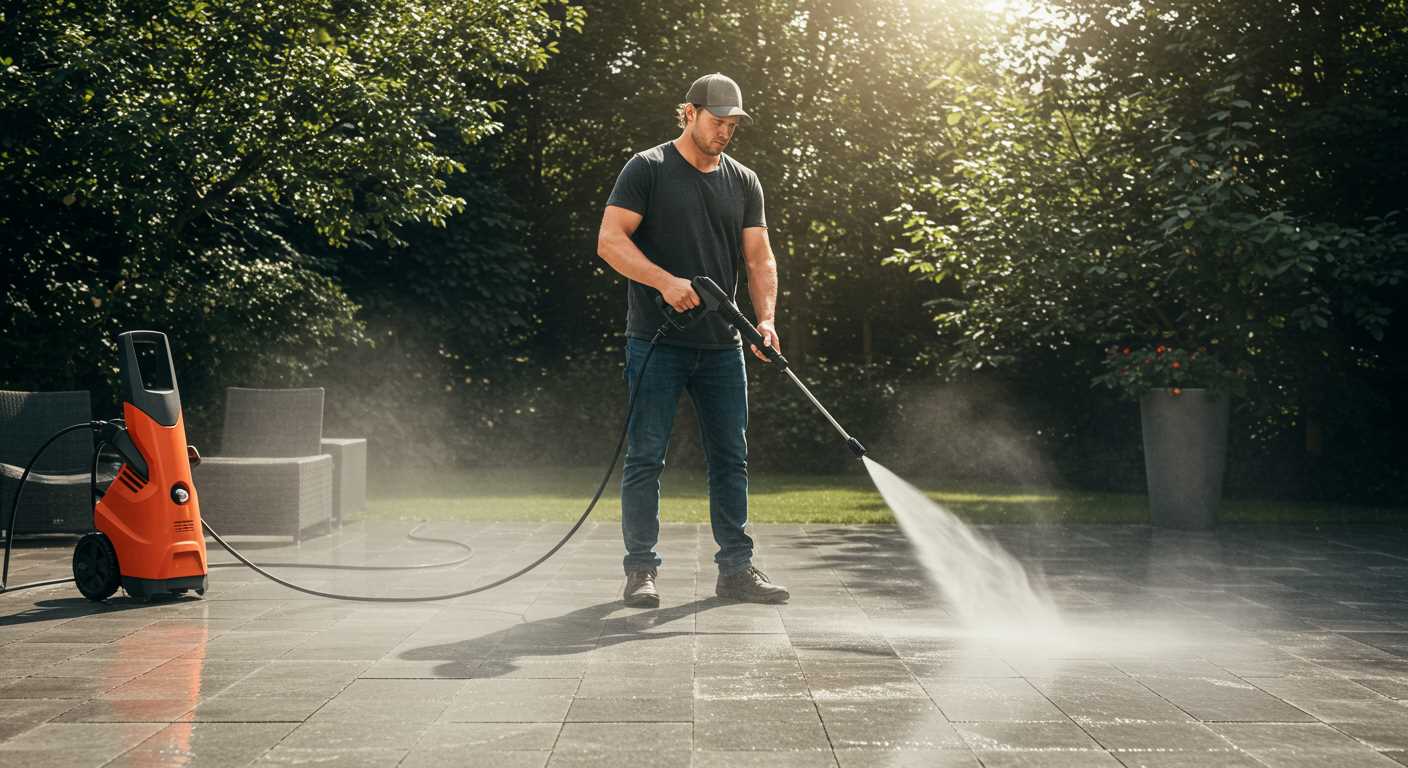
Rinsing the Deck: Methods Without a Pressure Washer
Using a garden hose with a spray nozzle can be an effective way to rinse surfaces. Choose a nozzle that allows for adjustable water pressure, enabling you to switch between a gentle spray and a more forceful stream. Start from the highest point of the surface and work your way down to ensure water runs off without pooling.
If you prefer a more targeted approach, a bucket and sponge method works well. Fill a bucket with clean water and use a large sponge to apply it to the surface. This method allows for better control over the amount of water applied and prevents excessive wetness that could lead to mould.
For stubborn areas, consider using a hose attachment, like a foam cannon, which mixes water with a cleaning solution. This can help lift dirt while keeping water usage minimal. Alternatively, a simple garden sprayer can be used to apply the solution, followed by a thorough rinse with your hose.
Timing is key. Rinsing should be done on a dry day to prevent rapid evaporation, which can leave streaks. Always test your chosen rinsing method in a small area first to ensure it doesn’t damage the surface.
Lastly, after rinsing, leave the area to air dry completely. Avoid using towels or rags to speed up the process, as these can leave lint or residues behind. A natural air-dry will yield the best results, preserving the integrity of your surface.
Drying the Deck Properly After Cleaning
For optimal results, allowing the surface to dry thoroughly post-cleaning is essential. I recommend starting with a thorough inspection to remove any remaining debris. After rinsing, ensure that water doesn’t pool in any areas. This can lead to uneven drying and potential damage.
Utilising a high-quality best cordless garden vacuum and blower can significantly expedite the drying process. The air circulation helps evaporate moisture trapped in the wood’s pores, reducing the risk of mould or mildew developing.

Additionally, consider the weather conditions. On sunny days, the surface will dry faster, but shade can prolong the drying time. If it’s overcast, you might need to wait longer or take extra steps to ensure proper moisture removal. You may also want to prop open any furniture or planters to allow air to circulate underneath them.
Lastly, avoid walking on the surface until it is completely dry. This prevents any marks or imprints which can become permanent. Patience is key for maintaining the integrity and appearance of your surface.
Preventing Future Stains and Damage
To maintain the beauty of your outdoor surface, applying a protective sealant is a wise choice. After thorough cleaning, wait for the area to dry completely, then use a high-quality sealant designed for your specific material. This will create a barrier against moisture and dirt, significantly reducing the chances of future stains.
Regular Maintenance Checks
Incorporate regular inspections into your routine. Look for signs of wear, such as splintering or discoloration. Addressing these issues promptly can prevent more significant damage later. Additionally, keep an eye on nearby trees and shrubs that might shed leaves or sap, as these can lead to staining.
Seasonal Preparations
Before seasonal changes, especially in autumn and spring, prepare your area by clearing away debris. Leaves, twigs, and other organic matter can trap moisture, leading to mould and mildew growth. After clearing, consider adding a protective coating to shield the surface from the elements. This simple step can extend the lifespan of your outdoor area considerably.
Maintaining Your Wood Deck Regularly
Establishing a routine for upkeep is crucial for longevity. I recommend inspecting your outdoor surface at least twice a year, ideally in spring and autumn. This allows you to spot any signs of wear or damage before they escalate. Look for cracks, splintering, or areas where moisture may be trapped.
Routine Cleaning Schedule
Incorporate sweeping and light scrubbing into your monthly tasks. This prevents dirt accumulation and keeps the surface looking fresh. A simple mixture of warm water and mild soap works wonders for this purpose. Use a soft-bristled brush, as it won’t scratch the surface while effectively removing loose debris.
Sealing and Staining
Applying a sealant every couple of years can significantly enhance protection against the elements. Choose a product suitable for your specific type of timber. A well-sealed exterior not only repels moisture but also helps to maintain the aesthetic appeal. When staining, ensure you pick a dry, warm day to allow for proper absorption and drying.


.jpg)


