


Begin by selecting a high-pressure cleaner with adjustable settings to avoid damaging fabrics. I recall the first time I used one; I was amazed at how quickly it restored my sun-drenched seating. The key is to start at a low setting and gradually increase the pressure as needed.
Before you get started, remove any detachable covers. This allows for a thorough wash without obstruction. I often use a soft-bristle brush to tackle stubborn spots before bringing out the cleaner. Just a few minutes of pre-treatment can save you time later.

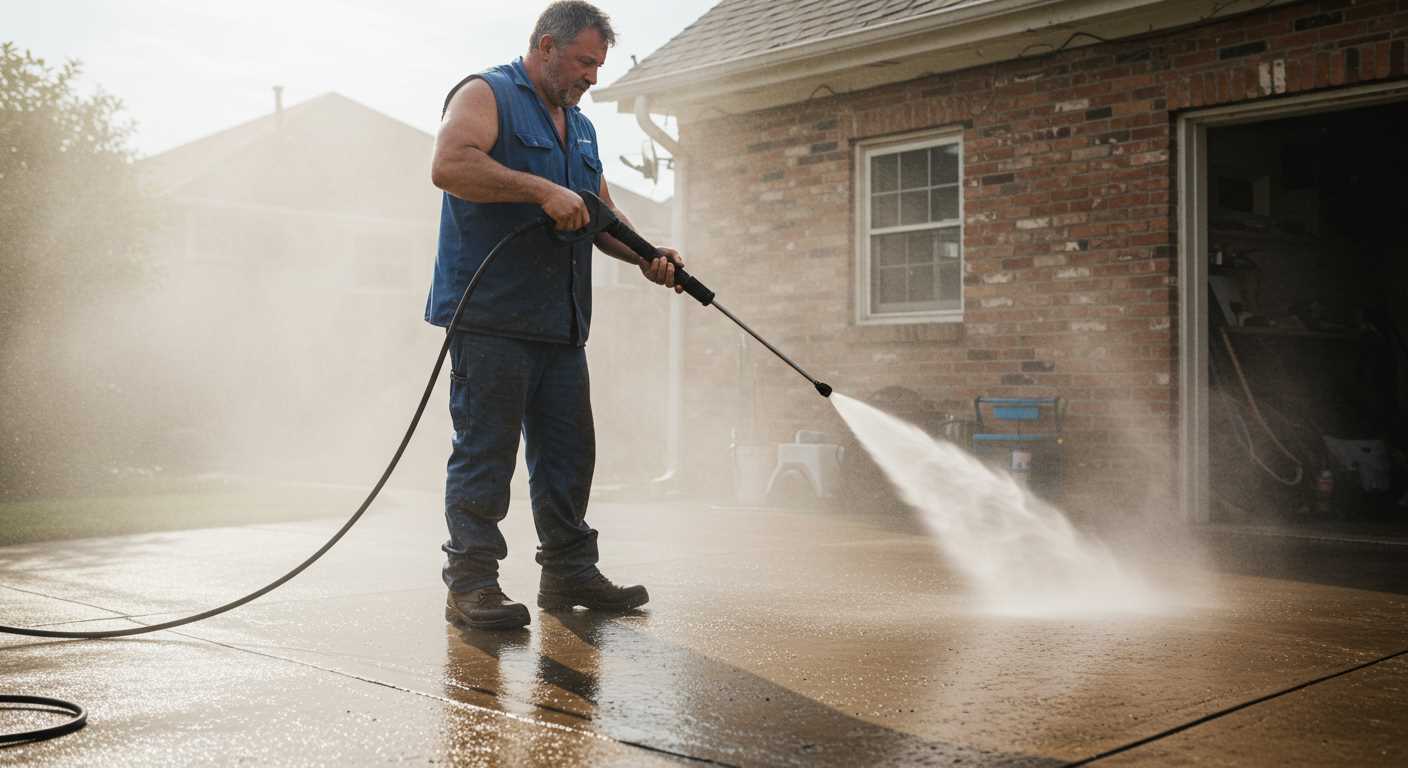
Position the nozzle about 12 inches from the surface. I’ve learned that keeping it at this distance prevents water from saturating the material excessively. Move the sprayer in a sweeping motion, ensuring even coverage. My first attempt was a bit too aggressive, and I ended up with a few waterlogged pieces that took ages to dry!
After rinsing, allow everything to air dry completely before reassembling. I’ve found this step is crucial to prevent mould and mildew formation. Watching my patio transform into a fresh, inviting space is always rewarding, and it takes just a fraction of the time compared to traditional methods.
Cleaning Techniques for Patio Upholstery Using High-Pressure Equipment
Always begin by ensuring the fabric is suitable for high-pressure treatment. Check manufacturer labels for any specific care instructions. In my experience, most fabrics, such as polyester or acrylic, respond well to this method. If unsure, conduct a spot test on a hidden area to gauge the fabric’s tolerance.
Before commencing, remove any loose debris. A soft brush or a handheld vacuum works wonders to eliminate dirt and dust. This step prevents grime from being pushed deeper into the material during the washing process. Once the surface is clear, set up your high-pressure apparatus with a fan spray nozzle, typically 25 degrees is ideal for this task.
Optimal Cleaning Solutions
Mix a gentle detergent with warm water in a bucket. I prefer using a biodegradable option to protect the environment while achieving effective results. Apply this solution to the fabric using a sponge or brush, allowing it to penetrate for about 10-15 minutes. This pre-treatment makes a significant difference, especially for stubborn stains.
Washing Technique
Start from a distance of about 12 inches from the surface. Gradually move closer, ensuring even coverage without saturating the fabric. The key is to maintain a consistent motion to avoid damaging the upholstery. Rinse thoroughly with clear water to remove any soap residue. Finally, allow the upholstery to dry completely in a shaded area to prevent fading and maintain its structure.
In my years of experience, I’ve found that following these steps leads to a remarkable restoration of fabric, making your outdoor furniture look fresh and inviting once again.
Choosing the Right Pressure Washer for the Job
For tackling this task, I recommend looking for a unit with at least 2000 PSI. This strength effectively removes dirt and grime without damaging fabric. A pressure washer with adjustable settings allows for versatility, catering to different materials and levels of soiling.
Electric models are typically quieter and suitable for lighter jobs, while gas-powered units deliver greater power and are ideal for extensive cleaning tasks. I’ve found that electric washers are more manageable for home use, especially if you’re working in a smaller area.
Pay attention to the GPM (gallons per minute) rating as well. A higher GPM means more water flow, which aids in rinsing away debris effectively. A combination of high PSI and GPM is the winning formula for achieving a thorough refresh.
Don’t overlook attachments. A rotating nozzle can significantly enhance the cleaning process, providing a wider spray pattern that covers more surface area. I once used a turbo nozzle, and it made light work of stubborn stains.
Make sure to invest in a model with a long hose and power cord. This feature allows for greater reach without the hassle of moving the unit constantly. I once faced an uphill challenge trying to clean a patio with a short hose, and it was a time-consuming ordeal.
Lastly, consider the weight and portability of the machine. A lightweight model is easier to manoeuvre, especially if you’re moving from one spot to another. I’ve learned that ease of handling can make a significant difference in the overall experience.
Preparing Outdoor Cushions for Cleaning
Before engaging in the intense task of revitalising your garden seating, ensure you follow a few critical steps. First, remove any loose debris, such as leaves and dirt. A simple shake or a gentle brush will usually do the trick. This helps to prevent clogs in your equipment later on.
Next, check for any specific care instructions on the labels of your items. Some materials may require special treatment or may not respond well to high-pressure methods. If you encounter any stains, pre-treat them with an appropriate stain remover before proceeding.
It’s also wise to inspect for damage. Look for any fraying seams or worn spots. Addressing these issues beforehand can save you from further complications during the cleaning process. If you find any significant damage, consider repairing it prior to the washing session.
Lastly, ensure you have adequate space to work. Position your items on a flat, non-porous surface, ideally away from any nearby plants or delicate structures. This helps to contain any mess and avoids accidental damage to your surroundings.
Selecting the Appropriate Cleaning Solution
For effective results, choosing the right cleaning agent is paramount. I’ve tested numerous products, and my go-to recommendation is a biodegradable formula specifically designed for fabric and outdoor applications. These solutions are gentle yet powerful, breaking down dirt and grime without damaging materials.
Concentration Matters
Pay attention to the concentration of the cleaning agent. A highly concentrated formula allows for dilution, which means you can adjust the strength based on the level of soiling. I’ve found that a 1:4 dilution often strikes the perfect balance for most situations. Always mix according to the manufacturer’s instructions to ensure optimal performance.
Consider the Material
Different fabrics require different approaches. For instance, acrylic and polyester blends respond well to standard cleaners, while natural fibres like cotton may need a more delicate touch. If you’re unsure about compatibility, test the solution on a hidden area first. This quick check can save you from potential damage and ensure the longevity of your items.
Setting Up Your Pressure Washer Safely
Before engaging in any cleaning task, ensuring safety is paramount. Always inspect your equipment before use. Check for any leaks in hoses and ensure connections are secure. I recall a time when I neglected this step, leading to an unexpected spray that soaked everything in sight. A simple inspection would have saved me a lot of hassle.
Location Matters
Choose an open area free from obstacles. This not only provides ample space for movement but also helps prevent any accidental damage to nearby items. During one of my projects, I found myself working too close to flower beds, resulting in some unfortunate collateral damage. Keep a safe distance from plants and delicate surfaces.
Personal Protective Equipment (PPE)
Wearing the right gear is non-negotiable. Use safety goggles to protect your eyes from debris and spray back. Heavy-duty gloves are a must; they shield your hands from chemical exposure and provide grip. I’ve had my fair share of mishaps where a sudden burst of water caught me off guard, and I learned the hard way that a little preparation goes a long way.
Additionally, sturdy footwear will help prevent slips. Wet surfaces can be treacherous, especially when dealing with high-pressure streams. It’s better to be cautious than to experience an accident that could have been avoided.
Lastly, ensure children and pets are kept at a safe distance. An enthusiastic pet or curious child can inadvertently wander into the line of fire. I’ve seen a few close calls, and it’s never worth the risk. Keeping the area secure will allow you to focus on the task at hand without distractions.
Testing Pressure Settings on a Small Area
Begin by selecting an inconspicuous spot on your fabric to assess the appropriate force. A small test area will prevent any damage to your furnishings. I recommend starting with the lowest setting on your equipment; this helps gauge how the material reacts without risking harm.
Steps for Testing
- Ensure the nozzle is set to a wide spray pattern, typically 25 or 40 degrees.
- Hold the lance about 2 feet away from the surface.
- Activate the device briefly, moving from side to side.
- Inspect the test area for any signs of damage or fading.
If the test area shows no adverse effects, gradually increase the intensity. This method allows you to find the sweet spot for cleaning while minimising the risk of wear.
Adjusting Based on Material
- For more delicate fabrics, opt for lower settings and wider spray angles.
- Sturdier materials can handle higher pressures; however, always start low.
- Remember, the distance from the surface affects the impact; closer means more force.
Once you find the right setting, apply that pressure consistently across the rest of your items. Always consider the specific needs of your fabric type to ensure effective maintenance. For those seeking a robust option, check out the best petrol pressure washers for powerful cleaning capabilities.

Cleaning Techniques for Different Fabric Types
When tackling various materials, it’s crucial to adapt your approach to ensure optimal results. Here’s a breakdown based on fabric types:
- Polyester: This synthetic fabric is durable and resistant to mildew. I recommend setting the equipment to a medium pressure and using a mild detergent. Start from a distance of about 30 cm to avoid any damage. Rinse thoroughly to remove any soap residue.
- Acrylic: Acrylic is known for its vibrant colours and UV resistance. Use a lower pressure setting to prevent fading. A gentle all-purpose cleaner works well. Maintain a distance of 45 cm and use sweeping motions to ensure even coverage.
- Sunbrella: This brand is synonymous with outdoor textiles. It’s designed to withstand the elements. For cleaning, I’ve found that using a mixture of water and a specific fabric cleaner works wonders. Use a pressure level that’s low to moderate, ensuring you keep a distance of 60 cm to protect the fabric’s integrity.
- Canvas: This heavy-duty material can handle more aggressive cleaning. I often use a higher pressure setting, around 1500 PSI, along with a solution that contains bleach for tough stains. It’s essential to spot test first and keep the nozzle at least 30 cm away to avoid any wear.
- Vinyl: Vinyl can handle robust cleaning methods. A high-pressure setting is acceptable, but I prefer to use a dedicated vinyl cleaner to avoid discolouration. Rinse well after applying the cleaner, ensuring all residues are washed away.
Adjusting pressure and cleaning agents according to the material not only enhances the longevity of your textiles but also ensures a pristine finish. Always remember to refer to the manufacturer’s guidelines for specific recommendations on their products.
Rinsing Off Detergent and Dirt Thoroughly
After applying your chosen cleaning solution, it’s time to remove all the residues. I recommend using a wide spray nozzle for an even distribution of water. Stand at a distance of about 12-18 inches from the fabric to avoid damaging the material while ensuring that all soap and grime are washed away effectively.
Technique for Effective Rinsing
Start from the top and work your way down. This method prevents dirty water from running back onto already rinsed areas. Move the nozzle in a sweeping motion to cover large sections efficiently. If you notice stubborn spots, a concentrated spray can help dislodge any remaining dirt.

Checking for Residues
Once rinsing is complete, inspect the fabric closely. Any lingering soap can lead to discolouration or attract dirt more quickly. If you spot any soap film, repeat the rinsing process on the affected areas. Always ensure that the fabric feels clean and free from any slippery residue before leaving it to dry.
Ensuring Cushions Dry Properly After Cleaning
After using a high-pressure device, the drying process is critical to prevent mould and mildew. To expedite drying, lay the items flat on a clean, dry surface. If possible, elevate them to allow airflow underneath. Using a clothesline or a drying rack can be effective, as it promotes circulation.
Utilising Sunlight and Airflow
Position the items in direct sunlight, if the fabric allows. Sunlight not only helps to dry but also aids in sanitising. For shaded areas, ensure there’s good airflow; using fans can enhance the drying process. Avoid folding or stacking the items until they are fully dry to prevent trapping moisture.
Monitoring for Residual Moisture
Check for any damp spots even after drying. A quick check with your hand can help determine if more time is needed. If moisture is detected, give it additional time in the sun or airflow. For those seeking versatility, consider a small pressure washer for home use for easy maintenance tasks.
Maintaining Outdoor Cushions to Extend Their Lifespan
Regular upkeep is vital for ensuring longevity. I’ve seen too many people overlook basic care, leading to premature wear and tear. Start by storing your items in a dry, shaded area when not in use. This prevents fading and protects against moisture buildup. Using breathable covers can also shield from dust and UV damage.
Routine Inspection
Make it a habit to inspect your items every few months. Look for signs of mildew, discolouration, or fraying seams. Early detection allows for timely repairs. Minor fixes, like sewing loose seams or applying fabric protector, can significantly enhance durability.
Proper Storage Techniques
When storing, ensure items are clean and completely dry to prevent mould growth. Stack them neatly or use storage bins that allow airflow. Avoid placing heavy objects on top to maintain shape and cushioning integrity.
| Tip | Description |
|---|---|
| Use Covers | Invest in quality, breathable covers to guard against weather elements. |
| Regular Inspections | Check for wear and tear every few months to catch issues early. |
| Store Properly | Ensure items are clean and dry before storage to prevent damage. |
| Apply Fabric Protector | Consider using a fabric protector spray to enhance resistance against stains and UV light. |
Implementing these practices will not only keep your items looking fresh but also extend their lifespan significantly. A little effort goes a long way in preserving your outdoor seating comfort.


.jpg)


