


Begin with disassembling the nozzle from the lance. This step allows for a thorough inspection of any built-up residues or blockages. I’ve often found that a simple twist can reveal a world of grime hiding within. Keep a small container handy for small parts; trust me, they have a way of disappearing!
Next, prepare a mixture of warm water and mild detergent. I recommend using a soft brush or cloth to gently scrub the components. In my experience, this method removes stubborn deposits without damaging the surfaces. Pay special attention to the filter screen; a clogged filter can significantly hinder performance.

After scrubbing, rinse everything thoroughly to ensure no soap remnants are left behind. I once made the mistake of skipping this step, and it led to a sticky mess on my next use. Once rinsed, let the parts air dry completely before reassembling. A quick assembly can lead to moisture build-up, which is best avoided.
Lastly, consider applying a silicone lubricant to the threads of the nozzle before reattaching it. This not only aids in smoother operation but also prevents future sticking. I’ve seen many tools last far longer with this simple precaution.
Cleaning the Attachment for Optimal Performance
Begin with disconnecting the nozzle from the main unit to prevent any unwanted spray. Use a soft-bristle brush to remove any debris or stuck-on substances from the exterior. This step is crucial for maintaining the longevity of the equipment.
Internal Maintenance
For internal components, a mixture of warm water and mild detergent works wonders. Soak the nozzle for about 15 minutes, then rinse thoroughly. Ensure all orifices are clear; any blockage can significantly reduce efficiency.
- Inspect rubber seals and O-rings for wear; replace them if necessary.
- Use a straightened paper clip or a fine wire to clear blocked jets gently.
- Check for any cracks or damage on the body; this could lead to leaks.
Final Steps
After rinsing, let the attachment air dry completely before reattaching it. Store it in a cool, dry place to avoid moisture accumulation and corrosion. Regular attention to these details can prevent costly repairs and ensure your tool performs at its best.
Gather Necessary Cleaning Supplies
For an effective refresh of your cleaning tool, assemble the following supplies:
- Soft-bristle brush: Ideal for removing stubborn debris without causing scratches.
- Bucket: Useful for mixing cleaning solutions and rinsing tools.
- Garden hose: To rinse off any residues after the cleaning process.
- Cleaning solution: Choose a mild detergent that’s safe for your equipment.
- Microfiber cloth: Perfect for drying and polishing after the job is done.
- Protective gloves: To keep your hands safe from chemicals and grime.
- Safety goggles: Essential for protecting your eyes from splashes.
While I was testing various models, I found that having the right tools at hand made a significant difference in the outcome. One time, I tackled a stubborn build-up on a nozzle without the right brush and ended up damaging the surface. A soft-bristle brush would have saved me that headache.
Using a dedicated cleaning solution rather than household cleaners is another tip I picked up through experience. Those commercial products are formulated to break down grime effectively while being gentle on your equipment. Always read the labels and select products designed for your specific tools.
Lastly, never underestimate the importance of rinsing thoroughly. A quick rinse with a garden hose can prevent any cleaning residues from causing damage over time. I learned this the hard way when I neglected rinsing after a deep clean, resulting in corrosion on a frequently used attachment.
Keep this checklist handy to ensure you’re fully equipped before starting your maintenance routine.
| Supply | Purpose |
|---|---|
| Soft-bristle brush | Removes debris without scratching |
| Bucket | Mixes solutions and rinses tools |
| Garden hose | Rinses residues after cleaning |
| Cleaning solution | Breaks down grime safely |
| Microfiber cloth | Dries and polishes the surface |
| Protective gloves | Keeps hands safe from chemicals |
| Safety goggles | Protects eyes from splashes |
Disconnect the Pressure Washer
Before starting the maintenance, ensure to disconnect the power supply. If you’re using an electric model, unplug the unit from the outlet to avoid any accidental activation. For gas-powered machines, turn off the fuel valve and remove the spark plug wire. This step is crucial to prevent any mishaps while you work on the equipment.
Next, detach the high-pressure hose from the unit. This is often secured tightly, so a firm grip may be necessary. Use a wrench if needed, but be cautious not to damage the fittings. After disconnecting, drain any remaining water from the hose to prevent leaks during cleaning.
Don’t forget to remove any attachments, such as nozzles or brushes. These parts can accumulate grime over time, and cleaning them separately will enhance their performance. For stubborn residue, soak them in a mixture of water and mild detergent before rinsing.
Lastly, store all components in a dry, safe place away from direct sunlight. This will prolong the lifespan of your equipment and ensure it’s ready for the next use.
| Step | Action |
|---|---|
| 1 | Unplug electric unit or disconnect spark plug wire from gas model. |
| 2 | Detach high-pressure hose and drain remaining water. |
| 3 | Remove and clean any attachments. |
| 4 | Store all parts safely and dry. |
For additional cleaning tips, you might find this guide on how to clean algae off aquarium decorations helpful.
Remove the Wand from the Pressure Washer
To detach the spray tool, grip the handle firmly while pressing the release button, usually located near the connection point. Gently pull the nozzle away from the main unit. Avoid using excessive force, as this could damage the locking mechanism or the attachment itself.
If the connection feels stuck, inspect for any debris or buildup around the joint. A quick wipe with a damp cloth can often clear any obstructions. In cases where the nozzle is particularly stubborn, applying a small amount of lubricant around the base can facilitate easier removal.
Once the attachment is free, check for any signs of wear or damage. It’s wise to replace worn components promptly to ensure optimal performance when you reassemble everything. Store the detachable piece in a dry, clean area to prevent any moisture-related issues before your next use.
Inspect for Damage or Blockages
Before you proceed, take a moment to closely examine the attachment for any signs of wear or obstruction. Look for cracks, bends, or any irregularities in the structure. Even minor damage can affect performance significantly. I recall a time when I ignored a small crack, thinking it was insignificant. The result was a reduced water flow and increased pressure, leading to an ultimately frustrating experience.
Next, check the nozzle for blockages. Debris can easily accumulate and restrict water flow, which diminishes the effectiveness of your tool. I’ve found that using a small wire or a toothpick can help clear out stubborn clogs. When I faced this issue, a simple cleaning made all the difference, restoring the tool to its original functionality.
Don’t forget to inspect the connectors as well. Make sure there’s no corrosion or buildup around the fittings. A faulty connection can lead to leaks, creating a mess that’s more trouble than it’s worth. If you encounter any rust, it’s wise to replace the affected parts promptly.
For those tackling outdoor surfaces, consider using a deck cleaner to use with pressure washer to avoid subjecting your equipment to harsh chemicals that could cause damage over time.
Regular inspections not only prolong the lifespan of your equipment but also enhance its performance. Make it a habit to check for these issues after each use, and you’ll save yourself from potential headaches down the line.
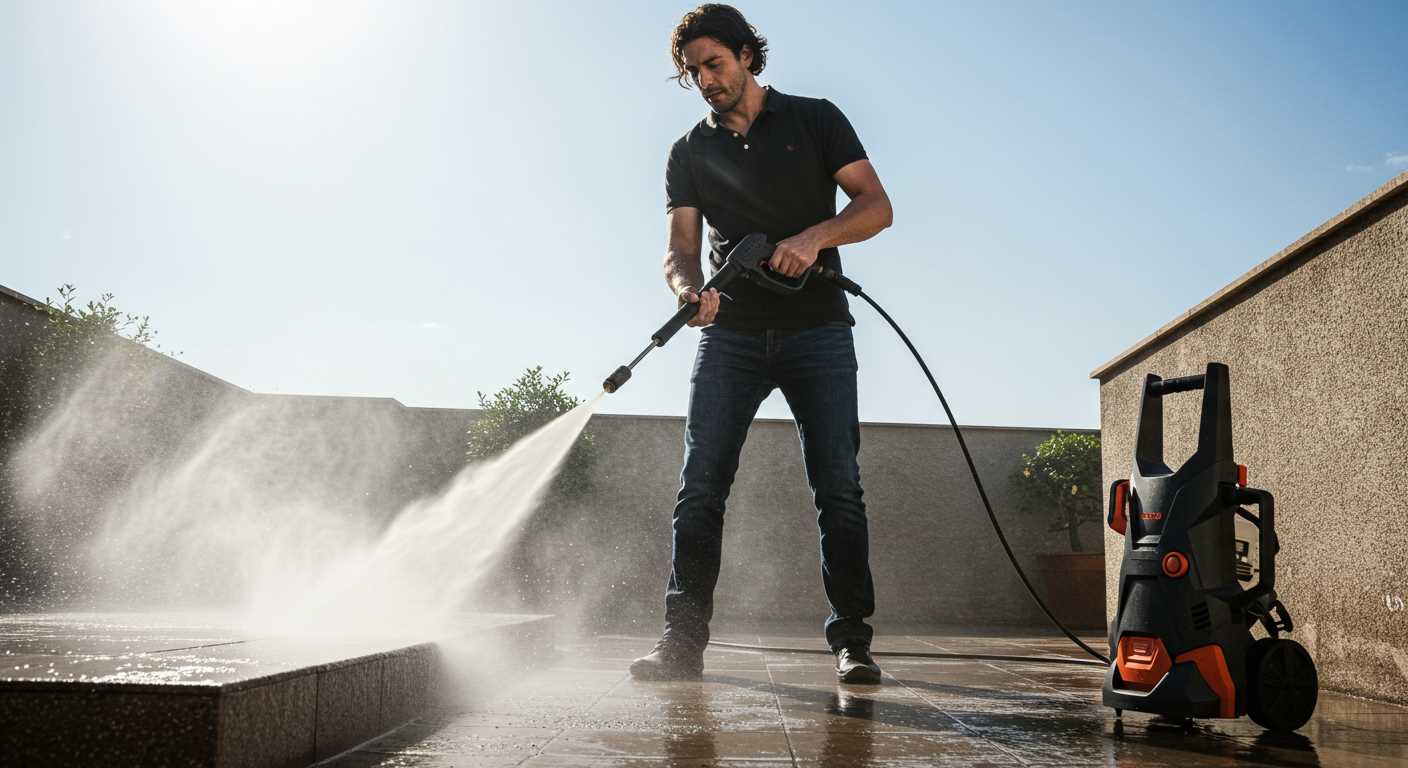
Clean the Nozzle and Tip
.jpg "How to clean pressure washer wand")
Begin by removing the nozzle from the extension. This step allows for direct access and makes the task much simpler. Use a soft brush or a toothpick to dislodge any debris lodged inside the nozzle. Often, dried soap or dirt can create blockages that hinder performance. If you find any stubborn residue, soaking the nozzle in a vinegar solution for a few minutes can help loosen it up.
Inspect and Rinse
After dislodging the grime, rinse the nozzle thoroughly with warm water. This removes any remaining particles and ensures a clear passage for the water. Check the orifice closely; if it appears damaged or excessively worn, replacing it might be necessary to maintain optimal functionality.
Reassemble and Test
Once everything is clean, reattach the nozzle securely. It’s a good idea to test it on a low setting before returning to full power. This ensures that everything is functioning properly and that water flows freely without any interruptions. Regular maintenance of the nozzle and tip will extend the lifespan of your equipment and enhance its performance significantly.
Use Soapy Water for General Cleaning
Mix a solution of warm water and a few drops of dish soap in a bucket. This simple blend works wonders for tackling grime on various surfaces. I recall a time when I was faced with a particularly tough layer of dirt on my old garden furniture. A sponge soaked in soapy water made quick work of it, leaving everything sparkling clean.
Application Techniques
Soak a cloth or sponge in the soapy mixture, then gently scrub the exterior of your equipment. Pay special attention to any crevices where dirt can accumulate. After a good scrubbing, rinse with clean water to ensure no soap residue remains. I’ve often found that rinsing thoroughly prevents any potential streaks or film from forming later on.
Drying and Final Touches
Once rinsed, use a microfiber cloth to dry the surfaces. This step is crucial–it helps avoid water spots and keeps everything looking polished. A tip I’ve learned over the years is to take this opportunity to check for any signs of wear or tear while cleaning. It’s easier to spot issues when everything is fresh and visible.
Rinse Thoroughly to Remove Residue
After completing the cleaning process, ensure that all components are rinsed thoroughly to eliminate any remaining soap or debris. Skipping this step can lead to blockages or performance issues during future use.
Follow these steps for an effective rinse:
- Reconnect the cleaning tool to a water source without any detergent.
- Turn on the water flow, allowing it to run through the entire assembly.
- Direct the flow towards the nozzle to clear any trapped residue.
- Inspect the water exiting the nozzle; it should run clear, indicating successful removal of contaminants.
In my experience, a thorough rinse can prevent future headaches. I once neglected this step, and it resulted in clogged tips that required replacement. By ensuring a proper rinse, you can extend the lifespan of your equipment and maintain optimal performance.
Don’t forget to also check the connection points for any soap build-up. A quick rinse here can save you from having to deal with leaks later on.
Reassemble and Test the Wand
After ensuring everything is spotless and free from blockages, it’s time to put the equipment back together. Here’s the straightforward process I follow:
- Align the nozzle with the wand. Ensure the connection points are clean and free from debris.
- Firmly push the nozzle into place until you hear a click or feel it lock securely. This is crucial for optimal performance.
- Reattach any fittings or adaptors that were removed. Tighten them gently with your hands to avoid over-tightening, which can lead to damage.
Once everything is reassembled, it’s essential to conduct a test before full use. Here’s how I approach it:
- Reconnect the device to the power source.
- Turn on the water supply, ensuring there are no leaks around the connections.
- Start the machine at a low setting and gradually adjust to a higher pressure.
- Observe the output from the nozzle. It should produce a steady, strong stream without any interruptions.
If you notice any irregularities, disassemble the parts again and double-check for any misalignment or overlooked debris. It’s better to troubleshoot now than to face issues during a cleaning task. In my experience, taking the time to ensure everything is properly assembled can save a lot of hassle later on.
FAQ:
What tools do I need to clean a pressure washer wand?
To clean a pressure washer wand, you will need a few basic tools and supplies. First, gather a soft cloth or sponge for wiping down the exterior. A small brush, like an old toothbrush, can be helpful for getting into crevices. Additionally, you might need a bucket of warm water mixed with mild detergent for cleaning. If you encounter stubborn debris, a vinegar solution can be effective. Finally, ensure that you have a hose or access to water for rinsing off any cleaning agents.
How often should I clean my pressure washer wand?
It is advisable to clean your pressure washer wand after every use to ensure optimal performance and longevity. This routine maintenance helps to prevent clogs and keeps the wand in good condition. If you use your pressure washer frequently, consider a more thorough cleaning every few months. Regular checks for any build-up or damage can help you catch issues before they become problematic.
What is the best way to remove clogs from a pressure washer wand?
To remove clogs from a pressure washer wand, first, disconnect it from the pressure washer for safety. Inspect the nozzle for any debris. If you find a blockage, use a thin object, like a paperclip or a small pin, to gently clear it. Soaking the nozzle in a vinegar solution can help dissolve stubborn blockages. After clearing the clog, rinse the nozzle thoroughly before reattaching it to the pressure washer.
Can I use harsh chemicals to clean my pressure washer wand?
Using harsh chemicals is not recommended for cleaning a pressure washer wand. These substances can damage the wand’s materials and affect its performance. Instead, opt for mild detergents or natural solutions like vinegar. These options are effective for cleaning without causing harm to the wand. Always check the manufacturer’s guidelines for any specific cleaning recommendations.
What should I do if my pressure washer wand is damaged?
If you notice any damage to your pressure washer wand, such as cracks or leaks, it is important to address the issue promptly. Inspect the wand carefully to determine the extent of the damage. If it is a minor issue, like a loose connection, you may be able to tighten it. For more significant damage, it is advisable to replace the wand to avoid safety hazards and ensure effective operation. Always consult the manufacturer’s instructions for replacement parts and procedures.
What are the best steps to clean a pressure washer wand?
To clean a pressure washer wand, you should first disconnect it from the power source and water supply. Next, inspect the wand for any visible debris or blockages. Use a soft brush or cloth to wipe down the exterior, removing dirt and grime. For any stubborn deposits, a mixture of warm soapy water can be applied. If there are clogs in the nozzle, you may need to use a needle or a small wire to clear them. After cleaning, rinse the wand with clean water and let it dry completely before reattaching it to the pressure washer.
.jpg)


