
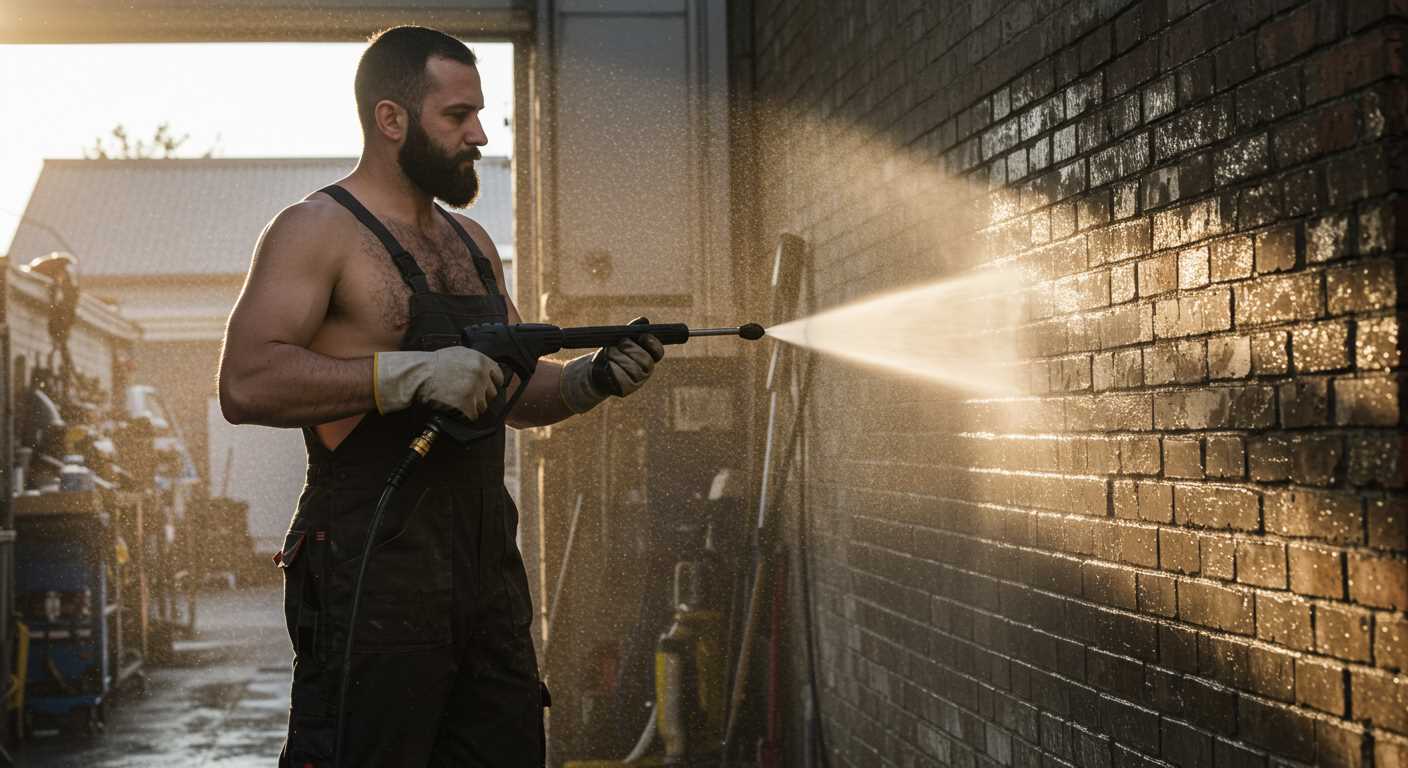


Begin by selecting a suitable nozzle for your equipment; a 25-degree or 40-degree nozzle works wonders for this task. I recall a time when I hastily grabbed the wrong attachment and ended up causing more chaos than clarity. The right choice makes all the difference, so take a moment to ensure you’re equipped properly.
Next, prepare your outdoor area. Clear any furniture or obstacles that could obstruct your work. I once made the mistake of trying to manoeuvre around items, which only prolonged the process and left me frustrated. A clear space allows for smooth operation and effective results.
Before you start, consider applying a pre-treatment solution to tackle stubborn stains. Mixing a mild detergent with water can help loosen dirt and grime. I’ve often found that a little pre-soaking goes a long way. Just remember to rinse thoroughly afterwards to avoid any residue that could mar the finish.

As you begin, maintain a steady distance of about two feet from the surface. I learned this the hard way during my early days, when I got too close and left unintended marks. Keep the nozzle moving at a consistent pace to avoid streaks or damage.
After finishing, don’t forget to inspect your work. Sometimes, a second pass is necessary for those tricky spots. I often found that a quick touch-up can transform an average job into a stellar one, leaving surfaces looking refreshed and vibrant.
Efficient Techniques for Your Outdoor Surfaces

Begin by selecting the right nozzle; a 25-degree nozzle works wonders for most surfaces without causing damage. I remember tackling a particularly stubborn area on my own terrace, where grime had built up over the years. Switching to this nozzle made all the difference, providing a perfect balance between power and control.
Adjust the pressure setting on your machine to around 2000 PSI. This level is typically sufficient for removing dirt without risking harm to the material. I’ve found that higher pressures can sometimes lead to unwanted etching or chipping, so it’s best to err on the side of caution.
Before starting, ensure the area is free of loose debris. A quick sweep can prevent larger particles from getting blasted around and potentially causing scratches. Once cleared, wet the surface lightly to help lift stubborn residues. I often do this step before applying any detergent; it enhances the overall effectiveness.
When applying a suitable cleaning solution, opt for one specifically formulated for outdoor surfaces. I’ve seen many people use generic soaps, but they can leave a film that’s hard to rinse away. Apply the solution using a low-pressure setting and allow it to sit for a few minutes, which allows the product to penetrate the dirt.
After the dwell time, switch back to that 25-degree nozzle and start washing from one end to the other, maintaining a consistent distance of about 12-18 inches from the surface. This technique ensures an even clean and prevents streaks. I remember one time, I got too close and ended up creating a patch that required extra work to remedy.
Finally, rinse thoroughly, ensuring all residues are removed. I often double-check the results under different lighting to catch any missed spots. If needed, a second pass can be beneficial, especially in troublesome areas. Once everything is done, allow the surface to dry completely before placing any furniture back. This prevents moisture from being trapped underneath, which can lead to further issues down the line.
Selecting the Right Pressure Washer for the Task
Choosing the appropriate equipment is crucial for achieving satisfactory results. A model with a minimum pressure of 130 bar is advisable for tackling tough grime while ensuring safety for delicate surfaces. I once used a unit with 150 bar pressure on a friend’s outdoor tiles, and while it cleared away the dirt effectively, it also caused minor damage to the grout. Lesson learned!
Consider the Flow Rate
A higher flow rate, measured in litres per minute (L/min), can significantly affect cleaning efficiency. I recall a time when I tested two machines: one with a flow rate of 8 L/min and another at 12 L/min. The latter completed the task in half the time, proving that sometimes, more water can mean less work. Look for a unit that balances pressure and flow rate for optimal performance.
Evaluate Accessories and Attachments
Pay attention to the included nozzles and accessories. A rotating nozzle can be a game changer when it comes to stubborn stains. I’ve found that having a variety of attachments, like surface cleaners and extension wands, increases versatility. I once tackled a particularly stubborn area using a surface cleaner attachment, and it made all the difference in speed and efficiency.
Preparing the Patio Area Before Cleaning
Clear the surface of any furniture, pots, and decorative items. This will not only protect them from damage but also provide ample space for manoeuvring. I remember one time I neglected this step and ended up with a broken plant pot that took ages to replace.
Check for any loose stones or debris that could become projectiles during the washing process. I’ve seen a few friends accidentally chip windows or even injure themselves this way. It’s worth taking a moment to walk around and collect any loose items or rubbish.
Assessing the Surroundings
Look at the nearby plants and grass. Ensure they are covered with a tarp or plastic sheeting to avoid direct exposure to the high-pressure stream. I’ve made the mistake of not shielding my garden before, and it took weeks for some plants to recover from the sudden shock. Always better to be safe than sorry.
Setting Up the Equipment
Before starting, ensure all the hoses and connections are secure. I once had a very messy situation because I overlooked a loose connection, which resulted in water spraying everywhere except where I intended. Conduct a quick check on the machine’s settings to confirm it’s ready to go. A little preparation can save a lot of hassle later on.
Choosing the Appropriate Cleaning Solution
For optimal results, selecting the right cleaning solution is paramount. Here’s what I recommend based on years of experience in the field.
- pH-Neutral Detergents: These are gentle yet effective. They won’t harm the surface or surrounding plants. Look for products specifically designed for outdoor surfaces.
- Oxygen Bleach: This is a fantastic option for tackling tough stains. It’s eco-friendly and won’t produce harmful chemicals. Mix according to package instructions for best results.
- Commercial Cleaners: If stains are particularly stubborn, consider a commercial-grade solution. Ensure it’s suitable for outdoor use and compatible with your equipment.
- Homemade Mixtures: A blend of vinegar and baking soda can work wonders. Combine equal parts and apply directly to the affected areas. Let it sit before rinsing thoroughly.
Always check the manufacturer’s recommendations for your specific equipment before using any cleaning agent. Some may require dilution, while others can be used directly. Remember to test any solution on a small, inconspicuous area first to ensure compatibility.
Once you’ve chosen the right cleaner, remember to follow safety precautions. Wear gloves and eye protection, especially when handling commercial products or strong mixtures. Your safety is just as important as achieving that pristine look.
In my experience, patience is key. Allow solutions to dwell on the surface for the recommended time to maximise effectiveness. Rinse thoroughly to remove any residues that could attract dirt in the future.
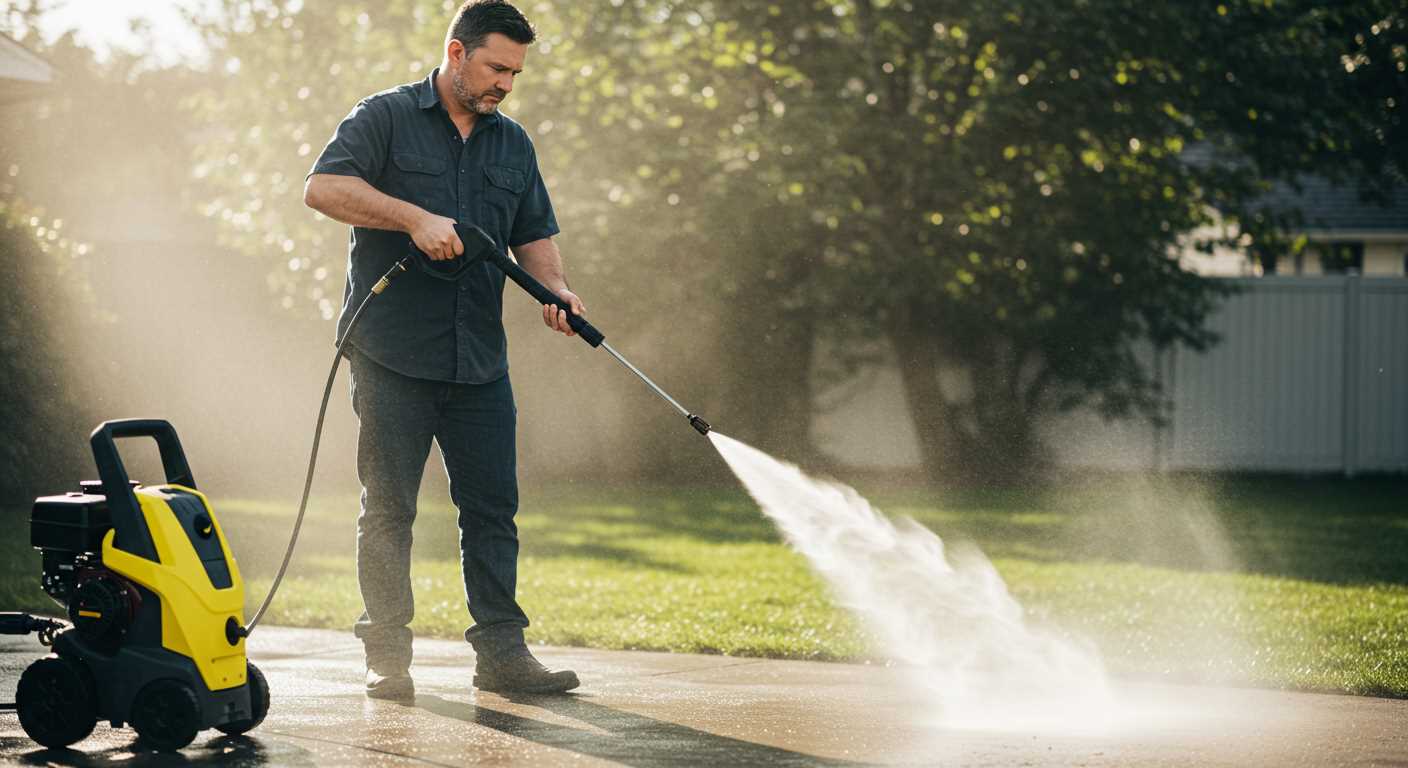
Setting Up the Pressure Washer for Optimal Performance
Ensure the equipment is on a flat, stable surface. This prevents any accidental tipping during operation. Secure all attachments tightly, particularly the nozzle and hose. A loose connection can lead to leaks and reduced efficiency.
Check Water Supply
Confirm that the water source is adequate. A steady flow is crucial to maintain pressure. If you’re using a garden hose, make sure it’s free of kinks and blockages. Connecting to a tap with good water pressure will enhance performance significantly.
Adjust Pressure Settings
Each task requires different settings. For delicate surfaces, start with a lower pressure to prevent damage. Gradually increase as needed. Familiarise yourself with the adjustment mechanism to avoid sudden surges that could harm the surface.
| Pressure Setting | Recommended Surface |
|---|---|
| Low (1000-1500 PSI) | Delicate materials, painted surfaces |
| Medium (1500-2500 PSI) | Concrete, brick |
| High (2500+ PSI) | Heavy-duty cleaning, stubborn stains |
After adjusting, test the spray on a small, inconspicuous area first. This helps gauge the impact before proceeding with the entire surface.
Lastly, always wear appropriate safety gear – goggles and gloves are a must. Protect yourself from debris and potential splashes. Your safety is just as important as the task at hand.
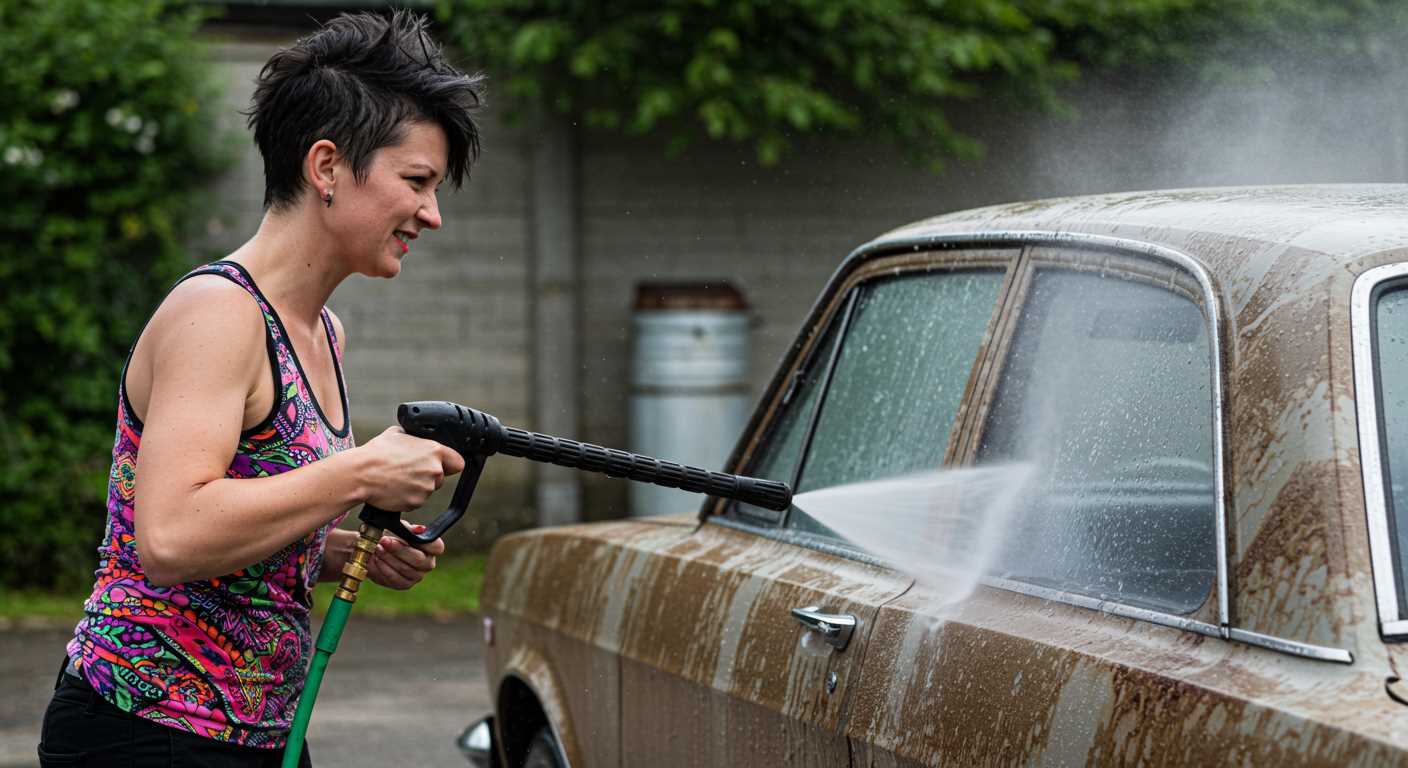
Techniques for Cleaning Silver Patio Slabs
Start by adjusting the nozzle on your equipment to a narrow fan spray. This concentrated stream is ideal for lifting dirt and grime without damaging the surface. I recall a time when I used a wider spray on a delicate surface, and the outcome was less than satisfactory–splattered debris instead of a polished look. A narrow fan allows for precision.

Maintain a consistent distance of around 30 cm from the surface. This distance ensures effective cleaning while preventing any potential etching or pitting. I learned this the hard way when I got too close, resulting in marks that took extra effort to rectify.
Work in sections, methodically moving from one area to the next. Overlapping each pass slightly guarantees uniform results. I often think back to a project where I tried to cover too much ground at once; the inconsistencies were glaring. Patience pays off in achieving that immaculate finish.
For stubborn stains, employ a scrubbing brush attachment. This tool can significantly enhance the removal process, especially for ingrained dirt. I’ve had success using this method on particularly challenging spots that resisted the initial wash.
After the main wash, rinse thoroughly to remove any residual cleaning agents. I once skipped this step, thinking a quick blast would suffice, only to find streaks left behind that required a second round of effort. A thorough rinse ensures a clean slate.
Lastly, consider applying a sealant post-cleaning. In my experience, this not only enhances the appearance but also adds a protective layer against future stains. I’ve seen surfaces treated this way remain cleaner for longer, making maintenance far simpler.
Post-Cleaning Rinse and Maintenance Tips
After completing the cleaning process, performing a thorough rinse is vital. Use a standard garden hose to wash away any residual cleaning agents and dirt. Ensure all areas are covered to prevent staining or spotting.
Here are some key maintenance tips to keep your outdoor surfaces looking pristine:
- Regular Sweeping: Remove leaves, dirt, and debris weekly to prevent build-up. A soft-bristle broom works best to avoid scratches.
- Immediate Spillage Cleanup: Promptly wipe away any spills, such as food or beverages, to prevent discoloration and staining.
- Seasonal Deep Cleaning: Schedule a detailed wash every six months to remove ingrained dirt and algae. This can help maintain the surface’s appearance and longevity.
- Sealant Application: Consider applying a sealant every couple of years to protect against stains and moisture penetration. Follow the manufacturer’s instructions for the best results.
- Inspect for Damage: Regularly check for cracks or deterioration. Address any issues promptly to avoid further damage.
For ongoing maintenance, investing in tools like lawn levelling rakes can help manage the surrounding area effectively, ensuring your outdoor space remains tidy and inviting.
Safety Precautions
Wear appropriate clothing–long sleeves, gloves, and non-slip footwear. Protective eyewear is a must. I’ve seen too many people regret not wearing goggles when a rogue jet of water hits them unexpectedly. A good pair of goggles can save you from a nasty eye injury.
Check Surroundings
Before starting, inspect your work area. Remove any obstacles like furniture or plants. I once had a close call with a garden gnome that I didn’t notice until it was too late. Not only did it get blasted, but I also had to clean up the mess afterwards. Ensure pets and children are at a safe distance, preferably indoors.
Equipment Safety
Inspect the unit for any damage before use. Frayed cords or leaks can lead to accidents. I learned the hard way on a rainy day that slipping on a wet surface while operating machinery is no joke. Always ensure your equipment is in good shape.
Keep the nozzle pointed away from yourself and others. The force of the water can cause serious injuries. I’ve seen people underestimate this power; a misplaced nozzle can turn a simple task into a trip to the emergency room. It’s not just about the cleaning–it’s about doing it safely.
Finally, maintain a firm grip on the handle. I’ve dropped my share of tools, and trust me, the last thing you want is for a high-powered device to slip out of your hands. Always remember that safety comes first.
For those interested in capturing the process, a digital camera looks almost identical to a traditional camera, making it easy to document your efforts while keeping safety in mind.
Common Mistakes to Avoid During the Cleaning Process
Skipping the pre-cleaning preparation can lead to ineffective results. Always ensure you remove debris like leaves and dirt to avoid clogging the nozzle or damaging the surface. I’ve seen many people dive straight in, only to find that the grime remains stubbornly in place.
Incorrect Nozzle Selection
Choosing the wrong nozzle can cause more harm than good. A narrow jet may seem effective, but it can chip or etch the surface. I recall a friend who used a 0-degree nozzle on his patio; it left unsightly marks that took considerable effort to fix. Opt for a wider angle to gently lift dirt without causing damage.
Neglecting to Test First
Always test on a small, inconspicuous area before starting the main cleaning. A misstep here can lead to permanent discolouration or surface damage. I learned this the hard way when I didn’t test a new cleaning solution and ended up with patches that were brighter than the rest. Always play it safe; it saves time and hassle down the line.
Not adhering to the manufacturer’s guidelines for equipment can result in operational issues. Each machine has specific pressure limits and recommended techniques. Ignoring these can lead to reduced performance or even equipment failure. I’ve seen poorly maintained washers struggle with even basic tasks, causing frustration and wasted time.
Finally, rushing the rinsing process can leave residue behind, which attracts dirt more quickly. Take the time to thoroughly rinse the area after applying cleaning solutions. I’ve had experiences where I thought I was done, only to find the surface looking worse a few days later due to leftover product. Patience pays off in the long run.
.jpg)


