


For the best results, select an attachment designed specifically for surfaces like these. My go-to has always been the turbo nozzle, which creates a swirling pattern that eliminates grime efficiently. During one of my home projects, I noticed how much easier it was to tackle those stubborn algae stains when using this tool. It saved me time and effort.
Before starting, ensure you have the right detergent mixed in a separate container. A biodegradable option is preferable, as it’s gentle on the environment. I once made the mistake of using a harsh chemical that damaged the finish, so I learned the hard way to read labels carefully. A mixture that’s too strong can leave streaks or discolouration.
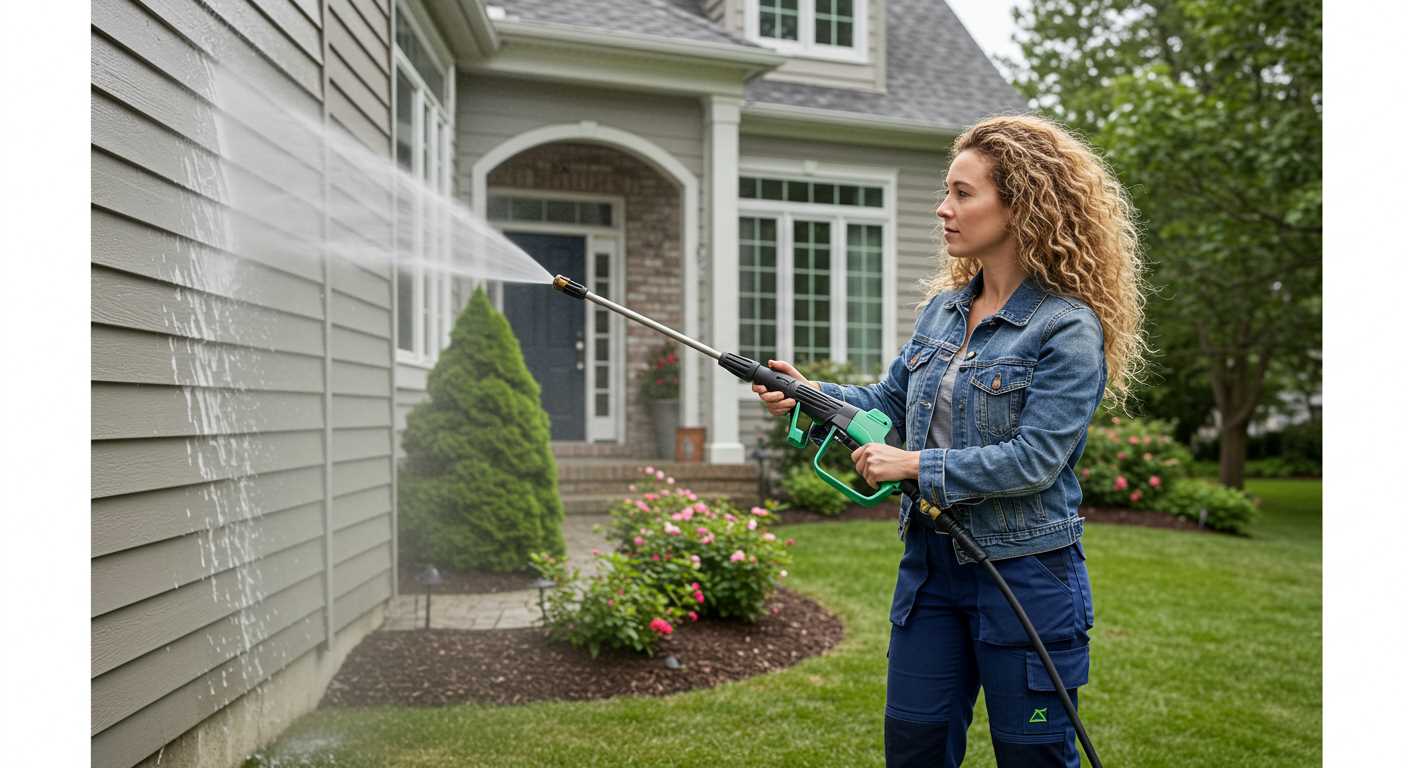
Position the jet at a 45-degree angle, maintaining a distance of about two feet from the surface. This technique prevents damage while still delivering the necessary force. I vividly remember the first time I used this method; I was amazed at how much easier it made the task and how quickly I saw results.
Work from the top down to allow the dirt to flow away, and don’t forget to rinse thoroughly afterward. After completing the job, the satisfaction of seeing a bright, refreshed exterior is truly rewarding. It’s one of those projects that not only improves your home’s appearance but also boosts your sense of accomplishment.
Effective Techniques for Maintaining Your Exterior
Adjust the nozzle to a wide spray pattern before you begin. This helps to disperse the water evenly, reducing the risk of damage to the surface. I once made the mistake of using a narrow stream, which ended up causing some unintended gouges. Trust me; a gentle approach works wonders.
Start from the top and work your way down. Gravity will assist you in removing dirt and debris rather than pushing it upwards. I’ve seen too many people struggle by starting at the bottom and then having to go back to the top to fix the mess they created.
Use a cleaning solution specifically designed for outdoor surfaces. My go-to is a biodegradable detergent that won’t harm the environment. I recall a day when I opted for a generic cleaner, and it left a nasty residue that took ages to rinse off. Lesson learned!
Keep the nozzle about 30 cm away from the surface. Getting too close can lead to marks or streaks. I once got a bit too enthusiastic, and it took a while to repair the damage. A steady hand and some distance make a significant difference.
Work in sections. I usually take a 2×2 metre area at a time. This way, I can ensure thorough cleaning without missing spots. I remember rushing through one time, and it resulted in patchy results that required a second round. Slowing down pays off.
Pay attention to corners and crevices. Use a narrow nozzle for these areas if needed. I often switch back and forth between nozzles to ensure every inch is addressed. It’s those hidden spots that tend to accumulate grime over time.
After rinsing, inspect for any missed areas. I’ve found that taking a step back helps to identify spots that need another pass. A quick review can save you from having to redo the entire job later.
Lastly, allow the surface to dry completely. This helps you see if any areas need additional attention. I’ve had instances where I thought everything looked clean, only to discover a few stubborn patches once it dried. Patience pays in the end.
Choosing the Right Pressure Washer for Vinyl Siding

For optimal results, select a unit that delivers a pressure range of 1200 to 2000 PSI. I recall a time when I opted for a model at the lower end of this spectrum. It struggled to remove stubborn grime, leaving me frustrated. A mid-range option made all the difference in efficiency and final appearance.
Understanding Water Flow Rate
The water flow rate, measured in gallons per minute (GPM), is just as crucial. A higher GPM means more water is used, which aids in rinsing away dirt. Aim for a machine that offers at least 1.4 GPM. I had a chance to work with a model boasting 2.5 GPM, and it truly transformed my approach. Less time scrubbing, more time enjoying the results!
Choosing the Right Nozzle
Don’t underestimate the importance of nozzle selection. A 25-degree or 40-degree nozzle is typically ideal for residential surfaces. I once used a 0-degree nozzle and inadvertently chipped some paint on a nearby window frame due to the concentrated force. Experimenting with different nozzles has taught me the value of precision in achieving desired outcomes without damage.

Always consider the weight and portability of the machine. If you’re moving around your property frequently, a lightweight design can save you from unnecessary strain. I learned this the hard way after my first session with a bulky model left me sore for days.
Lastly, don’t overlook additional features such as detergent tanks or adjustable pressure settings. These can significantly enhance your cleaning experience. From my experience, having the right equipment makes all the difference in achieving a spotless finish, allowing you to maintain your home’s exterior effortlessly.
Preparing Your Home and Surroundings for Cleaning
Before starting the task, ensure that all windows and doors are securely closed. This simple step prevents water from entering your home. I recall a time when I neglected this precaution, and it led to a soggy mess inside. Double-checking these entries saves time and hassle.
Remove any outdoor furniture, planters, or decorations from the vicinity. I once overlooked a potted plant, and the resulting spray left me with muddy soil all over my patio. Clear space not only protects your belongings but also allows for easier movement while working.
Cover any electrical outlets, light fixtures, and vents with plastic sheeting or tape. Water can cause significant damage to these areas. I learned this the hard way after a careless spray caused a short circuit in my outdoor lighting. Protecting these elements is crucial.
Inspect your surroundings for loose items or debris. Ensure that drains and gutters are clear, as you don’t want water pooling around your foundation. I had a close call once when a clogged gutter caused water to overflow, leading to potential damage. Keeping everything tidy mitigates these risks.
Consider weather conditions before proceeding. Avoid cleaning on windy days; debris can be blown back onto the surface, defeating your efforts. I’ve had instances where a light breeze brought dirt back onto freshly cleaned areas, requiring additional work. A calm day is ideal for this task.
| Preparation Step | Reason |
|---|---|
| Close windows and doors | Prevents water intrusion |
| Remove outdoor items | Avoids damage and clutter |
| Cover electrical fixtures | Protects from water damage |
| Clear drains and gutters | Prevents water pooling |
| Check weather | Avoids re-soiling from wind |
Following these steps ensures a smoother process and enhances the effectiveness of your cleaning efforts. Taking the time to prepare adequately makes a noticeable difference in the outcome.
Mixing Cleaning Solution for Vinyl Siding
Start by combining a solution that effectively tackles dirt and grime. A mixture of one part bleach to three parts water works well for most cases. Ensure you’re using a non-abrasive cleaner designed for exterior surfaces. If you prefer a more eco-friendly approach, consider using a combination of white vinegar and water in a 1:1 ratio. This alternative is gentler yet still effective.
Preparation Steps
Before mixing, gather all necessary materials: a clean bucket, a long-handled brush, and safety gear including gloves and goggles. Always mix your solution in a well-ventilated area to avoid inhaling fumes. If you’re working on a larger surface, consider using a pump sprayer for even distribution.
Application Tips
Once your mixture is ready, apply it generously to the surface. Allow the solution to sit for about 10-15 minutes to break down stubborn stains. Avoid letting it dry out, as this can make rinsing more difficult. After the dwell time, rinse thoroughly using clear water to ensure no residue remains.
Setting Up the Pressure Washer Correctly
Adjust the nozzle to the desired spray pattern before starting your task. A wide fan is ideal for larger areas, while a narrow stream can be used for stubborn stains.
Here’s a quick list to ensure everything is in order:
- Check the Water Supply: Ensure a steady flow of water is available. A garden hose should be connected securely to the source.
- Inspect the Equipment: Look for any signs of wear on hoses and connections. Replace any damaged parts before use.
- Set the Pressure: Most machines have adjustable pressure settings. Start low and increase only if necessary to avoid damage.
- Connect the Nozzle: Attach the correct nozzle for your cleaning solution. If using a soap nozzle, switch to the regular one for rinsing.
During my time in the industry, I often encountered problems stemming from improper setup. I recall a client who had a frustrating experience due to a faulty hose connection. The loss of water pressure not only extended the cleaning time but resulted in uneven results. Make sure everything is secure and functioning before proceeding.
Once you’ve checked these essentials, it’s wise to test the machine on a small, inconspicuous area. This will help you gauge the pressure and effectiveness of your chosen cleaning mixture.
Remember, safety is paramount. Always wear protective gear, including goggles and gloves, to shield yourself from debris and cleaning solutions that may splatter during the process.
Techniques for Cleaning Different Areas of Vinyl Siding
For corners, maintain a 30-degree angle and keep the nozzle about 12 inches away. This allows you to reach those tricky spots without causing damage. I recall a time when I underestimated the importance of this technique and ended up with some unsightly streaks. Avoid that mistake by ensuring you’re mindful of your positioning.
For vertical panels, work from the top down. This prevents dirty water from running over areas you’ve already tackled. Using a wider spray pattern, I often found it helpful to overlap each stroke slightly. This method ensures even coverage and eliminates streaks. I’ve witnessed firsthand how a consistent approach can lead to a pristine finish.
In areas with stubborn stains, like those near drainage points, I recommend using a concentrated cleaner before starting. Apply it directly to the affected area and let it sit for a few minutes. I once dealt with a particularly grimy section near my garage; letting the solution dwell made all the difference. Afterwards, use a tighter spray pattern to lift the grime without excessive effort.
For low-lying sections, such as around flower beds or landscaping features, angle the nozzle slightly upwards. This avoids pushing dirt further into the ground or onto your plants. I’ve learned this the hard way when I inadvertently created mud splatters on newly planted flowers. A gentle approach works wonders.
Finally, don’t forget to inspect the seams and joints. These areas often trap dirt and mould. A careful, precise application ensures you don’t miss any hidden spots. I once neglected these details and was surprised at how much grime remained. A thorough inspection post-cleaning is a habit I’ve since adopted.
Safety Precautions While Using a Pressure Washer
Always wear safety goggles and a face shield. Flying debris can cause serious injury, and your eyes are particularly vulnerable. I remember the first time I neglected this advice; a small piece of dirt hit my eye, and it was quite a painful experience.
Use appropriate footwear. Sturdy, slip-resistant shoes are essential since water and soap can create slippery surfaces. I once slipped while working on a rainy day; it was a reminder of how important proper footwear is.
Protective Gear
- Gloves: Rubber gloves will protect your hands from chemicals in cleaning solutions.
- Long sleeves and trousers: These will shield your skin from both the high-pressure stream and any cleaning agents.
- Hearing protection: If your machine is particularly loud, consider earplugs or earmuffs.
Setting Up for Safety
- Inspect the area: Clear away furniture, plants, and other items that could obstruct your path or be damaged.
- Check equipment: Ensure all connections are secure, and hoses are free from leaks.
- Keep a safe distance: Maintain a safe distance between the nozzle and the surface to avoid damage or injury.
- Be mindful of electrical sources: Avoid spraying near outlets, wires, or any electrical connections.
Always have a plan for handling chemicals. Read labels carefully and follow instructions for any cleaning solutions. Mixing the wrong chemicals can be hazardous. I remember a time when I mixed two cleaners without checking; the reaction was alarming, and I had to ventilate the area immediately.
In case of an emergency, keep a phone nearby, and know the location of the nearest first aid kit. It’s wise to be prepared; accidents can happen despite all precautions. For instance, I once had a friend who accidentally sprayed their foot; luckily, we had a first aid kit on hand.
Lastly, never operate the machine while tired or under the influence. Staying alert is key to maintaining control and making sound decisions. I’ve seen how fatigue can lead to mistakes, so always work when you’re focused.
For more tips on safe practices in other areas, check out this guide on how to can carrots without a pressure cooker.
Post-Cleaning Maintenance Tips for Vinyl Siding
After completing the washing process, it’s vital to inspect the surfaces for any remaining dirt or stains. Use a soft cloth or sponge to address any missed areas. Regular maintenance prevents the buildup of grime and keeps the exterior looking fresh.
Regular Inspections
Schedule inspections every few months, checking for signs of mildew or discolouration. Early detection allows for prompt action, ensuring that surfaces remain pristine. Pay special attention to shaded areas where moisture tends to accumulate.
Protective Coatings
Consider applying a protective sealant designed for exterior surfaces. This can act as a barrier against dirt and UV damage, prolonging the life of the finish. Research products that are compatible with your exterior materials and apply them according to the manufacturer’s guidelines.
Using a commercial pressure washer gun can be handy for future touch-ups, allowing for detailed cleaning without extensive effort. Keep it stored properly to maintain its functionality for your next maintenance task.
Finally, remember to clear away debris from gutters and downspouts regularly. This prevents water from pooling and creates an unfavourable environment for mould and mildew growth.
FAQ:
What equipment do I need to clean vinyl siding with a pressure washer?
To clean vinyl siding with a pressure washer, you will need a pressure washer itself, preferably one with adjustable pressure settings. A 1500 to 2000 PSI pressure washer is usually sufficient. Additionally, you should have a cleaning solution specifically designed for vinyl siding, a garden hose, and various nozzles for the pressure washer. A soft-bristle brush can also be helpful for tougher stains. It’s advisable to wear safety goggles and gloves to protect yourself during the cleaning process.
How do I prepare my vinyl siding before using a pressure washer?
Before you start cleaning, prepare your vinyl siding by removing any loose dirt, dust, or debris with a soft brush or broom. Check for any damage to the siding, such as cracks or loose panels, and repair them if necessary. Cover any nearby plants or landscaping with tarps to protect them from the cleaning solution. Ensure that windows and doors are closed tightly to prevent water from entering your home. It’s also a good idea to test the pressure washer on a small, inconspicuous area to see how the siding reacts.
What cleaning solution should I use for vinyl siding?
For cleaning vinyl siding, it is best to use a solution specifically formulated for this purpose. Many commercial products are available that are safe for vinyl and can effectively remove dirt, mould, and mildew. If you prefer a homemade solution, you can mix a combination of water and a mild detergent, or a mixture of vinegar and water. Avoid using bleach or harsh chemicals, as these can damage the siding. Always follow the manufacturer’s instructions for any cleaning product you choose to use.
What pressure setting should I use on my pressure washer for vinyl siding?
The pressure setting you should use for cleaning vinyl siding typically ranges between 1300 and 2000 PSI. Start with a lower pressure setting to avoid damaging the siding. You can gradually increase the pressure if needed, depending on the level of dirt and stains present. Always maintain a distance of at least 6 to 8 feet from the surface to prevent any potential damage. Use a wide spray nozzle to ensure an even distribution of the cleaning solution and water.
How often should I clean my vinyl siding?
It is recommended to clean vinyl siding at least once a year to maintain its appearance and prevent the build-up of dirt, mould, and mildew. However, if you live in a particularly dusty area or near trees, you may want to clean it more frequently. Keep an eye on the siding throughout the year, and clean it as needed if you notice any discolouration or stains. Regular maintenance will help extend the lifespan of your siding and keep your home looking its best.
What preparation is needed before using a pressure washer to clean vinyl siding?
Before using a pressure washer on vinyl siding, it’s important to prepare the area properly. Begin by removing any outdoor furniture, decorations, or plants that may obstruct your cleaning process. Next, check for any loose or damaged siding panels and repair them to prevent further issues during cleaning. It’s advisable to wash the siding on a cloudy day or when the surface is cooler to avoid quick drying, which can leave streaks. Additionally, ensure that you have the right cleaning solution, typically a mix of water and a mild detergent, that is safe for vinyl. Having a sturdy ladder and safety gear, such as goggles and gloves, will also enhance your safety while working at height.
How should I adjust the pressure washer settings for cleaning vinyl siding?
When using a pressure washer to clean vinyl siding, the settings should be adjusted carefully to avoid damaging the surface. It is recommended to use a pressure setting between 1,500 to 2,500 PSI. This range is powerful enough to remove dirt and grime but gentle enough to prevent harm to the siding. Use a wide spray nozzle, typically a 25-degree or 40-degree nozzle, to spread the water over a larger area and reduce direct pressure. Always maintain a distance of about 6 to 8 feet from the siding while spraying and use a sweeping motion from side to side. If you encounter tough stains, you can apply the cleaning solution first, allow it to sit for a few minutes, and then rinse it off with the pressure washer, ensuring the nozzle is still at a safe distance.


.jpg)


