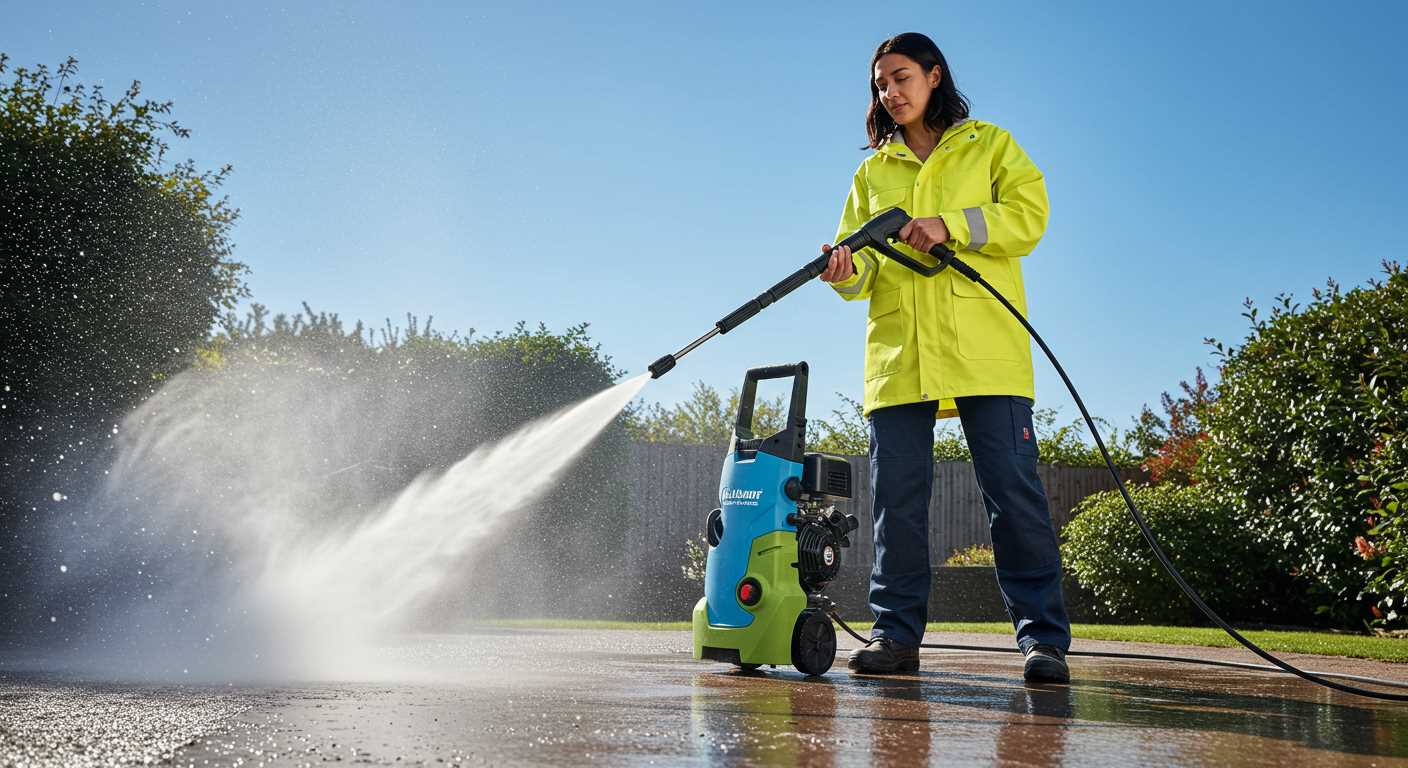


For a truly remarkable transformation of your outdoor area, consider using a high-pressure device to restore the beauty of your timber surfaces. I’ve had the pleasure of working with various models over the years, and the results can be astonishing when done correctly.
Begin by selecting the appropriate nozzle; a 25-degree nozzle typically does wonders for most surfaces, striking a balance between power and precision. I recall a weekend where I tackled my own patio, using a 25-degree attachment to clear years of grime. The key is to maintain a consistent distance–about 30 centimetres from the wood–to avoid gouging or damaging the surface.
Pre-treating stubborn spots with a suitable cleaner designed for timber can enhance the results significantly. During one project, I let the cleaning solution sit for a few minutes before rinsing. This not only loosened stubborn dirt but also revitalised the natural colour of the wood. Remember to always rinse from the same angle to ensure an even finish.
After the task is done, allow the timber to dry completely before applying any finishes or sealants. I learned this the hard way; rushing into sealing can lead to a less than desirable outcome. With patience and the right techniques, your outdoor space can look as good as new, inviting you to enjoy it for years to come.
Cleaning Your Outdoor Surface Effectively
For optimal results, select a nozzle with a 25-degree spray angle. It strikes a perfect balance between pressure and coverage, making it ideal for outdoor surfaces. Starting at one end, maintain a consistent distance of about 12 inches from the surface to avoid damage. Move the nozzle in a sweeping motion, ensuring even coverage.
Preparation Steps
- Remove all furniture and planters from the area.
- Clear away debris, leaves, or dirt using a broom or blower.
- Check for any loose boards or nails and address them before proceeding.
Aftercare Tips

Once you’re done, let the surface dry completely. This usually takes a few hours depending on the weather. After drying, consider applying a sealant to protect against moisture and UV damage. Regular maintenance will prolong the life of your outdoor area, so plan for occasional upkeep to keep it in top condition.
Choosing the Right Pressure Washer for Wooden Decking
Opt for a model with a pressure rating between 1200 to 2000 PSI. This range provides enough power to remove dirt and grime without damaging the surface. I’ve seen too many people use machines with excessive pressure, resulting in splintering and irreversible damage. Stick to the right PSI for a safe and effective clean.
Consider the Flow Rate
Look for a unit that offers a flow rate of at least 1.5 GPM (gallons per minute). Higher flow rates help rinse away debris more thoroughly, which is crucial for achieving a clean finish. I once used a low-flow model and spent twice as long scrubbing stubborn spots that a higher GPM machine could have handled easily.
Attachments Matter
Invest in a pressure cleaner that comes with a variety of nozzles. A 25-degree nozzle is ideal for most tasks, providing a good balance of cleaning power and coverage. I often switch to a wider nozzle for larger areas to speed up the process, but I always keep a narrower one handy for those tough-to-reach spots.
Also, consider a surface cleaner attachment for large flat areas. It saves time and enhances the result, ensuring an even clean without streaks. A few years back, I used one on my own patio, and the difference was remarkable.
Ultimately, the right machine will make the task more straightforward, allowing you to enjoy your outdoor space without the worry of damaging it. Choose wisely, and your efforts will be rewarded with a refreshed and inviting area to relax and entertain.
Preparing Your Deck and Surrounding Area
Clear the area around your outdoor surface of any furniture, plants, or decorations. This prevents damage during the cleaning process and allows for a thorough job. If you have potted plants or delicate flowers nearby, consider relocating them to avoid any overspray or debris.
Next, sweep away any loose dirt, leaves, or debris. A clean surface will help the cleaning equipment perform better and protect the integrity of the timber. Pay attention to corners and crevices where dirt tends to accumulate.
Inspect the surface for any loose boards or protruding nails. Secure these to avoid injury and ensure your equipment runs smoothly. It’s also wise to check for rot or damage; addressing these issues beforehand can save time and effort later.
Cover nearby areas that could be affected by water and cleaning solution. This includes nearby walls, patios, or driveways. A simple tarp or plastic sheeting can shield them from potential splashes.
Finally, ensure that you have the necessary equipment and protective gear handy. Safety goggles and gloves will protect against debris and cleaning agents. For a more controlled cleaning process, you might want to consider a surface cleaner attachment, which helps distribute the water evenly.
As a side note, if you’re planning to travel soon, you might find it useful to check if are digital cameras allowed in carry on luggage to ensure you can document your cleaning success later!
Selecting the Appropriate Cleaning Solution
Choose a cleaner specifically formulated for timber surfaces. Avoid harsh chemicals that can damage the wood. Opt for biodegradable solutions that are safer for the environment and your garden.
In my experience, a concentrated deck cleaner mixed with water works wonders. Look for products containing sodium hypochlorite or oxygen bleach, as they effectively remove mildew and stains without harming the wood. Always follow the manufacturer’s instructions for dilution ratios.
Before applying any solution, test it in a small, inconspicuous area. This helps you assess how the cleaner interacts with the surface. I remember one time using a new product without testing it first, and it slightly discoloured the timber. Lesson learned!
| Type of Cleaner | Benefits | Considerations |
|---|---|---|
| Biodegradable Cleaner | Environmentally friendly, safe for plants | May require more scrubbing |
| Sodium Hypochlorite Solution | Effective against mould and mildew | Can bleach wood if left too long |
| Oxygen Bleach | Non-toxic, safe for pets | Less effective on heavy stains |
After selecting your cleaner, ensure you have the right tools for application. A stiff-bristled brush can help agitate the solution into the timber, especially in areas with stubborn dirt. Once the solution has been applied, let it sit as per the instructions before rinsing it off thoroughly.
Setting Up the Pressure Washer Correctly
Ensure the machine is placed on a stable, flat surface to prevent any unwanted movement during operation. I’ve seen many people try to use their equipment on uneven ground, which can lead to accidents or inefficient operation. Connect the water supply before anything else. A garden hose with a secure fitting is essential; leaks can disrupt your work and create a mess.
Pressure and Nozzle Selection
Select the correct pressure setting for your task. For most outdoor surfaces, a medium setting is usually sufficient. I remember once opting for too high a pressure on a delicate surface, resulting in damage that was costly to repair. Pair this with the right nozzle; a fan spray is typically ideal for thorough cleaning without causing harm. Swapping nozzles is quick and can dramatically alter the cleaning effect, so keep a few options handy.
Safety Precautions
Always wear protective gear. Safety goggles and gloves should be your first line of defence. I’ve had a few near misses with debris flying around due to high-pressure jets. It’s also wise to ensure children and pets are at a safe distance. Lastly, check all connections and the power cord for any wear and tear before starting. I once overlooked a frayed cable, and it almost caused a serious incident. Better safe than sorry!
Techniques for Cleaning Without Damaging Wood
Maintain a distance of at least 30 centimetres from the surface when operating your equipment. This prevents the high-velocity water stream from penetrating the wood’s fibres, which can lead to splintering or erosion.
Utilise a fan-shaped nozzle instead of a concentrated stream. The wider spray pattern disperses the pressure over a larger area, reducing the risk of damage while still effectively removing dirt and grime.
Always work in the direction of the wood grain. This method not only enhances the appearance but also minimizes the potential for surface damage. Moving against the grain can lead to scratches and uneven wear.
Adjust the pressure setting to a lower level. Many machines have adjustable settings; using a lower pressure is often sufficient for routine maintenance and helps to protect delicate surfaces.
Keep the nozzle moving continuously. Stopping in one spot can cause the water to penetrate too deeply, leading to potential softening of the wood. A consistent motion ensures even cleaning and reduces the chances of harm.
Combine your approach with a suitable cleaning solution that is safe for timber. A mild detergent diluted with water can boost the effectiveness of the process without introducing harsh chemicals that may compromise the wood.
After the process, allow the surface to dry completely before applying any sealants or finishes. This helps to ensure that the wood retains its integrity and prevents any moisture from becoming trapped, which can lead to mould or mildew growth.
Post-Cleaning Care and Maintenance Tips
After giving your outdoor surface a thorough wash, applying a protective sealant is crucial. This helps to shield the wood from moisture and UV damage. I recommend using a high-quality sealant specifically designed for exterior surfaces. When I first started, I learned the hard way that not all products are equal; some left a sticky residue that attracted dirt.
Regular inspections should follow your cleaning routine. Look for any signs of wear, such as splintering or cracking. Addressing these issues early prevents more extensive damage later. I often set a reminder every few months to check for these problems, ensuring my surfaces remain in top shape.
Consider reapplying the sealant annually or bi-annually, especially if your area experiences harsh weather conditions. I remember a particularly rainy season when I neglected this step, and it resulted in significant water damage that required extensive repairs.
Incorporating a gentle brushing routine can keep your surfaces looking fresh. Using a soft-bristle broom or brush helps remove debris without causing scratches. I always keep one handy after my cleaning sessions to maintain that pristine appearance.
Lastly, avoiding furniture with sharp edges or heavy weights prevents unnecessary pressure on the surface. I once placed a heavy planter without thinking, and it left an impression that was hard to fix. Investing in protective pads for furniture legs is a small but effective measure that pays off in the long run.
Safety Precautions When Using a Pressure Washer
Always wear appropriate protective gear. Safety goggles are a must to shield your eyes from debris. Heavy-duty gloves protect your hands from chemicals and high-pressure spray. Non-slip footwear is advisable, as surfaces can become slippery during operation.
Equipment Checks
- Inspect hoses and connections for damage before use.
- Ensure that the nozzle is securely attached to the lance.
- Check the power source for any issues, especially if using an electric model.
Operational Guidelines
- Never point the nozzle at anyone or any pets; the force can cause serious injury.
- Keep a safe distance from the surface being treated to avoid gouging.
- Always start from a distance and gradually move closer as needed.
For best results and safety, avoid using harsh chemicals unless specifically designed for such machines. If needed, consider a car cleaner to use with pressure washer that is safe for your surface.
FAQ:
What equipment do I need to clean wooden decking with a pressure washer?
To clean wooden decking with a pressure washer, you will need the following equipment: a pressure washer, a suitable nozzle (ideally a fan nozzle with a pressure of around 1500-2000 PSI), a broom or brush for pre-cleaning, and a deck cleaner or detergent specifically designed for wood. It’s also advisable to have safety gear such as goggles and gloves to protect yourself while working.
How do I prepare my wooden decking before using a pressure washer?
Before using a pressure washer on your wooden decking, it’s important to prepare the area. Start by removing any furniture, plants, or obstacles from the deck. Sweep the surface to remove dirt, leaves, and debris. If there are any mould or mildew spots, you may want to treat them with a wood cleaner or bleach solution beforehand. This preparation ensures that the pressure washer can effectively clean the entire surface without any hindrances.
What pressure setting should I use on my pressure washer for wooden decking?
For cleaning wooden decking, a pressure setting of 1500 to 2000 PSI is generally recommended. This range is powerful enough to remove dirt and grime without damaging the wood. It’s also wise to start with a lower pressure and gradually increase it if necessary. Always maintain a distance of at least 6 to 12 inches from the wood surface to avoid gouging or splintering the wood.
Can I use regular detergent with my pressure washer for cleaning decking?
Using regular household detergent is not advisable for cleaning wooden decking with a pressure washer. Instead, opt for a cleaner specifically formulated for wood surfaces, as these products are designed to remove dirt and prevent damage to the wood. Always check the manufacturer’s instructions for compatibility with your pressure washer and follow the recommended dilution ratios for the best results.
How often should I clean my wooden decking with a pressure washer?
The frequency of cleaning your wooden decking with a pressure washer depends on several factors, including weather conditions, usage, and exposure to elements. As a general guideline, it is advisable to clean your deck at least once a year. However, if your deck is in a shaded area or experiences heavy foot traffic, you might need to clean it more often, perhaps every six months, to maintain its appearance and prevent the growth of mould or mildew.
What steps should I take to clean my wooden decking with a pressure washer?
To clean your wooden decking with a pressure washer, follow these steps: First, clear the area of any furniture, plants, and debris. Next, check the decking for any loose boards or nails that may need securing. After that, apply a suitable wood cleaner to the surface, allowing it to sit for the recommended time to break down dirt and grime. Once the cleaner has set, use the pressure washer on a low setting, keeping the nozzle at least 30 cm away from the wood to prevent damage. Move the nozzle in a consistent direction along the grain of the wood. Finally, rinse the area thoroughly to remove any cleaner residue and allow the decking to dry before putting back any items.


.jpg)


