


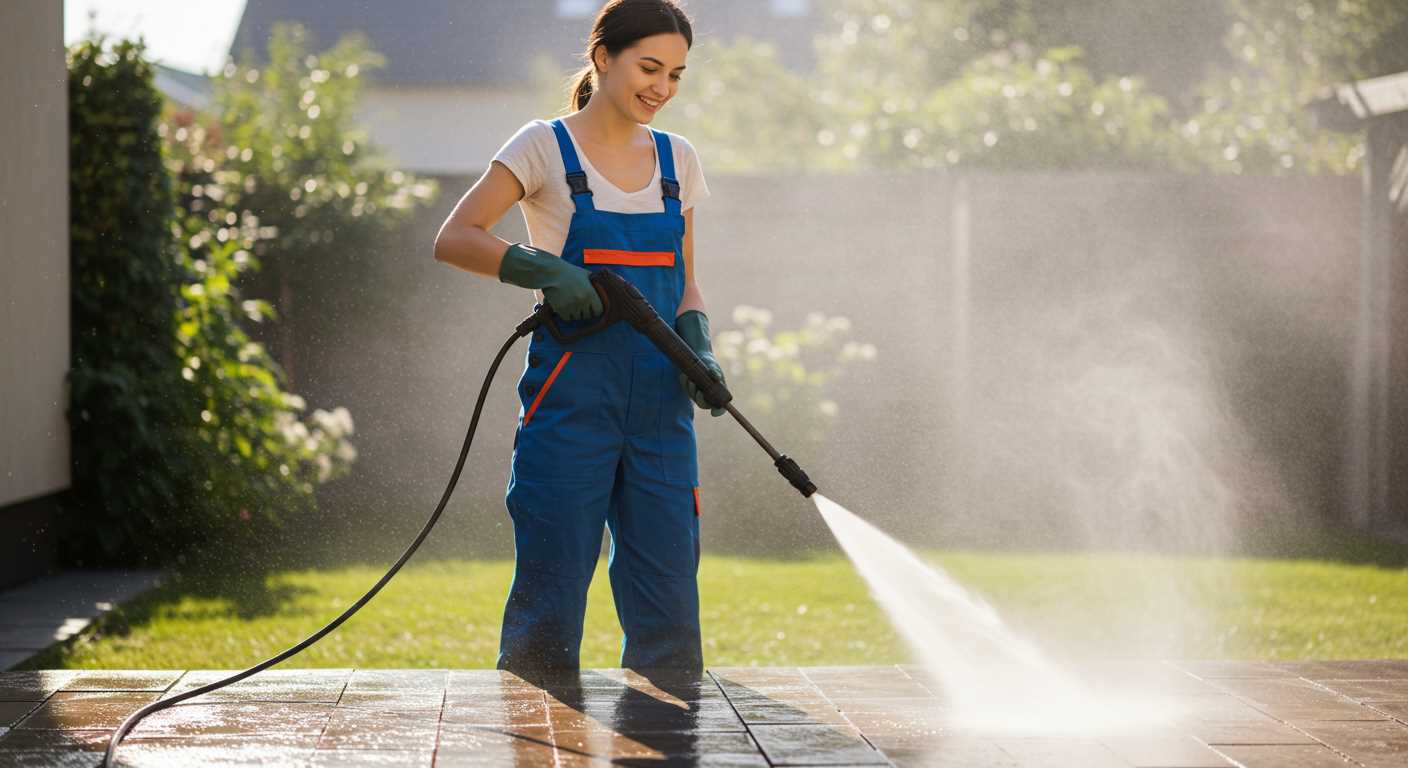
To achieve that perfect layer of suds for your vehicle or outdoor surfaces, using a foam sprayer with a high-pressure cleaner is a game-changer. First, ensure you have the right adapter for your specific model; this is crucial for a seamless attachment. Most units will require a quick-connect fitting, which allows for easy setup without tools.
Next, fill the sprayer with a high-quality car shampoo mixed with water according to the manufacturer’s instructions. This mixture ensures optimal foam generation, which is essential for effective cleaning. Once filled, securely attach the sprayer to the high-pressure outlet, ensuring a tight fit to prevent leaks during operation.

After everything is connected, adjust the nozzle on the sprayer. A wider spray pattern will cover more area, while a narrower focus is perfect for targeted cleaning. Turn on the cleaner and watch the thick foam cascade over your surfaces, lifting dirt and grime effortlessly. Always remember to test the spray on a small, inconspicuous area first to ensure compatibility with your surfaces.
In my experience, the satisfaction of seeing a vehicle covered in thick foam is unmatched. It not only enhances the cleaning process but also makes it more enjoyable. With the right setup, you’ll find that maintaining a pristine finish is easier than ever.
Choosing the Right Foam Applicator for Your Cleaning Device
The most critical factor in selecting a foam applicator is compatibility with your cleaning device’s specifications. Pay close attention to the inlet size and fitting type. Most units operate on a standard quick-connect system, but it’s wise to double-check before making a purchase. I recall a time when I hastily bought an applicator, only to find it didn’t match my machine’s connector. A couple of adapters later, I finally made it work, but it was a hassle I could have avoided.
Consider the Foam Thickness
Look into the adjustable settings of the nozzle. A unit that allows you to modify the foam thickness is invaluable. For instance, when I was cleaning my car, a thicker foam helped cling to dirt and grime, making it easier to rinse off. Conversely, a lighter foam can be beneficial for washing delicate surfaces or larger areas like driveways. The versatility of adjustment can save you time and effort.
Quality of Construction
Invest in a model made from durable materials. Plastic components may seem appealing due to their lower price, but they often don’t withstand the rigours of frequent use. I’ve experienced cheaper models cracking after just a few sessions. Opt for brass fittings and sturdy plastic or metal housing whenever possible. This small investment can significantly enhance the lifespan of your equipment.
Understanding compatibility between high-pressure cleaning units and foam applicators
Always check the specifications of your cleaning unit before pairing it with an applicator. Not every nozzle or attachment is compatible with every model. Some units operate at lower PSI, while others can exceed 3000 PSI. An applicator designed for lower pressure may not work effectively with a high-output machine and vice versa.
Key specifications to consider
| Specification | Importance |
|---|---|
| PSI Rating | Ensure the applicator matches or can handle the output pressure of the unit. |
| GPM Rating | Higher flow rates can affect the performance of the applicator; check compatibility. |
| Connection Type | Verify that the attachment fits securely with the hose or wand of the unit. |
| Material Compatibility | Some cleaning solutions may damage certain materials; confirm compatibility. |
Personal experiences with various models
I’ve tested numerous combinations over the years. One time, I used a popular applicator meant for lower-rated machines with a high-performance unit. The result was a disappointing spray pattern that left a lot of dirt untouched. Conversely, I’ve had great success pairing a high-end applicator with a mid-range unit, resulting in a rich lather and excellent coverage on vehicles. Always ensure that the units complement each other for optimal results.
Preparing Your Equipment for Foam Attachment
Before attaching the foam sprayer, ensure your machine is clean and in good working condition. Check the hoses for any leaks or wear, as damaged hoses can lead to reduced performance and messy applications. I’ve seen too many units struggle simply because of a worn-out hose. A quick inspection can save you time and hassle later on.
Check the Nozzle
Verify that the nozzle is compatible. Most of the time, a quick change of the nozzle is all that’s needed to fit the sprayer. I had a situation where I tried to use a non-matching nozzle, and it resulted in a poor foam distribution, leading to extra work. Always match the size and type of nozzle to the requirements of your foam applicator.
Adjust the Settings

Set the correct pressure for your foaming task. Many units have adjustable settings. I recommend starting with a lower pressure setting to avoid overwhelming the foam applicator. You can increase it gradually if needed. This step ensures that the foam adheres well to the surface without being blown away or diluted too quickly.
If you’re working with a smaller area, consider looking into a pressure washer for small patio, as these can offer great performance without excessive power. Adjusting your equipment properly sets the stage for optimal cleaning results.
Attaching Foam Accessories to Your High-Pressure Cleaner
Begin by ensuring the equipment is switched off and disconnected from the power source. Locate the detergent inlet on your cleaning device, which is usually positioned near the gun or lance. Depending on the model, you may need to remove the existing nozzle or fitting to expose the inlet for the cleaning agent.
Next, take the foam accessory and align it with the detergent inlet. If the connection requires a specific adapter, make sure to use it for a secure fit. Tighten the connection by hand to prevent leaks, but avoid overtightening, as this could damage the threads.
Testing Your Setup
After securing the connection, it’s wise to conduct a quick test. Reconnect the power and turn on the unit. Check for any leaks around the joint. If you notice any dripping, recheck the fitting and ensure it’s properly tightened. Once confirmed, it’s time to add your preferred cleaning solution into the accessory. Follow the manufacturer’s recommendations for diluting the cleaning agent if necessary.
Before you start washing, adjust the nozzle on the lance to the desired setting for foam application. A wider spray can help cover larger areas, while a narrower stream is better for targeted cleaning. Now you’re ready to tackle those stubborn surfaces.
Maintenance Tips
After use, disconnect the foam accessory and rinse it out with clean water to prevent residue build-up. Store it in a dry place to prolong its lifespan. Regular maintenance ensures optimal performance during your next cleaning session.
If you’re also interested in maintaining other surfaces, check out how to clean stainless steel the ultimate guide for additional tips.
Setting the Correct Pressure for Optimal Foam Application
For achieving thick, clingy suds, adjusting the output force of your cleaning equipment is key. I’ve found that the ideal setting typically ranges from 800 to 1200 PSI, depending on the specific model of your equipment. Lower settings are preferable for delicate surfaces like car paint, while higher pressures work well on tougher materials like concrete.
Testing and Adjusting Pressure
Before committing to a specific setting, I recommend conducting a quick test. Start with a lower pressure and gradually increase it while observing the foam quality. If the suds are too watery, reduce the force. Conversely, if the foam isn’t adhering well, a slight increase might be necessary. This trial-and-error method has always helped me find that sweet spot.
Monitoring Foam Thickness and Coverage
The thickness of the lather is a direct indicator of your equipment’s performance. I’ve noticed that when the mixture is too thin, it often means the output force is too high or the soap-to-water ratio is off. Aim for a consistency that allows the foam to stick to surfaces for a longer duration, enhancing the cleaning process. Adjusting the force not only affects the suds but also the overall effectiveness of the entire cleaning task.
Mixing Soap for Use with Your Foam Tool
For optimal cleaning results, the right soap mixture is crucial. I’ve experimented with various products, and a well-mixed solution makes a significant difference in foaming and cleaning efficiency.

Choosing the Right Soap
- Use a dedicated car wash soap. These are designed to be safe on vehicle surfaces and effective at lifting dirt.
- Avoid household detergents. They can strip wax and damage paint finishes.
- Consider the pH level. Neutral pH soaps are best as they won’t harm protective coatings.
Mixing Ratios
Getting the mix right is key. Here’s a simple guideline based on my experience:
- Start with a base of 1 part soap to 5 parts water. This should yield a thick, clinging foam.
- If you desire more foam, gradually increase the soap concentration. Aim for a 1:3 ratio for thicker suds.
- Always mix in a separate container before adding to the tank to ensure even distribution.
Be sure to check the product label for specific mixing instructions, as some formulations may vary in concentration.
After mixing, test the foam consistency on a small section of your vehicle to ensure it adheres well and performs as expected. Adjust the mixture as needed based on the results.
Testing the Foam Cannon Before Starting Your Cleaning Task
Before diving into your cleaning project, it’s wise to test the attachment to ensure it operates correctly. Here’s how I typically conduct this check:
- Fill the container with your chosen cleaning solution, following the manufacturer’s guidelines for dilution ratios.
- Attach the unit to the spray gun, ensuring a snug fit to prevent leaks.
- Adjust the nozzle to a wider spray pattern. This will help you assess the foam application more effectively.
- Turn on the power source and activate the sprayer at a low setting. Observe the foam output.
- If the consistency is too thin, consider adjusting the soap concentration or the nozzle setting for a denser application.
During one of my tests, I noticed that the foam wasn’t clinging well to the surface. After a bit of troubleshooting, I realised I had used too much water in the mix. Adjusting the ratio solved the issue instantly, providing a thick layer that adhered well.

- Ensure the unit is clean and free of any clogs from previous use. A quick rinse can save you from future headaches.
- Check the spray pattern and distance. The foam should cover the surface evenly without excessive splatter.
- Look for any leaks where the attachment meets the spray gun. Even a small drip can affect performance.
Once satisfied with the foam output, you’re ready to tackle your cleaning task. Testing beforehand saves time and ensures you achieve the best results possible.
Maintaining Your Foam Applicator After Use
After every cleaning session, it’s crucial to properly care for your foam applicator to ensure its longevity and performance. Start by rinsing the unit thoroughly with clean water. This step removes any soap residue that may clog the nozzle. I usually run a bucket of water through it, allowing the water to flow until it runs clear.
Next, disassemble the various components according to the manufacturer’s instructions. Pay special attention to the filter and nozzle; these parts can easily accumulate debris. I once neglected this step and found my sprayer was barely working during my next use, which was a frustrating experience.
Storing Your Equipment
Once cleaned, store the applicator in a cool, dry place, away from direct sunlight. I’ve learned the hard way that extreme temperatures can damage the plastic components. If you live in a particularly cold area, consider bringing it indoors during winter months to prevent freezing and cracking.
Regular Inspections
Make it a habit to inspect your applicator regularly for any signs of wear or damage. Check the hoses for kinks or leaks, and ensure that all seals are intact. I’ve found that addressing minor issues early can save you from larger problems down the line. With proper care, your foam applicator can serve you well for years, making your cleaning tasks more efficient and enjoyable.
Troubleshooting common issues with foam cannon connection
If you notice that the mixture isn’t generating the expected suds, the first thing to check is the soap dilution. Too much water can thin the formula, resulting in a lack of foam. A good rule of thumb is to start with a 1:4 ratio of soap to water and adjust from there based on the results.

Inconsistent foam output
Another frequent issue is inconsistent foam production. This can often be traced back to the nozzle or orifice size. Ensure that the nozzle is clean and free from clogs. A simple rinse can often resolve this. If the problem persists, consider whether the orifice size matches the specifications of your cleaning unit. Sometimes, using a nozzle with a larger opening can lead to less foam, while a smaller one can restrict flow.
Leakage problems
Leaks during operation can be frustrating. First, examine all connection points for wear or damage. Rubber seals and O-rings can wear out over time. Replacing these components can often eliminate leaks. Additionally, ensure that all attachments are tightened securely. If you notice any persistent leaks from the unit itself, it may require a more thorough inspection or professional servicing.
FAQ:
What equipment do I need to connect a foam cannon to my pressure washer?
To connect a foam cannon to your pressure washer, you will need a foam cannon itself, which usually comes with a bottle and a nozzle. Additionally, ensure you have the appropriate adapter that fits your pressure washer’s wand. Most foam cannons are designed to fit standard quick-connect fittings, but it’s wise to check the specifications of both the cannon and your pressure washer.
Can I use any pressure washer with a foam cannon?
Not all pressure washers are compatible with foam cannons. Foam cannons typically work best with pressure washers that have a minimum pressure rating of around 1000 PSI and a flow rate of at least 1.5 GPM. Check the specifications of your pressure washer to ensure it meets these requirements for optimal performance.
How do I adjust the foam thickness when using a foam cannon?
The thickness of the foam produced by the foam cannon can be adjusted by changing the nozzle setting or by altering the dilution ratio of the soap and water mixture. Most foam cannons have a dial that allows you to adjust the amount of air mixed with the soap solution, which affects foam density. Additionally, using a more concentrated soap can also result in thicker foam.
What type of soap should I use with my foam cannon?
It’s best to use soap specifically designed for foam cannons or pressure washers. Look for pH-balanced car wash soaps that create thick foam and are safe for automotive finishes. Avoid using dish soap or household cleaners, as they can damage your vehicle’s paint and may not foam effectively. Always read the manufacturer’s recommendations for the soap to ensure compatibility.
How do I clean my foam cannon after use?
To clean your foam cannon, start by rinsing it thoroughly with clean water to remove any soap residue. If necessary, disassemble the cannon to clean the bottle and nozzle separately, using a soft brush to remove any stubborn soap buildup. After rinsing, allow all components to dry completely before reassembling to prevent any clogs or buildup from occurring in the future.
What equipment do I need to connect a foam cannon to a pressure washer?
To connect a foam cannon to a pressure washer, you will need a foam cannon specifically designed for use with pressure washers, a pressure washer with a suitable pressure rating (generally between 1,500 and 3,000 PSI), and the appropriate connectors or adaptors that match your pressure washer’s outlet. It’s also helpful to have car shampoo or a foam cannon soap to create the foam needed for effective cleaning. Make sure your foam cannon is compatible with your pressure washer model for optimal results.
.jpg)
.jpg)


