


Begin by ensuring your water inlet is free from debris and any blockages. A clean inlet guarantees optimal performance and prevents any unwanted interruptions during your cleaning tasks. With a good supply in place, the next step is selecting the right attachment. Most Bosch models come with a quick-connect feature, which simplifies the process significantly. Just match the connector size to your unit–typically, it’s a straightforward fit.
Once you’ve secured the correct connector, thread it onto the water inlet. Be careful not to overtighten; a snug fit is all you need. I recall a time when I was too eager and ended up damaging the threads. A gentle twist is all it takes. After that, attach the other end to your water source, ensuring it’s tight enough to prevent leaks but not so tight that you can’t easily disconnect it later.

Before turning on the water, it’s wise to check for any signs of wear on the connectors. I’ve had instances where a worn-out seal led to unnecessary water loss. If everything looks good, turn on the water supply slowly to avoid sudden pressure spikes that can cause damage. With the proper setup, your Bosch cleaning device is ready to tackle any task with ease.
Guidelines for Attaching a Water Supply to Your Device
To ensure optimal performance of your cleaning equipment, follow these precise steps for a seamless attachment of the water supply line.
- Inspect the inlet: Before anything, examine the water intake area on your unit for any debris or damage. A clean inlet ensures a proper seal.
- Gather your tools: You will need a suitable connector for your water supply line. Depending on the model, you may require an adapter.
- Align the connection: Position the connector from the supply line directly over the inlet. Make sure it’s oriented correctly to avoid cross-threading.
- Secure the joint: Hand-tighten the connector until it feels snug. Avoid using tools that could over-tighten and damage the threads.
- Check for leaks: Once attached, turn on the water supply. Observe the connection for any signs of leakage. If you notice water seeping, try tightening the connection slightly.
In my experience, ensuring the water supply is properly attached can significantly impact the effectiveness of the cleaning process. I recall a time when I rushed through this step and ended up with a frustrating mess due to leaks. Taking that extra moment to verify the connection saved me a lot of hassle later.
Regular maintenance of the inlet and connector can also prolong the life of your equipment. Always store your supply line in a dry place to prevent wear and tear.
Choosing the Right Hose for Your Bosch Pressure Washer
Selecting the correct tubing for your cleaning machine is critical for optimal performance. The diameter of the line can significantly impact water flow, so always opt for a size that matches the specifications of your model. Generally, a 1/4-inch diameter is standard for most domestic units, while larger machines might require a 3/8-inch line.
Length plays another vital role. A longer line might seem convenient, but it can lead to pressure loss. Aim for a length that allows you to reach your cleaning area without excessive slack. Typically, 25 to 50 feet works well for most tasks.
Material is equally important. Rubber and PVC are the most common choices. Rubber lines tend to be more durable and resistant to kinks, making them ideal for heavy use. PVC, while lighter and more affordable, may not withstand rigorous conditions as well. Always check for compatibility with your equipment to avoid leaks or failures during operation.
In my experience, flexibility is a key factor. A more pliable line is easier to handle and manoeuvre around corners and obstacles. I once used a stiff line that made it difficult to clean certain areas, which was frustrating and time-consuming.
| Feature | Rubber | PVC |
|---|---|---|
| Durability | High | Moderate |
| Flexibility | Good | Very Good |
| Weight | Heavier | Lighter |
| Price | Higher | Lower |
Don’t forget to check the fittings. Ensure that the connections are compatible with your equipment to prevent leaks or damage. I once had a frustrating situation where mismatched connectors resulted in a messy cleaning session. Investing in quality connectors can save you hassle down the line.
Finally, always consider the type of cleaning tasks you’ll perform. For heavy-duty jobs, a more robust line is necessary, while lighter tasks might only require a standard option. Tailoring your choice to your specific needs ensures that your cleaning sessions are as effective as possible.
Preparing the Equipment for Hose Attachment
Ensure the machine is switched off and unplugged before starting. This eliminates any risk of accidental activation while setting up. Next, inspect the connectors on both the device and the flexible tubing. Look for any debris or damage that may hinder a solid fit. Clean the areas thoroughly with a dry cloth to avoid any leaks during operation.
Once the surfaces are clean, check the rubber seals. These are critical for maintaining pressure. If they appear worn or damaged, replace them before proceeding. A good seal prevents water from escaping, ensuring optimal performance.
Next, locate the correct attachment point on your unit. Most models have a designated area for the tubing. Align the connection carefully, ensuring it fits snugly. If you encounter resistance, don’t force it; recheck the alignment. A misaligned connection can lead to leaks or even damage.
After securing the connection, turn on the water supply. Allow it to flow through the line for a few moments. This step helps to clear out any trapped air and ensures a steady stream when you begin your tasks.
Finally, double-check all attachments before plugging in the device. This simple precaution can save you from potential mishaps and allows for a smooth start to your cleaning project.
Locating the Hose Connection Point on the Machine
Identifying the attachment area on the unit is straightforward. Look for a prominent inlet, typically situated at the front or side. It’s often marked with a symbol indicating water flow, making it easier to spot. In my experience, this point is designed for quick access, ensuring you can set up without hassle.
Visual Indicators
Many models feature a colour-coded system or a distinct shape around the inlet, which can be immensely helpful. If you’re unsure, consulting the user manual is a great way to clarify. I remember a time when I overlooked this detail and wasted valuable minutes trying to figure it out. A simple glance at the manual saved me from unnecessary frustration.
Additional Tips
Before attaching any equipment, ensure the inlet is free from debris or blockages. A clean entry point ensures optimal performance. If you’re considering accessories, such as a foam cannon for ryobi electric pressure washer, knowing the exact connection can enhance your cleaning experience. For those looking at commercial usage, assessing the compatibility with the best commercial pressure washers will also be beneficial.
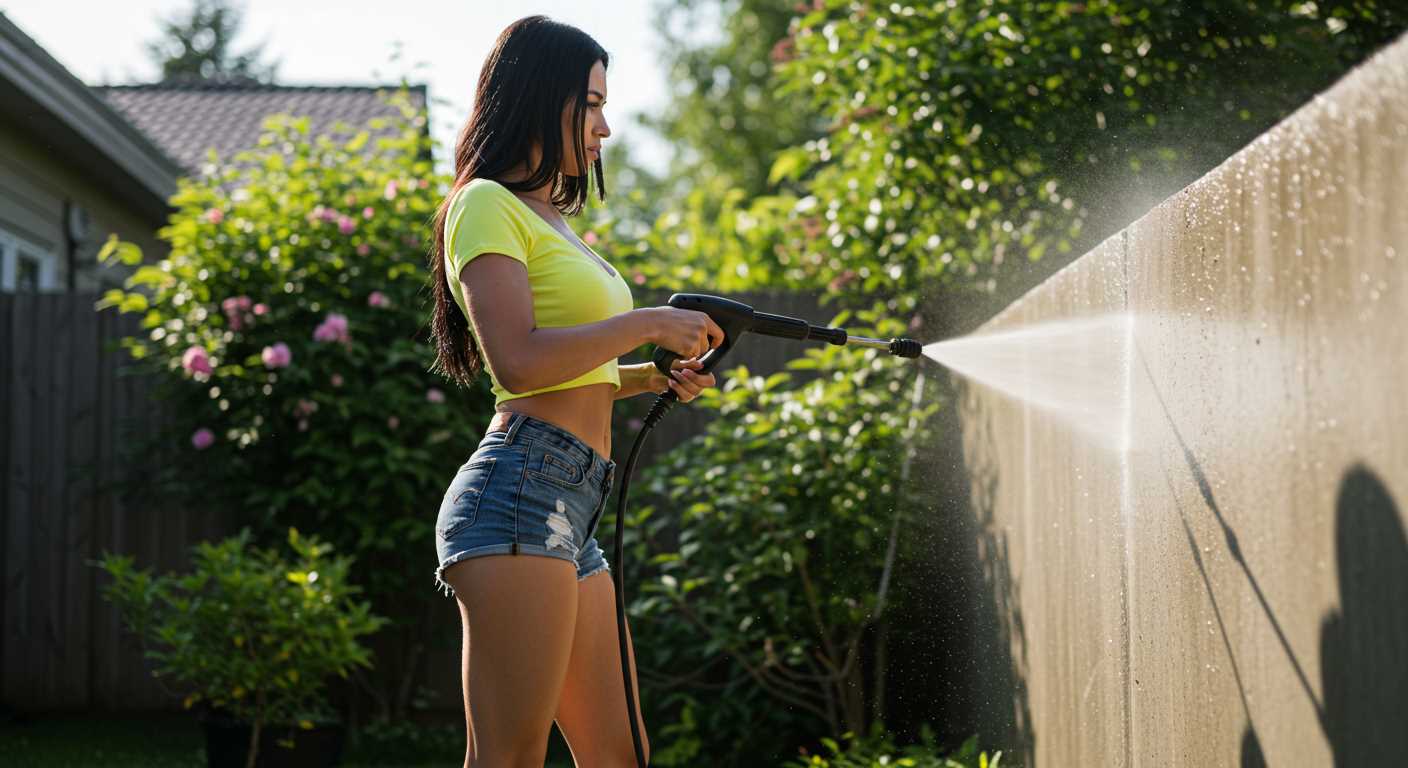
Attaching the Hose to the Pressure Washer
Ensure the quick-release connector on the end of your pipe aligns perfectly with the inlet valve on the machine. You should hear a satisfying click when it’s securely in place. If it doesn’t fit snugly, check for any debris or damage on the connector or the valve that could be causing the issue.
Steps to Securely Fix the Pipe

- Turn off the unit and disconnect from the power source for safety.
- Align the connector with the valve, ensuring no twists in the line.
- Push firmly until you hear the click, confirming a secure fit.
- Give a gentle tug to ensure it’s properly attached.
Final Checks
After securing the line, inspect for any leaks by turning on the water supply without activating the motor. If water seeps from the connection, it may need to be reattached. Always double-check that all fittings are tight to prevent any mishaps during operation.
Checking for Leaks After Connection
After securing the attachment, inspect the joints meticulously. A leak can lead to diminished performance and wastage of water. Start by running the unit briefly to build up pressure. Keep an eye on the connection points; any water escaping is a clear indication of an issue.
It’s wise to check both the inlet and outlet areas. A common oversight is a loose fitting or an improperly seated seal. If you notice any moisture, turn off the machine immediately. Tighten the connection gently, avoiding excessive force, which could damage the threads or cause further leaks.
Using a cloth, wipe around the connection points to identify any hidden drips. Sometimes, a small amount of water may escape only after the machine has been in operation for a minute or two. If leaks persist, consider replacing seals or washers; these components can wear out over time and may require periodic replacement.
In my experience, a small bottle of dish soap mixed with water can help spot leaks. Apply it around the joints, and watch for bubbles forming–this is a sure sign that air is escaping. It’s a simple but effective method to ensure everything is sealed correctly before you start your cleaning tasks.
Connecting the Other End of the Hose to the Water Supply
Begin by selecting a suitable tap or water source. Ensure it has a standard garden tap fitting, as this will provide compatibility with most connectors. Before attaching the flexible line, check for debris or mineral build-up in the tap; a clean connection prevents leaks and ensures a steady flow.
Using the Right Fitting
In my experience, using the appropriate adapter is key to a secure connection. If your supply tap has a different size, invest in an adapter to ensure a tight fit. Avoid using excessive force when tightening; hand-tight is usually sufficient. If you have a quick-connect fitting on the end of your flexible line, simply push it onto the tap until you hear a click.
Testing the Connection
Once secured, turn on the water supply gradually. This will help identify any leaks immediately. If you notice water escaping, turn off the supply and check that the fitting is properly seated. Adjust as necessary, and repeat the testing process. In my years of handling these machines, I’ve found that a little diligence at this stage saves a lot of hassle later on.

Ensure the water supply remains on while you’re operating the equipment, as a lack of water can damage components. If you’re using a longer line, consider securing it to avoid kinks that could restrict water flow during use.
Testing the Setup Before Use
Before firing up your cleaning machine, it’s vital to ensure everything is set up correctly. First, double-check that all connections are secure. Any loose fittings can lead to leaks or reduced performance. I’ve seen many enthusiasts overlook this step, only to face unnecessary frustration later on.
Next, turn on the water supply to the unit without starting the motor. This allows you to check for any leaks at the connection points. If you notice any water escaping, shut off the tap immediately and tighten the fittings. A simple twist with the right tool can often resolve minor issues.
Once leaks are addressed, it’s a good idea to run a quick test of the water flow. Activate the trigger on the cleaning gun briefly to release any air that may be trapped in the system. This step ensures smooth operation and helps in achieving optimal pressure during use. I learned this the hard way–starting a job only to find the machine sputtering because of air pockets can be quite annoying.
Finally, listen for any unusual sounds when the motor starts. A steady hum is what you want to hear. If there’s a rattling or grinding noise, it might indicate a problem that needs to be inspected further. Trust me, addressing these issues before commencing work saves time and effort in the long run.
FAQ:
What tools do I need to connect the hose to a Bosch pressure washer?
To connect the hose to a Bosch pressure washer, you will typically need a garden hose with a compatible connector, the pressure washer itself, and possibly an adjustable wrench to ensure a secure fit. Check the specifications of your pressure washer to confirm the connector type required for your hose.
Can I use any garden hose with my Bosch pressure washer?
While many garden hoses can work with Bosch pressure washers, it is advisable to use a hose that is at least 1/2 inch in diameter for optimal water flow. Ensure that the hose has a standard threaded connector compatible with your pressure washer’s inlet. Some users prefer reinforced hoses to prevent kinking and enhance durability.
What are the steps to connect the hose to my Bosch pressure washer?
First, ensure the pressure washer is turned off and unplugged. Take your garden hose and attach one end to a water tap, ensuring it is tightly secured. Next, locate the water inlet on your Bosch pressure washer, usually at the rear of the unit. Attach the other end of the hose to this inlet, tightening it with your hands or an adjustable wrench if needed. Finally, turn on the water supply and check for any leaks before starting the pressure washer.
Is there a specific way to ensure the hose is tightly attached to the pressure washer?
To ensure a tight attachment, first hand-tighten the hose fitting onto the pressure washer’s inlet. If you still have concerns about leaks, use an adjustable wrench to give it a slight turn, being careful not to overtighten, as this might damage the threads. It’s also useful to inspect the rubber washer inside the hose connector, as a worn washer can cause leaks.
What should I do if the hose won’t connect to my Bosch pressure washer?
If you are having trouble connecting the hose, first check that the hose fitting is compatible with your pressure washer model. Look for any debris or damage on the threads of both the hose and the pressure washer’s inlet. If the hose still does not fit, you might need an adapter to bridge any size differences. Additionally, consult the user manual for specific guidance related to your model.


.jpg)


