
.jpg)


.jpg "How to connect karcher pressure washer to kitchen tap")
To get started, grab a suitable adapter that fits your sink’s faucet. It’s crucial to ensure that the thread size matches the faucet’s outlet to prevent leaks. I recommend using a universal tap connector, which can adjust to various sizes and types of taps. In my experience, these connectors can save a lot of hassle when moving between different locations.
Next, securely attach the adapter to the faucet. Make sure to tighten it by hand to avoid any damage; tools can be overkill and may cause cracks or breaks. Once attached, it’s advisable to run some water through the system to check for any leaks before proceeding with your cleaning tasks. I once skipped this step and ended up regretting it when water sprayed everywhere during my first use.

Once the adapter is in place and leak-free, connect the hose from your unit to the outlet of the adapter. Ensure that the connection is snug, as a loose fit could lead to pressure loss. I’ve found that a little twist can make a big difference in securing the hose properly. After everything is in place, turn on the water supply and check for any irregularities. This simple verification can save you from interruptions while you’re working.
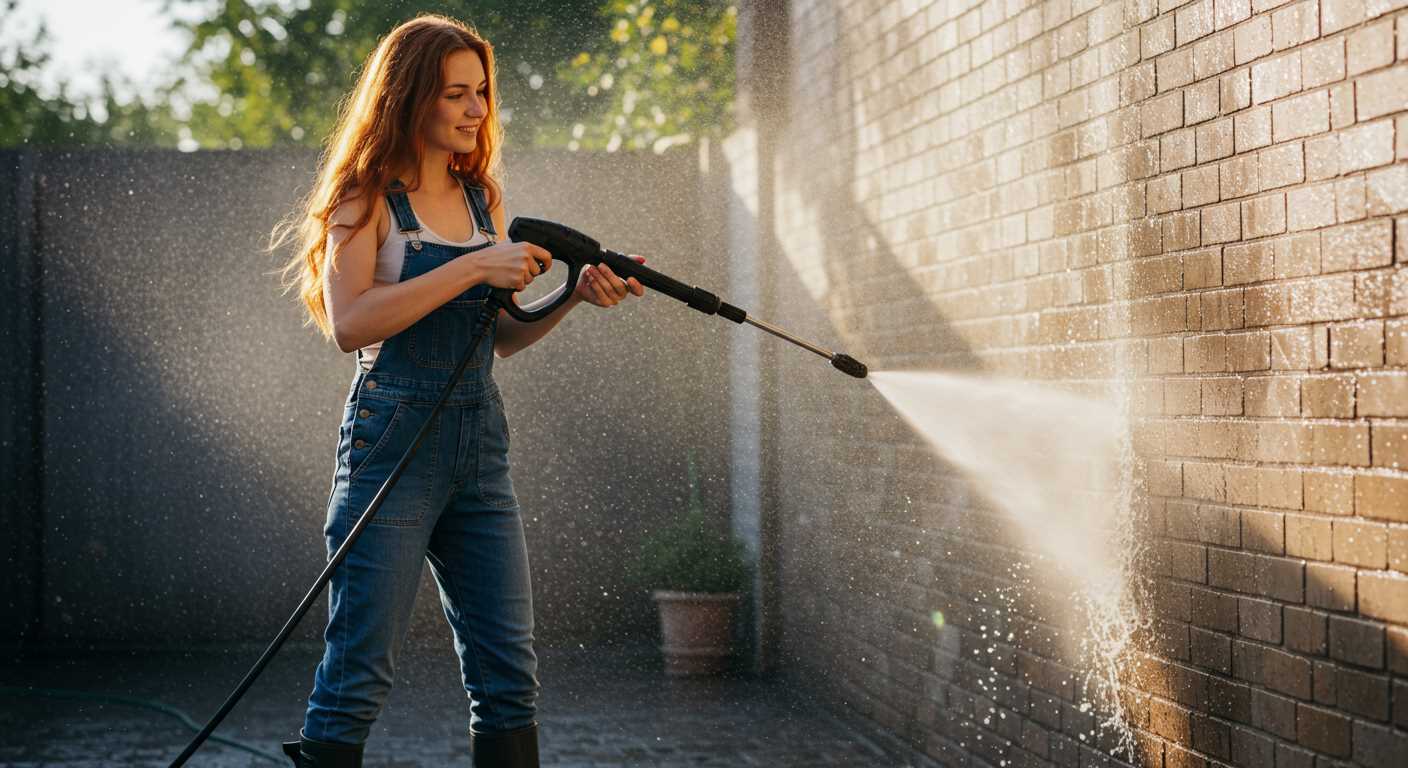
Finally, adjust the settings on your cleaner according to the task at hand. Whether you’re tackling grime on a patio or washing your car, different settings will yield better results. I’ve often experimented with various settings to find the sweet spot for different surfaces. It’s all about getting the job done efficiently without damaging anything!
Connecting Your Cleaning Unit to a Sink
Begin with a suitable adapter for your faucet. I always recommend checking the size of your faucet threads; most modern sinks have a standard size, but having an assortment of adapters on hand can save time and frustration. When I set up my unit, I had a couple of different sizes to ensure a snug fit.
Once you’ve selected the right adapter, securely attach it to the faucet. Ensure that the rubber washer is in place to prevent leaks. I’ve seen many setups fail due to overlooked washers. It’s a small detail, but it makes a world of difference. After that, twist the connection tightly by hand to avoid damage to the threads.
Next, take the hose from your equipment and connect it to the adapter. Make sure this connection is also tight but don’t overdo it; you want it to be secure without risking damage to the fitting. I’ve had hoses burst because they were cranked too hard.
It’s time to test the connection. Turn on the water slowly to check for any leaks. If you spot any, simply tighten the connections until the flow is steady. I remember one time I got a little splash back because I didn’t check properly–I learned my lesson quickly!
Here’s a simple table summarising the steps:
| Step | Action |
|---|---|
| 1 | Select the appropriate adapter for the faucet. |
| 2 | Attach the adapter securely, ensuring the rubber washer is in place. |
| 3 | Connect the hose to the adapter, ensuring it’s tight but not over-tightened. |
| 4 | Turn on the water slowly and check for leaks. |
After confirming everything is secure, you’re ready to start your cleaning tasks. Remember, keeping the hose free of kinks and ensuring a clear path for water will enhance performance. I’ve seen too many folks struggle with poor results simply because they didn’t account for these small details.
Understanding the Karcher Pressure Washer Connections
To ensure a seamless experience with your cleaning device, it’s crucial to get familiar with the various types of fittings and adapters available. Each model has specific requirements that can directly impact performance.
- Water Supply Fittings: Most models come with a standard garden hose connector. If your water source has a different fitting, consider purchasing an adapter that matches your tap’s specifications.
- Hose Length: Opt for a hose that is long enough to reach your working area without stretching. A longer hose facilitates movement and reduces strain on connections.
- Quick-Connect Systems: Many units feature a quick-connect system that allows for effortless attachment and detachment. This can save time and prevent wear on the fittings.
I recall a time when I faced a challenge with a non-standard tap in my garden. The solution was to invest in a specific adapter that not only fit perfectly but also ensured a tight seal, preventing leaks. The importance of having the right accessories can’t be overstated.
- Check your tap type before purchasing any adapters.
- Invest in high-quality hoses to avoid kinks or burst issues.
- Regularly inspect connections for wear and tear.
Understanding these details can significantly enhance the overall performance of your cleaning machine. Don’t underestimate the impact of proper fittings and connections; they can make all the difference in how efficiently your device operates.
Identifying the Right Adapter for Your Kitchen Tap
To ensure compatibility, start by assessing the size and threading of your faucet. Most taps have either a standard 1/2-inch or 3/4-inch male thread. Measure the diameter of the faucet outlet, and check if it’s metric or imperial. This will guide you in selecting the correct fitting.
Next, consider the type of tap you have. If it’s a regular aerator tap, you’ll likely need a simple threaded adapter. However, if you’re dealing with a pull-out or pull-down design, special adapters that accommodate the unique shape may be necessary. Some models can even require a specific connector to create a secure fit.
Don’t overlook the material of the adapter. Stainless steel options offer durability, while plastic ones are lightweight and often less expensive. Choose according to your usage frequency; if you plan on frequent setup and takedown, a robust model will serve better.
Visiting a local hardware store can be beneficial. Bring your measurements to ensure you find the right match. Many stores have knowledgeable staff who can offer insights based on their experience with various adapters and setups.
Online reviews can also provide valuable information. Look for user feedback regarding specific adapters to learn about their performance and compatibility with different faucet types. This can save you the hassle of purchasing multiple adapters in search of the right one.
Ultimately, selecting the appropriate adapter streamlines the process. A proper fit not only enhances efficiency but also minimises the risk of leaks or damage during use. Take the time to identify what you need, and the entire experience will be much smoother.
Preparing Your Kitchen Tap for the Connection
Ensure the faucet is clean and free from debris before proceeding. A quick wipe around the spout and threads will eliminate any potential blockages. If you’ve not used the faucet in a while, turn it on for a few seconds to flush out any stagnant water.
Check the water flow. Turn the tap fully on and observe the pressure. If the flow seems weak, consider cleaning the aerator or inspecting for any clogs in the plumbing. Strong water flow is essential for optimal performance with your equipment.
Verify the compatibility of your faucet’s threading. Most modern fixtures have standard fittings, but it’s wise to confirm this. If your setup includes any unique or non-standard components, such as a pull-out sprayer, you may need to remove it for a proper connection.
Consider the height of the faucet. If it’s particularly low, you might need to adjust the hose length or angle to ensure the equipment can operate effectively without any kinks or bends in the hose.
Lastly, ensure you have all necessary accessories ready before starting. This includes the right fittings, hoses, and any adapters that may be required. Being prepared will make the process smoother and help avoid any interruptions.
Connecting the Hose to the Kitchen Tap
Begin by ensuring the faucet is free from any obstructions. Remove any aerators or attachments to achieve a smooth connection. I once encountered a situation where a simple aerator was causing leaks, making a mess of the entire setup. Always check for any debris or old washers that might interfere with a tight seal.
Next, take the correct adapter you identified earlier and attach it securely to the faucet. It’s crucial to hand-tighten it without using any tools, as overtightening can lead to damage. I recall a colleague who used pliers, resulting in a cracked fitting. A snug fit is all that’s needed.
Attaching the Hose
Once the adapter is in place, it’s time to attach the hose. Align the hose end with the adapter and twist it clockwise until it feels secure. If your equipment has a quick-connect feature, listen for a click, indicating a proper lock. During my testing, I found that a loose connection could lead to water pressure loss, so double-check your work.
After securing the hose, turn on the water slowly to check for leaks. Small drips can often be fixed by simply tightening the connection a bit more. I’ve learned that a little patience goes a long way in avoiding larger issues down the line. Always inspect the entire setup before you start using the machine to ensure everything is in order.
Checking for Leaks After Connection
After establishing the link between your equipment and the water source, it’s crucial to ensure there are no leaks. Begin by turning on the water supply slowly. This gradual increase in pressure allows you to observe any potential issues without overwhelming the connections.
Inspect all joints and connections visually. Look for any signs of water escaping, which could indicate a poor seal or a misaligned fitting. A small trick I’ve learned over the years is to listen closely; sometimes, you can hear a faint hissing sound if there’s a leak present.
Testing for Seals
Using a cloth or paper towel, wipe around the connection points. If moisture appears, you know there’s a problem that needs addressing. Tighten any loose fittings, but be careful not to overtighten, as this can cause damage. If leaks persist, consider using Teflon tape on the threads for a better seal.
Observing During Operation
Once you’ve checked for leaks and made adjustments, run the equipment for a few minutes. Keep an eye on the connections during this period. If you notice any water pooling around the fittings, it’s an indication that further adjustments are required. This hands-on approach has saved me from potential water damage and equipment failure on numerous occasions.

Setting Up the Pressure Washer for Use
Before you start washing, ensure that everything is in place for a smooth operation. Here are the steps to prepare your equipment for action:
-
Fill the Water Tank: If your unit has a built-in tank, fill it with clean water. For models that draw directly from the source, ensure the connection is secure and the water supply is on.
-
Attach the High-Pressure Hose: Securely fasten the high-pressure hose to the machine. Check that it clicks into place to avoid any unexpected disconnections during use.
-
Choose the Right Nozzle: Depending on your cleaning task, select the appropriate nozzle. A wider spray is ideal for gentle cleaning, while a narrower one is perfect for tougher stains.
-
Adjust the Pressure Settings: If your model allows pressure adjustments, set it according to the surface you’ll be cleaning. Lower settings are suitable for delicate surfaces, while higher settings can tackle more robust areas.
-
Power On: Plug in your device and turn it on. Allow it a moment to build pressure before you start washing.
-
Test the Spray: Point the nozzle away from yourself and others, and pull the trigger to test the spray. Make sure the water flow is consistent and that there are no blockages.
Having set everything up correctly, you’re ready to begin your cleaning task. Keep an eye out for any issues, and always prioritise safety during operation.
Adjusting Water Flow Settings on the Pressure Washer
To optimise performance, ensure the water flow is set correctly before starting. Locate the flow control dial on the unit; it typically ranges from low to high settings. For gentle tasks like washing a car, utilise a lower setting to prevent surface damage. Conversely, for tougher cleaning jobs such as patios or driveways, increase the flow to maximise effectiveness.
Fine-Tuning the Pressure
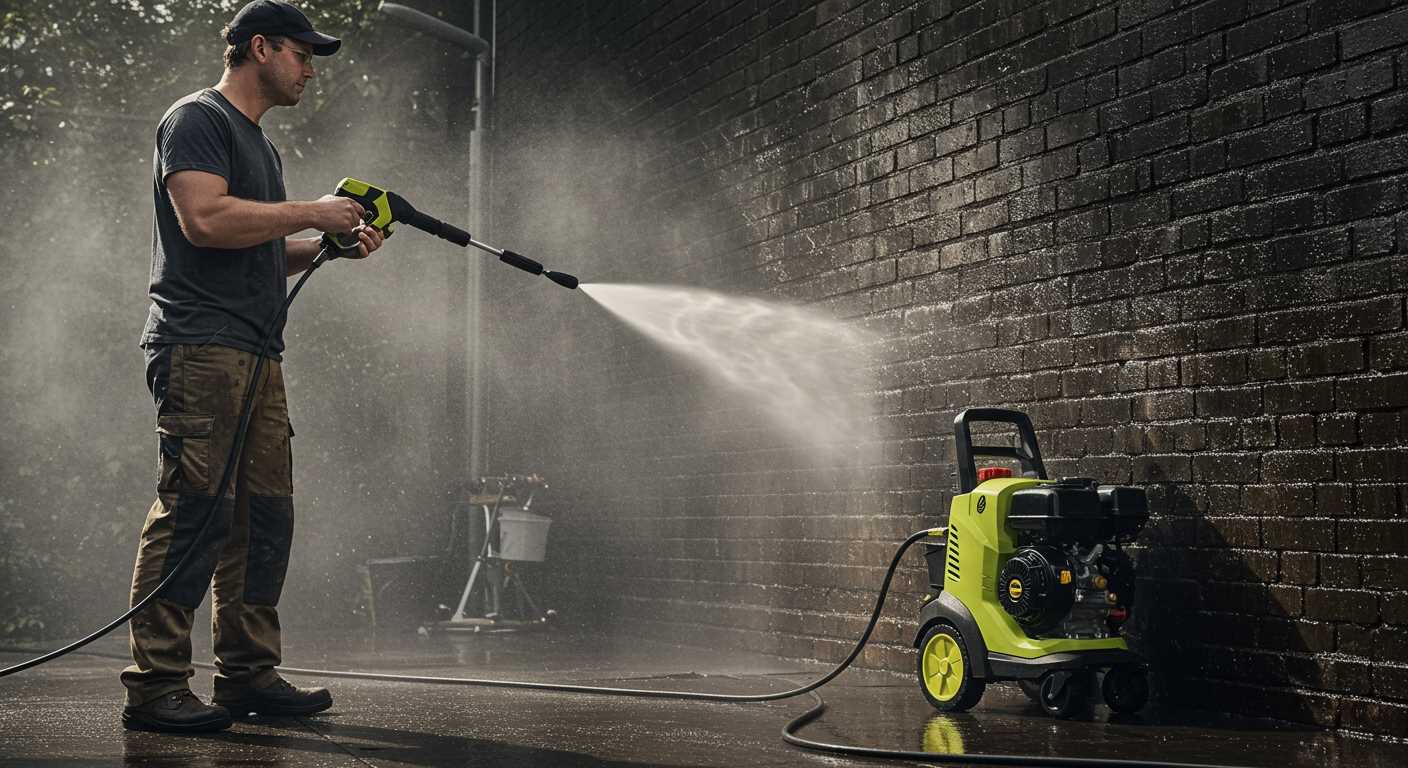
In addition to flow, adjusting the pressure is vital. There’s usually a pressure adjustment knob or lever. Start with a mid-range setting, then gradually increase or decrease based on the surface being cleaned. I’ve found that experimenting with pressure levels can lead to discovering the optimal setting for various materials. For instance, brick surfaces often require higher pressure, while wooden decks benefit from a gentler touch.
Monitoring Water Temperature
Water temperature can significantly impact cleaning efficiency. Using warm water can enhance detergent effectiveness, especially when tackling grease or oil stains. However, always consult the manufacturer’s specifications to avoid any potential damage to the equipment. I once used heated water on a stubborn stain, and the results were impressive, but I made sure to keep the temperature within safe limits.
Regularly check for any clogs in the system that might affect flow. A quick rinse through the nozzles can prevent build-up and maintain consistent performance. Keeping the settings adjusted according to your specific cleaning task ensures not only effective results but also prolongs the lifespan of the equipment.
Testing the Connection Before Full Operation
After establishing your setup, it’s prudent to verify the connection. This step is crucial to ensure everything is functioning optimally before you start your tasks.
Steps to Perform a Connection Test
- Turn on the water supply gradually. Avoid turning it on at full force to prevent sudden pressure spikes.
- Observe for any immediate leaks at the junctions. Even a small drip can indicate a poor seal.
- Check the hose and fittings. Ensure they are tightly secured and aligned properly.
Monitoring Performance
- Listen for unusual noises. A steady, consistent sound indicates proper operation.
- Watch for water flow. It should be smooth and without interruptions.
- Inspect the connection points after a few minutes of operation. This can help identify any slow leaks that might develop under pressure.
Taking the time to test your setup not only ensures safety but also enhances the longevity of your equipment. A little diligence here saves potential headaches later. I’ve seen setups fail because of overlooked connections, and it’s always better to catch these issues early. Happy cleaning!
Maintaining Your Setup for Future Use
Investing time in proper upkeep ensures your equipment remains in top condition for subsequent tasks. After using your high-powered cleaning device, follow these key steps to safeguard your setup:
| Action | Description |
|---|---|
| Clean the Hoses | After each use, flush out the hoses with fresh water to remove any debris or detergent residues that might cause blockages. |
| Disconnect Accessories | Separate all attachments like nozzles and brushes. Rinse them thoroughly and allow them to dry completely to prevent rust or mould. |
| Inspect for Damage | Regularly check hoses, fittings, and connectors for cracks or wear. Replace any damaged parts to avoid leaks in future operations. |
| Store Properly | Keep your setup sheltered from extreme temperatures. Consider investing in a pressure washer cover to protect it from the elements. |
| Maintain Water Supply | Ensure your water source remains clean and free of sediment. Cleaning or replacing filters as needed will promote optimal performance. |
In my experience, those who overlook these steps often find themselves facing unexpected issues when they’re ready to use their equipment again. Just like how I learned to adapt my cooking techniques by discovering how to can food without a pressure cooker, maintaining your cleaning setup requires a bit of knowledge and consistency.
By adhering to these maintenance tips, you can ensure your cleaning equipment is always ready for action, making your future tasks much smoother and more efficient.
FAQ:
What equipment do I need to connect a Karcher pressure washer to my kitchen tap?
To connect a Karcher pressure washer to your kitchen tap, you will need a few items. Firstly, ensure you have the pressure washer itself and its hose. You will also need a suitable tap connector, which is often provided with the pressure washer. Additionally, an adapter may be required if your kitchen tap has a non-standard size or thread. It’s advisable to check the specifications of your pressure washer model for compatibility.
Can I use my Karcher pressure washer with a standard kitchen tap?
Yes, you can typically use a Karcher pressure washer with a standard kitchen tap. Most kitchen taps are compatible with the pressure washer’s connectors. However, if your tap has a unique design or size, you might need an adapter to ensure a proper fit. Always check the user manual for specific details regarding tap compatibility.
How do I attach the pressure washer hose to the kitchen tap?
To attach the pressure washer hose to the kitchen tap, first, ensure the tap is turned off. Then, take the tap connector and screw it onto the tap’s thread, ensuring a tight fit to prevent leaks. Next, connect the pressure washer hose to the other end of the connector. Make sure all connections are secure before turning on the tap to test for leaks.
What should I do if my kitchen tap connection leaks after attaching the pressure washer?
If you notice a leak after connecting your Karcher pressure washer to the kitchen tap, first, turn off the tap and the pressure washer. Check the connections to ensure they are tightly secured. If the leak persists, inspect the rubber washer inside the tap connector; it may need to be replaced. Also, ensure that the tap thread is not damaged, as this could cause leaks. If necessary, you may need to try a different adapter or connector that fits better.
Are there any precautions I should take when connecting a pressure washer to a kitchen tap?
Yes, there are several precautions to consider. First, ensure that the kitchen tap can handle the water pressure from the pressure washer. Use only the recommended tap adapter to avoid damaging the tap or the pressure washer. Be cautious when operating the pressure washer indoors, as it can create significant spray and may cause water damage. Lastly, always follow the manufacturer’s instructions for both the pressure washer and the tap connector to ensure safe operation.
.jpg)


