
.jpg)


.jpg "How to connect nozzle to pressure washer")
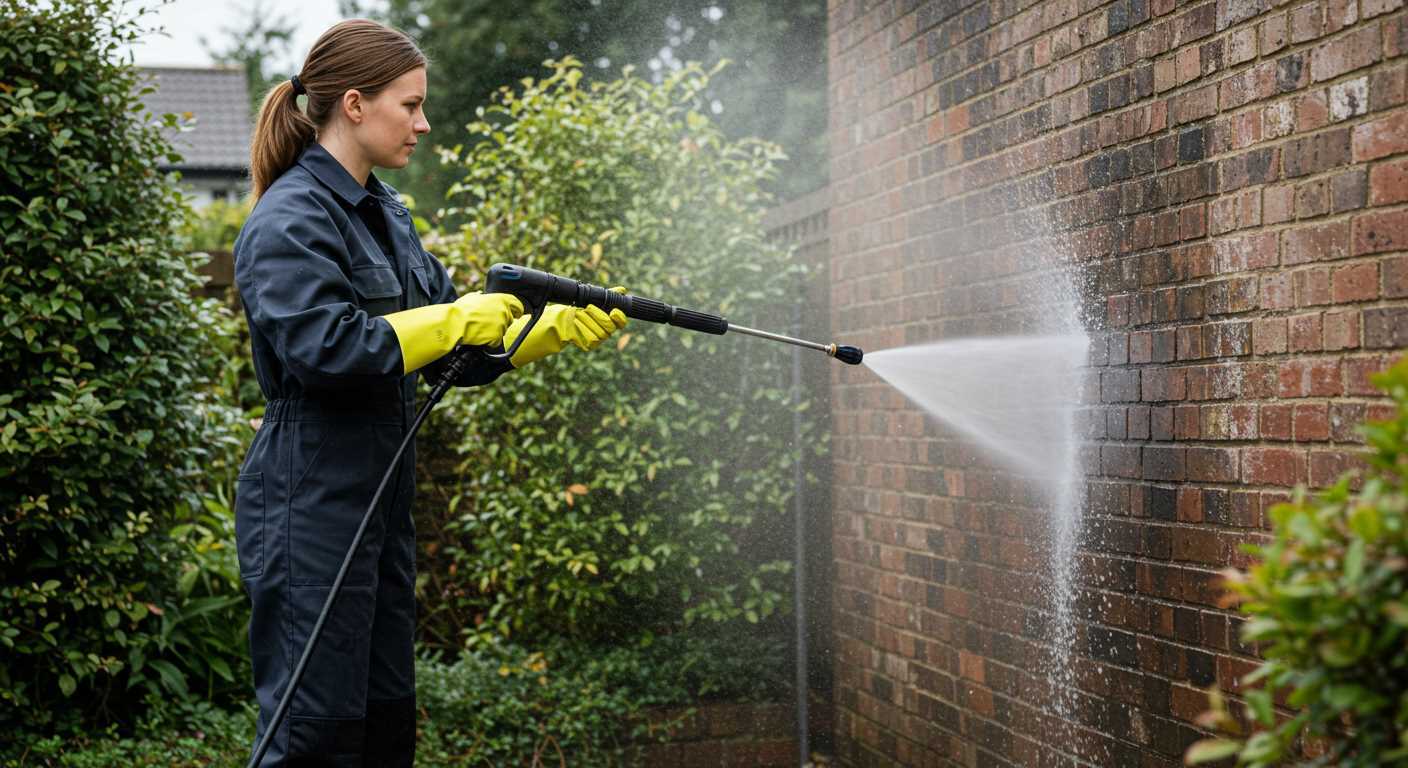
First off, ensure that your equipment is powered off and disconnected from any supply. A simple mistake can lead to accidents. Grab the attachment you intend to use; each type is designed for specific tasks, from gentle rinsing to intense scrubbing.
Next, locate the quick-release mechanism on the front of the unit. This is typically a robust clasp or a push-button design. Align the attachment with the connector, making sure it fits snugly. You should hear or feel a click once it’s properly seated. If it doesn’t engage easily, double-check for any debris or obstructions that might be hindering the connection.

Once secured, give it a gentle tug to confirm that it’s firmly attached. This small step can save you from unexpected disconnections during use. After that, turn on your device and test the connection at a low setting. Observe the water flow; it should be steady and consistent, indicating that everything is in place. If you notice any leaks, turn off the machine immediately and reassess the attachment.
With these steps, you’re ready to tackle any cleaning task, from patio stones to vehicles, ensuring a thorough and efficient experience. Trust me, the right attachment can make all the difference in achieving that pristine finish.
Attaching the Sprayer Tip to the Cleaning Unit
Begin by ensuring the device is powered off and disconnected from the water supply. Safety is paramount. Once that’s settled, locate the end of the cleaning arm where the sprayer tip will be affixed.
Here’s a straightforward method that has worked well for me over the years:
- Examine the connection point on the cleaning arm; it should be designed for easy attachment.
- Align the sprayer tip with the connection point, making sure the grooves or fittings match perfectly.
- Firmly push the sprayer tip into place until you hear a click or feel a secure fit. This indicates it’s locked in position.
- If your model features a rotating or twist-lock mechanism, rotate the sprayer tip clockwise until it is snug. Avoid overtightening, as this can damage the fittings.
Once attached, give it a gentle tug to confirm stability. It’s wise to perform a quick check before starting your cleaning task. I’ve had experiences where a loose attachment caused spray inconsistencies, leading to less effective cleaning.
After securing the sprayer, reconnect the water supply and power on the unit. Test the attachment by activating the sprayer briefly to ensure everything functions correctly. A proper fit will provide a steady stream, enhancing your cleaning experience significantly.
If you encounter any resistance or difficulty while attaching, inspect the components for debris or damage. Clean the connection area thoroughly to ensure a proper seal. From my experience, a well-maintained device performs better and lasts longer.
Identifying the Correct Nozzle Type for Your Pressure Washer
Choosing the right tip for your cleaning equipment is vital for achieving optimal results. Each type is designed for specific tasks, and understanding these distinctions can save you time and effort. For instance, a 0-degree tip delivers a concentrated jet ideal for tough stains on concrete, while a 25-degree tip is better suited for general cleaning on decks or patios.
In my experience, I found that many users overlook the significance of the degree rating. A wider angle, such as 40 degrees, is perfect for rinsing off surfaces without damaging them, making it a go-to choice for delicate areas. Conversely, if you’re tackling grime on a wooden deck, a 15-degree or 25-degree attachment would be more appropriate to prevent splintering while still providing adequate cleaning power.
Consult your user manual for recommendations specific to your model. Each make may have different specifications that could affect performance and compatibility. If you’re unsure, I recommend experimenting with various attachments on less visible areas. This cautious approach helps to identify the best fit without risking damage to your surfaces.
For those interested in maintaining wooden decks, using the right tip can also prolong the life of the wood. An optimal choice can enhance the cleaning efficacy without stripping away protective finishes. If you’re considering a suitable model for this task, check out a reliable source for a pressure washer for wooden decks.
In summary, understanding the specific function of each tip enables you to maximise the cleaning potential of your equipment while protecting the surfaces you work on.
Gathering Necessary Tools for Nozzle Installation
Before starting the task, ensure you have the following tools readily available. This will streamline the process and help avoid unnecessary delays.
| Tool | Purpose |
|---|---|
| Adjustable Wrench | To secure or loosen any fittings on the equipment. |
| Screwdriver Set | For any screws that may need adjusting during installation. |
| Safety Goggles | To protect your eyes from debris during the installation process. |
| Cleaning Cloth | To wipe down any surfaces before and after attaching your accessory. |
| Thread Seal Tape | To ensure a watertight seal on threaded connections. |
In my experience, having these items close by makes the job smoother. I once started a project without a wrench, and it turned into a frustrating search around the garage. Besides the tools, ensure you’re wearing appropriate clothing and gloves to safeguard against any unexpected splashes or debris. A little preparation goes a long way in making the installation process hassle-free.
Preparing the Pressure Washer for Nozzle Connection
Ensure the machine is turned off and unplugged. Safety must be the priority. I learned this the hard way during my early days in the field. I was eager to start a job and almost made the mistake of trying to attach an accessory while the unit was still powered. A quick lesson in caution saved me from a potentially dangerous situation.
Next, inspect the fittings on both the machine and the attachment. Look for any signs of wear or damage. During a routine job, I once overlooked a frayed connector, which led to a frustrating leak. A simple check could have saved me the hassle and downtime.
Clear the Area
Before proceeding, clear the workspace of any debris or obstacles. I remember a time when I was rushed and didn’t tidy up. I ended up tripping over a garden hose while working, which not only delayed my progress but also risked damaging the equipment. A simple clean area can help you avoid accidents and distractions.
Check Water Supply
Ensure that the water supply is adequate and free of blockages. I once faced a situation where I thought I was ready to start, only to find out the inlet was partially blocked. This caused the machine to overheat, and I had to wait for it to cool down before I could continue. A quick check of the water line before you start can save valuable time and effort.
Step-by-Step Instructions for Attaching the Nozzle
Begin by ensuring your machine is switched off and unplugged. This safety precaution prevents any accidental operation while you work. Next, locate the quick-release coupling on the lance. This is typically a simple mechanism that allows for easy attachment and detachment of accessories.
1. Align the Nozzle
Take the selected attachment and align it with the coupling. You should notice a small notch or groove that guides the positioning. Ensure the nozzle is facing the right direction for your intended cleaning task; aligning it incorrectly can lead to inefficient results.
2. Secure the Attachment
Push the nozzle firmly into the coupling until you hear a click. This sound indicates that it is locked in place. To double-check, gently tug on the attachment; it should feel secure and not wobble. If it does, repeat the alignment process.
Next, once attached, it’s beneficial to run a quick test. Connect your machine to the water source and turn it on briefly to check for leaks or any signs of improper fitting. This ensures everything is functioning correctly before you dive into your cleaning tasks.
For those looking for high-performance equipment, consider exploring the best commercial pressure washers. They often feature more robust attachments and capabilities, which can enhance your cleaning efficiency.
Following these steps will lead to a seamless experience when working with your cleaning equipment. Always refer to your specific model’s manual for any unique features or requirements related to nozzle attachment.
Testing the Connection for Leaks and Proper Function
After securing the attachment, it’s vital to ensure everything is functioning correctly. Begin by turning on the machine at a low setting to check for any leaks. Carefully inspect the area where the accessory meets the lance. If you notice any water escaping, it could indicate a poor seal or misalignment. A quick twist or adjustment may resolve this issue.
Next, increase the intensity gradually. Observe the spray pattern; it should be consistent and strong. If the output appears weak or erratic, the fitting may not be secured properly. In my experience, I’ve encountered situations where a simple reinstallation can make all the difference. It’s also wise to listen for any unusual sounds that could signal an underlying problem.
Additional Checks for Performance
Beyond visual inspections, it’s beneficial to test the equipment with different surfaces. If you notice that dirt or grime isn’t being effectively removed, reassess the attachment type. I once faced a situation where I used the wrong accessory for a specific cleaning task, leading to unsatisfactory results. Each type has its intended use, and matching them correctly will enhance performance.

Lastly, after testing, always remember to disconnect the equipment and store it properly. This not only prolongs the lifespan of your tools but also ensures that they are ready for future use without any hitches. Regular checks after each use can prevent issues down the line.
Maintaining Equipment for Longevity
Regular upkeep of your cleaning device and its accessories significantly extends their lifespan. From my experience, simple practices can prevent costly repairs and ensure optimal performance.
Cleaning and Inspection
- After each use, rinse the attachment to remove debris and dirt. This prevents blockages that can lead to decreased output.
- Inspect the attachment and unit for wear and tear. Look for cracks, corrosion, or any signs of damage. Addressing these issues early can save you from larger problems down the line.
Proper Storage

- Store your equipment in a dry, cool area. Avoid places with extreme temperatures or moisture, as these conditions can degrade parts.
- Keep all accessories in a designated container, ensuring nothing gets lost or damaged.
- Consider hanging the device or placing it on a shelf to avoid unnecessary pressure on hoses and connections.
During my years in the industry, I’ve seen many people neglect these basic steps, leading to premature failures. It’s the little things, like ensuring your gear is clean and stored correctly, that make a significant difference in longevity.
Regular Maintenance Schedule
- Set a routine for checks. Monthly inspections can help catch issues before they escalate.
- Replace worn parts as needed. Having spare components on hand can be a lifesaver during peak usage times.
By prioritising these maintenance practices, you can keep your gear in prime condition and ready for any task at hand. In my experience, a well-cared-for tool will always perform better and last longer.
FAQ:
What types of nozzles can I connect to my pressure washer?
Pressure washers typically accommodate a range of nozzle types, including fan nozzles, turbo nozzles, and soap nozzles. Fan nozzles vary in spray angle, with options like 0°, 15°, 25°, and 40°, each suited for different tasks. Turbo nozzles provide a rotating spray pattern for more intense cleaning, while soap nozzles are specifically designed for applying detergent. Check your pressure washer’s manual for compatible nozzle types.
How do I attach a nozzle to my pressure washer?
To attach a nozzle, first ensure the pressure washer is turned off and unplugged for safety. Locate the quick-connect fitting on the end of the spray wand. Align the nozzle with this fitting and push it in firmly until you hear a click, indicating it’s securely attached. If your model has a locking mechanism, make sure to engage it to prevent accidental detachment during use. Always refer to the user manual for specific instructions related to your model.
Can I use any nozzle with my pressure washer?
No, not all nozzles are compatible with every pressure washer. Each model has specific requirements for nozzle size and type. Using an incompatible nozzle can lead to reduced performance or even damage to the machine. Always consult your pressure washer’s manual to find the appropriate nozzle specifications and ensure you are using a compatible option for safe and effective operation.
What should I do if my nozzle gets clogged?
If your nozzle becomes clogged, first turn off the pressure washer and disconnect it from the power source. Remove the nozzle from the spray wand and inspect it for debris. You can use a small pin or needle to clear any blockages in the nozzle tip. Soaking the nozzle in a mixture of water and vinegar can also help remove stubborn clogs. After cleaning, reattach the nozzle and test it to ensure proper function before use.
How do I know which nozzle is best for my cleaning task?
The best nozzle for your cleaning task depends on the surface and the type of dirt or grime you are dealing with. For heavy-duty cleaning, such as removing paint or grease, a 0° nozzle is effective due to its concentrated spray. For moderate tasks like cleaning driveways, a 15° or 25° nozzle works well. For delicate surfaces, such as cars or windows, a 40° nozzle is recommended to prevent damage. Always start with the widest spray and adjust as needed.
.jpg)


