


To begin, ensure you have the correct fittings for your cleaning accessory. Most models come with a quick-release mechanism, allowing for a straightforward attachment. Align the connector on the tool with the appropriate fitting on the spray lance, making sure the notches match up. A gentle push should secure the two pieces together.
Once attached, it’s crucial to check for any leaks. With the machine turned off, run a quick test by turning on the water supply. If you notice any water escaping from the joint, disconnect and reattach, ensuring everything is tightly secured. In my experience, this step saves a lot of trouble later on, especially during more extensive cleaning tasks.

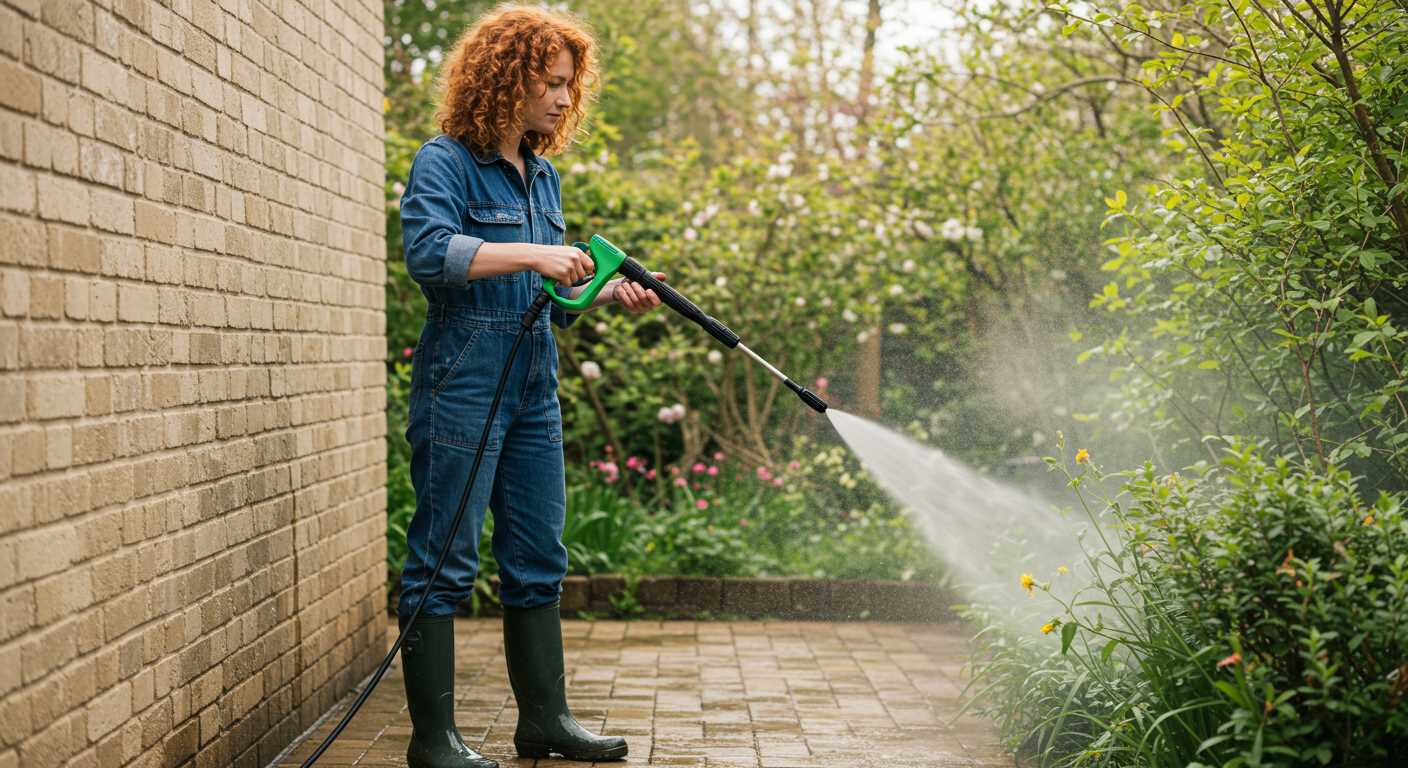
Next, adjust the angle of the nozzle to suit the surface you’re working on. Different tasks require various spray patterns; a wider spray is ideal for delicate surfaces like cars, while a narrower jet works best for stubborn grime on concrete. I often remind users to take a moment to select the right setting to avoid damage and optimise cleaning efficiency.
Finally, don’t forget to maintain your equipment. Regularly inspect the connections and clean them after use. This practice not only prolongs the life of your tools but also ensures they perform at their best every time you need them. Trust me, a little care goes a long way in this line of work.
Attaching Your Long Reach Tool
To achieve a seamless fit, ensure the locking mechanism is aligned correctly. Insert the tool into the designated socket until you hear a click, indicating it’s secured. It’s pivotal to check for any gaps; a snug fit will prevent leaks and optimise performance, especially when tackling stubborn grime.
Ensuring Compatibility
Before proceeding, confirm that the diameter of your attachment matches that of the main unit. Mismatched sizes can lead to inefficient cleaning and potential damage. Always refer to the manufacturer’s specifications for precise measurements. If you’re using an adapter, make sure it’s designed for your specific model.
Testing the Setup
Once attached, perform a brief test run at a low setting. Observe for stability and ensure that the connection holds firm under pressure. If you notice any instability, detach and reattach, verifying that all components are securely fastened. This step is crucial, particularly if you plan on using a pressure washer for bin cleaning where manoeuvrability is key.
Choosing the Right Extension Wand for Your Pressure Washer
When selecting an add-on tool for your cleaning machine, focus on compatibility, length, and nozzle options. Each of these factors significantly influences the effectiveness of your cleaning tasks.
- Compatibility: Ensure the attachment fits your machine’s specifications. Check the connection type–most models use a quick-connect mechanism. Consult your user manual or the manufacturer’s website for details.
- Length: Assess the areas you need to reach. For high places or hard-to-access corners, a longer tool can save time and effort. Typically, lengths range from 18 to 36 inches. I found a 24-inch model perfect for cleaning gutters without needing a ladder.
- Nozzle Options: Some add-ons come with adjustable or interchangeable nozzles. These can provide various spray patterns–whether you need a wide fan for large surfaces or a concentrated stream for stubborn stains. I once used a versatile nozzle to switch between tasks seamlessly, which significantly improved my workflow.
Consider the material of the accessory as well. Lightweight materials like aluminium can be easier to handle, while durable options like stainless steel offer longevity but may add weight. I prefer a balanced approach–an aluminium core with a protective coating for strength.
Lastly, review customer feedback and product ratings. Real-world experiences help gauge reliability and performance. I often rely on reviews to identify hidden gems in the market that stand out for their ease of use and durability.
In summary, take the time to evaluate your cleaning needs against these criteria. A well-chosen tool enhances efficiency and ensures a satisfying cleaning experience.
Preparing Your Pressure Washer for Extension Wand Attachment
Before attaching the additional tool, ensure the unit is powered down and disconnected from the electrical source. This step is crucial for safety. I’ve seen too many instances where people rush this part and end up with a nasty surprise.
Next, inspect the connections on both the machine and the accessory. Look for any signs of wear or damage. A cracked fitting can lead to leaks or, worse, a malfunction during operation. I always carry spare seals and o-rings in my toolkit, as they are easy to replace and can save a lot of hassle.
Make sure the water supply is properly connected and that the hose is free from kinks or blockages. A clear water line is essential for optimal performance. Once you’re certain everything is in order, prime the system by turning on the water supply and letting it run for a minute without any attachments. This clears out any debris that might have accumulated.
Next, check the pressure settings. If your device allows for adjustments, calibrate it to match the requirements of the new accessory. I learned this the hard way when I once used an incompatible setting, which resulted in an inefficient clean-up. Adjustments ensure that you get the best results from your equipment.
Finally, take a moment to familiarise yourself with the new tool. Understanding its features and capabilities makes the cleaning process smoother. I often take a few minutes to practice with a new attachment on a less critical area before tackling the main job. It’s a small step that can lead to significant improvements in performance.
Aligning and Securing the Extension Wand Properly
To ensure optimal performance, precise alignment and secure attachment of the additional tool is non-negotiable. Begin by identifying the connection point on your cleaning unit. This often requires a simple twist or slide action, but must be done carefully to avoid misalignment.
Steps for Proper Alignment
- Inspect the attachment end of the tool for any debris or damage. Clean it if necessary.
- Position the tool at the correct angle, typically 90 degrees to the unit’s body.
- Firmly push the tool into the connection point until you hear a click or feel it lock into place.
- Rotate the tool slightly to ensure it’s seated correctly and is stable.
Securing the Attachment
- After alignment, look for a locking mechanism or collar. Engage it fully to prevent accidental disconnection during operation.
- Check for any play or wobble in the tool. If present, recheck the alignment and securing process.
- Always perform a quick test by gently pulling on the tool to ensure it is firmly attached before you begin working.
In my experience, taking a few moments to ensure everything is aligned and secured can save a lot of hassle later. A loose attachment can lead to decreased efficiency and even damage to your equipment. Always prioritise a secure fit. It’s a simple step that can make all the difference in your cleaning tasks.
Testing the Connection for Leaks and Stability
After attaching the additional tool, it’s crucial to check for any leaks. Turn on the unit and observe the joints closely. Any signs of water escaping indicate a poor seal that needs addressing. I’ve seen many users overlook this step, only to face unnecessary pressure drops while working.
To ensure a secure fit, gently wiggle the tool after it’s engaged. A stable connection should exhibit minimal movement. If it feels loose, it’s worth disconnecting and reattaching, ensuring that all components are aligned correctly. Remember, a slight misalignment can lead to performance issues.
Using a cloth, wipe around the connection points during this test. This not only helps in spotting leaks but also provides a clearer view of any potential drips forming. If you notice moisture accumulating, that’s a telltale sign of a faulty connection that must be rectified immediately.
When I first began working with these devices, I encountered a situation where I rushed through this testing phase. Water sprayed everywhere, and I ended up with a soaked work area. Since then, I’ve learned to take the time to ensure everything is properly secured before starting any task.
For an added layer of assurance, consider using a sealant tape designed for these types of connections. Just wrap it around the threaded parts before attaching. This simple addition can eliminate many headaches down the line.
Finally, after the initial test, keep an eye on the connection during use. If any unusual noises or vibrations occur, reassess the integrity of the connection. Regular checks can prevent minor issues from escalating into major problems.
Adjusting Spray Settings After Wand Attachment
After securing your new accessory, it’s time to tailor the spray settings to suit your cleaning needs. The adjustments can significantly impact performance, turning a simple task into a satisfying experience. I recall a time when I underestimated this aspect, leading to an entire afternoon of scrubbing that could have been avoided.
Understanding Different Spray Patterns
Most tools come equipped with various spray patterns, each designed for specific tasks. Here’s a quick reference table to help you select the right setting:
| Spray Pattern | Ideal Use |
|---|---|
| Wide Fan | Gentle cleaning of delicate surfaces |
| Medium Fan | General cleaning tasks, such as patios or vehicles |
| Narrow Jet | Heavy-duty cleaning, such as removing stubborn dirt or grime |
| Soap Setting | Applying cleaning solutions or detergents |
Fine-Tuning the Pressure
Once you’ve selected the pattern, adjust the pressure accordingly. Lower settings are ideal for sensitive areas, while higher pressures can tackle tough stains. I vividly remember using too much force on a wooden deck, resulting in noticeable damage. It’s crucial to find a balance that ensures effective cleaning without compromising the surface integrity.
Always start with the lowest pressure and gradually increase until you achieve the desired results. This approach not only protects surfaces but also helps you gauge how the machine responds after attaching the new accessory.
In my experience, optimal adjustments can save time and effort, making any cleaning project far more enjoyable. Don’t rush through this stage; take a moment to get it right and watch your cleaning tasks transform.
Maintaining Your Pressure Cleaner and Extension Tool Connection
Regular upkeep of your cleaning equipment’s attachments is crucial for optimal performance. I’ve seen too many users overlook this aspect, leading to frustrating experiences and inefficiencies. After each use, inspect the fittings and seals for any signs of wear or damage. A small crack can lead to leaks, which not only reduce efficiency but can also cause further issues with the machine itself.
Cleaning the connection points is equally important. Residue build-up can impede proper sealing, so a quick wipe with a damp cloth can make a significant difference. If you notice stubborn grime, a gentle scrub with a soft brush can help. Always ensure everything is dry before reattaching components to prevent moisture-related problems.
Seasonal Checks and Storage Tips
At the start and end of each season, take a moment to thoroughly check all attachments. Replace any worn-out parts to avoid mishaps during use. Additionally, proper storage can prolong the life of your equipment. Keep the attachments in a dry, cool place, and consider using a protective case to avoid physical damage. I’ve learned that a little bit of care goes a long way in maintaining efficiency and saving on replacement costs.
Lastly, if you’re keen on keeping your tools in top shape, consider reading up on other maintenance tips, such as how to clean an old aquarium glass. The principles of cleanliness and care are universally applicable, no matter the equipment.
.jpg)

.jpg)


