


To start using your high-pressure cleaner with a water supply, ensure you have the correct adapter. Most garden hoses and water outlets require specific connectors, so check your equipment to find the right fit. I remember the first time I set up mine; I was excited but slightly overwhelmed by the different attachments available. It’s crucial to have the right one to avoid leaks and ensure a steady flow of water.
Next, attach the water inlet hose to the cleaner. Make sure it’s tightly secured to prevent any water loss during operation. I once had a loose connection that not only wasted water but also reduced the pressure significantly. Always double-check these connections before starting your cleaning task.

Finally, turn on the water supply before powering up the machine. This step is essential to prevent any damage to the pump. In my experience, I’ve learned that starting the cleaner without a proper water supply can lead to costly repairs. Once everything is set and the supply is flowing, you’re ready to tackle those tough cleaning jobs with ease.
Connecting Your High-Pressure Cleaner to a Water Supply
Ensure the water inlet of your unit is clean and free from debris. A quick inspection can prevent clogs that may affect performance. Next, take the hose specifically designed to fit your model. It’s crucial to use the right diameter to avoid any leaks or pressure loss.
Attach one end of the hose securely to the water source. Depending on the type of fitting, you may need to push and twist it to ensure a tight seal. Always double-check that the connection is firm. After that, connect the other end to your cleaner’s inlet. Similar to the previous step, make sure it’s tightly secured to prevent any mishaps during operation.
Checking for Leaks
Before starting the machine, turn on the water supply. Inspect all connections for leaks by running your hand over the joints. If you feel any moisture, tighten the fittings again. It’s better to address these issues now rather than during your cleaning task.
Preparing for Operation
Once you’ve confirmed everything is secure and leak-free, turn on your cleaner. Allow it to draw water for a minute before you start your cleaning. This will ensure that the system is primed and ready for action. I’ve seen too many people rush this step, leading to air pockets that can affect the unit’s performance. A little patience goes a long way!
Choosing the Right Pressure Washer for Your Garden Tap
For optimal performance, select a model with a flow rate of at least 6-8 litres per minute. This ensures sufficient water supply from your faucet without overwhelming the plumbing. I recall a time when I opted for a machine with a lower flow rate, only to face frustrating interruptions. The cleaning process became tedious, and I learned the hard way that flow matters.
Look for units that are compatible with standard UK hose fittings. The last thing you want is to face compatibility issues when you’re ready to start cleaning. I once ended up at the hardware store scrambling for adapters because my chosen device didn’t fit my existing hoses. A simple check on specifications can save significant hassle.
Consider the pressure rating. For typical outdoor tasks, a pressure level between 100 and 150 bar is usually sufficient. I’ve often found myself recommending machines in this range, as they provide the right balance for tasks like cleaning patios, vehicles, and garden equipment without causing damage.
Weight and portability are crucial factors too. If you need to move your machine around frequently, choose a lightweight model with wheels. I remember lugging a heavy unit up and down the garden steps, wishing I had opted for something more manageable. Convenience can make a world of difference during a long cleaning session.
Lastly, pay attention to the warranty and support offered by the manufacturer. A solid guarantee can give you peace of mind. I’ve encountered various brands, and those with robust customer service made a significant difference when I faced minor issues. It’s always comforting to know you have support if something goes wrong.
Identifying the Type of Connection for Your Outdoor Faucet
Begin by closely examining your outdoor fixture. Most commonly, you will encounter two types of fittings: threaded and quick-connect. Understanding these will save you time and effort.
Threaded Connections
If your fitting has visible threads, it’s likely a threaded connection. These typically measure either ½ inch or ¾ inch. Use a ruler or measuring tape to confirm the diameter. For this type, you’ll need a compatible adaptor that can screw onto the threads securely. Remember, a rubber washer can help prevent leaks.
Quick-Connect Fittings
Some installations feature a quick-connect design, allowing for effortless attachment and detachment. Usually, these have a push-and-click mechanism. If you have this type, make sure to check the diameter, as sizes can vary. Adapters for these fittings are generally easier to find in hardware stores, ensuring a seamless fit.
In my experience, having the right adaptor can make all the difference in ensuring a secure and leak-free connection. Measure twice, shop once, and you’ll be well on your way to effective outdoor cleaning.
Required Tools and Accessories for Connection
To successfully establish a link between your cleaning unit and the outdoor faucet, you’ll need a selection of specific tools and accessories. First off, a quality hose connector is a must. Look for a universal connector that fits various faucet sizes; this will save you from the hassle of incompatible parts.
A sturdy garden hose is equally important. Opt for one that is at least 10 metres long, which provides ample reach without excessive strain. Ensure it is rated for high flow to maintain optimal water pressure. An adjustable nozzle or spray gun can enhance versatility, allowing you to switch between different spray patterns as needed.
Adapters and Fittings
Depending on your faucet type, you may require specific adapters or fittings. For instance, if your faucet has a different threading, an adaptor will bridge the gap. Always check the thread size before purchasing to avoid any mismatches. A hose clamp can also be handy; it secures the connection and prevents leaks during operation.
Additional Considerations
Don’t forget about a filter or strainer to prevent debris from clogging the inlet of your unit. This simple addition can significantly extend the lifespan of the equipment. Lastly, a pair of adjustable pliers can assist in tightening connections, ensuring everything is secure before starting your task. With these tools and accessories at hand, you’ll be well-prepared for a seamless setup.
Preparing the Water Source for Connection
Ensure the water source is turned off before beginning preparations. Check for any leaks or damage in the faucet. A faulty tap can lead to pressure loss, affecting performance. If you notice any issues, repair or replace the tap before proceeding.
Clear the Area
Remove any obstructions around the water outlet. A clean space allows for easier access and reduces the risk of tripping over hoses or tools later on. Keep the area tidy to facilitate a smooth setup process.
Inspect Water Flow
Turn on the tap briefly to check the water flow. It should be consistent and strong. If the flow is weak, consider cleaning or replacing filters within the tap, or check for blockages in the connecting hoses. A steady supply is crucial for optimal performance.
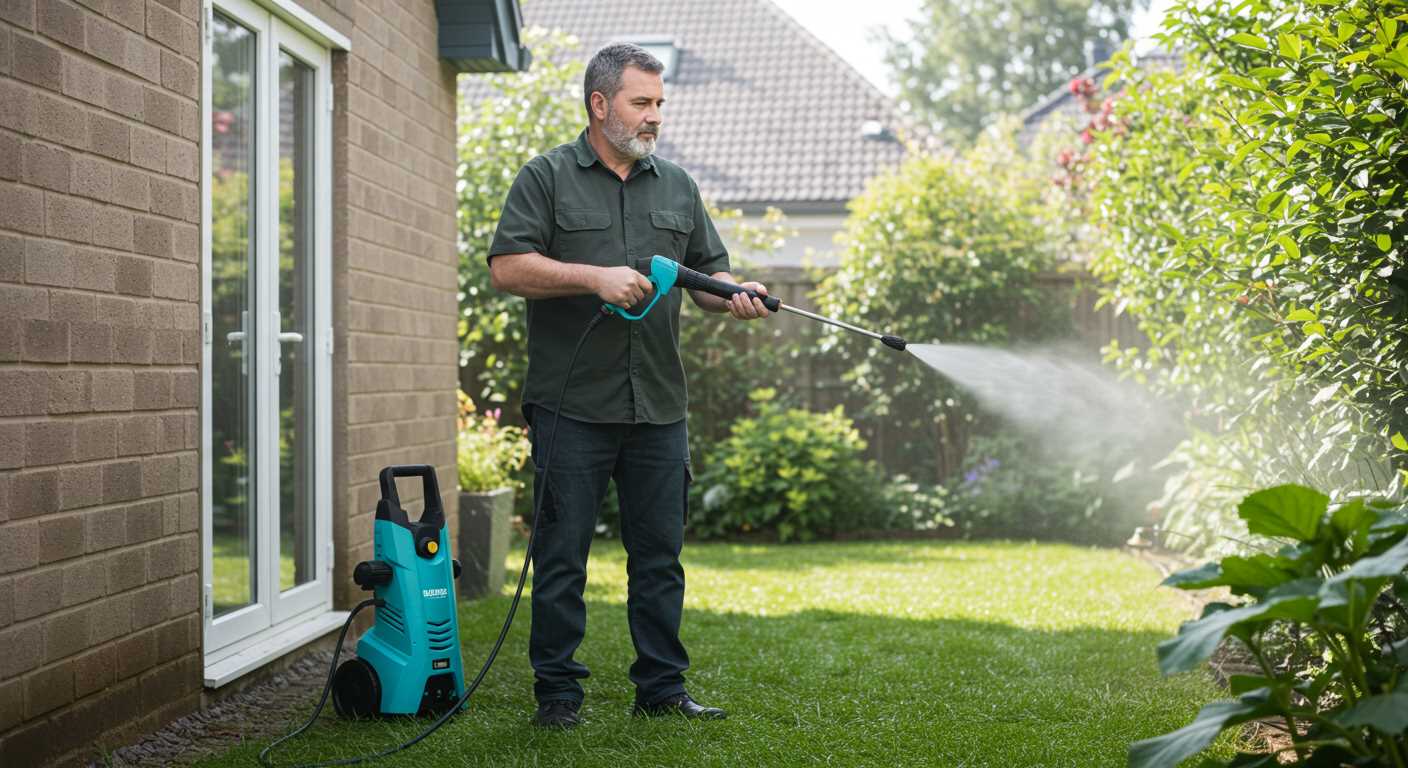
Attaching the Hose to the Garden Tap
Begin by ensuring you have the correct hose fitting that matches your water source. Typically, this involves a simple twist-on connector. Align it properly with the threaded end of the tap and apply gentle pressure while turning clockwise until it’s secure. Avoid overtightening to prevent damage.
Check for Leaks
Once attached, turn on the water supply slowly. Observe the connection point for any signs of leakage. If water seeps out, you may need to adjust the connection or use plumber’s tape to seal any gaps. In my experience, a tight seal is crucial to avoid interruptions during use.
Final Preparations

Before starting your equipment, make sure to check the hose for kinks or damage. A smooth flow is essential for optimal performance. It’s also wise to review the water quality; impurities can affect the equipment’s efficiency. For those cleaning projects, I often recommend using the best chemical for pressure washing vinyl siding to achieve the best results.

Attaching the Hose to the Nozzle
To ensure a seamless water flow, the first step involves securing the hose to the nozzle of your cleaning device. Align the end of the hose with the inlet on the unit, ensuring the threads match perfectly. I recall a time when I rushed this part and ended up with a leak that wasted both water and time. Don’t make that mistake. Make sure to hand-tighten the connection to avoid cross-threading, which can damage the fittings.
Using the Right Connectors
Choosing the correct connectors is vital. Typically, these will either be quick-release or screw-on types. I prefer quick-release connectors for their ease of use, especially during larger tasks. If you’re dealing with stubborn fittings, a pair of pliers can provide just the right grip, but be cautious not to overtighten. A snug fit is ideal to prevent any leaks.

Testing for Leaks
After securing the hose, it’s time to test the connection. Turn on the water supply slowly and watch for any signs of leakage. If you notice any, it’s crucial to turn off the water, disconnect, and check the O-ring or washer inside the connector. A quick replacement can save you a lot of hassle. I’ve learned that a small amount of preventative maintenance goes a long way in ensuring smooth operation.
Checking for Leaks After Connection
After securing your equipment, it’s crucial to verify that there are no leaks. Start by turning on the water supply and observing the connections closely. Any sign of dripping or moisture indicates a faulty seal or loose fitting. Adjusting the connections may often resolve the issue.

Steps for Leak Detection
Follow these steps to identify potential leaks:
- Inspect the hose and fittings for cracks or damage.
- Check all connection points. Ensure that washers are seated properly.
- Run the system for a few minutes and watch for any water escaping.
Common Leak Areas
Focus on these typical leak spots:
| Connection Type | Potential Issues |
|---|---|
| Hose to Adapter | Loose fitting or worn washer |
| Adapter to Water Source | Improper alignment or debris |
| Hose Couplings | Cracked hose or missing seals |
If you spot a leak, immediately turn off the water and tighten the fittings. If the problem persists, consider replacing any damaged components. Regular maintenance of your setup will help prevent leaks in the future, ensuring a smooth operation during your cleaning tasks.
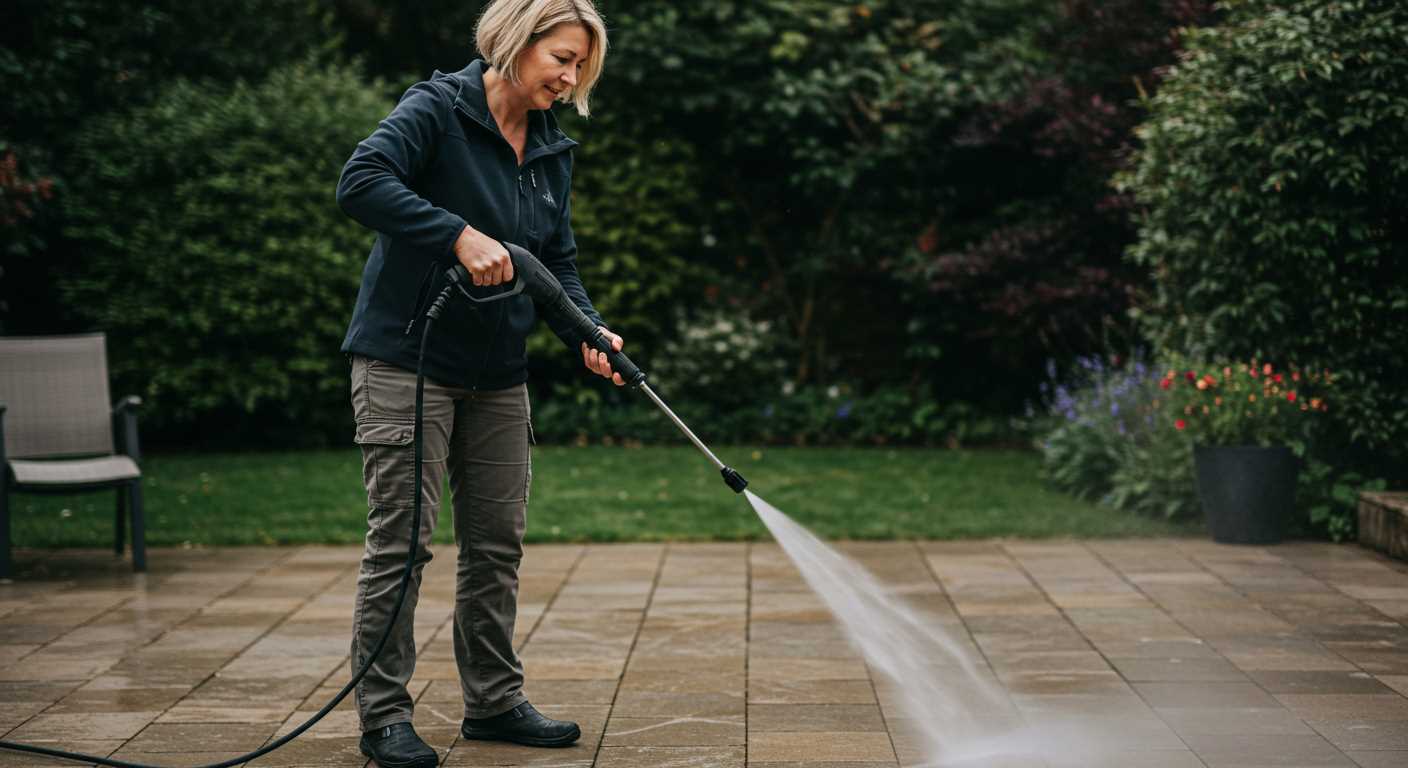
Adjusting Water Pressure for Optimal Performance
For effective cleaning, it’s crucial to set the water flow correctly. An ideal rate enhances the machine’s capability while preventing damage. Start by checking the specifications of your model. Typically, a medium duty electric pressure cleaner operates best with a water flow of around 5-7 litres per minute.

Consider these steps to adjust the flow:
- Identify the water supply’s capacity. If your source is capable of providing 10 litres per minute, you’re in a good position.
- Use a flow meter to measure the output from the supply. This tool can help you determine if adjustments are necessary.
- If the water flow is insufficient, check for any blockages in the hose or fittings. Ensure that your connections are seamless.
In my experience, using a medium duty electric pressure washer has shown that small adjustments can lead to drastic improvements. I once had a unit that struggled with low flow. After clearing blockages and ensuring a steady supply, the difference was remarkable. The cleaner removed grime effortlessly, showcasing its true potential.
Monitor the machine during use. If you notice fluctuations in performance, it’s worth revisiting your water supply. Investing in a quality hose can also ensure consistent flow, which is key for optimal results.
Lastly, remember that too much pressure can cause damage to certain surfaces. Always test on a small area first to gauge how your equipment interacts with the surface being cleaned.
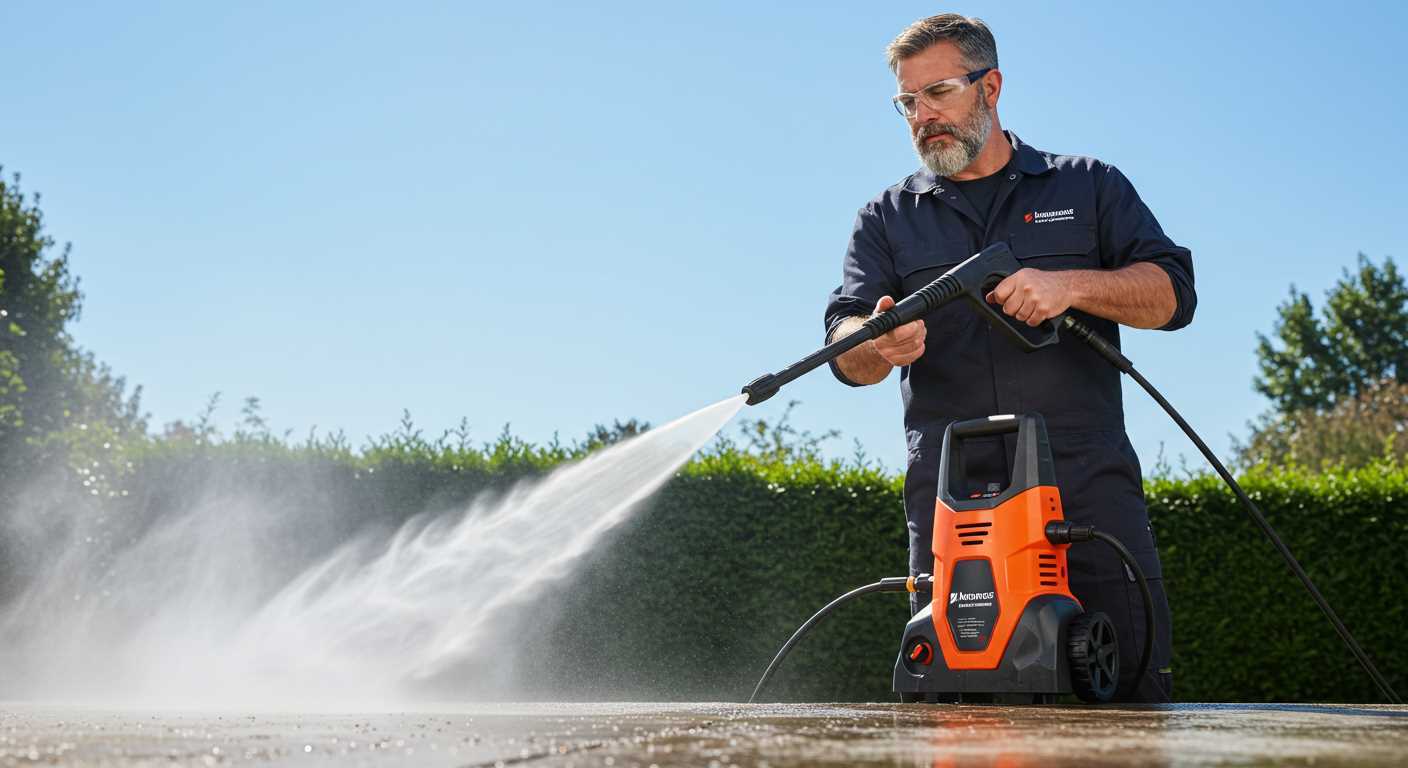
Safety Tips While Using a High-Pressure Cleaner
Always wear appropriate protective gear, including safety goggles, gloves, and sturdy footwear. This shields you from debris and water spray.
- Maintain a safe distance from surfaces. Keep the nozzle at least 30 cm away to avoid damage or injury.
- Ensure the area is clear of people and pets. High-velocity water can cause injury or damage.
- Check the electrical connections if your device is electric. Use a residual current device (RCD) to prevent electric shock.
- Inspect hoses and nozzles for wear and tear before use. Replace any damaged components to avoid leaks or failures.
Be mindful of the pressure settings. Start at a lower setting and gradually increase it as needed. This prevents unintended harm to the surfaces you’re cleaning.
- Never point the nozzle at yourself or others, even if the unit is off.
- Do not use the unit on ladders or unstable surfaces. Always maintain a firm footing to avoid accidents.
- Be cautious with chemicals. If using detergents, ensure they’re compatible with your equipment and safe for the environment.
- After finishing, disconnect the equipment safely and store it properly to prevent damage or accidents.
Regular maintenance is key. Clean the filters and check for clogs after each use to keep everything in optimal condition.
Lastly, always read the manufacturer’s manual. It contains specific instructions tailored to your model, ensuring a safe and effective experience.
FAQ:
What tools do I need to connect a pressure washer to a garden tap?
To connect a pressure washer to a garden tap, you will typically need a few basic tools and accessories. Firstly, ensure you have a suitable pressure washer with the correct hose. You will need a garden hose that connects to your tap, and an adapter if your pressure washer has a different connection size. Most pressure washers come with a quick-connect fitting, but if yours doesn’t, you may need a universal adapter. Additionally, a pair of pliers may help tighten connections securely.
Can I use any garden tap to connect my pressure washer?
Most standard garden taps are suitable for connecting a pressure washer. However, it’s important to check the water flow rate and pressure specifications of your pressure washer to ensure compatibility. If your garden tap has a low flow rate, it might not provide sufficient water for the pressure washer to operate effectively. If you’re unsure, consult the manual of your pressure washer for specific requirements regarding water supply.
How do I connect the pressure washer to the garden tap?
Connecting a pressure washer to a garden tap is a straightforward process. Begin by turning off the tap. Attach one end of the garden hose to the tap using a hose connector, ensuring it is tight to prevent leaks. Then, connect the other end of the hose to the pressure washer inlet. If necessary, use an adapter to ensure a snug fit. Once everything is securely connected, turn on the tap slowly to allow water to flow into the pressure washer. Check for any leaks at the connections before starting the machine.
What should I do if there’s a leak after connecting my pressure washer?
If you notice a leak after connecting your pressure washer to the garden tap, first turn off the water supply. Inspect all connection points, including the hose, fittings, and any adapters used. Make sure all connections are tight and properly fitted. If a connection appears worn or damaged, consider replacing that part. After addressing any issues, turn the water back on to check if the leak persists. If the problem continues, you may need to consult the manufacturer’s instructions or seek professional assistance.
Is it safe to connect a pressure washer to a garden tap?
Yes, it is generally safe to connect a pressure washer to a garden tap as long as the equipment is used correctly and the connections are secure. Ensure that your pressure washer is designed for outdoor use and that all components are in good condition. Always follow the manufacturer’s guidelines for setup and operation to avoid accidents. Additionally, ensure that the water supply is clean and free of debris to prevent damage to the pressure washer.
How do I safely connect my pressure washer to a garden tap?
To connect a pressure washer to a garden tap, first ensure you have the appropriate adapter for your pressure washer’s inlet. Begin by turning off the tap to prevent any water spillage. Attach the hose from the pressure washer to the garden tap using the adapter. Make sure the connection is secure to avoid leaks. Once connected, you can turn on the tap slowly to allow water to flow into the pressure washer. Check for any leaks at the connection point before starting the washer. This will ensure a safe and efficient operation.
.jpg)


