


Attach the hose securely to the water inlet, ensuring a snug fit to prevent leaks. I’ve come across many models that can be a bit finicky with connections, so double-checking this step saves you from a soggy mess later on. Always use a hose rated for cold water if you’re working with a standard unit, as hot water can damage some components.
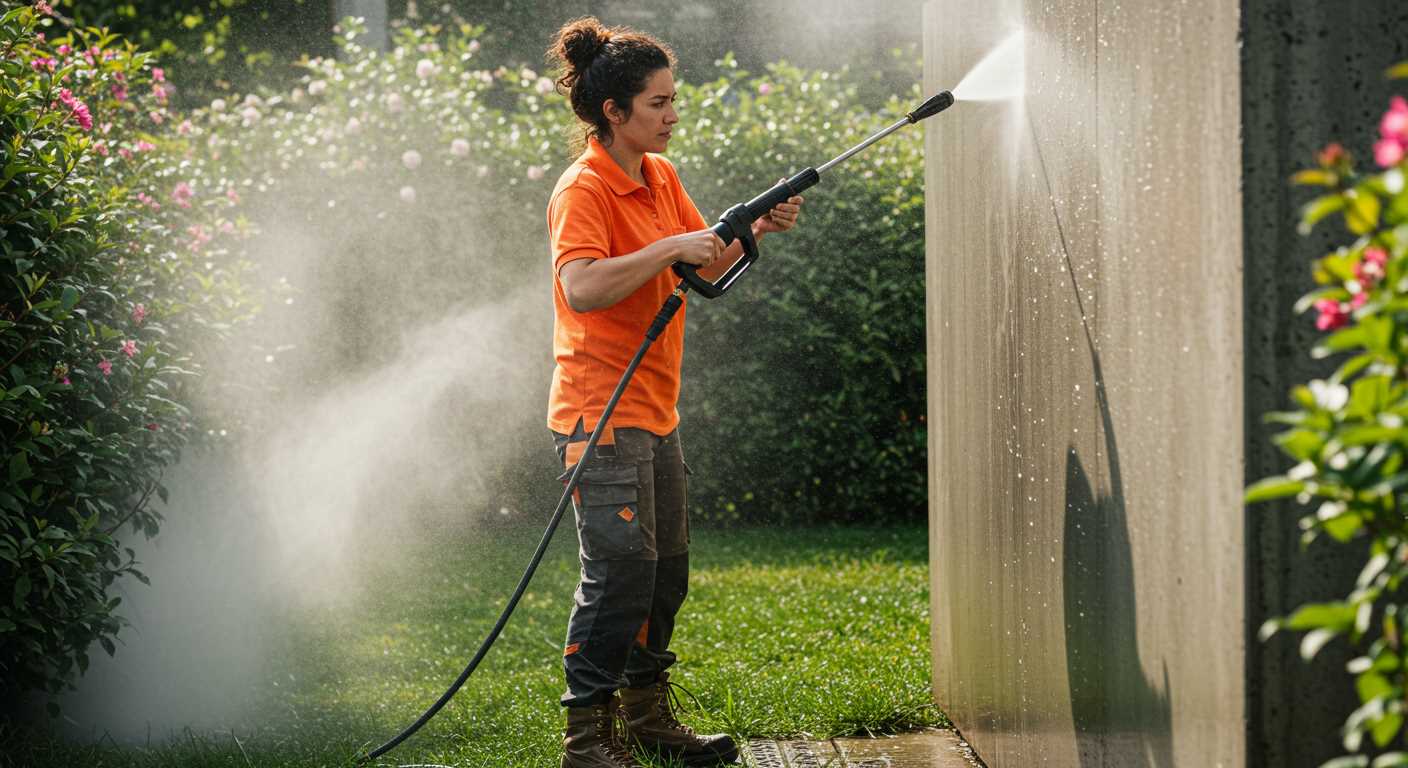
Next, connect the high-pressure nozzle. I remember the first time I used one of these machines; I struggled with the nozzle attachment. Make sure it clicks audibly into place. That sound is your assurance that it’s locked and ready to deliver the power you need. Choose the right nozzle for your task; a wider spray works well for large areas, while a narrow jet is perfect for stubborn stains.

Before you start, fill the detergent tank if your model supports it. I often recommend using a cleaner specifically designed for this type of equipment. Dilute according to the manufacturer’s instructions; an overly concentrated solution can damage surfaces and the machine itself. Trust me, learning this the hard way can be quite expensive.
Once everything is connected and primed, turn on the water supply and power up the unit. Allow it to run for a minute to clear any air from the system. I’ve seen many users jump in too quickly and end up with air locks, leading to inefficient cleaning. Patience pays off here!
Setting Up Your High-Pressure Cleaner
Begin with connecting the water supply. Ensure the hose is firmly attached to the tap and your unit. A secure fit prevents leaks and optimises water flow. I’ve seen too many setups fail at this stage simply because of a loose connection.
Next, attach the high-pressure hose. Make sure it clicks into place; you should hear a definitive sound. This guarantees there’s no chance of it coming loose during operation. I once had a client experience a mishap due to a poorly secured hose, resulting in a rather messy situation.
Now, it’s time to select the right nozzle for your task. Different nozzles deliver varied spray patterns and pressure levels. For heavy-duty cleaning, I often recommend starting with a narrower spray before adjusting to a wider one. It’s all about finding that perfect balance for the surface you’re working on.
Before powering on, double-check all connections and ensure the detergent tank is filled if you’re using cleaning solutions. I’ve often found that a little preparation saves a lot of hassle down the line. Mixing the right solution is key; follow the manufacturer’s guidelines for dilution ratios to avoid damage.
Once everything is in place, plug in the unit and turn on the water supply. Engage the trigger to release any air trapped in the system. This step is often overlooked, but it ensures a consistent flow of water right from the start. I remember the first time I missed this; it took me a while to realise why the cleaner wasn’t operating as expected.
Finally, adjust the pressure settings based on the task at hand. Higher pressure is effective for tough grime, while lower settings are gentler on delicate surfaces. Experiment with different settings to see what works best for your specific needs. In my experience, taking the time to adjust pressure can significantly improve the outcome of your cleaning project.
Choosing the Right Location for Your Cleaning Equipment

Pick a spot that’s close to a water source. This makes setup seamless and reduces the hassle of moving hoses. I’ve found that being within a short distance from your tap saves a lot of time and effort.
Ensure the ground is even and stable. Uneven surfaces can lead to instability, which I learned the hard way during a particularly slippery cleaning session. If your machine tips over, it can cause leaks or damage.
Consider the proximity to the area you’ll be cleaning. If you’re washing a car, a location near your driveway is perfect. For larger projects like patios or driveways, having your unit set up nearby can streamline your process.
Think about drainage. Avoid placing your equipment in areas where water tends to pool. I once set up near a flower bed, and the excess water caused quite the muddy situation. A well-drained area helps prevent unnecessary mess.
Sunlight exposure matters too. If you use your device in direct sunlight, it can overheat. I learned this during a hot summer day; the machine struggled to maintain pressure. A shaded spot can keep your unit running smoothly.
Remember to account for noise. If you live in a neighbourhood where noise complaints are common, choose a location that minimises disturbance to others. I’ve had to delay my cleaning sessions out of respect for my neighbours’ peace.
Lastly, consider accessibility for maintenance. I always make sure I have enough space to perform routine checks and cleanings without feeling cramped. A little room goes a long way in ensuring your equipment stays in peak condition.
Connecting the Water Supply to Your Pressure Washer
To ensure optimal performance, connect your water source using a quality hose. I always recommend using a hose rated for high pressure, generally a minimum of 1/2 inch in diameter. This ensures sufficient water flow and prevents kinks that could restrict water delivery.
Start by securely attaching one end of the hose to the water inlet on the cleaning unit. Make sure it fits snugly to avoid leaks. The other end should connect to your tap. If your water supply has a filter, check it regularly to prevent blockages that could affect operation.
Before starting, turn on the water supply fully. It’s a common mistake to underestimate the importance of this step. Insufficient water can lead to pump failure. I once encountered a client whose equipment malfunctioned because the water wasn’t fully turned on–an easy fix that could have saved a costly repair.
Check for leaks after connection. Turn on the machine briefly to observe any issues. A small amount of water around the fittings is manageable, but a steady drip indicates a need for tightening or replacing the seals.
If using a long hose, consider a hose reel or a storage system. It keeps the area tidy and prevents wear on the hose, which can lead to costly replacements. From my experience, a well-organised workspace enhances efficiency and safety.
Finally, inspect the water supply for pressure. If you’re in an area with low water pressure, you might need to adjust your setup or consider a pressure booster. I once had a situation where a low-pressure supply hampered a project, leading to frustration. A quick check could have prevented that delay.
Attaching the High-Pressure Hose Securely
To ensure optimal performance, connecting the high-pressure hose properly is critical. Here’s how to achieve a secure attachment:
- Inspect the hose and fittings for any damage or wear. A compromised hose can lead to leaks or bursts during operation.
- Align the fitting of the hose with the connector on the machine. Ensure it matches the designated slot to avoid cross-threading.
- Push the hose fitting into the connector firmly. You should hear a click, confirming a secure lock.
- For additional security, turn the fitting clockwise until it cannot turn anymore. This step ensures that it’s tight enough to prevent accidental disconnection during use.
In my experience, I often noticed issues arising when users overlooked this step. One time, a colleague had a hose that wasn’t attached properly, resulting in a messy situation during a big clean-up job. The pressure was so high that it caused water to spray everywhere, creating a slippery hazard and wasting time.
After attaching the hose, it’s wise to perform a quick test. Turn on the machine briefly to check for any leaks at the connection point. If you see water escaping, disconnect and recheck your fittings.
Using a hose with a quick-connect system can also make life easier. It allows for faster attachments and detachment, perfect for those who frequently switch between different cleaning tasks.
Finally, always store the hose properly after use to avoid kinks and damage. A well-maintained hose will last longer and perform better when you need it the most.
Selecting the Appropriate Nozzle for Your Task
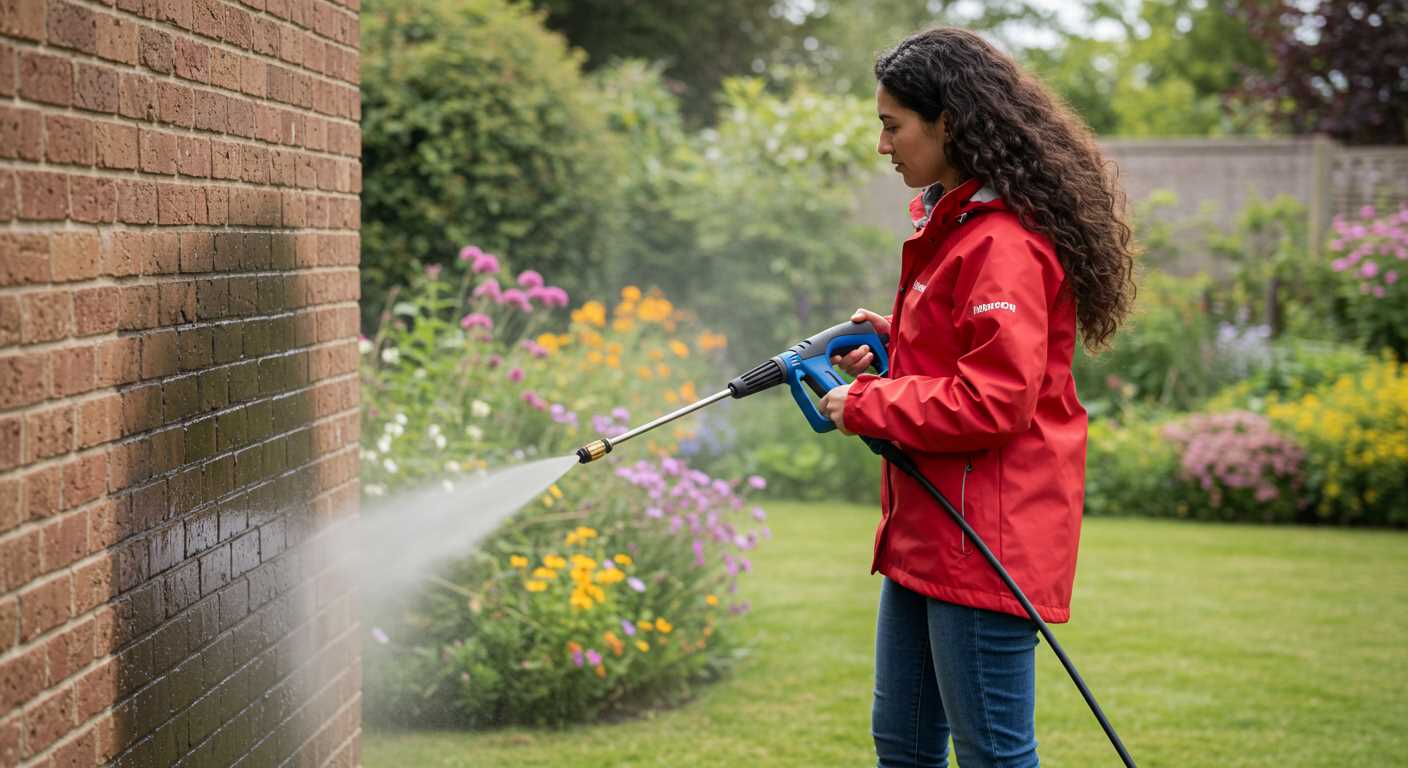
For optimal results, always match the nozzle type to the specific cleaning challenge. A fan spray nozzle is ideal for broad surfaces like patios, providing an even distribution of water without damaging the material. I recall a time when I tackled an old driveway using this nozzle; it effortlessly removed built-up grime and moss.
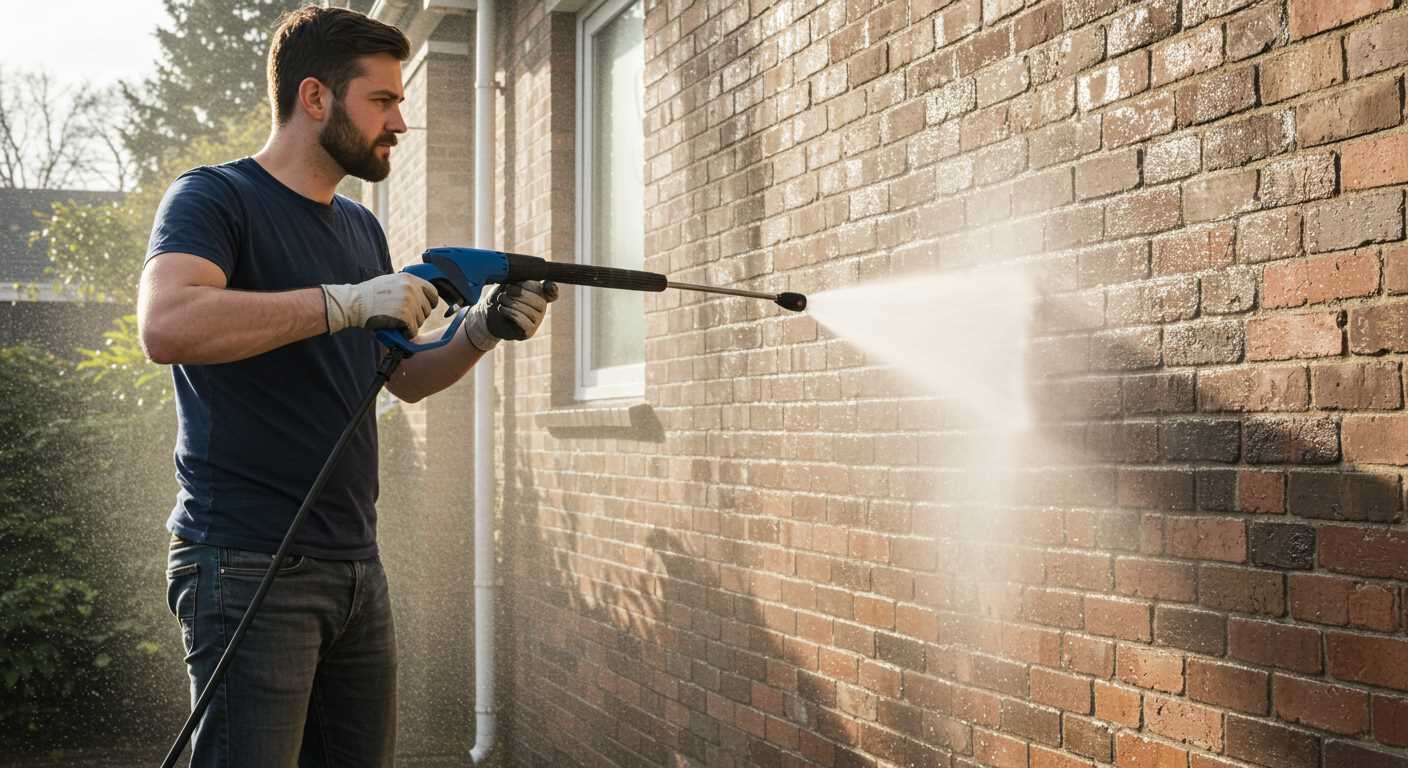
For tougher jobs, such as removing paint or heavy stains, a zero-degree nozzle delivers a concentrated stream of water. I once used this on a stubborn graffiti mark on a brick wall. The focused jet made quick work of the task, but caution is necessary as it can cause damage to softer surfaces.

For delicate surfaces, such as cars or wooden decks, a 25-degree nozzle is your best friend. This nozzle offers a gentle spray that cleans effectively without risk of harm. I remember washing my car with this attachment, leaving it spotless while protecting the paintwork.
Lastly, always consider the material you’ll be cleaning. A nozzle suitable for concrete may not be right for wood. I learned this the hard way when I used a more aggressive nozzle on a wooden fence, resulting in splintering. Adjusting the nozzle to the task at hand can save time and prevent mishaps.
Powering Up Your Karcher Pressure Washer
Ensure your appliance is positioned near a suitable power outlet. If the cord is short, use an extension lead that meets the required specifications to avoid overheating. During my time as a consultant, I often encountered users who overlooked this, leading to frustrating situations and even equipment damage.

Before connecting, check that the voltage matches the specifications on the machine’s label. This simple step can save you from potential electrical issues. I once had a colleague who connected to a higher voltage supply, resulting in a costly repair and downtime.
Once you’ve confirmed the power source, plug in the device firmly. Pay attention to the cord; it should not be pinched or damaged. A clean connection can prevent power fluctuations. I had a client whose machine would intermittently shut off, which turned out to be caused by a frayed cord.
After connecting the power, ensure that all other components are securely attached; an unsecured connection can lead to improper operation when you start the unit. I learnt this the hard way when I rushed through the setup and ended up with water spraying everywhere instead of a clean surface.
Finally, before powering on, take a moment to double-check everything. A thorough inspection can save you time and trouble. I’ve seen firsthand how a quick look can prevent mishaps and ensure a smooth start to any cleaning task.
Performing a Safety Check Before Use
Before starting your cleaning session, it’s vital to conduct a thorough inspection. This ensures not only your safety but also the longevity of the equipment. First, check for any visible damage on the unit, including frayed cables, leaks, or cracks in the casing. I recall a time when I overlooked a small crack, and it led to a significant malfunction during use. Avoid that scenario by inspecting every part meticulously.
Key Safety Points to Review
| Safety Aspect | What to Look For |
|---|---|
| Electrical Connections | Ensure all plugs and sockets are dry and free from moisture. Replace damaged cords immediately. |
| Water Supply | Check hoses for kinks or breaks. A compromised hose can lead to pressure loss or accidents. |
| Nozzle Condition | Inspect for blockages or damage. A faulty nozzle can alter the spray pattern and increase the risk of injury. |
| Protective Gear | Wear appropriate clothing, gloves, and eye protection. I learned this the hard way when a stray pebble hit my glasses. |
Additional Recommendations
Always ensure the area is clear of bystanders, especially children and pets. I once had a near-miss with a curious dog that darted into my workspace. Safety should always be your priority. Also, consider the surface you’re cleaning. Delicate materials might require a gentler approach, while tougher surfaces can handle higher pressure.
Finally, if you’ve never used a bucket-powered model before, they can be a great alternative for specific tasks. For more information on these units, check out this bucket powered pressure washer guide.
Understanding the Control Panel and Settings
Familiarising yourself with the control panel is key to optimising performance. The interface typically features a power button, a pressure adjustment dial, and a detergent selection switch. Each component plays a role in tailoring the cleaning experience to your needs.
Power and Pressure Controls
Start with the power button; it’s straightforward. The pressure adjustment dial allows you to increase or decrease the intensity. For delicate surfaces like vehicles or painted fences, a lower setting is advisable. Conversely, for tougher grime on patios or driveways, crank it up. My first time using a unit, I underestimated the pressure and ended up with a few unintended water spots on my car. Lesson learned!
Detergent Settings
The detergent selection switch is another vital feature. Some models offer a low and high setting. For jobs requiring cleaning agents, always begin with the lower setting to avoid foaming that’s too aggressive. I once used a high setting on a couch cleaning project, and it created a bubbly mess. If you’re interested in similar cleaning techniques, check out this guide on how to clean microfiber couch with steam cleaner.
When you adjust the settings, take note of how the equipment responds. It’s all about finding the right balance between power and gentleness, ensuring you get the job done without damaging surfaces. Get to know your model, and soon it will feel like second nature.
.jpg)


