


The ideal ratio for combining your liquid soap with water is typically 1:10. This means for every part of the cleaning agent, you should mix it with ten parts of water. A simple measuring cup can help you achieve this accurately, ensuring optimal performance without risking damage to your machinery.
In my experience, using warm water makes a noticeable difference. It helps the mixture blend more effectively and enhances the cleaning power. Just remember not to exceed a temperature of 60°C, as higher temperatures can degrade the soap, reducing its efficacy.
When preparing your mixture, it’s advisable to use a separate container. This allows for thorough mixing before adding it to your equipment. Pouring the solution into the tank directly can lead to uneven distribution, which might affect cleaning results.
Always consult your equipment’s manual for any specific recommendations regarding cleaning agents. Some models may have restrictions on certain products, and adhering to these guidelines will prolong the life of your machine.
Lastly, safety should never be overlooked. Wearing gloves and eye protection is wise, as even diluted cleaning agents can cause irritation. Enjoy your cleaning tasks with the right approach and proper precautions!
Mixing Ratio for Optimal Cleaning Solution
For the best results, I recommend using a ratio of 1 part detergent to 10 parts water. This provides a strong enough solution to tackle grime while being gentle on surfaces.
Steps to Prepare Your Solution
1. Gather a clean container for mixing. A bucket works well for this purpose.
2. Measure 1 cup of the liquid soap and pour it into the bucket.
3. Add 10 cups of warm water to the bucket. Warm water helps the soap mix more thoroughly.
4. Stir the mixture gently until it becomes consistent. Avoid creating excessive suds.
Using the Solution
Fill the detergent tank of your device with the prepared mixture. If your machine has adjustable pressure settings, start with a lower setting to test on a small area. This ensures you won’t damage any surfaces.
| Ingredients | Measurement |
|---|---|
| Liquid soap | 1 cup |
| Water | 10 cups |
After use, always rinse the surfaces thoroughly with clean water to remove any soap residue. This ensures your cleaning is effective and leaves no slippery films behind.
Choosing the Right Concentration of Dawn
For optimal results, I recommend a ratio of 1 part soap to 10 parts water. This concentration effectively cuts through grime without risking damage to surfaces. In my experience, using a stronger mix can lead to residue that’s difficult to rinse off, while a weaker solution may not tackle tough stains efficiently.
When tackling various tasks like cleaning patios or driveways, adjust the mixture according to the level of dirt. For heavily soiled areas, a 1:8 ratio works wonders, but ensure to rinse thoroughly afterwards to avoid any buildup. I’ve seen many users underestimate the importance of rinsing, leading to streaks or soap scum.
It’s also wise to test a small area first. This helps you gauge how well the mixture works on the specific surface you’re treating. Some materials may react differently to certain concentrations. If you’re looking for a suitable cleaner for patios, consider this patio cleaner solution for pressure washer for thorough cleaning.
Lastly, always remember that environmental factors like temperature and humidity can affect how well your solution performs. On hot days, the soap may dry faster, requiring more frequent rinsing. Adjust your approach based on these conditions for the best outcome.
Understanding the Benefits of Dilution
Using a concentrated solution can lead to damaging surfaces when cleaning. The art of mixing the right amount of detergent not only enhances cleaning efficiency but also safeguards delicate materials. In my years of experience, I found that an appropriately mixed cleaner can penetrate grime effectively without causing harm.
One significant advantage is the reduction of residue left on surfaces. A well-balanced mixture ensures that the solution adheres to dirt and grime, allowing for easier rinsing and a streak-free finish. I recall a time when I underestimated the concentration and ended up with a sticky residue on a vehicle, which only added to my workload.
Another key benefit lies in cost-effectiveness. By creating a proper mixture, you maximise the use of your cleaning agent. This practice not only saves money but also reduces waste, which is increasingly important in today’s environmentally conscious world. I often recommend mixing small batches to avoid unnecessary excess, as this ensures freshness and efficacy.
Moreover, safety is paramount. Many concentrated cleaners can be harsh on skin and eyes. A diluted solution can mitigate these risks while still delivering powerful cleaning results. When I first started in this industry, I learned the hard way about the importance of protective gear, but a well-prepared mixture greatly reduced exposure to harmful chemicals.
Optimising the cleaning process with a proper blend allows for quicker results. I’ve experienced the frustration of battling stubborn stains, only to discover that a simple adjustment in my mixture could have saved time and effort. It’s about working smarter, not harder.
Lastly, for those involved in automotive care, a well-mixed solution can enhance the performance of various tools, including the best air compressor for car restoration. When everything works in harmony, the results speak for themselves, providing a cleaner and more polished finish.
Required Equipment for Mixing Solutions
Start with a clean, empty container. I always recommend using a plastic bucket with a capacity of at least 5 gallons. This size ensures there’s enough room to mix thoroughly without spills. Avoid metal containers, as they can react with some cleaning agents and create unwanted residues.
A sturdy stirring tool is a must. I’ve found that a long wooden stick or a plastic mixer works best. It allows for easy mixing without scratching the container. When I first began experimenting with various cleaning products, I often underestimated the importance of this tool until I struggled to get a consistent mixture.
Protective gear is crucial. Always wear gloves and safety goggles during the mixing process. I recall a time when I neglected to wear gloves and ended up with irritated skin. Your safety should never be compromised, especially when handling concentrated solutions.
Measuring cups or a graduated cylinder are necessary for accuracy. I’ve seen many people eyeball their measurements, leading to ineffective mixtures. Using precise measurements ensures optimal results. When I switched to a measuring system, I noticed a significant improvement in cleaning efficiency.
Lastly, a spray bottle or a dedicated dispenser is ideal for transferring the mixture from the bucket to your cleaning device. A good spray applicator allows for even distribution and better results. I’ve tested various types, and those with adjustable nozzles provide the most versatility for different tasks.
Step-by-Step Guide to Diluting Dawn

Start by gathering your materials: a measuring cup, a spray bottle, and warm water. The temperature helps the solution mix better. Aim for a clean container to ensure no residues interfere with the mixture.
Mixing Instructions
- Measure out the concentrated liquid. A common ratio is 1 part soap to 10 parts water. Adjust according to the task at hand–more stubborn grime might need a stronger mix.
- Pour the measured soap into the spray bottle.
- Slowly add warm water to the bottle. This prevents excessive foaming.
- Cap the bottle and gently swirl to combine the ingredients. Avoid shaking vigorously to keep the bubbles at bay.
Storage Tips
- Store any leftover mixture in a cool, dark place to maintain its effectiveness.
- Label the bottle clearly, noting the contents and the dilution ratio for future use.
In my experience, this method ensures a consistent and reliable solution, perfect for various cleaning projects. Adjust the concentration based on the specific grime you’re tackling, and you’ll find optimal results every time.
Safety Precautions During the Mixing Process
Always wear protective gear, including gloves, goggles, and a mask, to avoid skin irritation and respiratory issues while handling cleaning agents. Ensure you work in a well-ventilated area to prevent the accumulation of fumes.
Proper Storage and Handling
- Store all cleaning solutions in a cool, dry place away from direct sunlight.
- Keep all chemicals out of reach of children and pets.
- Use dedicated containers for mixing; avoid reusing containers that previously held other substances.
Mixing Environment
- Choose a flat, stable surface for your mixing process to prevent spills.
- Have absorbent materials, such as paper towels or rags, on hand to quickly clean up any accidental spills.
- Keep a source of water nearby for rinsing hands or equipment if needed.
Be cautious of the order in which you combine substances. Always add the cleaning solution to water, never the other way around. This helps prevent splashing and reduces the risk of chemical reactions.
If you experience any adverse reactions, such as skin irritation or respiratory discomfort, cease activity immediately and seek fresh air or medical attention if necessary. Always refer to the labels on the products for specific safety instructions and first aid recommendations.
Following these guidelines can help ensure a safe and effective mixing process, allowing you to achieve optimal cleaning results without compromising your well-being.
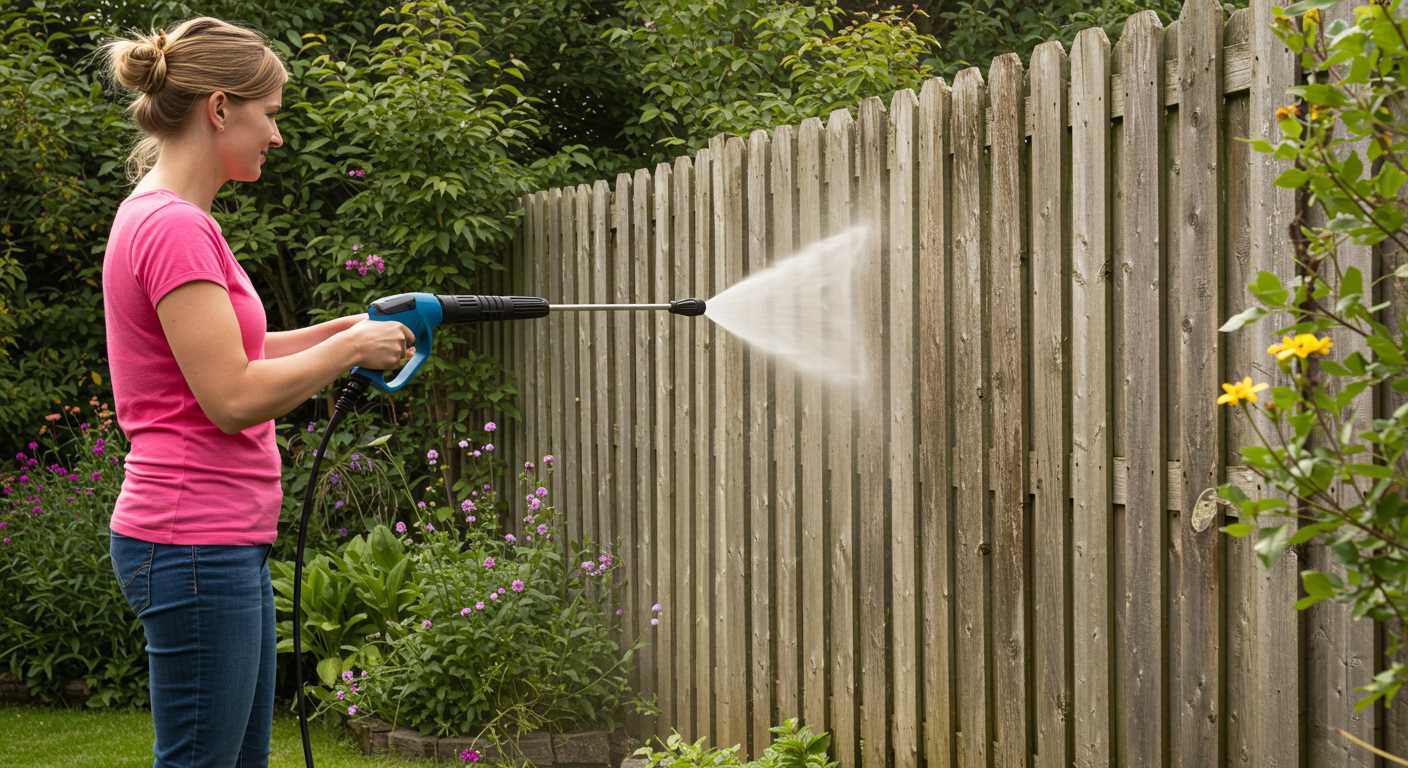
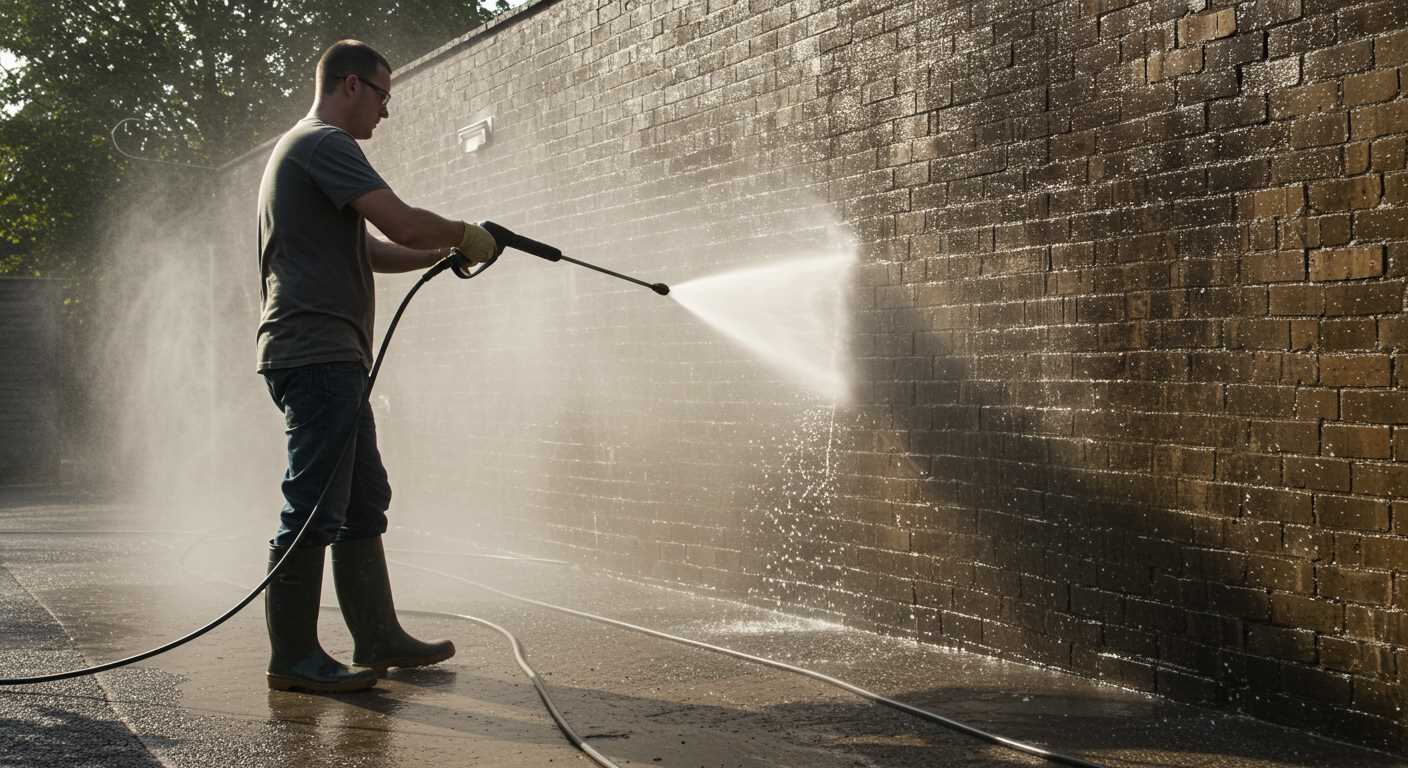
Testing the Diluted Solution in Your Pressure Washer
Begin by pouring a small amount of the mixed solution into the detergent reservoir of your cleaning machine. It’s important to use a test area to observe the results before tackling the entire project. I recommend selecting a section of a surface that’s less visible, like the corner of a patio or the bottom of a driveway. This way, you can evaluate the effectiveness without worrying about visible damage.
Once you’ve filled the reservoir, adjust the machine to the lowest setting. Start the unit and spray the test area. Watch for a few seconds to see how well the solution interacts with the surface. The results should be evident quickly–if the grime and dirt begin to break down almost immediately, you’re on the right path.
If you notice that the solution is struggling to lift dirt, it might be a sign that the mixture is too weak. In that case, consider increasing the concentration slightly in your next batch. However, be cautious; too strong a mixture can risk damaging certain surfaces, so always err on the side of caution.
After testing, it’s wise to rinse the area thoroughly to assess the final outcome. This step will show you how well the mixture worked and how easily the residue washes away. If satisfied, proceed to apply the solution to the rest of the area, using the same low-pressure setting initially to avoid any potential mishaps.
As someone who has tested numerous cleaning solutions over the years, I’ve learned that patience is key. Sometimes, a little experimentation is necessary to find the right balance that works for your specific tasks. Keep notes on what works best so you can replicate successful results in the future.
FAQ:
What is Dawn, and why is it used for pressure washing?
Dawn is a brand of dishwashing liquid known for its grease-cutting properties. It’s often used in pressure washing because it can help break down tough stains and grime on surfaces such as driveways, patios, and vehicles. Its formulation allows for effective cleaning without being overly harsh on surfaces.
How should I dilute Dawn for use in a pressure washer?
To dilute Dawn for a pressure washer, mix a small amount of the dish soap with water in a bucket. A common ratio is about 1 part Dawn to 10 parts water. This can be adjusted based on how dirty the surfaces are. Always test a small area first to ensure the mixture works well without damaging the surface.
Can I use undiluted Dawn in my pressure washer?
Using undiluted Dawn in a pressure washer is not recommended. The concentrated soap can create too many suds, which may damage the pressure washer or obstruct its functioning. Diluting the soap helps to control the suds and ensures effective cleaning without risking equipment damage.
Are there any safety precautions I should take when using Dawn for pressure washing?
Yes, when using Dawn for pressure washing, it is important to wear protective gear such as gloves and goggles to prevent skin and eye irritation. Ensure the area is well-ventilated, especially if you are using it indoors. Additionally, be cautious of slippery surfaces after applying the soapy mixture.
What surfaces should I avoid using diluted Dawn on while pressure washing?
While diluted Dawn is safe for many surfaces, it should not be used on painted surfaces, as it may strip the paint. Avoid using it on delicate materials like wood, as it can cause damage. Always check the manufacturer’s guidelines for any specific surfaces you plan to clean with a pressure washer.
What is the recommended dilution ratio for Dawn dish soap when using it in a pressure washer?
The recommended dilution ratio for Dawn dish soap when using it in a pressure washer is typically around 1 part soap to 10 parts water. This means that for every cup of Dawn, you should mix it with about 10 cups of water. However, this may vary depending on the level of grime you are dealing with, so feel free to adjust the ratio as needed. Always test a small area first to ensure that the mixture works effectively without damaging the surface you are cleaning.
.jpg)


