


Before diving into the specifics, ensure you have the right tools at hand: a screwdriver set, pliers, and a soft cloth. This preparation will save you time and effort. With years of experience working with various cleaning machines, I’ve found that a systematic approach leads to the best results.
Begin by disconnecting the device from any power source. Safety is paramount, and working on a live unit can lead to accidents. Once you’ve ensured it’s powered down, gently remove any attachments and hoses. This will give you clear access to the body of the machine.
Next, focus on the outer casing. Locate the screws holding it in place; they are often hidden under labels or rubber feet. Take your time, as forcing anything can cause damage. Carefully lift off the casing to reveal the inner components. This is where I recommend using a soft cloth to wipe away dust and debris, ensuring you have a clean workspace for examining the parts.
As you proceed to the inner workings, pay attention to each component’s placement. Taking photos can be a lifesaver when reassembling. Trust me; I’ve learned this the hard way! Each part plays a role in the functionality of the device, so keep everything organised. Once opened, check for any signs of wear or damage. It’s often the small things that can lead to significant issues down the line.
Steps for Taking Apart a K4 Cleaning Device
Begin with disconnecting the power supply. Ensuring safety is paramount; unplug the unit before any disassembly. Next, use a screwdriver to remove the screws located at the back casing. There are typically four screws, so keep them together to avoid losing any.
Once the screws are out, gently pull the back casing away. Be cautious of any wires attached to the casing; they may need to be unplugged carefully. Take note of their positions for reassembly later. Moving on, locate the water inlet and detach the hose connection. This may require a wrench if it’s tightly secured.
Now, focus on the motor area. Remove the protective cover by unscrewing the relevant screws. You’ll find the motor secured with additional bolts. Use a socket wrench to loosen and remove these bolts, keeping track of them in a separate container.
After the motor is free, gently lift it out. It’s advisable to have a clean, soft surface to place it on to avoid any damage. Next, examine the pump assembly. This part usually has a few screws or clips holding it in place. Remove these carefully, as the pump is often connected to the motor.
Once the pump is detached, inspect the internal components. Take photographs during this process for reference. This will greatly assist when it comes time for reassembly. Clean any debris or build-up you encounter; it can prevent future issues.
Lastly, ensure all components are accounted for. Lay everything out systematically, following the order of disassembly. This method will streamline the reassembly process and help maintain the integrity of the device.
Gathering Necessary Tools for Disassembly
Before you start taking apart the unit, ensure you have the following tools at hand. Trust me, having the right equipment can make a significant difference in your experience.
Recommended Tools
| Tool | Purpose |
|---|---|
| Philips Screwdriver | For removing screws on the casing and components. |
| Flathead Screwdriver | Useful for prying open clips or covers. |
| Socket Set | For loosening bolts that hold the motor and pump in place. |
| Hex Key Set | Needed for hex screws, often found in various parts of the device. |
| Pliers | Helpful for gripping and twisting wires or small components. |
| Torch or Work Light | To illuminate dark areas and ensure you can see everything clearly. |
| Magnetic Tray | To keep screws and small parts organised and prevent loss. |
Pro Tips
In my experience, it’s wise to wear gloves to protect your hands from sharp edges. Also, label any wires or components as you remove them to make reassembly smoother later. If you have a smartphone, take pictures during the process. This can serve as a handy reference for putting things back together correctly. Each step becomes easier with a bit of preparation and the right tools.
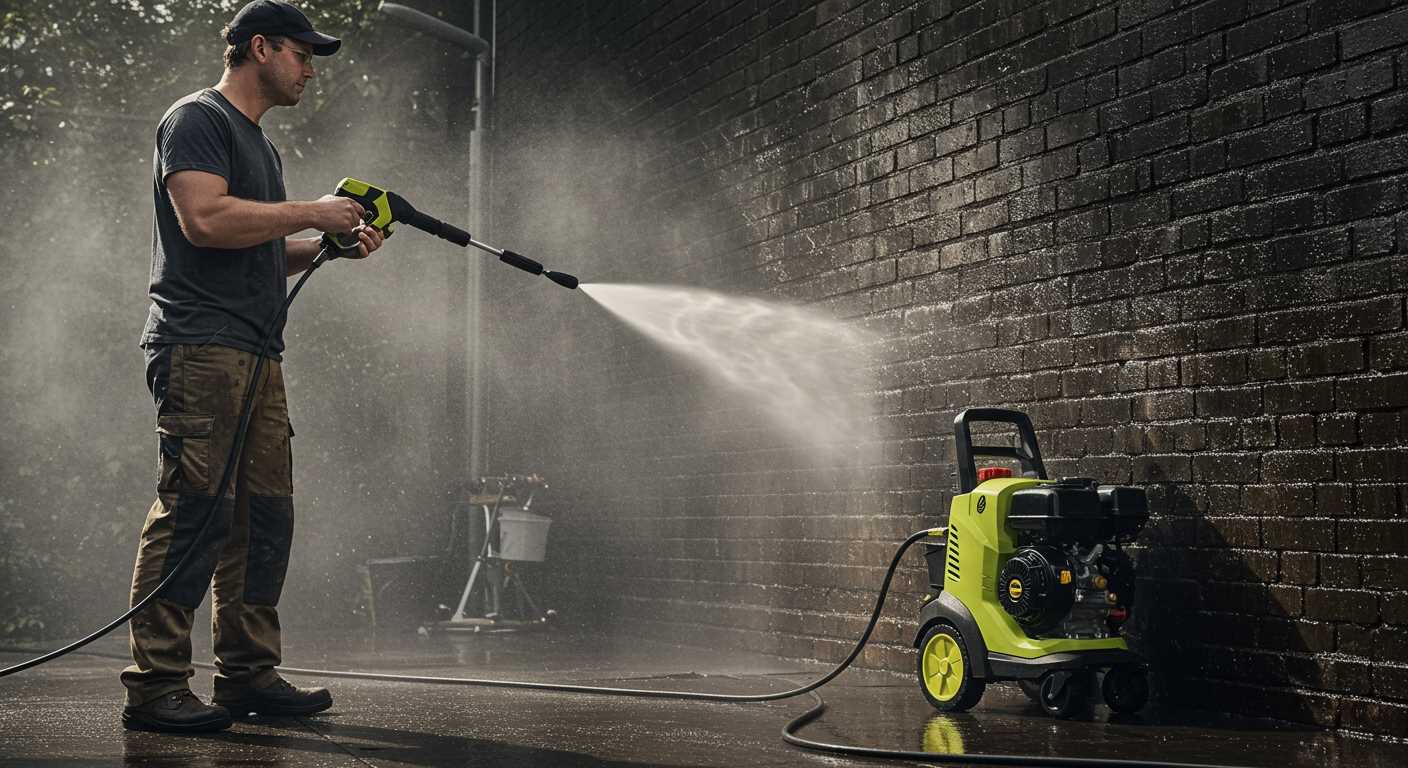
Identifying the Main Components of the Karcher K4
The first step in understanding this machine is recognising its key parts. The K4 is built around several essential components that work in unison to deliver high performance. Familiarising yourself with these elements can greatly aid in any maintenance or repair tasks you may undertake. Here’s a brief overview based on my hands-on experience.
Core Parts Breakdown
The K4 consists of a few significant sections:
| Component | Description |
|---|---|
| Motor | The heart of the unit, converting electrical energy into mechanical energy, driving the pump. |
| Pump | This is where the magic happens, pressurising water for powerful cleaning action. |
| Hose | Transports water from the pump to the nozzle, available in various lengths for flexibility. |
| Nozzle | Controls water spray patterns; different nozzles allow for various cleaning tasks. |
| Chassis | The outer shell that houses and protects all internal components, often featuring wheels for mobility. |
Additional Features
Beyond the core parts, there are additional features worth noting. The detergent tank allows for easy application of cleaning solutions, enhancing your cleaning efficiency. Additionally, the safety trigger mechanism prevents accidental activation, ensuring safe handling. Having worked with these machines, I can attest to the importance of knowing where each part is located, especially when troubleshooting or replacing components. This knowledge not only simplifies the process but also saves time and effort in the long run.
Removing the Outer Casing Safely
To begin the process of safely taking off the outer casing, first ensure that the device is completely disconnected from any power source. This is non-negotiable for your safety. A simple plug pull is all it takes, but double-checking is always wise.
Gathering Your Tools
For this task, you’ll need a few specific tools: a screwdriver set with both Phillips and flat-head options, a pair of pliers, and a gentle plastic pry tool. The pry tool is especially useful for avoiding damage to the plastic casing while you work.
Step-by-Step Casing Removal
Start by locating screws on the rear and sides of the outer casing. Some models may have hidden screws beneath stickers or rubber feet, so inspect carefully. Use the appropriate screwdriver to remove these fasteners. Keep them in a small container to prevent loss.
Once the screws are out, gently use the plastic pry tool. Insert it in the seam between the casing and the underlying structure. Work your way around, applying a slight amount of pressure to pop the clips holding the casing in place. Avoid using excessive force, as this can lead to cracks.
As you peel back the casing, be mindful of any attached wires or components. If you feel resistance, stop and reassess. It’s better to take your time than risk damaging any internal parts.
After successfully removing the outer casing, take a moment to inspect the interior components. This not only gives you a better understanding of the equipment but also prepares you for any repairs or maintenance you may need to perform.
Disconnecting the Water Inlet and Outlet Hoses
To begin, ensure that the machine is unplugged and completely depressurised. This step is critical to prevent any accidents during the process. For the water inlet, locate the hose connection at the rear of the unit. Typically, this will require a simple twist to the left to loosen and then pull away from the connector. Be cautious of any residual water that may still be in the hose.
The outlet hose, which directs the flow of water during operation, is usually found at the front. Like the inlet, it may feature a quick-release mechanism or require unscrewing. Gently detach the outlet hose, ensuring that you do not damage the fitting. Store both hoses in a safe location; they are essential for reassembly.
Inspecting the Connectors
After removal, take a moment to inspect the connectors for any signs of wear or damage. If you note any issues, replacing these parts can save you future headaches. I’ve seen many units suffer from leaks due to neglected hose connectors. Regular maintenance in this area can prolong the life of the equipment significantly.
Cleaning Before Reassembly
Before moving on, it’s wise to clean the hose fittings. A simple cloth can remove debris or mineral build-up that may affect future performance. This small action can help maintain optimal water flow when you reconnect everything. If you’re interested in enhancing your cleaning arsenal, consider checking out options for a pressure washer hoover; it’s a great addition for comprehensive maintenance tasks.
Taking Apart the Motor and Pump Assembly
For the next phase, focus on the motor and pump assembly. This section is critical for maintenance and repair, so handle every component with care.
Firstly, you’ll need to detach the motor from the pump. Look for the screws securing the motor to the pump housing. Use a Phillips screwdriver to remove these screws. Make sure to keep them in a safe place for reassembly later.
Once the screws are out, gently lift the motor away from the pump. If it feels stuck, check for any remaining screws or clips holding it in place. A little wiggling can help, but avoid using excessive force to prevent damage.
Next, focus on the pump itself. Inspect the pump for any visible screws or clamps. These usually hold the pump casing together. Remove these with the appropriate tool, typically a socket wrench or screwdriver, depending on the type of fasteners used.
After disassembling the casing, carefully lift off the outer shell. Inside, you’ll find the pistons and valves. Take a moment to note the arrangement of these components, as they are crucial for proper reassembly.
- Document the layout with a quick sketch or take photos for reference.
- Inspect the seals and O-rings for wear. Replace them if they show signs of damage.
Now, examine the internal components of the pump. If you notice any debris or build-up, clean these parts with a soft cloth. Avoid using harsh chemicals that could damage the materials.
When finished, ensure all components are dry before reassembling. If you plan to replace any parts, verify compatibility before proceeding.
Remember, keeping the motor and pump in good condition is key to the longevity of your machine. Regular maintenance can save you from future headaches down the line.
Accessing and Replacing Internal Seals and Gaskets
To access the internal seals and gaskets, first, ensure you have removed the outer casing and disconnected all hoses. Locate the motor and pump assembly; this is where most of the internal components reside. Pay attention to the orientation of each part as you proceed, as this will be crucial during reassembly.
Once you have the assembly exposed, identify the seals and gaskets that may need replacement. Common areas for wear include the water inlet, pump housing, and any joints that may have been subjected to high pressure. Use a flat screwdriver to gently pry out old seals, being careful not to damage the surrounding surfaces. If the seals are particularly stubborn, a bit of lubricant can help ease them out.
When selecting new replacements, ensure they are the correct size and type for your model. I’ve had experiences where using off-brand seals led to leaks shortly after installation. Always opt for OEM parts or high-quality alternatives. Lay the new seals in place, ensuring they sit evenly in their grooves.
Before reassembling, take a moment to inspect all components for damage or wear. A small crack in a gasket can lead to bigger issues down the line. After confirming everything is in good condition, carefully reassemble the motor and pump assembly, ensuring that all seals are properly seated to avoid leaks.
Finally, reattach the outer casing and reconnect the hoses. After reassembly, perform a quick test run to check for any leaks. If everything looks good, you can be confident in your repair. In my experience, taking the time to replace seals and gaskets properly pays off in extended equipment life and performance.
Reassembling the Karcher K4 after maintenance
Start by gathering all components and tools used during the disassembly. Ensure the work area is clean and organised to prevent any parts from going missing.
Follow these steps to successfully put everything back together:
- Reconnect the motor and pump assembly: Align the motor and pump properly. Ensure that any seals and gaskets are in place before tightening screws.
- Attach the water inlet and outlet hoses: Ensure that both hoses are securely connected. Look for any signs of wear and replace them if necessary to avoid leaks.
- Reinstall the outer casing: Line up the casing with the main body. Check that all clips and screws are used correctly to secure the casing firmly.
- Reconnect any electrical connections: Make sure all wiring is securely attached to avoid operational issues. Pay attention to the correct placement of wires to prevent any short circuits.
- Perform a visual inspection: Before powering on, double-check that all components are in their correct positions. Look for misplaced screws or parts.
After reassembly, conduct a brief test run without any attachments. This ensures everything is functioning correctly before putting it back to regular use. If you’re also interested in maintaining clean surfaces, you might find this link useful: how to clean aquarium decorations without bleach.
Regular maintenance checks will prolong the life of your equipment. Make it a habit to inspect seals and gaskets periodically to prevent any unforeseen problems down the line.
.jpg)

.jpg)


